時系列データは、傾向分析、モニタリング、ML などのさまざまなアプリケーションで使用できる、非常に価値のあるアセットです。時系列データを生成できるソースには、サーバー インフラストラクチャ、アプリケーション コードなどが含まれます。OpenTSDB では、大量の時系列データを極めて細かい粒度で収集し、保持できます。
このガイドでは、ソフトウェア エンジニアとアーキテクトを対象として、GKE を使用して時系列データ用のスケーラブルな収集レイヤを作成する方法を説明します。また、Bigtable を使用して収集されたデータの処理方法も示します。このガイドでは、Kubernetes と Bigtable の知識があることを前提としています。
次の図に、このガイドで説明するアーキテクチャの概要を示します。

上図は、GKE にデプロイされた OpenTSDB を使用して Bigtable に保存される複数の時系列データ(IoT イベントやシステム指標など)のソースを示しています。
目標
- このガイドで使用するコンテナ イメージを Cloud Build でビルドする。
- Artifact Registry を使用して、これらのコンテナ イメージを管理する。
- Bigtable インスタンスを作成する。
- GKE クラスタを作成する。
- OpenTSDB を GKE クラスタにデプロイする。
- OpenTSDB に時系列指標を送信する。
- OpenTSDB と Grafana を使用して指標を可視化する。
料金
このドキュメントでは、Google Cloud の次の課金対象のコンポーネントを使用します。
料金計算ツールを使うと、予想使用量に基づいて費用の見積もりを生成できます。
このドキュメントに記載されているタスクの完了後、作成したリソースを削除すると、それ以上の請求は発生しません。詳細については、クリーンアップをご覧ください。
始める前に
-
Google Cloud Console の [プロジェクト セレクタ] ページで、Google Cloud プロジェクトを選択または作成します。
-
Bigtable, Bigtable Admin, GKE, Compute Engine, Cloud Build, and Artifact Registry API を有効にします。
Google Cloud コンソールの [スタート] ページに移動します。
後の手順で使用するため、プロジェクト ID をメモしておきます。
-
Google Cloud コンソールで、「Cloud Shell をアクティブにする」をクリックします。
Bigtable インスタンスを作成する
このガイドでは、収集した時系列データを Bigtable に保存します。そのため、Bigtable インスタンスを作成する必要があります。
Bigtable は、キー / ワイドカラム型のストアであり、時系列データに適しています。Bigtable では、HBase API をサポートしており、OpenTSDB などの Apache HBase と連携するように設計されたソフトウェアを使用できます。OpenTSDB が使用する HBase スキーマの詳細については、HBase スキーマをご覧ください。
OpenTSDB のキー コンポーネントは、AsyncHBase クライアントです。このクライアントにより、完全非同期、非ブロッキング、スレッドセーフという形で HBase に対する一括書き込みを行うことができます。OpenTSDB を Bigtable で使用する場合、AsyncHBase は AsyncBigtable クライアントとして実装されます。
このガイドでは、単一ノードクラスタによる Bigtable インスタンスを使用します。本番環境に移行する場合は、大規模なクラスタによる Bigtable インスタンスの使用を検討してください。クラスタサイズの選択の詳細については、Bigtable のパフォーマンスについてをご覧ください。
Cloud Shell で、Bigtable クラスタと GKE クラスタを作成する Google Cloud ゾーンの環境変数と、Bigtable クラスタのインスタンス識別子を設定します。
export BIGTABLE_INSTANCE_ID=BIGTABLE_INSTANCE_ID
export ZONE=ZONE
次のように置き換えます。
BIGTABLE_INSTANCE_ID: Bigtable インスタンスの識別子。ZONE: Bigtable クラスタと GKE クラスタが作成されるゾーン。
コマンドは次の例のようになります。
export BIGTABLE_INSTANCE_ID=bt-opentsdb
export ZONE=us-central1-f
Bigtable インスタンスを作成します。
gcloud bigtable instances create ${BIGTABLE_INSTANCE_ID} \
    --cluster-config=id=${BIGTABLE_INSTANCE_ID}-${ZONE},zone=${ZONE},nodes=1 \
    --display-name=OpenTSDB
OpenTSDB のデプロイとテストに使用するイメージを作成する
Bigtable ストレージ バックエンドで OpenTSDB をデプロイしてデモを行うために、このガイドでは GKE にデプロイされた一連の Docker コンテナ イメージを使用します。Cloud Build で付属の GitHub リポジトリのコードを使用して、これらのイメージのいくつかをビルドします。GKE にインフラストラクチャをデプロイする場合は、コンテナ リポジトリが使用されます。このガイドでは、Artifact Registry を使用して、これらのコンテナ イメージを管理します。
Cloud Shell で、Artifact Registry リポジトリを作成する Google Cloud ゾーンの環境変数を設定します。
export PROJECT_ID=PROJECT_ID
export REGION=REGION
export AR_REPO=AR_REPO
次のように置き換えます。
PROJECT_ID: プロジェクト IDREGION: Artifact Registry リポジトリが作成されるリージョンAR_REPO: Artifact Registry リポジトリの名前
コマンドは次の例のようになります。
export PROJECT_ID=bt-opentsdb-project-id
export REGION=us-central1
export AR_REPO=opentsdb-bt-repo
Artifact Registry リポジトリを作成します。
gcloud artifacts repositories create ${AR_REPO} \
    --repository-format=docker  \
    --location=${REGION} \
    --description="OpenTSDB on bigtable container images"
OpenTSDB のデプロイとデモに使用するイメージの作成と管理を行う
このガイドでは、2 つの Docker コンテナ イメージを使用します。最初のイメージは、OpenTSDB 用の 1 回限りの Bigtable データベース設定の実行と、OpenTSDB Deployment 用の読み取りおよび書き込みサービス コンテナのデプロイの 2 つの目的で使用されます。2 つ目のイメージは、OpenTSDB Deployment を示すサンプル指標データを生成するために使用されます。
コンテナ イメージのビルドジョブを Cloud Build に送信するときに、イメージにタグを付けて、ビルド後に Artifact Registry に保存できるようにします。
Cloud Shell で、付属のコードを含む GitHub リポジトリのクローンを作成します。
git clone https://github.com/GoogleCloudPlatform/opentsdb-bigtable.git
サンプルコードのディレクトリに移動します。
cd opentsdb-bigtable
Bigtable をストレージ バックエンドとして使用する OpenTSDB サーバー イメージの環境変数を設定します。
export SERVER_IMAGE_NAME=opentsdb-server-bigtable
export SERVER_IMAGE_TAG=2.4.1
Cloud Build を使用してイメージをビルドします。
gcloud builds submit \
    --tag ${REGION}-docker.pkg.dev/${PROJECT_ID}/${AR_REPO}/${SERVER_IMAGE_NAME}:${SERVER_IMAGE_TAG} \
    build
イメージに適切なタグを付けているため、ビルドが完了すると、イメージは Artifact Registry リポジトリによって管理されます。
デモの時系列データ生成イメージの環境変数を設定します。
export GEN_IMAGE_NAME=opentsdb-timeseries-generate
export GEN_IMAGE_TAG=0.1
Cloud Build を使用してイメージをビルドします。
cd generate-ts
./build-cloud.sh
cd ..
GKE クラスタを作成する
GKE は、マネージド Kubernetes 環境を提供します。GKE クラスタを作成したら、そのクラスタに Kubernetes Pod をデプロイできます。このチュートリアルでは、GKE と Kubernetes の Pod を使用して OpenTSDB を実行します。
OpenTSDB は、ストレージがアプリケーション層から分離されているため、複数のインスタンスに同時にデプロイできます。このように並行実行すると、OpenTSDB は大量の時系列データを処理できます。
Cloud Shell で、Bigtable クラスタと GKE クラスタを作成する Google Cloud ゾーンの環境変数と、GKE クラスタとその名前、ノードタイプ、バージョンを設定します。
export GKE_CLUSTER_NAME=GKE_CLUSTER_NAME
export GKE_VERSION=1.20
export GKE_NODE_TYPE=n1-standard-4
GKE_CLUSTER_NAMEを GKE クラスタの名前に置き換えます。コマンドは次の例のようになります。
export GKE_CLUSTER_NAME=gke-opentsdb
export GKE_VERSION=1.20
export GKE_NODE_TYPE=n1-standard-4
GKE クラスタを作成します。
gcloud container clusters create ${GKE_CLUSTER_NAME} \
    --zone=${ZONE} \
    --cluster-version=${GKE_VERSION} \
    --machine-type ${GKE_NODE_TYPE} \
    --scopes "https://www.googleapis.com/auth/cloud-platform"
このオペレーションには数分かかることがあります。GKE クラスタにスコープを追加すると、OpenTSDB コンテナが Bigtable および Container Registry とやり取りできるようになります。
このガイドの残りの部分では、Artifact Registry によって管理される、ビルドしたコンテナを使用します。コンテナを作成するために使用する Dockerfile および
entrypointスクリプトは、このガイドのリポジトリのbuildフォルダに格納されています。GKE クラスタに接続できるように認証情報を取得します。
gcloud container clusters get-credentials ${GKE_CLUSTER_NAME} --zone ${ZONE}
構成の詳細を含む ConfigMap を作成する
Kubernetes では、アプリケーションの移植性を高めるため、ConfigMap を使用して構成の詳細がコンテナ イメージから切り離されます。OpenTSDB の構成は、opentsdb.conf ファイルで指定されます。サンプルコードには、opentsdb.conf ファイルを含む ConfigMap が含まれています。
以降の手順では、GNU envsubst ユーティリティを使用して、YAML テンプレート ファイル内の環境変数プレースホルダを Deployment のそれぞれの値に置き換えます。
更新された
opentsdb-config.yamlファイルから ConfigMap を作成します。envsubst < configmaps/opentsdb-config.yaml.tpl | kubectl create -f -
Bigtable で OpenTSDB テーブルを作成する
OpenTSDB を使用してデータを読み書きするには、そのデータを格納するために Bigtable でテーブルを作成する必要があります。テーブルを作成するには、Kubernetes Job を作成します。
Cloud Shell で Job を起動します。
envsubst < jobs/opentsdb-init.yaml.tpl | kubectl create -f -
ジョブが完了するまでに 1 分以上かかることがあります。Job が正常に完了したことを確認します。
kubectl describe jobs
Pods Statusesが1 Succeededを示している場合の出力は、1 つの Job が成功したことを示しています。テーブル作成 Job のログを確認します。
OPENTSDB_INIT_POD=$(kubectl get pods --selector=job-name=opentsdb-init \
                    --output=jsonpath={.items..metadata.name})
kubectl logs $OPENTSDB_INIT_POD
出力は次のようになります。
create 'tsdb-uid',
  {NAME => 'id', COMPRESSION => 'NONE', BLOOMFILTER => 'ROW', DATA_BLOCK_ENCODING => 'DIFF'},
  {NAME => 'name', COMPRESSION => 'NONE', BLOOMFILTER => 'ROW', DATA_BLOCK_ENCODING => 'DIFF'}
0 row(s) in 3.2730 seconds

create 'tsdb',
  {NAME => 't', VERSIONS => 1, COMPRESSION => 'NONE', BLOOMFILTER => 'ROW', DATA_BLOCK_ENCODING => 'DIFF'}
0 row(s) in 1.8440 seconds

create 'tsdb-tree',
  {NAME => 't', VERSIONS => 1, COMPRESSION => 'NONE', BLOOMFILTER => 'ROW', DATA_BLOCK_ENCODING => 'DIFF'}
0 row(s) in 1.5420 seconds

create 'tsdb-meta',
  {NAME => 'name', COMPRESSION => 'NONE', BLOOMFILTER => 'ROW', DATA_BLOCK_ENCODING => 'DIFF'}
0 row(s) in 1.9910 seconds
作成された各テーブルが出力に表示されます。この Job は、
create TABLE_NAMEの形式を使用する、複数のテーブル作成コマンドを実行します。0 row(s) in TIME secondsの形式で出力された場合、そのテーブルは正常に作成されています。TABLE_NAME: Job が作成するテーブルの名前TIME: テーブルの作成にかかった時間
データモデル
作成したテーブルは、OpenTSDB からデータポイントを保存します。後のステップで、これらのテーブルに時系列データを書き込みます。時系列データポイントは、次のように編成されて保存されます。
| フィールド | 必須 | 説明 | 例 |
|---|---|---|---|
metric
|
必須 | 測定中の項目(デフォルトキー) |
sys.cpu.user
|
timestamp
|
必須 | 測定の Unix エポックタイム | 1497561091 |
tags
|
少なくとも 1 つのタグが必要です | 測定をクエリできるようにします |
hostname=www
cpu=0
env=prod
|
value
|
必須 | 測定値 | 89.3 |
指標、タイムスタンプ、タグ(タグキーとタグ値)が行キーを形成します。行に含まれるデータポイントが多くなりすぎないように、タイムスタンプは 1 時間に正規化されます。詳細については、HBase スキーマをご覧ください。
OpenTSDB をデプロイする
次の図は、OpenTSTB の Service が GKE で実行され、Bigtable がストレージ バックエンドとして動作する、OpenTSTB のデプロイメント アーキテクチャを示しています。

このガイドでは、2 つの OpenTSDB Kubernetes Deployment を使用します。1 つの Deployment は Bigtable に指標を送信し、もう 1 つの Deployment はそこから読み取りを行います。2 つの Deployment を使用することで、長時間実行される読み取りオペレーションと書き込みオペレーションが互いにブロックすることがなくなります。それぞれの Deployment 内の Pod は、同じコンテナを使用します。各コンテナ内では、OpenTSDB が提供する tsd というデーモンが実行されます。1 つの tsd プロセスで、高スループットのイベントを次々に処理できます。負荷を分散するために、このガイドでは各 Deployment で読み取りと書き込み Pod の 3 つのレプリカを作成します。
Cloud Shell で、指標を書き込むための Deployment を作成します。
envsubst < deployments/opentsdb-write.yaml.tpl | kubectl create -f -
書き込み用 Deployment の構成情報は、ガイドのリポジトリの
deploymentsフォルダ内のopentsdb-write.yaml.tplファイルにあります。指標を読み取るための Deployment の作成
envsubst < deployments/opentsdb-read.yaml.tpl | kubectl create -f -
読み取り用 Deployment の構成情報は、ガイドのリポジトリの
deploymentsフォルダ内のopentsdb-read.yaml.tplファイルにあります。
本番環境の Deployment では、実行する tsd Pod の数を手動または Kubernetes の自動スケーリングで増やすことができます。同様に、GKE クラスタのインスタンス数を手動で、またはクラスタ オートスケーラーを使って増やすことができます。
OpenTSDB Service を作成する
Deployment に一貫したネットワーク接続を提供するために、2 つの Kubernetes Service を作成します。1 つの Service は OpenTSDB に指標を書き込み、もう 1 つは読み取ります。
Cloud Shell で、指標を書き込む Service を作成します。
kubectl create -f services/opentsdb-write.yaml
指標書き込み Service の構成情報は、ガイド リポジトリの
servicesフォルダにあるopentsdb-write.yamlファイルに保存されています。この Service は Kubernetes クラスタ内に作成され、クラスタ内で実行される他の Service から到達可能です。指標を読み取るための Service を作成します。
kubectl create -f services/opentsdb-read.yaml
指標読み取り Service の構成情報は、ガイドのリポジトリの
servicesフォルダ内のopentsdb-read.yamlファイルにあります。
OpenTSDB に時系列データを書き込む
OpenTSDB にデータを書き込むメカニズムはいくつかあります。サービス エンドポイントを定義すると、エンドポイントへのデータの書き込みを開始するようにプロセスに指示できます。このガイドでは、クラスタメモリ使用率(memory_usage_gauge)とクラスタ CPU 使用率(cpu_node_utilization_gauge)の 2 つの指標について時系列データを生成する Python サービスをデプロイします。
Cloud Shell で、時系列指標生成ツールをクラスタにデプロイします。
envsubst < deployments/generate.yaml.tpl | kubectl create -f -
OpenTSDB を使用してサンプル時系列データを調べる
ガイドで前にデプロイした opentsdb-read サービス エンドポイントを使用して、時系列指標をクエリできます。データは、さまざまな方法で使用できます。一般的なオプションの一つは、データを可視化することです。OpenTSDB には、収集した指標を可視化するための基本的なインターフェースが組み込まれています。このガイドでは Grafana を使用します。これは指標の可視化に代わる一般的な方法で、追加の機能を利用できます。
クラスタ内で Grafana を実行するには、OpenTSDB をセットアップしたときと同様のプロセスを行います。ただし、ConfigMap と Deployment を作成するだけでなく、Kubernetes クラスタ内で実行中の Grafana にアクセスできるようにするために、ポート転送も構成する必要があります。
Cloud Shell で、ガイド リポジトリの
configmapsフォルダ内のgrafana.yamlファイルの構成情報を使用して、Grafana ConfigMap を作成します。kubectl create -f configmaps/grafana.yaml
ガイド リポジトリの
deploymentsフォルダ内のgrafana.yamlファイルにある構成情報を使用して、Grafana Deployment を作成します。kubectl create -f deployments/grafana.yaml
クラスタ内の Grafana Pod の名前を取得し、その名前を使用してポート転送を設定します。
GRAFANA_PODS=$(kubectl get pods --selector=app=grafana \
               --output=jsonpath={.items..metadata.name})
kubectl port-forward $GRAFANA_PODS 8080:3000
転送が成功したことを確認します。出力は次のようになります。
Forwarding from 127.0.0.1:8080 -> 3000
Grafana ウェブ インターフェースに接続するには、Cloud Shell で [ウェブでプレビュー] をクリックし、[ポート 8080 でプレビュー] を選択します。
詳細については、ウェブ プレビューの使用をご覧ください。
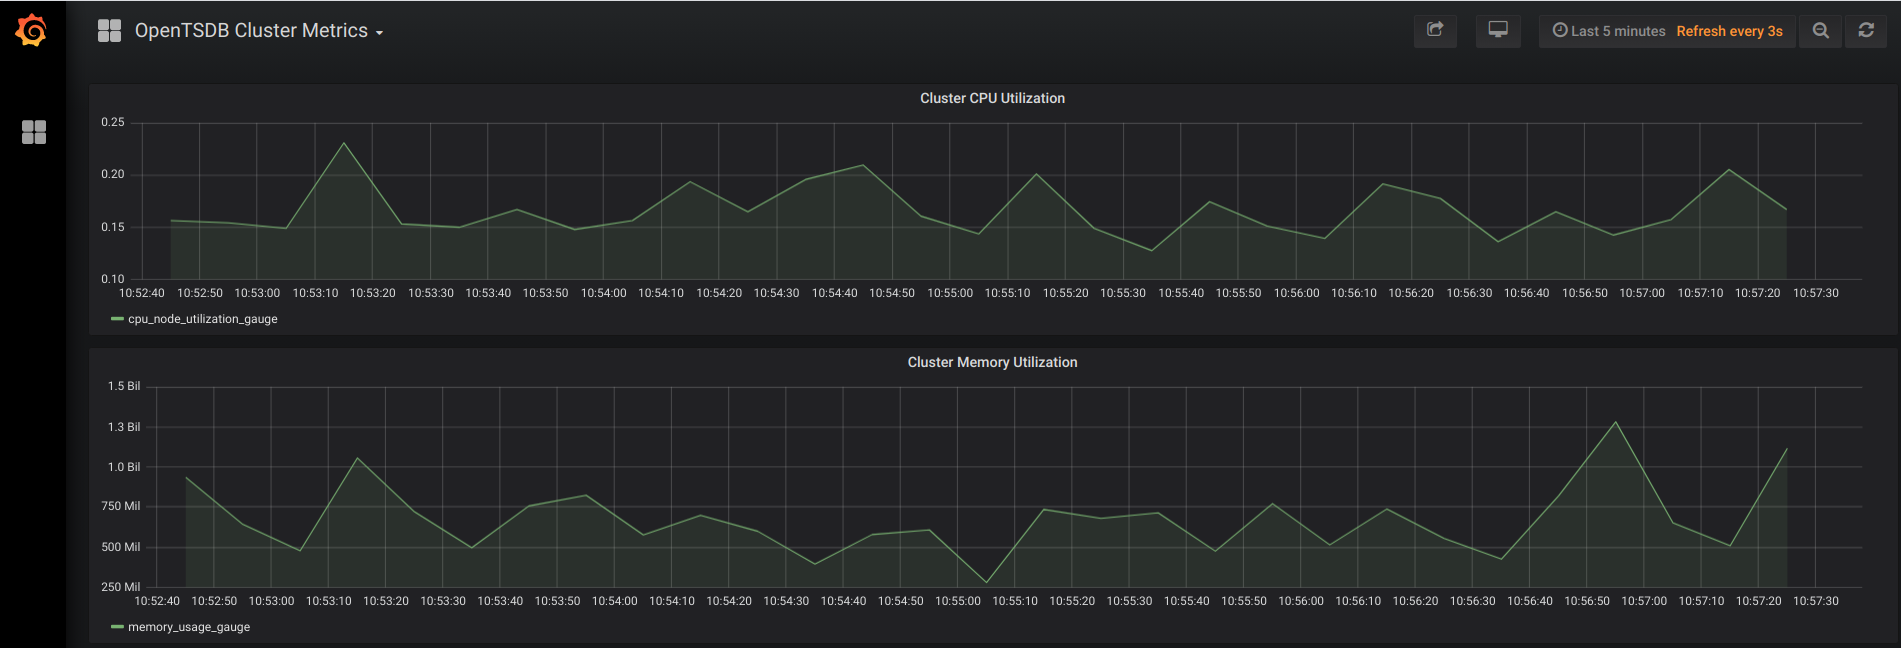
新しいブラウザタブが開き、Grafana ウェブ インターフェースに接続します。しばらくすると、ブラウザには次のようなグラフが表示されます。
Grafana のこの Deployment は、このガイド向けにカスタマイズされています。ファイル
configmaps/grafana.yamlとdeployments/grafana.yamlは、opentsdb-readService に接続し、匿名認証を許可して、いくつかの基本的なクラスタ指標を表示するように、Grafana を構成します。本番環境での Grafana の Deployment の場合は、適切な認証メカニズムを実装し、より充実した時系列グラフを使用することをおすすめします。
クリーンアップ
このチュートリアルで使用したリソースについて、Google Cloud アカウントに課金されないようにするには、リソースを含むプロジェクトを削除するか、プロジェクトを維持して個々のリソースを削除します。
個々のリソースを削除する
Kubernetes クラスタを削除して、作成したすべてのアーティファクトを削除します。
gcloud container clusters delete GKE_CLUSTER_NAME
Kubernetes クラスタを削除するには、
Yを入力して操作を確認します。Bigtable インスタンスを削除する手順は、次のとおりです。
Google Cloud コンソールで、[Bigtable] に移動します。
以前作成したインスタンスを選択し、[インスタンスの削除] をクリックします。
プロジェクトの削除
- Google Cloud コンソールで、[リソースの管理] ページに移動します。
- プロジェクト リストで、削除するプロジェクトを選択し、[削除] をクリックします。
- ダイアログでプロジェクト ID を入力し、[シャットダウン] をクリックしてプロジェクトを削除します。
次のステップ
- OpenTSDB の使用パフォーマンスを向上させる方法については、時系列データ用の Bigtable スキーマ設計をご覧ください。
- HBase から Bigtable に移行する方法については、HBase から Bigtable へのデータの移行をご覧ください。
- Google Cloud Next 17 の動画 Bigtable in Action では、パフォーマンスの重要な改善である、フィールド プロモーションについて記述しています。
- GKE クラスタのデフォルト スコープの詳細については、クラスタのスコープをご覧ください。
- Google Cloud に関するリファレンス アーキテクチャ、図、ベスト プラクティスを確認する。Cloud アーキテクチャ センター をご覧ください。