This page applies to Apigee and Apigee hybrid.
View
Apigee Edge documentation.

Next, you'll update the top (header) and bottom (footer) navigation bars to include the Get Started page.
To set up navigation:
- Click Menus on the portals details page.
First you'll update the top (header) navigation bar to add Get Started as a menu item. Notice that Header is selected by default in the menu drop-down. Open the navigation menu dialog.
Cloud Console UI
Click + Menu Items.
Classic UI
Click + Menu Item.
In the navigation menu dialog, enter the following details:
Field Value Name Get Started Page Path or URL Click in the text field and then click Get Started (/get-started) in the list. (You may need to scroll.) Click Create.
Rearrange the Get Started menu item.
Cloud Console UI
- Click the Up arrow on the Get started row to move it up.
- Click it repeatedly until Get started is after Home and before APIs.
Classic UI
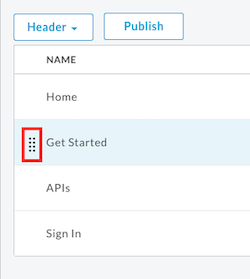
- Position your cursor over the Get Started menu item to display the actions.
- Click and hold the mouse button over the handle (
 ) that appears to the left of the menu item name.
 - Drag the menu item to position it before APIs and release the mouse button.
Click Footer in the menu drop-down to update the bottom (footer) navigation bar.
Repeat steps 2 through 5 to add Get Started as a menu item in the bottom (footer) navigation bar.
Publish your changes to the live portal.
Cloud Console UI
Click Publish menu.
Classic UI
Click Publish.
Open the live portal in a new browser tab (or refresh the tab in which it is already open).
Cloud Console UI
Click View Live Portal.
Classic UI
Click Live Portal.
Click Get Started in the top navigation bar to display the Get Started page.
Next, you'll publish an API to the portal.
1 2 3 4 5 (NEXT) Step 6: Publish an API