This page applies to Apigee, but not to Apigee hybrid.
View
Apigee Edge documentation.

You can provision a new Apigee Pay-as-you-go organization with just one click, using smart default configuration settings.
Before you begin
Before you provision your Apigee Pay-as-you-go organization:
- Review and complete the steps described in these topics:
- Ensure there is an available VPC network in the Google Cloud project you will use to provision
Apigee. To view available VPC networks in your project, go to the VPC Networks page:
If there is no available network in your project, you may encounter an error during provisioning. For more details, see Troubleshoot one-click provisioning.
Provision Apigee with one click
To start one-click provisioning for a new Apigee Pay-as-you-go organization:
- Go to the Welcome to Apigee API management page in the Google Cloud console.
- Click Set up with defaults.
When you select this one-click option, Apigee does the following:
- Enables the required APIs
- Creates the following configurable resources:
- Default networking: This resource uses the default authorized network and subnetwork in your Google Cloud project and automatically allocates IP ranges for network peering and runtime IPs.
- A Google-managed domain: This includes the
nip.iowildcard DNS service and a Google-managed SSL certificate to secure your domain.
- Creates the following permanent resource:
- Google-managed encryption key: This resource includes encryption keys for runtime database and runtime disk encryption.
- API hub instance: A new API hub instance is created in the same project and region as your Apigee organization. If you need API hub with customer-managed encryption keys, you must delete the auto-provisioned API hub instance and create a new API hub instance in the same project and region as your Apigee organization.
- The Provisioning Apigee page displays when provisioning begins. You can monitor
progress and view the approximate time remaining to complete from this page. Provisioning may take up to one hour.
Once the required APIs are enabled, as indicated by Enabled, you can leave the page. A notification will appear in the Google Cloud console when the provisioning operation completes.
- When provisioning completes, the Apigee Dashboard page displays. Congratulations! You can begin exploring Apigee!
Troubleshoot one-click provisioning
If the resources required to provision Apigee are not available in your Google Cloud project, you may encounter an error message after clicking Set up with defaults on the Welcome to Apigee API management page, as shown below:
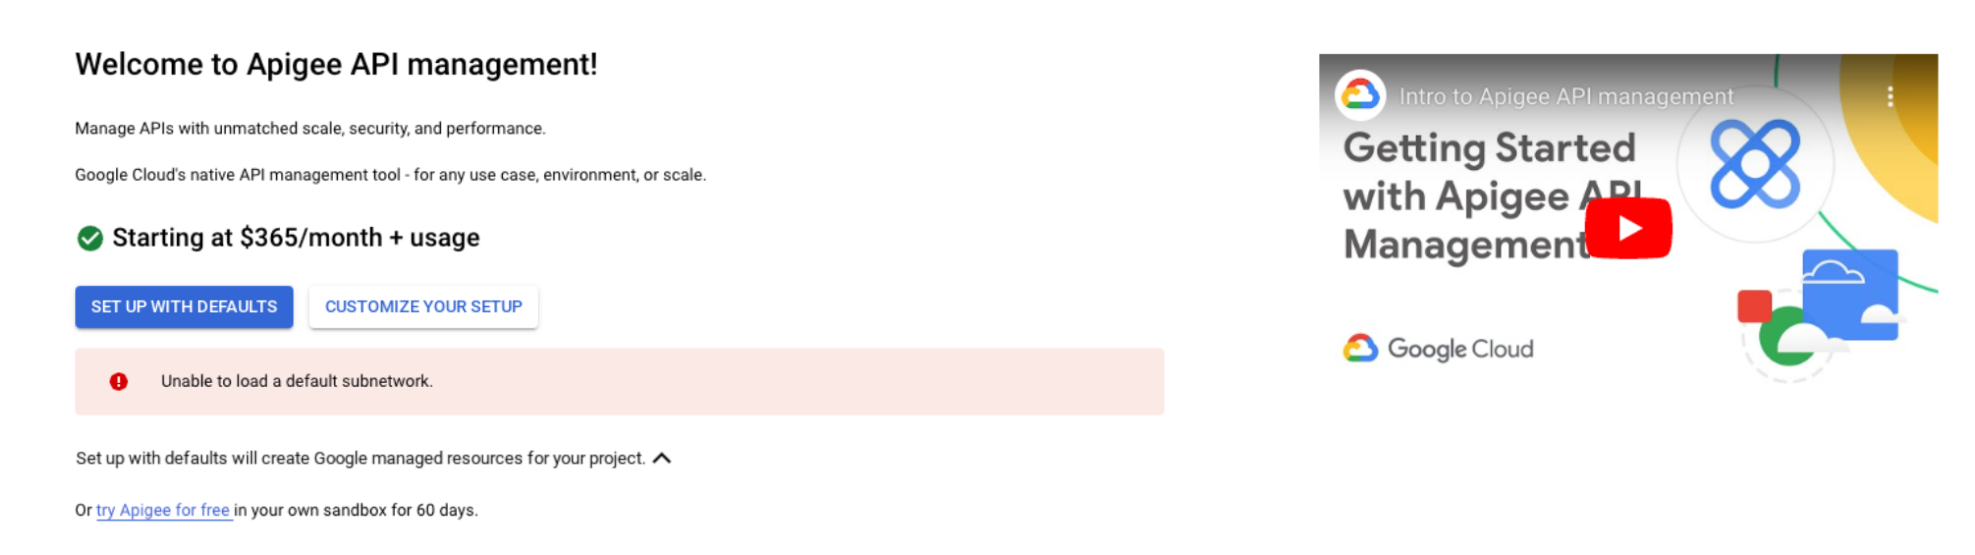
You may encounter this message if:
- There is no available VPC network in the Google Cloud project you are using to provision Apigee.
- Your Google Cloud organization has a policy restricting the creation of resources in the region used for Apigee provisioning. For more information, see Introduction to the Organization Policy Service.
If you encounter this error, we recommend clicking Customize your setup to customize the required resources created for Apigee in your project.