このページは Apigee と Apigee ハイブリッドに適用されます。
Apigee Edge のドキュメントを表示する。

ポリシーベースの機能を API プロキシに追加するには、次の 2 つの手順に従います。
- ポリシータイプのインスタンスを構成する。
- ポリシー インスタンスをフローに接続する。
下の図は、ポリシーとフローの関係を示しています。ご覧のように、ポリシーは処理のステップとしてフローに接続されます。API の目的の動作を構成するには、フローについて少し理解する必要があります(このトピックについては、上記のフローの構成で説明しています)。
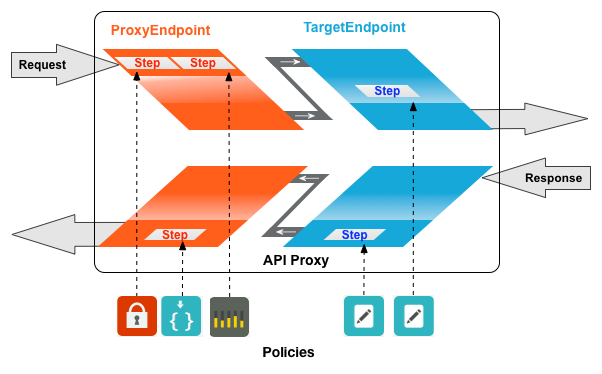
よく使用されるポリシータイプの 1 つに、SpikeArrest ポリシーがあります。SpikeArrest は、バックエンド サービスのパフォーマンス低下を引き起こすメッセージ トラフィックの急増を防止します。
フローにポリシーを接続する
Cloud コンソールの Apigee
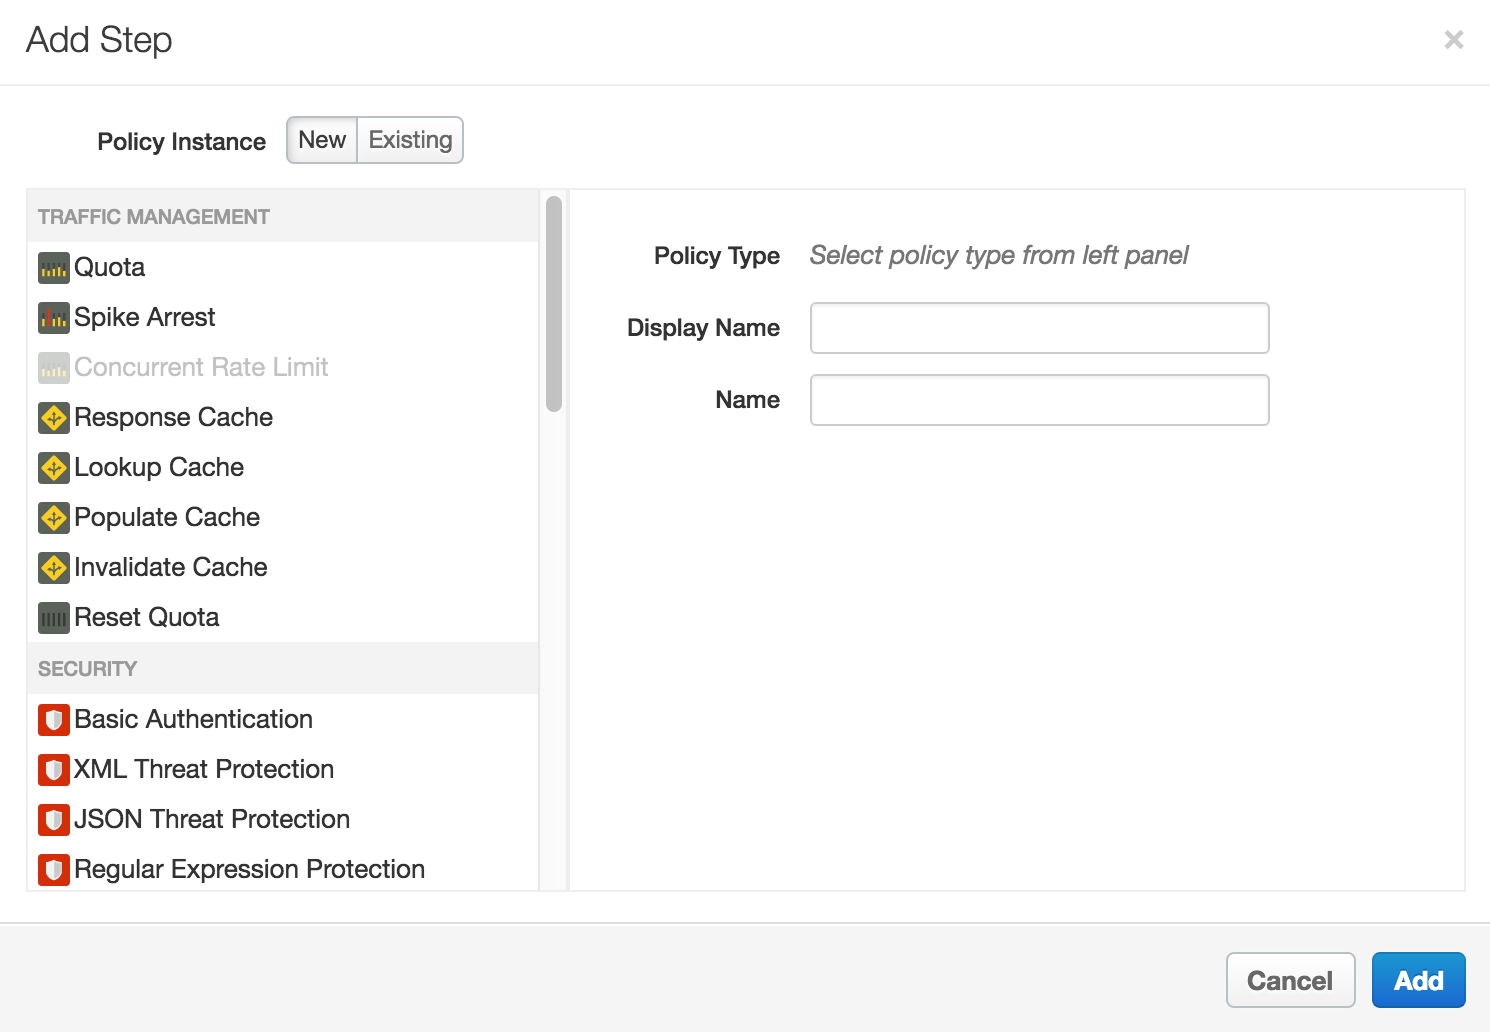
ポリシーをフローに接続するには:
- API プロキシを選択し、[Develop] ビューに移動します。
- 左側のパネルで、[Policies] 行の [+] ボタンをクリックします。
[Create policy] ダイアログで、[Select policy type] フィールドをクリックし、[Traffic Management] まで下にスクロールし、[SpikeArrest] を選択します。
必要に応じて、表示名と名前を変更できます。
![[Create policy] ダイアログ。](https://cloud.google.com/static/apigee/docs/api-platform/images/create-spike-arrest-policy-dialog.png?authuser=7&hl=ja)
完了したら、[Create] をクリックしてポリシーを作成します。
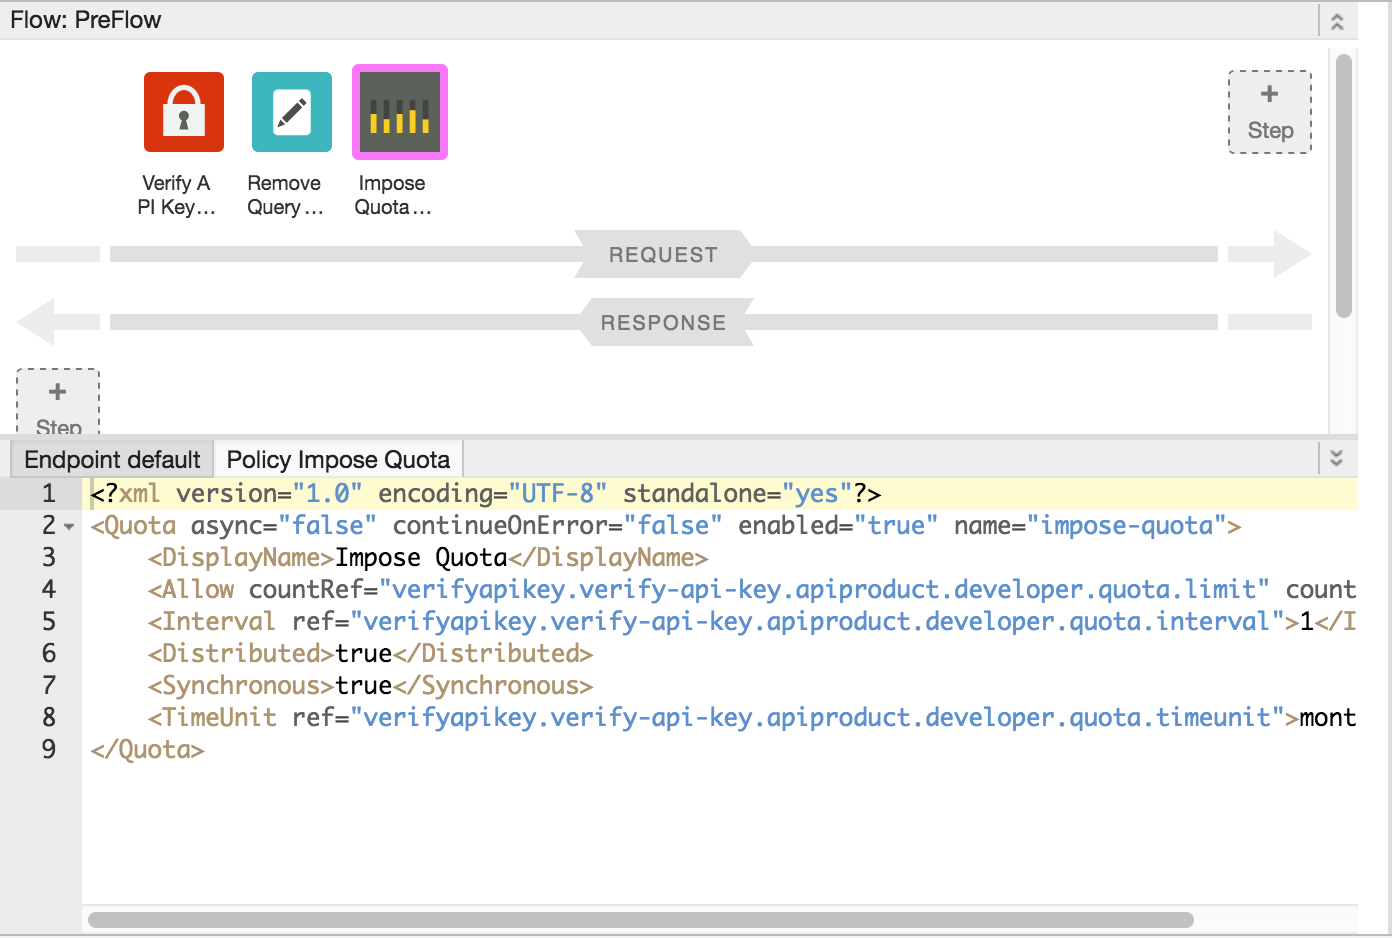
- 以上で Spike Arrest ポリシーが作成されたので、それを PreFlow のステップに接続できます。これを行うには、左側のペインで [Proxy Endpoints] > [default] > [PreFlow] を選択します。
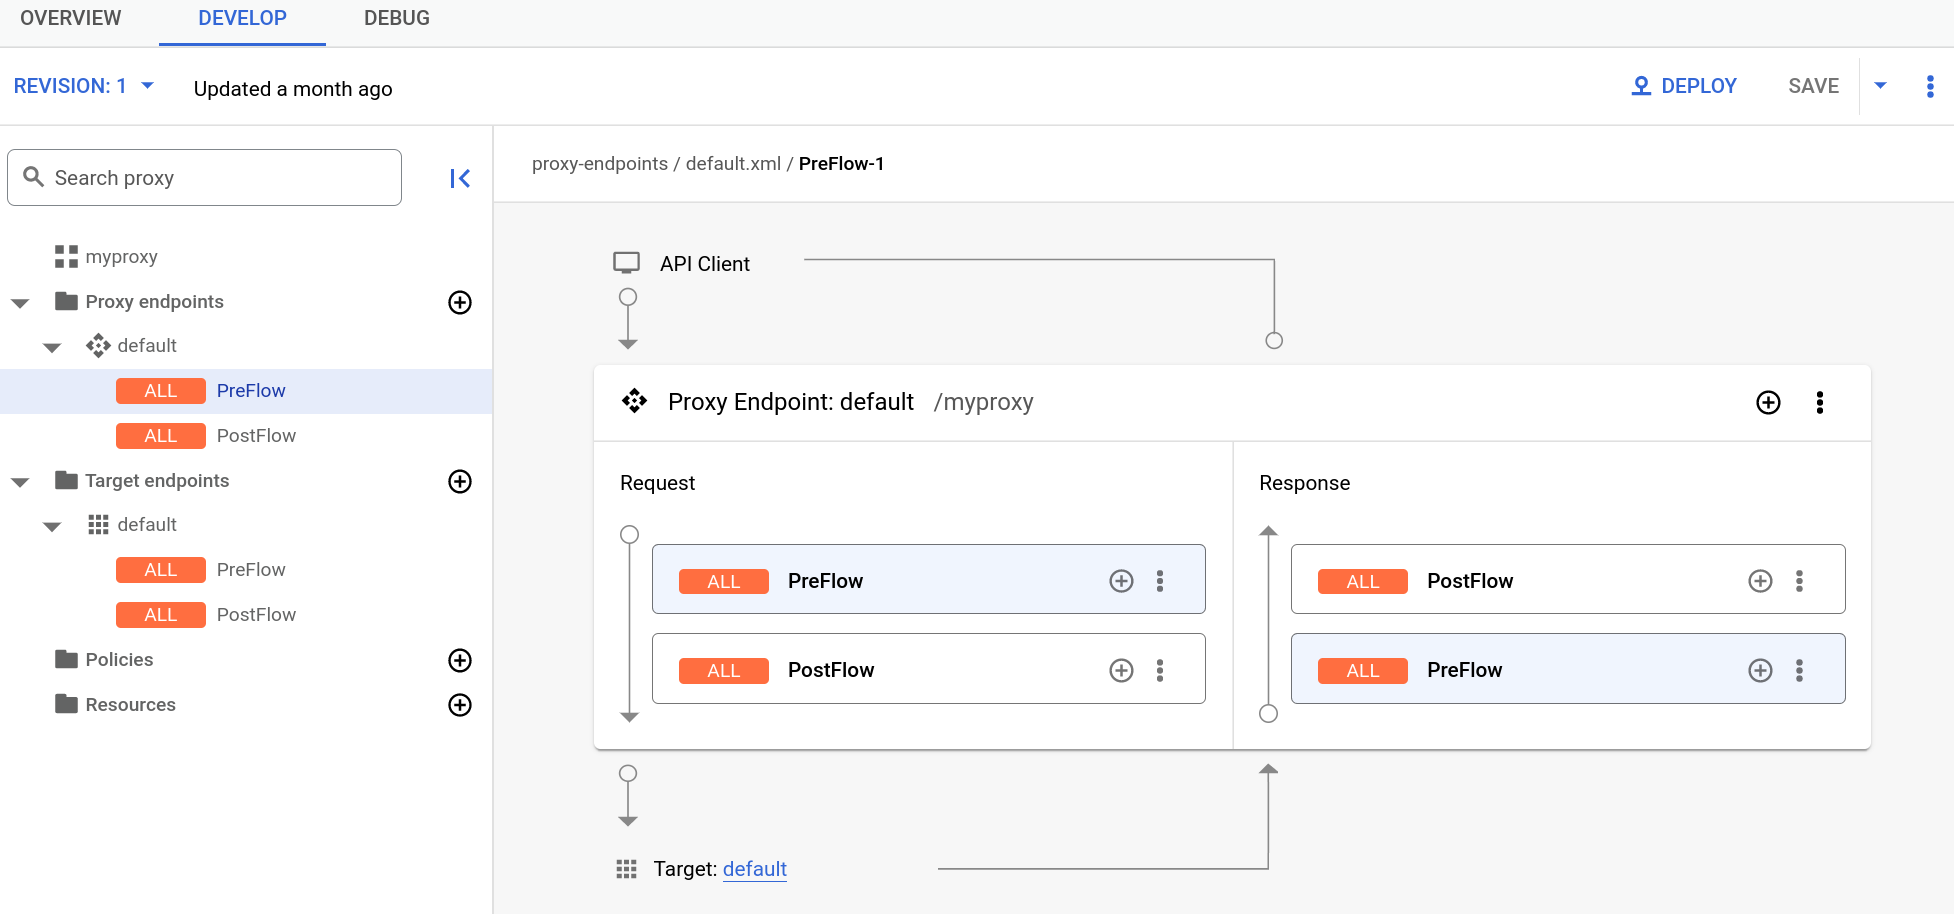
- ビジュアル エディタの右下にある [Response] ペインの [PreFlow] の横にある [+] ボタンをクリックします。
![[Response] ペインの [PreFlow] の横にある [+] ボタンをクリックします。](https://cloud.google.com/static/apigee/docs/api-platform/get-started/images/add-policy-to-response-preflow.png?authuser=7&hl=ja)
- [Add policy step] ダイアログで、[Spike Arrest] ポリシーを選択します。
[Add] をクリックしてポリシーを接続します。
Spike Arrest ポリシーが [Response] ペインに表示されます。
![[Response] ペインに表示される Spike Arrest ポリシー。](https://cloud.google.com/static/apigee/docs/api-platform/images/spike-arrest-displayed-in-response-pane.png?authuser=7&hl=ja)
プロキシの次の XML コードがテキスト エディタに表示されます。
<ProxyEndpoint name="default">
  <PreFlow name="PreFlow">
    <Request/>
    <Response>
      <Step><
        <Name>SA-</Name>
      </Step>
    </Response>
  </PreFlow>
  <Flows/>
  <PostFlow name="PostFlow">
    <Request/>
    <Response/>
  </PostFlow>
  <HTTPProxyConnection>
    <BasePath>/myproxy</BasePath>
  </HTTPProxyConnection>
  <RouteRule name="default">
    <TargetEndpoint>default</TargetEndpoint>
  </RouteRule>
</ProxyEndpoint>
Detaching policies from a flow
To detach a policy from a flow, click the three-dot menu next to the flow and select Delete policy step
Classic UI
To attach a policy to a flow:
- Select an API proxy and navigate to the Develop view.
- In the API Proxy Editor, select the flow to which you want to attach a policy in the
Navigator pane.
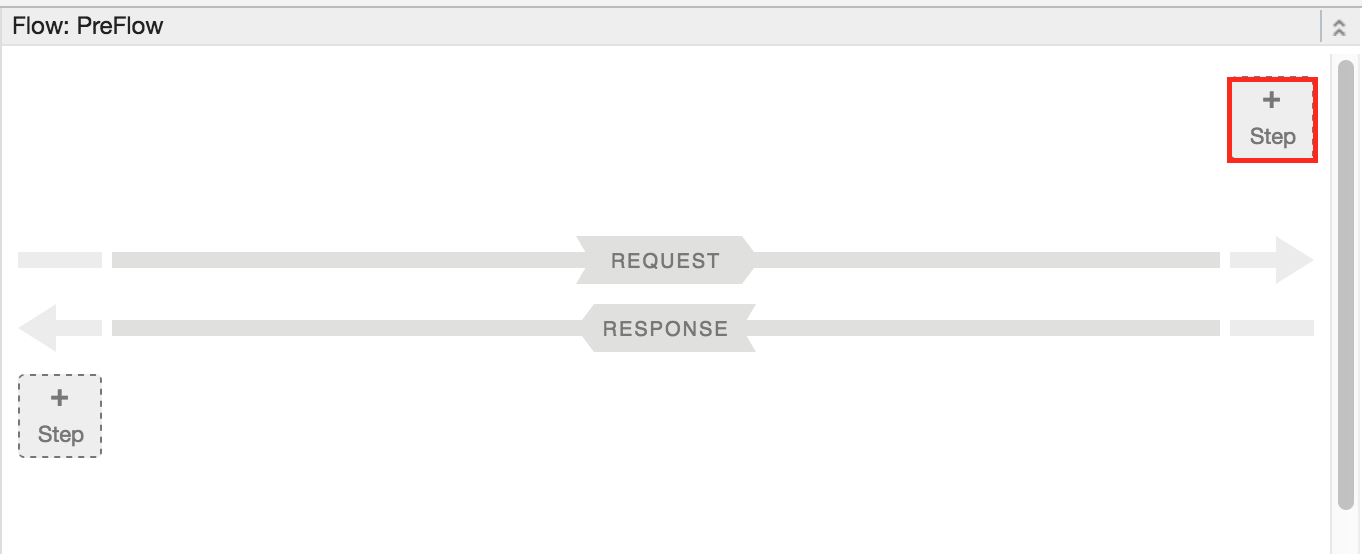
For example, the PreFlow flow is selected for the default API proxy endpoint in the following figure:
- In the Design view, click +Step associated with the request or response
flow to attach a policy. For example:
The Add Step dialog opens displaying a categorized list of policies.
- Scroll and select the policy type that you want to attach to the selected flow.
- Modify the following fields.
-
Display Name: Unique display name for the policy. The UI will generate a default name, but it is advisable to create a descriptive name for the policy. This will ensure that other developers in your organization have an easy time understanding what the policy is intended to do.
-
Name: Unique name for the policy. The policy name matches the display name with the following exceptions:
-
Spaces are replaced by dashes.
-
Consecutive dashes are replaced by a single dash.
-
Except for dashes, underscores, and spaces (which are replaced, as noted above), characters that are not alphanumeric, such as pound signs, percent signs, ampersands, and so on, are removed.
-
-
- Click Add.
The policy is attached to the selected flow.
After the policy is attached, you’ll see the policy displayed in the Designer view for the flow, in this example the PreFlow of the default proxy endpoint, and in the Policies list in the Navigation pane. The Code view, which displays the XML for the newly attached policy, displays below the Designer view. Apigee generates an instance of the policy that contains a set of reasonable default values.
Adding a policy without attaching it to a flow
To add a policy without attaching it to a flow, which is useful for Handling faults, click + in the Policies bar in the Navigator view to open the Add Policy dialog and add the policy (as described in steps 4 through 6 in the previous section).
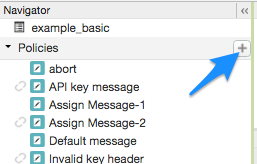
A policy that is not attached to any flow is flagged with the detached icon in the Policies list, as shown adjacent to the API key message policy shown in the previous figure.
After you create the policy, you can attach it to a flow by dragging and dropping it from the Policies list to the desired flow in the Designer view.
Detaching policies from a flow
To detach a policy from a Flow, select the Flow. Mouse over the icon for the policy in the Designer view of the Flow. Click the X in the circle that appears in the icon.
Deleting a policy instance
To delete a policy instance, mouse over the entry for the policy in the Navigator view. Click the X in the circle that appears to the right of the entry.
Configuring policies in the UI
When the UI generates a policy instance, it applies reasonable default values for common settings. You may need to modify these settings to meet your requirements.
For example:<?xml version="1.0" encoding="UTF-8" standalone="yes"?> <SpikeArrest async="false" continueOnError="false" enabled="true" name="spikearrest-1"> <DisplayName>SpikeArrest-1</DisplayName> <FaultRules/> <Properties/> <Identifier ref="request.header.some-header-name"/> <MessageWeight ref="request.header.weight"/> <Rate>30ps</Rate> </SpikeArrest>
ポリシーを構成するには、[Code] ビューで XML 構成を直接編集します。たとえば、Spike Arrest ポリシーのピーク メッセージ レートは当初 1 秒あたり 30 メッセージに設定されています。このピークレートを変更するには、ポリシーの XML で <Rate> 要素の値を変更します。ポリシーの構成の詳細については、ポリシー リファレンスをご覧ください。
[Code] ビューに、ポリシーのカットアンドペーストを行うこともできます。GitHub で入手可能なサンプルのポリシーを再利用するには、これが便利な方法です。
[Code] ビューでポリシー定義を変更すると、この変更は [Property Inspector] に反映されます。その逆の場合も同様です。[Property Inspector] に変更を加えると、[コード] ビューの XML に反映されます。
このトピックで使用する Quota ポリシーに関するドキュメントについては、Quota ポリシーをご覧ください。
ポリシーとともに Gemini Code Assist コードの説明を使用する
Gemini Code Assist がインストールされている場合は、これを使用して、Cloud コンソールの Apigee UI でポリシーとポリシー要素を直接確認できます。
ポリシーとともに Gemini Code Assist コードの説明を使用するには:
- [コード] ビューでポリシーを編集しているときに、XML の要素や属性など、ポリシーコードの一部をハイライト表示します。複数の要素をハイライト表示することもできます。
- 下図のように、Gemini Code Assist アイコンをクリックします。サイドパネルには、ポリシーとハイライト表示した要素の詳細が表示されます。
