Esta página aplica-se ao Apigee, mas não ao Apigee Hybrid.
Veja a documentação do
Apigee Edge.

Tem de implementar um proxy de API antes de os programadores poderem aceder e usá-lo.
Apigee na Cloud Console
- Na Google Cloud consola, aceda à página Apigee > Desenvolvimento de proxies > Proxies de API.
- Certifique-se de que o mesmo Google Cloud projeto onde criou o proxy de API está selecionado no menu pendente na parte superior da página.
- Selecione myproxy na lista de proxies.
- Clique em Implementar para apresentar a caixa de diálogo Implementar e introduza as seguintes informações:
- Revisão: selecione o número de revisão do proxy que quer implementar. Se estiver a fazer este tutorial desde o início, só tem uma revisão para escolher.
- Ambiente: selecione o ambiente onde quer implementar o proxy. Um ambiente é um contexto de execução de tempo de execução para os proxies de API numa organização do Apigee. Tem de implementar um proxy de API num ambiente antes de poder aceder ao mesmo.
- Conta de serviço (opcional): uma conta de serviço para o proxy. A conta de serviço representa a identidade do proxy implementado e determina as autorizações que tem. Esta é uma funcionalidade avançada e, para efeitos deste tutorial, pode ignorá-la.
- Clique em Implementar.
Quando o proxy é implementado, a coluna Estado na secção Implementações apresenta um ícone verde para mostrar que a revisão do proxy da API está implementada. Pode passar o cursor do rato sobre o ícone de estado para ver mais informações acerca da implementação.
IU do Apigee clássico
- Abra a IU do Apigee num navegador.
- Na IU do Apigee, selecione Develop > API Proxies.
Certifique-se de que o ambiente "test" está selecionado.
A IU apresenta o novo proxy na lista de proxies:

Clique no proxy "myproxy".
A IU apresenta o separador Vista geral dos proxies de API para esse proxy no editor de proxies.
Tenha em atenção que, em Implementações, a coluna Revisão mostra "Não implementado".
- Na coluna Revisão, expanda o seletor pendente para escolher a revisão a implementar.
A lista pendente apresenta apenas "1" e "Anular implementação":
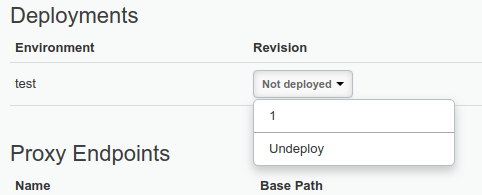
Selecione "1", a revisão que quer implementar, na lista pendente.
A IU pede-lhe que confirme a implementação:
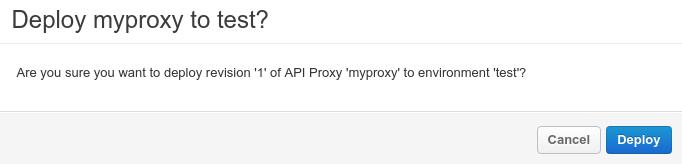
- Clique em Implementar.
O Apigee inicia o processo de implementação da revisão 1 do seu novo proxy.
O passo seguinte explica como chamar o proxy da API que acabou de implementar.
1 2 (NEXT) Passo 3: teste o proxy da API 4 5