Agora que configurou o Google Cloud e a IU do Apigee, e instalou e configurou o tempo de execução, está pronto para ver como tudo funciona em conjunto.
1. Crie um novo proxy de API através da IU do Apigee
Esta secção descreve como criar um novo proxy de API na IU através do assistente de proxy de API.
Apigee na Cloud Console
Para criar um novo proxy de API através do Apigee na Cloud Console:
- Abra a IU do Apigee na Cloud Console num navegador.
- Selecione a sua organização no menu pendente no canto superior esquerdo.
- Selecione Desenvolvimento de proxy > Proxies de API na vista principal.
- Clique em Criar.O assistente de proxy de API é iniciado.
- Selecione Proxy inverso (mais comum).
É apresentada a vista Detalhes do proxy.
- Configure o proxy com as seguintes definições:
- Nome do proxy: introduza myproxy. Os passos restantes nesta secção partem do princípio que este é o ID do seu proxy.
- Caminho base: definido automaticamente como / seguido do nome do proxy, que neste exemplo é /myproxy. O caminho base faz parte do URL usado para fazer pedidos à sua API. O Apigee usa o URL para fazer corresponder e encaminhar os pedidos recebidos para o proxy de API adequado.
- (Opcional) Descrição: introduza uma descrição para o novo proxy de API, como "Testar o Apigee hybrid com um proxy simples".
- Destino (API existente): introduza "https://mocktarget.apigee.net". Isto define o URL de destino que o Apigee invoca num pedido ao proxy de API. O serviço mocktarget está alojado no Apigee e devolve dados simples. Não requer uma chave da API nem um token de acesso.
Os detalhes do proxy de API devem ter o seguinte aspeto:
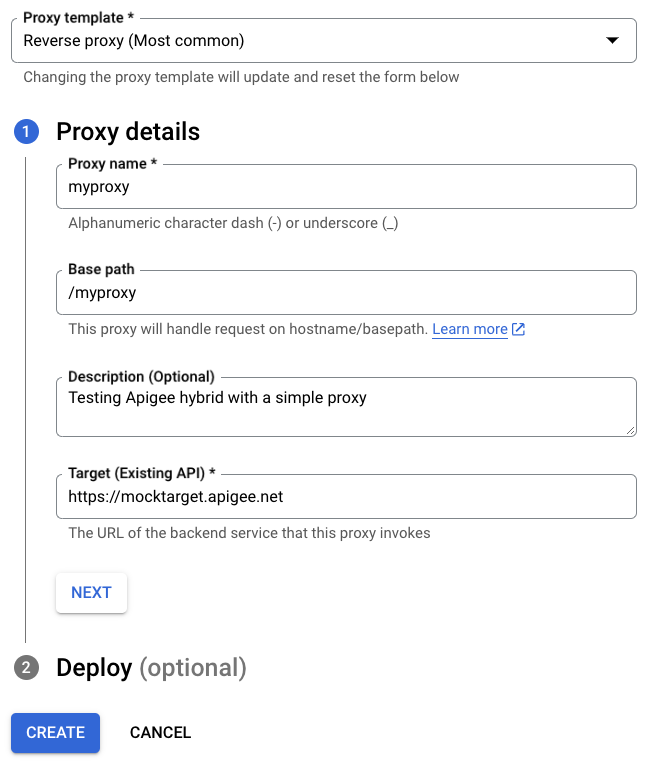
- Clicar em Seguinte.
- Em Implementar (opcional), tem a opção de selecionar um ou mais ambientes nos quais implementar o proxy no campo Ambientes de implementação. Se preferir não implementar o proxy neste ponto, deixe o campo Ambientes de implementação vazio. Pode sempre implementar o proxy mais tarde.
- Clique em Criar. O Apigee gera o proxy (por vezes, denominado pacote de proxy).
O Apigee apresenta a vista Resumo do proxy. Se optou por implementar o proxy, a secção Implementações apresenta o número da Revisão, que é 1 quando implementa pela primeira vez. A coluna Estado apresenta os ambientes nos quais o proxy está implementado com um indicador de estado verde.
Abaixo, a secção Revisões mostra todas as revisões feitas a este proxy. Clicando num dos itens VER na coluna Resumo do ponto final, a secção Ponto final apresenta:
- Pontos finais de proxy: o caminho base que define para o proxy, que neste exemplo é
/myproxy. - Pontos finais de destino: o caminho base que define para o destino, que neste exemplo é
https://mocktarget.apigee.net.
Apigee clássico
Para criar um novo proxy de API com o Apigee clássico:
- Abra a IU do Apigee num navegador.
- Selecione a sua organização no menu pendente no canto superior esquerdo.
- Selecione Desenvolver > Proxies de API na vista principal.
- Clique em Criar novo.O assistente de proxy de API é iniciado.
- Selecione Proxy inverso (mais comum).
É apresentada a vista Detalhes do proxy.
- Configure o proxy com as seguintes definições:
- Nome do proxy: introduza "myproxy". Os passos restantes nesta secção partem do princípio de que este é o ID do seu proxy.
- Caminho base do proxy: definido automaticamente como "/myproxy". O caminho base do proxy faz parte do URL usado para fazer pedidos à sua API. O Apigee usa o URL para fazer corresponder e encaminhar os pedidos recebidos para o proxy de API adequado.
- (Opcional) Descrição: introduza uma descrição para o novo proxy de API, como "Testar o Apigee hybrid com um proxy simples".
- Destino (API existente): introduza "https://mocktarget.apigee.net". Isto define o URL de destino que o Apigee invoca num pedido ao proxy de API. O serviço mocktarget está alojado no Apigee e devolve dados simples. Não requer uma chave da API nem um token de acesso.
Os detalhes do proxy de API devem ter o seguinte aspeto:
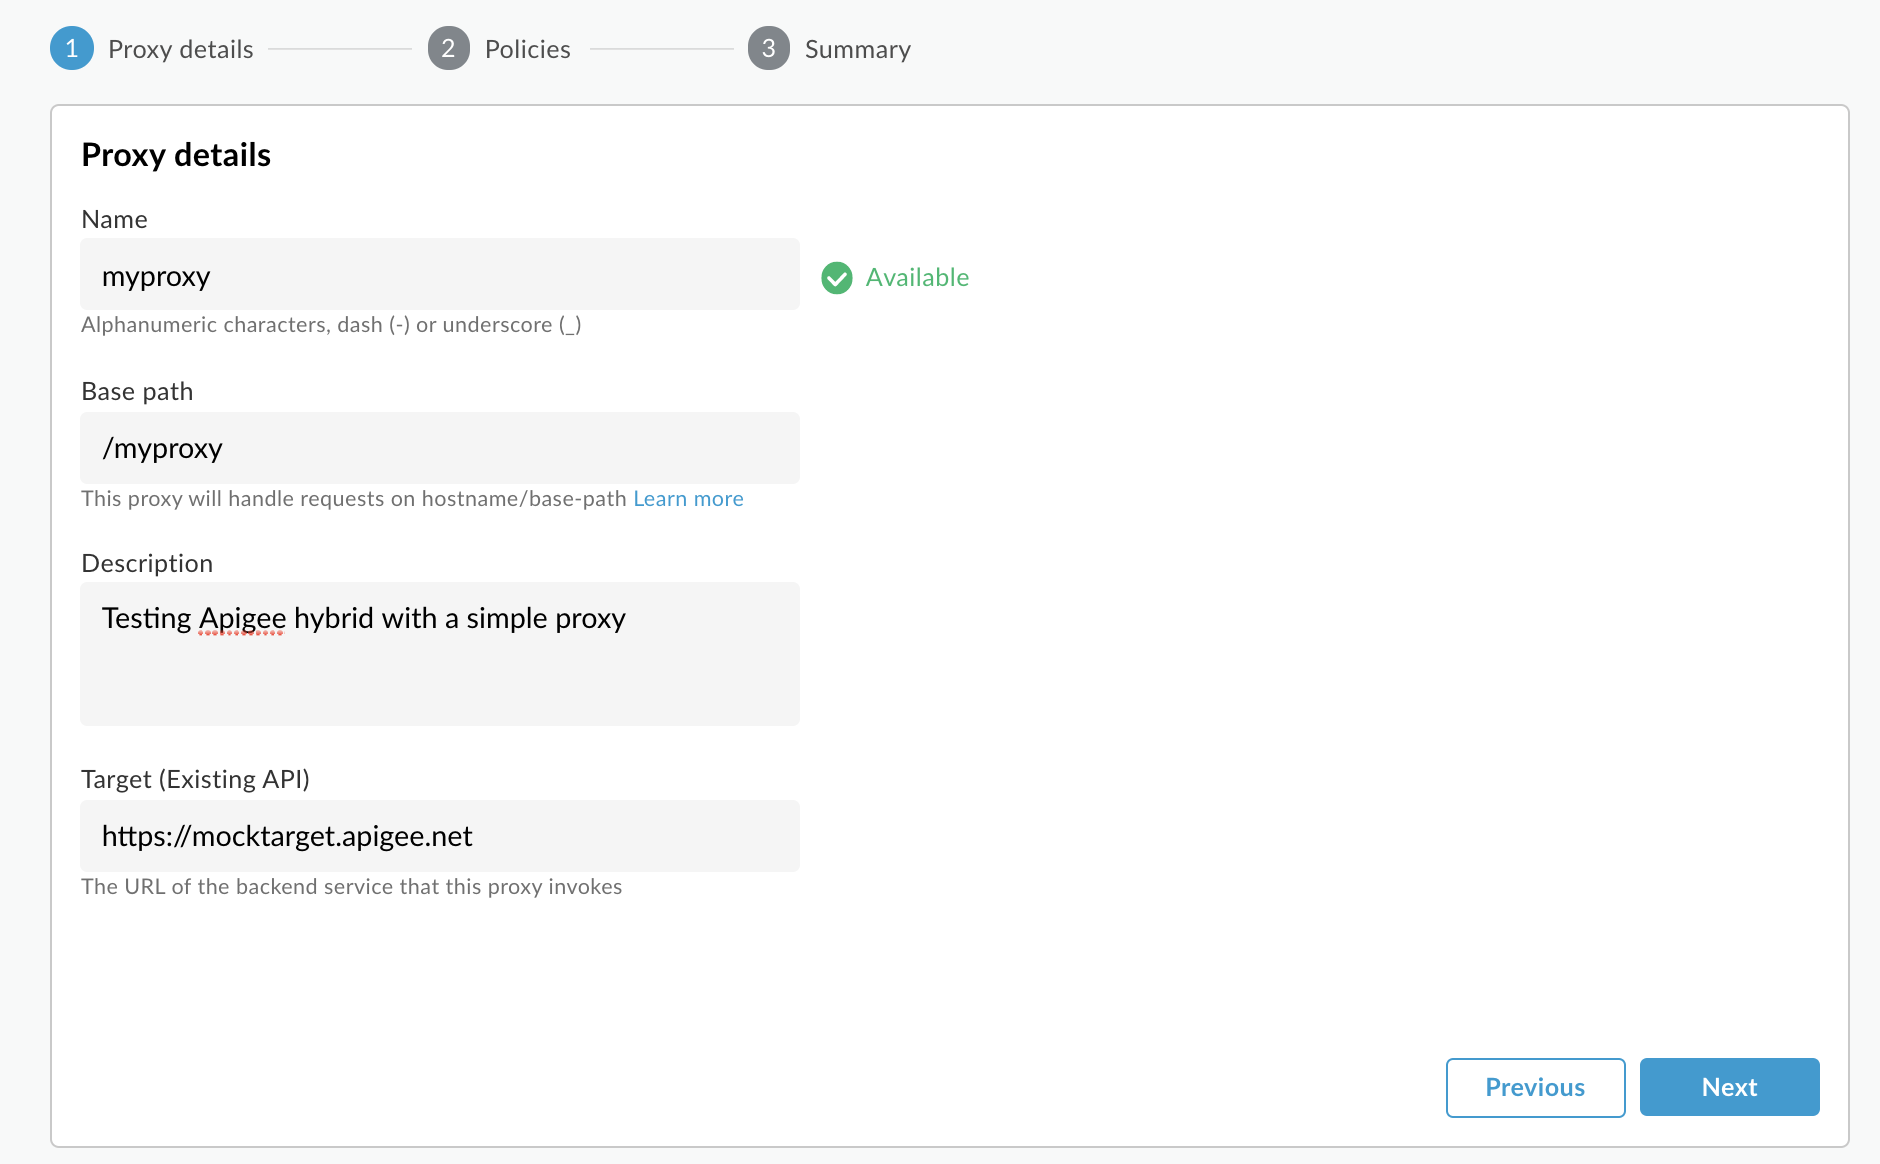
- Clicar em Seguinte.
- No ecrã Políticas comuns, selecione Pass through (no authorization) como a opção de segurança.
- Clicar em Seguinte.
- No ecrã Resumo, selecione um ambiente para implementar o proxy e
clique em Criar e implementar.
O Hybrid gera o proxy (por vezes, denominado o pacote de proxy) e implementa-o no ambiente que selecionou.
- Clique em Aceder à lista de proxies.
O Apigee apresenta a vista Proxies, que apresenta uma lista de proxies de API. O novo proxy deve ser apresentado com um indicador de estado verde, o que significa que foi implementado.
2. Chame o proxy da API
Quando a IU indicar que o proxy está implementado, pode tentar chamá-lo através do cURL ou do cliente REST à sua escolha. Por exemplo:
- Certifique-se de que a variável do ambiente
DOMAINestá definida para o nome do domínio que usou para o nome do anfitrião do seu grupo de ambientes em Configuração do projeto e da organização - Passo 3: crie um grupo de ambientes.echo $DOMAIN
-
Encontre o endereço IP externo e a porta do gateway de entrada do Apigee com o seguinte comando:
kubectl get svc -n APIGEE_NAMESPACE -l app=apigee-ingressgateway
O resultado deve ter um aspeto semelhante ao seguinte:
NAME                                        TYPE           CLUSTER-IP    EXTERNAL-IP     PORT(S)                                      AGE
apigee-ingressgateway-prod-hybrid-37a39bd   LoadBalancer   192.0.2.123   233.252.0.123   15021:32049/TCP,80:31624/TCP,443:30723/TCP   16h
- Exporte o IP externo e a porta para variáveis:
export INGRESS_IP_ADDRESS=EXTERNAL_IP_ADDRESS
export INGRESS_PORT=PORT_NUMBER - Chame o proxy da API:
curl  -H Host:$DOMAIN --resolve \
  $DOMAIN:$INGRESS_PORT:$INGRESS_IP_ADDRESS  \
  https://$DOMAIN:$INGRESS_PORT/myproxy -k -v
Por exemplo:
curl -v -H Host:example.com --resolve example.com:443:233.252.0.123 https://example.com:443/myproxy -k -v
- Uma chamada bem-sucedida ao proxy devolve um código de resposta HTTP 200 e o seguinte resultado.
Hello, Guest!
Para saber mais sobre a criação e a implementação de proxies de API, consulte o artigo Crie a sua primeira vista geral do proxy.