Zum Testen der bereitgestellten helloworld API klicken Sie in Apigee in Cloud Code auf den Tab Terminal und geben den folgenden curl-Aufruf ein:
curl 0:8998/helloworld
Die folgende Fehlermeldung wird angezeigt:
Da Sie beim Erstellen des API-Proxys die API-Schlüsselauthentifizierung aktiviert haben, müssen Sie beim Aufruf der API einen API-Schlüssel mit dem Suchparameter apikey übergeben.
Um einen API-Schlüssel zu erhalten, müssen Sie ein Test-Bundle erstellen und die folgenden Testressourcen konfigurieren:
API-Produkt, mit dem die API gebündelt und für Entwickler verfügbar gemacht wird.
Entwickler, der eine App für den Zugriff auf die API erstellt.
Entwickler-App, die über einen API-Schlüssel den Zugriff auf die API ermöglicht.
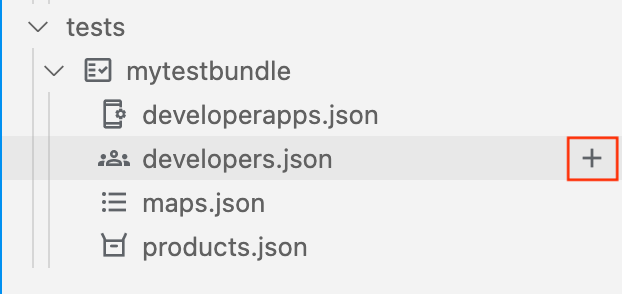
Testressourcen erstellen und exportieren
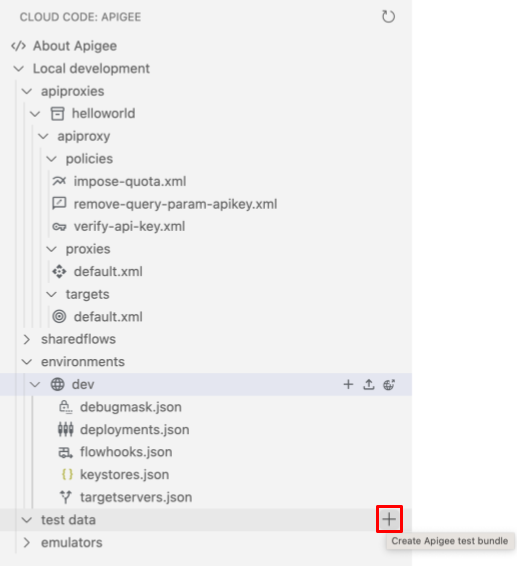
Erstellen Sie ein Test-Bundle:
Bewegen Sie den Mauszeiger auf den Ordner tests und klicken Sie auf .
Der Assistent zum Erstellen eines Test-Bundles wird geöffnet.
Geben Sie als Testnamen mytestbundle ein und drücken Sie die Eingabetaste.
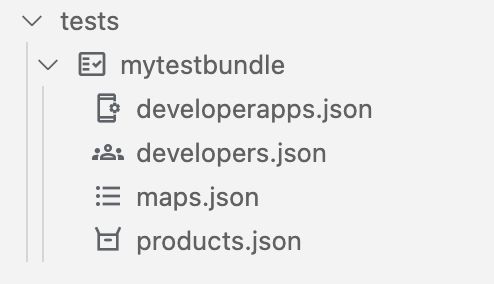
Das Test-Bundle wird erstellt.
Maximieren Sie den Ordner mytestbundle, um sich dessen Inhalt anzusehen.
API-Produkttestressource konfigurieren:
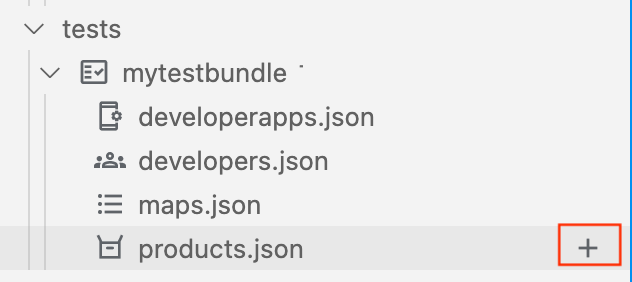
Bewegen Sie den Mauszeiger auf die Datei products.json und klicken Sie auf .
Der Assistent zum Erstellen einer API-Produkt wird geöffnet.
Geben Sie meinprodukt für den Namen des API-Produkts ein und drücken Sie die Eingabetaste, um den Vorgang zu bestätigen und fortzufahren.
Geben Sie myproduct ein, um die Beschreibung des API-Produkts einzugeben, und drücken Sie die Eingabetaste, um den Vorgang zu bestätigen und fortzufahren.
Wählen Sie helloworld aus, um den API-Proxy zum API-Produkt hinzuzufügen, und klicken Sie auf OK.
Die Datei products.json wird im Editor geöffnet, während das neue API-Produkt konfiguriert ist:
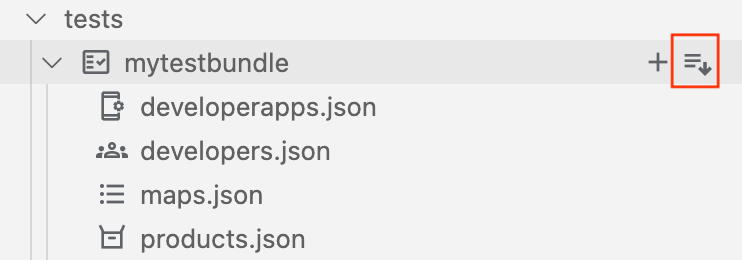
Exportieren Sie die Testressourcen in den Apigee Emulator.
Bewegen Sie den Mauszeiger auf das Test-Bundle mytestbundle und klicken Sie auf .
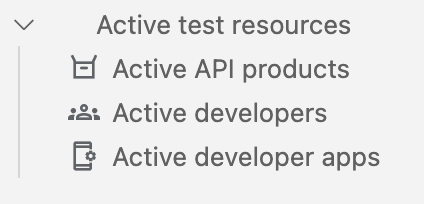
Die aktiven Testressourcen werden im Abschnitt "Apigee-Emulatoren" angezeigt, wie in der folgenden Abbildung dargestellt.
API-Schlüssel abrufen
Rufen Sie die Anmeldedaten für den API-Schlüssel für Ihre Entwickleranwendung ab:
Klicken Sie im Bereich Emulatoren unter Aktive Testdaten auf Aktive Entwickler-Apps.
Die aktive Konfigurationsdatei für Entwickler-Apps wird im Editor geöffnet. Die Datei enthält Anmeldedaten für myproduct, wie in der folgenden Abbildung dargestellt.
<p><img src="/apigee/docs/api-platform/images/vscode-consumerkey.png" alt="Developer apps with the consumerKey value highlighted."></p>
Kopieren Sie den Wert consumerKey (ohne Anführungszeichen) für das API-Produkt myproduct.
Die API testen
So testen Sie die API mit dem API-Schlüssel:
Übergeben Sie den API-Schlüssel in Ihrem curl-Aufruf mit dem Suchparameter apikey so:
curl 0:8998/helloworld?apikey=API_KEY
Die folgende Antwort wird zurückgegeben
Hello, Guest!
Das wars! Sie haben eine API in Ihrer lokalen Umgebung erfolgreich ausgeführt.
Im nächsten Schritt erfahren Sie, wie Sie den Zielendpunkt ändern können.
[[["Leicht verständlich","easyToUnderstand","thumb-up"],["Mein Problem wurde gelöst","solvedMyProblem","thumb-up"],["Sonstiges","otherUp","thumb-up"]],[["Schwer verständlich","hardToUnderstand","thumb-down"],["Informationen oder Beispielcode falsch","incorrectInformationOrSampleCode","thumb-down"],["Benötigte Informationen/Beispiele nicht gefunden","missingTheInformationSamplesINeed","thumb-down"],["Problem mit der Übersetzung","translationIssue","thumb-down"],["Sonstiges","otherDown","thumb-down"]],["Zuletzt aktualisiert: 2025-09-04 (UTC)."],[[["\u003cp\u003eThis guide is relevant for both Apigee and Apigee hybrid users, providing instructions on local API testing.\u003c/p\u003e\n"],["\u003cp\u003eTo successfully test an API secured with API key authentication, you must create and configure an API product, a developer, and a developer app.\u003c/p\u003e\n"],["\u003cp\u003eYou create a test bundle where you will configure your test resources, including API products, developers, and developer apps.\u003c/p\u003e\n"],["\u003cp\u003eAfter configuring the test resources, export the test bundle to the Apigee Emulator to make the active test data available, enabling you to retrieve the API key from the active developer app.\u003c/p\u003e\n"],["\u003cp\u003eOnce you have the API key, use it as a query parameter in a curl call to successfully test your API, receiving the "Hello, Guest!" response.\u003c/p\u003e\n"]]],[],null,["# Step 4: Test your API\n\n*This page\napplies to **Apigee** and **Apigee hybrid**.*\n\n\n*View [Apigee Edge](https://docs.apigee.com/api-platform/get-started/what-apigee-edge) documentation.*\n\n\u003cbr /\u003e\n\nTo test the deployed `helloworld` API, click the **Terminal** tab\nin Apigee in Cloud Code and enter the following curl call: \n\n```\ncurl 0:8998/helloworld\n```\n\nThe following error message is displayed:\n\nBecause you enabled API key-based authentication when creating the API proxy, you need to pass an API key using the `apikey` query parameter when calling the API.\n\nTo obtain an API key, you need to create a test bundle and configure the following test resources:\n\n- **API product** used to bundle the API and make it available to developers.\n\n- **Developer** that will create an app to access the API.\n\n- **Developer app** that will enable access to the API using an API key.\n\n| **Note:** The examples in this section use `0` for the host value and `8998` for the port value. You can configure the port values, as described in [Managing the Apigee Emulator.](/apigee/docs/api-platform/local-development/vscode/manage-apigee-emulator) If you get an error when using `0`, substitute `localhost` for the `0`: \n|\n| ```\n| curl localhost:8998/helloworld\n| ```\n\nBuild and Export test resources\n-------------------------------\n\n1. Create a test bundle:\n 1. Position your cursor over the **test data** folder and click .\n\n The **Create test bundle** wizard opens.\n 2. Enter **mytestbundle** for the test bundle name and press **Enter** .\n\n The test bundle is created.\n 3. Expand the **mytestbundle** folder to view its contents.\n\n2. Configure the API product test resource:\n 1. Position your cursor over the **products.json** file and click .\n\n The **Create API product** wizard opens.\n\n\n 2. Enter **myproduct** for the name of the API product and press **\u003ckbd\u003eEnter\u003c/kbd\u003e** to confirm and proceed.\n 3. Enter **myproduct** for the description of the API product and press **\u003ckbd\u003eEnter\u003c/kbd\u003e** to confirm and proceed.\n 4. Select **helloworld** to add the API proxy to the API product and click **OK** .\n\n The `products.json` file is opened in the editor with the new API product configured: \n\n ```\n [\n {\n \"attributes\": [\n {\n \"name\": \"sample_attribute_0\",\n \"value\": \"sample_attribute_value_0\"\n }\n ],\n \"scopes\": [],\n \"environments\": [],\n \"apiResources\": [\n \"/\",\n \"/*\",\n \"/**\"\n ],\n \"quota\": \"100\",\n \"quotaInterval\": \"1\",\n \"quotaTimeUnit\": \"minute\",\n \"name\": \"myproduct\",\n \"displayName\": \"myproduct\",\n \"proxies\": [\n \"helloworld\"\n ]\n }\n ]\n ```\n3. Configure the developer test resource:\n 1. Position your cursor over the **developers.json** file and click .\n\n\n The **Create developer** wizard opens.\n\n\n 2. Enter the following values at the prompts and press **\u003ckbd\u003eEnter\u003c/kbd\u003e** to confirm and proceed:\n - Developer email: **ahamilton@example.com**\n - Username: **ahamilton**\n - First name: **Alex**\n - Last name: **Hamilton**\n\n The `developers.json` file is opened in the editor with the new developer configured: \n\n ```\n [\n {\n \"attributes\": [\n {\n \"name\": \"sample_attribute_0\",\n \"value\": \"sample_attribute_value_0\"\n }\n ],\n \"email\": \"ahamilton@example.com\",\n \"userName\": \"ahamilton\",\n \"firstName\": \"Alex\",\n \"lastName\": \"Hamilton\"\n }\n ]\n ```\n4. Configure the developer app test resource:\n 1. Position your cursor over the **developerapps.json** file and click .\n\n\n The **Create developer app** wizard opens.\n\n\n 2. Select **ahamilton@example.com** as the owner of the app.\n 3. Enter the following values at the next set of prompts and press **Enter** to confirm and proceed:\n - App name: **myapp**\n - Description: **myapp**\n - Callback URL: **Leave blank**\n - Select **myproduct** to add it to the app and click **OK**.\n - Select **never** for the expiry value.\n\n The `developerapps.json` file is opened in the editor with the new app configured: \n\n ```\n [\n {\n \"attributes\": [\n {\n \"name\": \"sample_attribute_0\",\n \"value\": \"sample_attribute_value_0\"\n }\n ],\n \"developerEmail\": \"ahamilton@example.com\",\n \"name\": \"myapp\",\n \"displayName\": \"myapp\",\n \"callbackUrl\": \"\",\n \"apiProducts\": [\n \"myproduct\"\n ],\n \"expiryType\": \"never\"\n }\n ]\n ```\n5. Export the test resources to the Apigee Emulator. Position the cursor over the **mytestbundle** test bundle and click .\n\n\n | **Note:** If multiple [containers for the Apigee Emulator](/apigee/docs/api-platform/local-development/vscode/manage-apigee-emulator#add-container) are running, you are prompted to select the container to which you want to deploy the environment.\n\n The active test resources appears in the Apigee Emulators section, as shown in the following figure.\n\nObtain the API key\n------------------\n\nObtain the API key credentials for your developer app:\n\n1. In the **emulators** section, under **Active test data** , click **Active developer apps** .\n\n The active developer apps configuration file is opened in the editor. The file contains credentials for `myproduct`, as highlighted in the following figure.\n2. Copy the `consumerKey` value (without the quotes) for the `myproduct` API product.\n\n\u003cbr /\u003e\n\nTest your API\n-------------\n\nTest your API with the API key:\n\n1. Pass the API key in your curl call using the `apikey` query parameter, as follows: \n\n ```\n curl 0:8998/helloworld?apikey=\u003cvar translate=\"no\"\u003eAPI_KEY\u003c/var\u003e\n ```\n\n\n The following response is returned: \n\n ```\n Hello, Guest!\n ```\n\n\u003cbr /\u003e\n\n**Congratulations!** You've successfully run an API in your local environment.\n\nIn the next step, you'll learn how to change the target endpoint.\n\n\n[1](/apigee/docs/api-platform/local-development/vscode/tutorial-create-workspace)\n\n\n[2](/apigee/docs/api-platform/local-development/vscode/tutorial-create-proxy)\n\n\n[3](/apigee/docs/api-platform/local-development/vscode/tutorial-deploy)\n\n\n[4](/apigee/docs/api-platform/local-development/vscode/tutorial-test)\n\n\n[(NEXT) Step 5: Change the target endpoint](/apigee/docs/api-platform/local-development/vscode/tutorial-change-target-endpoint)\n\n\n[6](/apigee/docs/api-platform/local-development/vscode/tutorial-attach-policy)\n\n\n[7](/apigee/docs/api-platform/local-development/vscode/tutorial-deploy-apigee)\n\n\n[8](/apigee/docs/api-platform/local-development/vscode/tutorial-promote)\n\n\u003cbr /\u003e"]]


 .
.


 .
.