Cette page s'applique à Apigee et à Apigee hybrid.
Consultez la documentation d'Apigee Edge.
Configurez et déployez un environnement qui inclut le proxy d'API helloworld.
- Créez un environnement
- Placez le curseur sur le dossier environments, puis cliquez sur
 .
.
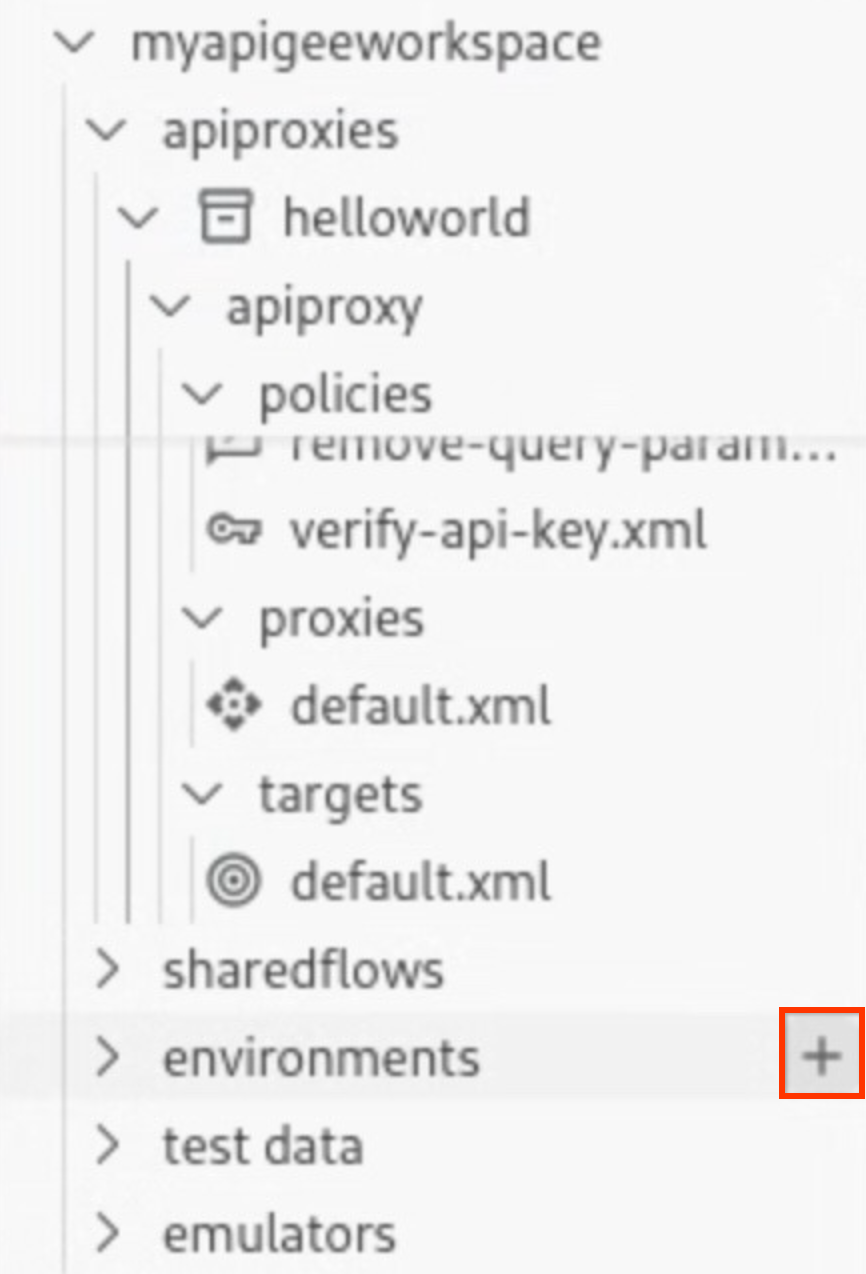
L'assistant de création d'environnement s'ouvre.
- Saisissez dev comme nom d'environnement, puis appuyez sur Entrée.
L'environnement est créé.
- Développez le dossier de l'environnement dev pour en afficher le contenu.

Lorsque vous créez un environnement, un ensemble de fichiers de configuration est inclus par défaut dans le dossier d'environnement
devpour configurer votre déploiement, ainsi que tous les masques de débogage, hooks de flux ou serveurs cibles requis.
- Placez le curseur sur le dossier environments, puis cliquez sur
- Configurez les détails du déploiement pour le proxy d'API
helloworlddans l'environnement :- Placez le curseur sur le fichier deployments.json, puis cliquez sur
 .
.
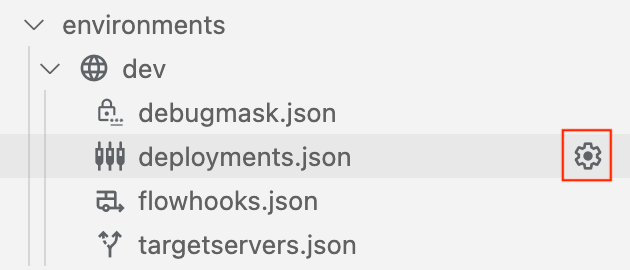
L'assistant Déploiement s'ouvre.
- Sélectionnez le proxy de l'API helloworld pour l'ajouter au déploiement, puis cliquez sur OK.
Le fichier
deployments.jsonest ouvert dans l'éditeur. Le fichier a été mis à jour pour inclure le proxy d'APIhelloworlddans le tableau de déploiementproxies:{ "proxies": [ { "name": "helloworld" } ], "sharedflows": [] }
- Placez le curseur sur le fichier deployments.json, puis cliquez sur
- Déployez l'environnement de dev :
- Placez le curseur sur le dossier d'environnement dev dans la section Apigee, puis cliquez sur
 .
.
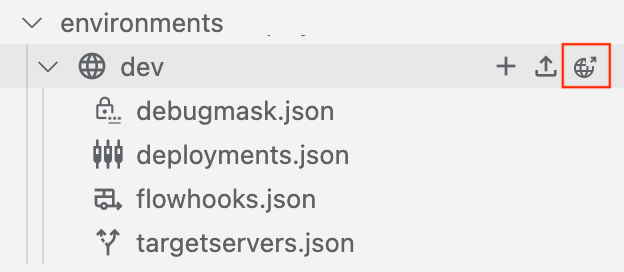
L'environnement
devest déployé, et l'onglet Résultat affiche un message de réussite.Les informations sur l'application déployée
helloworlds'affichent dans la section Émulateurs :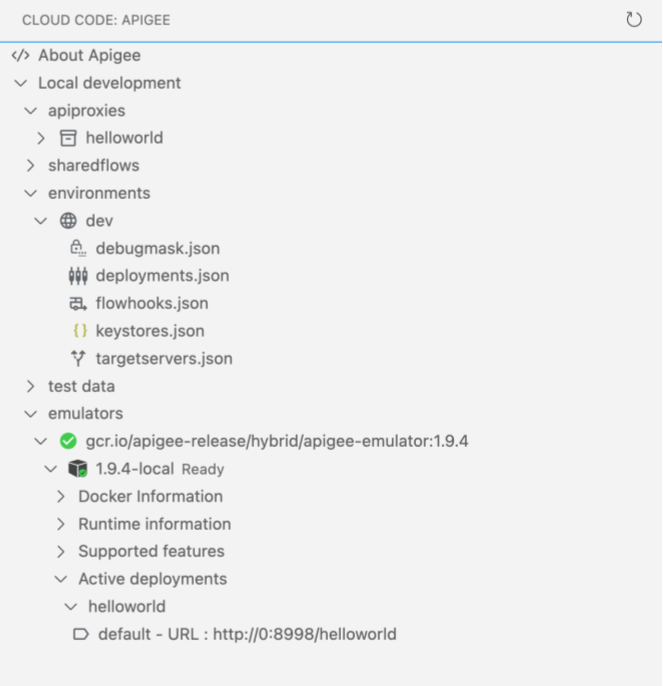
- Placez le curseur sur le dossier d'environnement dev dans la section Apigee, puis cliquez sur
Félicitations ! Vous avez déployé votre première application de proxy API. À l'étape suivante, vous allez tester le proxy d'API à l'aide de curl.
1 2 3 (ÉTAPE SUIVANTE) Étape 4 : Testez votre API 5 6 7 8