Ahora que configuraste Google Cloud y la IU híbrida, instalaste y configuraste el entorno de ejecución, estás listo para ver cómo funciona todo en conjunto.
Selecciona Desarrollar > Proxies de API en la vista principal.
En la lista desplegable Entorno, selecciona el entorno en el que deseas crear un proxy de API nuevo. En esta sección, se asume que el nombre del entorno es "test". Creaste al menos un entorno en el Paso 5: Agrega un entorno.
En la IU híbrida, se muestra una lista de los proxies de API para ese entorno. Si aún no has creado ningún proxy, la lista estará vacía.
Haz clic en +Proxy en la esquina superior derecha.
El asistente de proxy de API se inicia.
Selecciona Proxy inverso (más común) y haz clic en Siguiente.
Se muestra la vista Detalles del proxy.
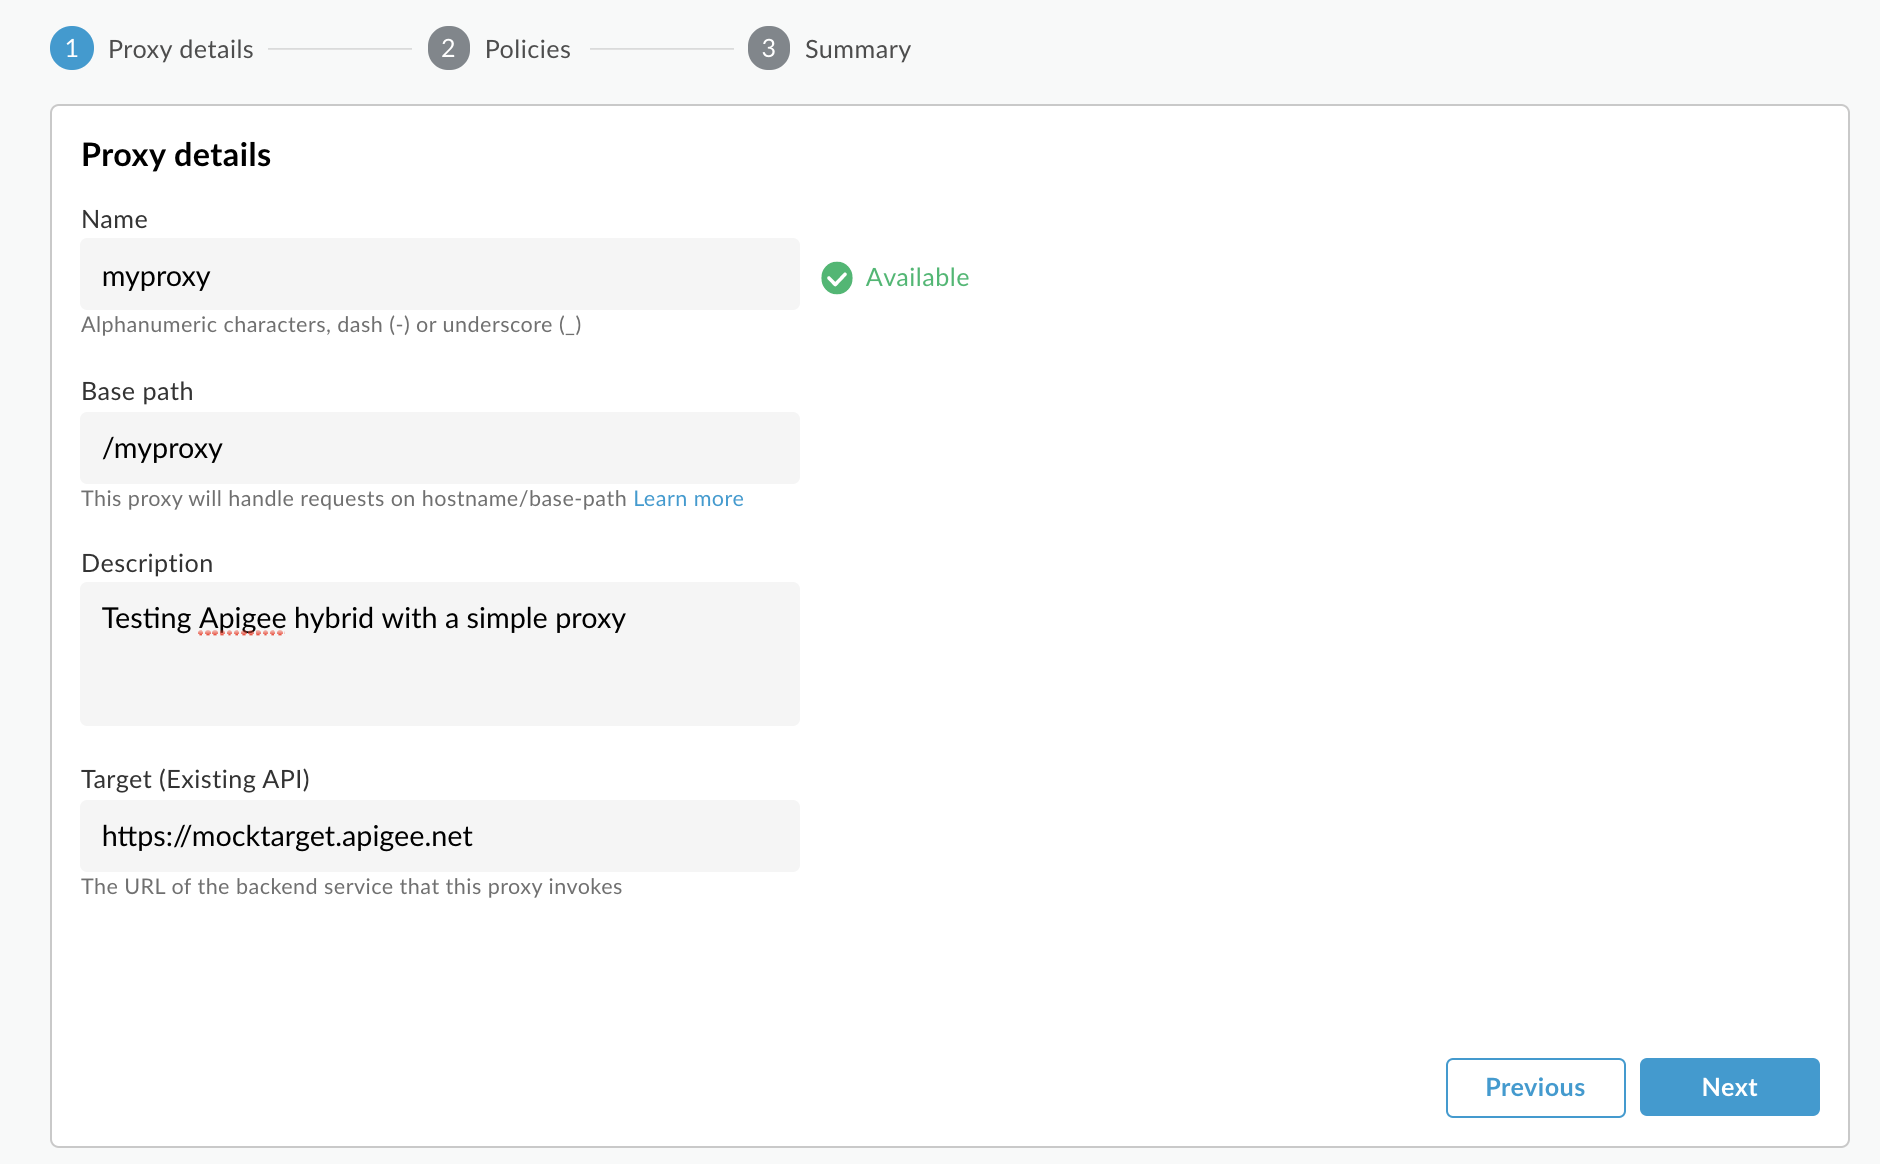
Configura tu proxy con los siguientes ajustes:
Nombre del proxy: Ingresa “myproxy”. En los pasos restantes de esta sección, se supone que este es el ID de tu proxy.
Ruta base del proxy: Se configurará de forma automática como "/myproxy". La ruta base del proxy es parte de la URL que se usa para realizar solicitudes a la API. Edge usa la URL para hacer coincidir solicitudes entrantes y enrutarlas al proxy de API adecuado.
(Opcional) Descripción: Ingresa una descripción para tu nuevo proxy de API, como "Prueba de Apigee Hybrid con un proxy simple".
Destino (API existente): Ingresa "https://mocktarget.apigee.net". Esto define la URL de destino que Apigee invoca en una solicitud al proxy de API. El servicio de destino ficticio se aloja en Apigee y muestra datos simples. No requiere una clave de API ni un token de acceso.
Los detalles de tu proxy de API deben tener el siguiente aspecto:
Haz clic en Siguiente.
En la pantalla Políticas, selecciona Pasar a través de (ninguno) como la opción de seguridad.
Haz clic en Siguiente.
En la pantalla Resumen, haz clic en Crear.
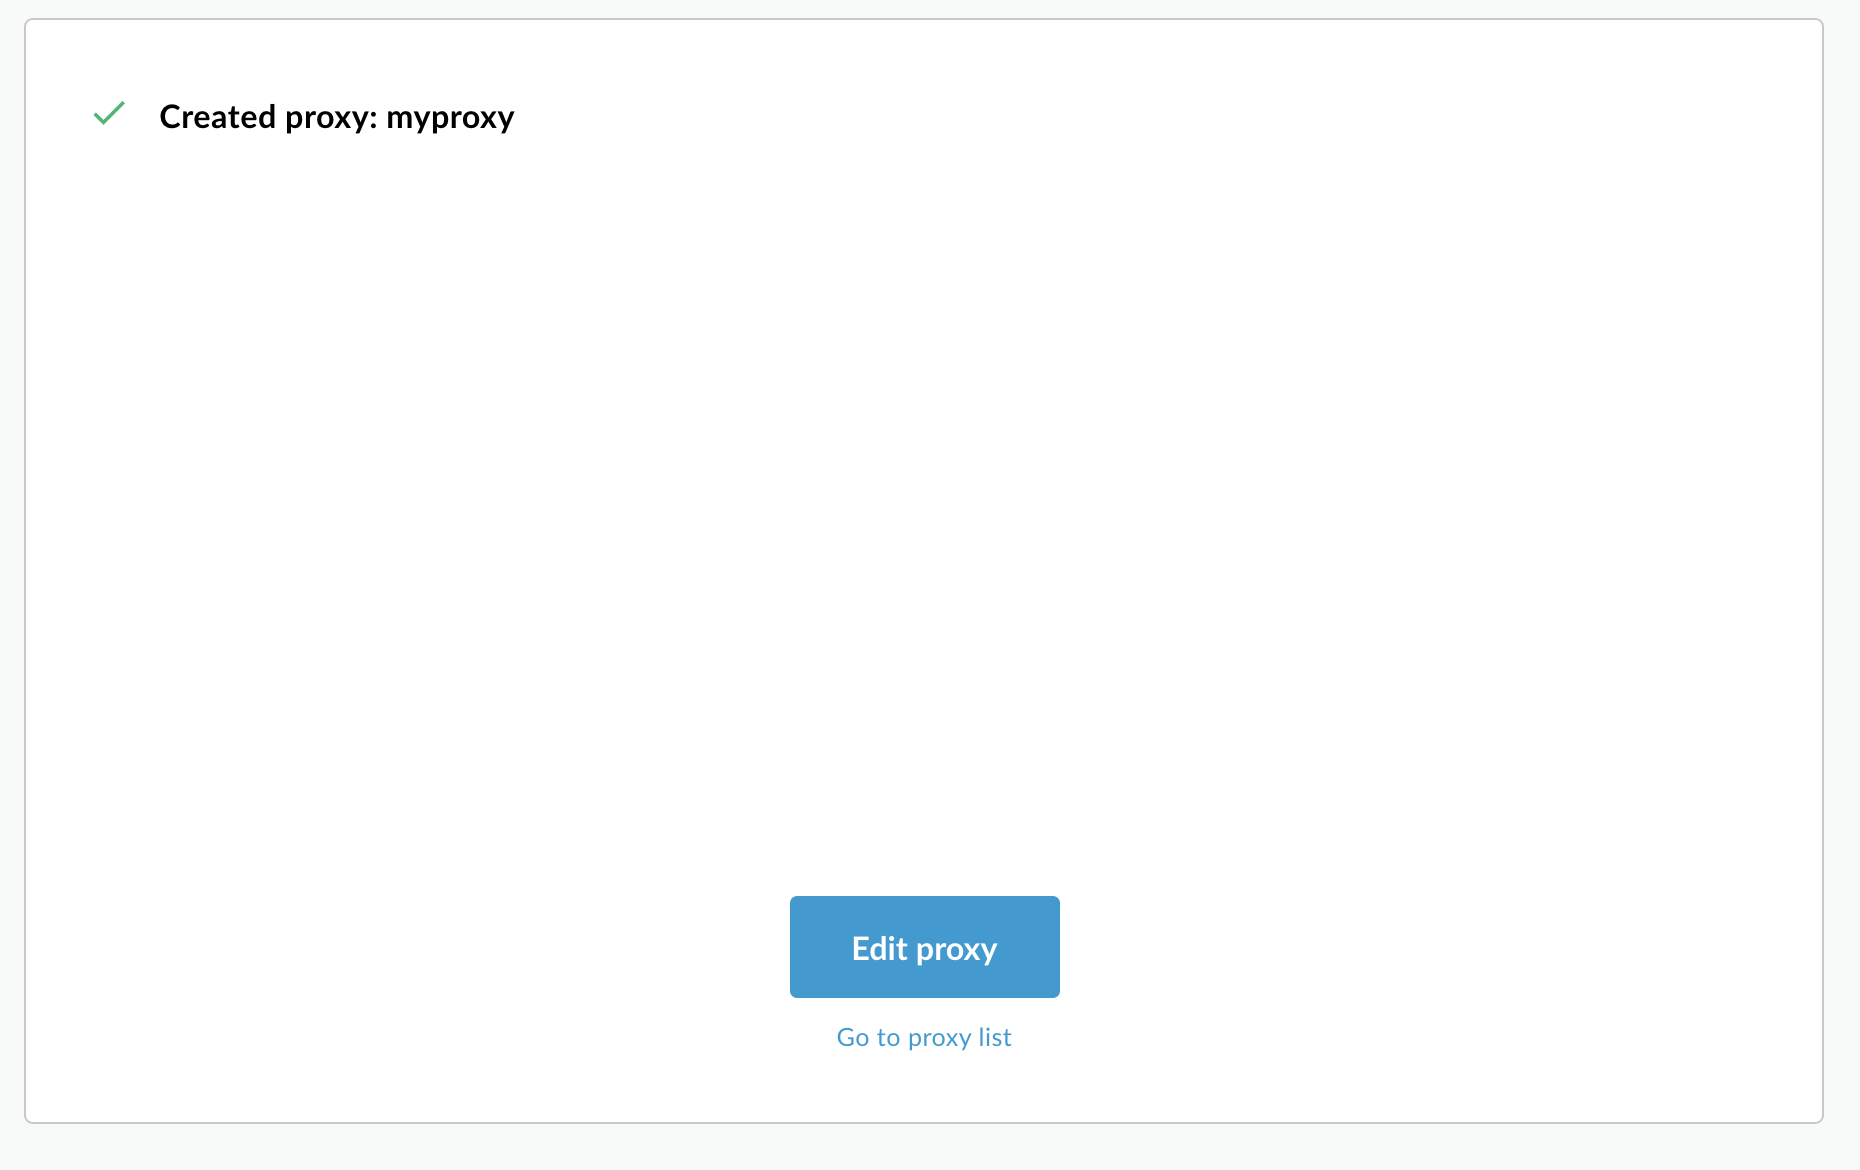
Hybrid genera el proxy (a veces denominado el paquete del proxy):
Haz clic en Salir.
Hybrid muestra la vista Proxies, en la que se muestra una lista de los proxies de API. El proxy nuevo debería aparecer en la parte superior de la lista, con un indicador de estado gris, que indica que aún no se implementó.
2. Implementa tu proxy en el clúster mediante la IU híbrida
Después de crear un proxy nuevo, debes implementarlo para poder probarlo. En esta sección, se describe cómo implementar el proxy nuevo mediante la IU híbrida.
Para implementar un proxy de API en la IU híbrida, haz lo siguiente:
En la IU híbrida, selecciona Desarrollar > Proxies de API.
Asegúrate de que el entorno de “prueba” esté seleccionado.
En la IU, se muestra el nuevo proxy en la lista de proxies:
Haz clic en el proxy "myproxy".
En la IU, se muestra la pestaña Descripción general de los proxies de API para ese proxy.
Ten en cuenta que en Implementaciones, en la columna Revisión, se muestra "Sin implementar".
En la columna Revisión, expande el selector desplegable para elegir la revisión que se implementará.
En la lista desplegable, solo se muestra "1" y "Sin implementar".
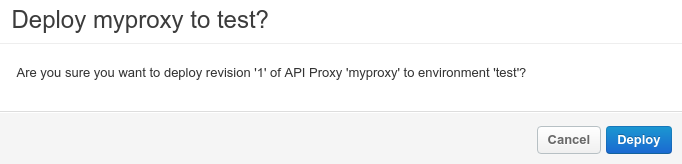
Selecciona "1", la revisión que deseas implementar, en la lista desplegable.
La IU te solicita que confirmes la implementación:
Haz clic en Implementar.
La IU inicia el proceso de implementación de la revisión 1 de tu proxy nuevo en el clúster.
Ten en cuenta que la implementación no es un proceso instantáneo. El modelo de implementación de “coherencia eventual” de Hybrid significa que una nueva implementación se implementará en el clúster durante un período corto y no de forma inmediata.
Aunque existen varias formas de verificar el estado de implementación de un proxy en la IU, en los dos pasos siguientes se explica cómo llamar al proxy de API que acabas de implementar y cómo verificar el estado de la implementación con una llamada a las API de Apigee.
En el que your_host_alias es un dominio público que se usa para acceder a tus API, como se configura en la propiedad virtualhosts.hostAliases en tu archivo de anulaciones. Consulta Configura el clúster.
Por ejemplo:
curl -v -k https://apitest.acme.com/myproxy
Si la llamada tiene éxito, verás el siguiente resultado:
[[["Fácil de comprender","easyToUnderstand","thumb-up"],["Resolvió mi problema","solvedMyProblem","thumb-up"],["Otro","otherUp","thumb-up"]],[["Difícil de entender","hardToUnderstand","thumb-down"],["Información o código de muestra incorrectos","incorrectInformationOrSampleCode","thumb-down"],["Faltan la información o los ejemplos que necesito","missingTheInformationSamplesINeed","thumb-down"],["Problema de traducción","translationIssue","thumb-down"],["Otro","otherDown","thumb-down"]],["Última actualización: 2025-09-04 (UTC)"],[[["\u003cp\u003eThis documentation version (1.2) is end-of-life and users should upgrade to a newer, supported version.\u003c/p\u003e\n"],["\u003cp\u003eYou can create a new API proxy in the Apigee UI using the API Proxy Wizard by selecting "Reverse proxy" and configuring the proxy details.\u003c/p\u003e\n"],["\u003cp\u003eAfter creating the API proxy, it needs to be deployed to the cluster via the UI, and the process involves selecting the revision to deploy and confirming the deployment.\u003c/p\u003e\n"],["\u003cp\u003eOnce deployed, the API proxy can be called using a tool like cURL, targeting the specified host alias and base path.\u003c/p\u003e\n"],["\u003cp\u003eThis specific case does not automatically deploy to the cluster and requires a manual step to be carried out in order for it to work.\u003c/p\u003e\n"]]],[],null,["# Create and deploy a new API proxy\n\n| You are currently viewing version 1.2 of the Apigee hybrid documentation. **This version is end of life.** You should upgrade to a newer version. For more information, see [Supported versions](/apigee/docs/hybrid/supported-platforms#supported-versions).\n\nNow that you've configured and the hybrid UI, and installed and configured the\nruntime, you're ready to see how it all works together.\n\nThis section walks you through the following:\n\n1. **[Create a new API proxy](#create-proxy)** in the Apigee UI using the API Proxy Wizard\n2. **[Deploy your new proxy](#deploy)** to your cluster with the UI\n\n1. Create a new API proxy using the hybrid UI\n---------------------------------------------\n\nThis section describes how to create a new API proxy in the UI by using the API Proxy Wizard.\n\n**To create a simple API proxy using the API Proxy Wizard:**\n\n1. Open [Apigee UI](https://apigee.google.com) in a browser.\n2. Select **Develop \\\u003e API Proxies** in the main view.\n3. From the **Environment** drop-down list, select the environment in which you want to create a new API proxy. This section assumes the name of the environment is \"test\". You created at least one environment in [Step 5: Add an environment](/apigee/docs/hybrid/v1.2/precog-add-environment).\n\n The hybrid UI displays a list of API proxies for that environment. If you haven't created any\n proxies yet, the list is empty.\n4. Click **+Proxy** in the upper right.\n\n The API Proxy Wizard starts.\n5. Select **Reverse proxy** (most common), and click **Next** .\n\n The **Proxy details** view is displayed.\n6. Configure your proxy with the following settings:\n - **Proxy Name:** Enter \"myproxy\". The remaining steps in this section assume that this is your proxy's ID.\n - **Proxy Base Path:** Automatically set to \"/myproxy\". The **Proxy Base\n Path** is part of the URL used to make requests to your API. Edge uses the URL to match and route incoming requests to the proper API proxy.\n - (Optional)**Description:** Enter a description for your new API proxy, such as \"Testing Apigee hybrid with a simple proxy\".\n - **Target (Existing API):** Enter \"https://mocktarget.apigee.net\". This defines the target URL that Apigee invokes on a request to the API proxy. The mocktarget service is hosted at Apigee and returns simple data. It requires no API key or access token.\n\n Your API proxy's details should look like the following:\n\n7. Click **Next**.\n8. On the **Policies** screen, select **Pass through (none)** as the security option.\n9. Click **Next**.\n10. On the **Summary** screen, click **Create** .\n\n Hybrid generates the proxy (sometimes referred to as *the proxy bundle*):\n\n | **NOTE:** In this case, the hybrid UI does *not* deploy the proxy to your cluster. You will do this in [the next step](#deploy).\n11. Click **Exit** .\n\n Hybrid displays the **Proxies** view, which displays a list of API proxies. The\n new proxy should be at the top of the list, with a gray status indicator, meaning that it has\n not yet been deployed.\n\n2. Deploy your proxy to the cluster using the hybrid UI\n-------------------------------------------------------\n\nAfter creating a new proxy, you must deploy it so that you can try it out. This section\ndescribes how to deploy your new proxy using the hybrid UI.\n\n**To deploy an API proxy in the hybrid UI:**\n\n1. In the hybrid UI, select **Develop \\\u003e API Proxies** .\n\n Be sure the \"test\" environment is selected.\n\n The UI displays your new proxy in the proxies list:\n\n2. Click on the \"myproxy\" proxy.\n\n The UI displays the **API Proxies Overview** tab for that proxy.\n\n Notice that under **Deployments** , the **Revision** column shows\n \"Not deployed\".\n3. In the **Revision** column, expand the drop-down selector to choose the revision to deploy.\n\n The drop down list displays only \"1\" and \"Undeploy\".\n4. Select \"1\"---the revision that you want to deploy---from the drop down list.\n\n The UI prompts you to confirm the deployment:\n\n5. Click **Deploy** .\n\n The UI begins the process of deploying revision 1 of your new proxy to the cluster.\n\n Note that deployment is not an instantaneous process. Hybrid's \"eventually consistent\"\n deployment model means that a new deployment will be rolled out to the cluster over a short\n period of time and not immediately.\n\nWhile there are [several ways](/apigee/docs/api-platform/deploy/ui-deploy-overview#viewing-deployment-status) to check the\ndeployment status of a proxy in the UI, the next two steps explain how to call the API proxy\nyou just deployed and how\nto check the deployment status with a call to the [Apigee APIs](/apigee/docs/reference/apis/apigee/rest).\n\n3. Call the API proxy\n---------------------\n\nWhen the [UI indicates\nyour proxy is deployed](/apigee/docs/hybrid/v1.2/ui-deploy-overview#view-deployment-status), you can try calling it using cURL or the REST client of your choice: \n\n```\ncurl -v -k https://your_host_alias/myproxy\n```\n\n\nWhere \u003cvar translate=\"no\"\u003eyour_host_alias\u003c/var\u003e is a publicly facing domain used to access your APIs,\nas configured in the `virtualhosts.hostAliases`\nproperty in your overrides file. See [Configure the cluster](/apigee/docs/hybrid/v1.2/install-copy-overrides).\n\n\nFor example: \n\n```\ncurl -v -k https://apitest.acme.com/myproxy\n```\n\nIf the call succeeds, you will see the following output: \n\n```\nHello, Guest!\n```\n\n*[Google Cloud]: Google Cloud"]]