Cette page s'applique à Apigee et à Apigee hybrid.
Consultez la documentation d'Apigee Edge.
Lors de cette étape, vous allez publier une API sur le portail en procédant comme suit :
- Créer un proxy d'API à partir d'une spécification
- Créer un produit d'API
- Publier l'API sur votre portail
Étape 1 : Créer un proxy d'API à partir d'une spécification
Créez un proxy d'API à partir d'une spécification OpenAPI qui décrit l'API.
Pour créer un proxy d'API à partir d'une spécification OpenAPI :
Interface utilisateur de la console Cloud
Dans la console Apigee dans Cloud, accédez à la page Développement de proxys > Proxys d'API.
Cliquez sur Créer. L'assistant Créer un proxy s'ouvre et vous invite à sélectionner le type de proxy d'API à créer.
Cliquez dans la zone Modèle de proxy.
Cliquez sur Modèle de spécification OpenAPI, proxy inverse (le plus courant).
Ouvrez le fichier suivant dans un navigateur, puis enregistrez-le :
https://raw.githubusercontent.com/apigee/api-platform-samples/master/default-proxies/helloworld/openapi/mocktarget3.0.yaml
Dans Étape 1 : Spécifications OpenAPI, cliquez sur Parcourir.
Accédez à un fichier de spécification OpenAPI que vous venez de télécharger, sélectionnez-le, puis cliquez sur Ouvrir.
Cliquez sur Suivant.
À l'étape 2 : Détails du proxy, les champs sont préremplis à l'aide des valeurs de la spécification OpenAPI. Modifiez le champ Description comme suit : proxy d'API pour Hello World.
Cliquez sur Suivant.
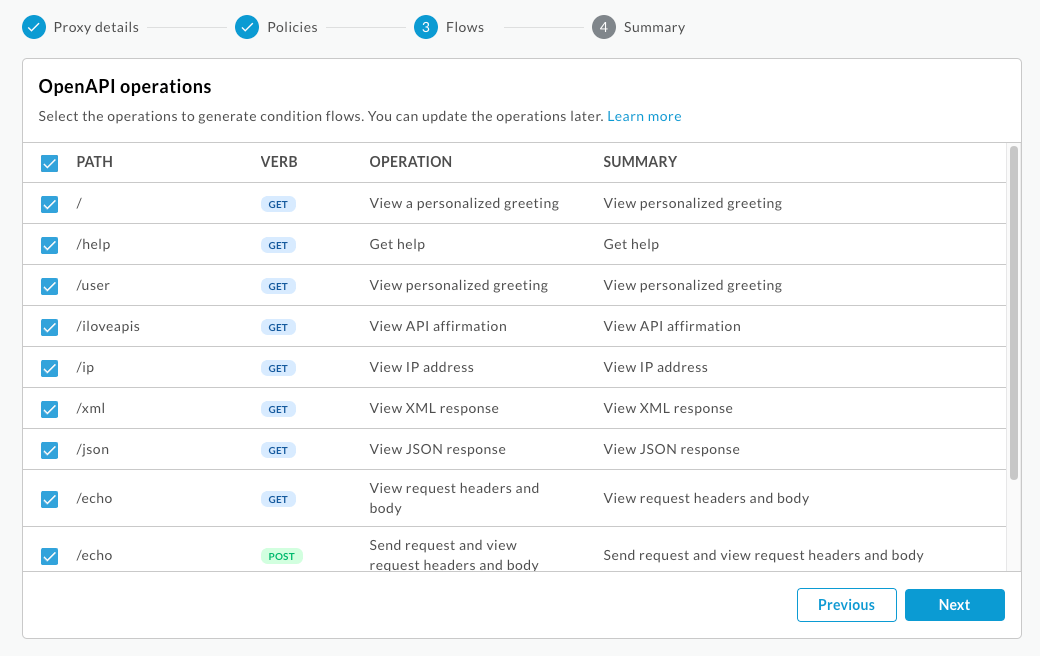
Dans Étape 3 : Flux, sélectionnez toutes les opérations.
Cliquez sur Suivant.
À l'étape 4 : Déployer, sélectionnez l'environnement dans lequel vous souhaitez effectuer le déploiement.
Cliquez sur OK.
Cliquez sur Créer.
Une fois le proxy déployé, la colonne État de la section Déploiements affiche une icône verte indiquant que la révision du proxy d'API est déployée. Vous pouvez maintenir le pointeur de la souris sur l'icône d'état pour en savoir plus sur le déploiement.
UI classique
- Dans l'interface utilisateur Apigee, sélectionnez Develop > API proxies (Développer > Proxys d'API) dans la barre de navigation de gauche pour ouvrir la page Proxys d'API.
Cliquez sur Créer.

L'assistant de création de proxy s'ouvre et vous invite à sélectionner le type de proxy d'API à créer.
Sous Proxy inverse (le plus courant), cliquez sur Utiliser la spécification OpenAPI.
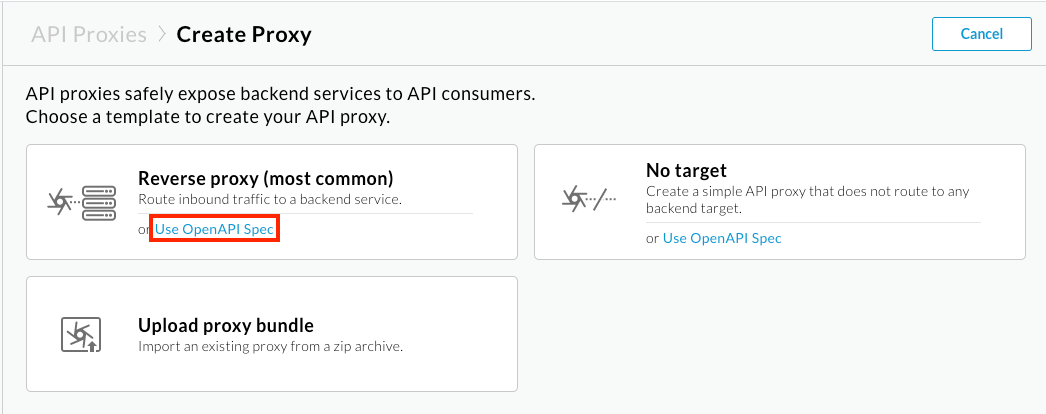
La boîte de dialogue Use OpenAPI Spec (Utiliser la spécification OpenAPI) s'affiche.
Copiez et collez l'URL suivante dans le champ URL de spécification OpenAPI de l'onglet URL :
https://raw.githubusercontent.com/apigee/api-platform-samples/master/default-proxies/helloworld/openapi/mocktarget3.0.yaml
Cliquez sur Sélectionner. L'assistant Create Proxy (Créer un proxy) s'ouvre, et la page Proxy details (Détails du proxy) est préremplie à l'aide des valeurs de la spécification OpenAPI.
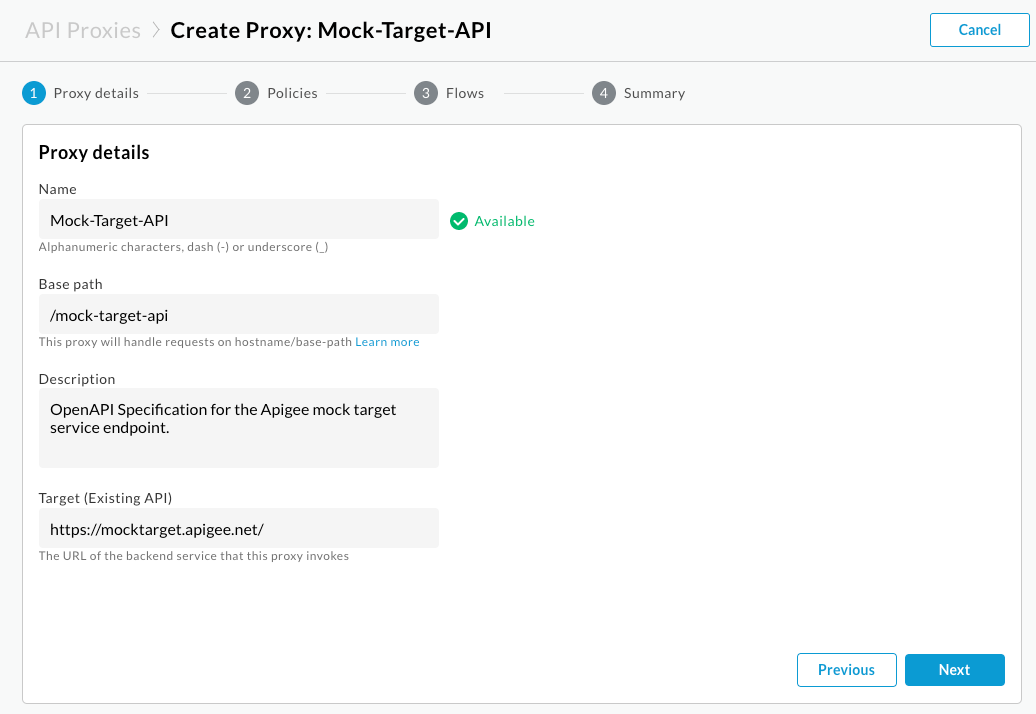
Modifiez le champ Description comme suit : proxy d'API pour Hello World.
Cliquez sur Suivant.
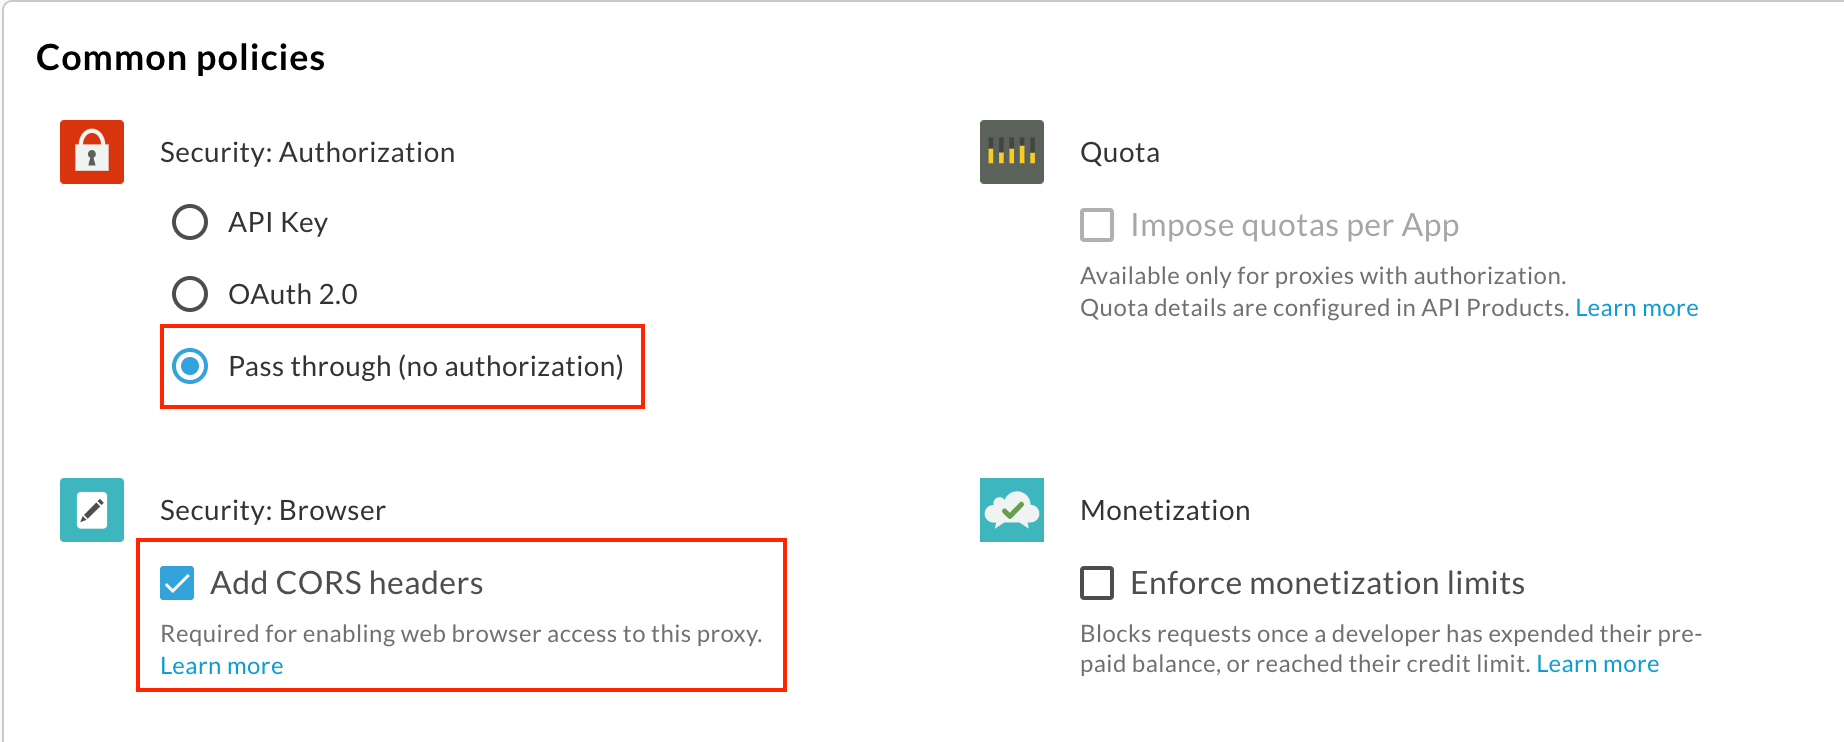
Sur la page Policies (Règles) :
- Sous Security: Authorization (Sécurité : Autorisation), sélectionnez Pass through (no authorization) (Directe [sans autorisation]).
- Sous Security: Browser (Sécurité : Navigateur), sélectionnez Add CORS headers (Ajouter des en-têtes CORS).
Cliquez sur Suivant.
Sur la page Flows (Flux), assurez-vous que toutes les opérations sont sélectionnées et cliquez sur Suivant.
Sur la page Summary (Résumé), sélectionnez l'environnement dans lequel vous souhaitez effectuer le déploiement sous Optional Deployment (Déploiement facultatif).
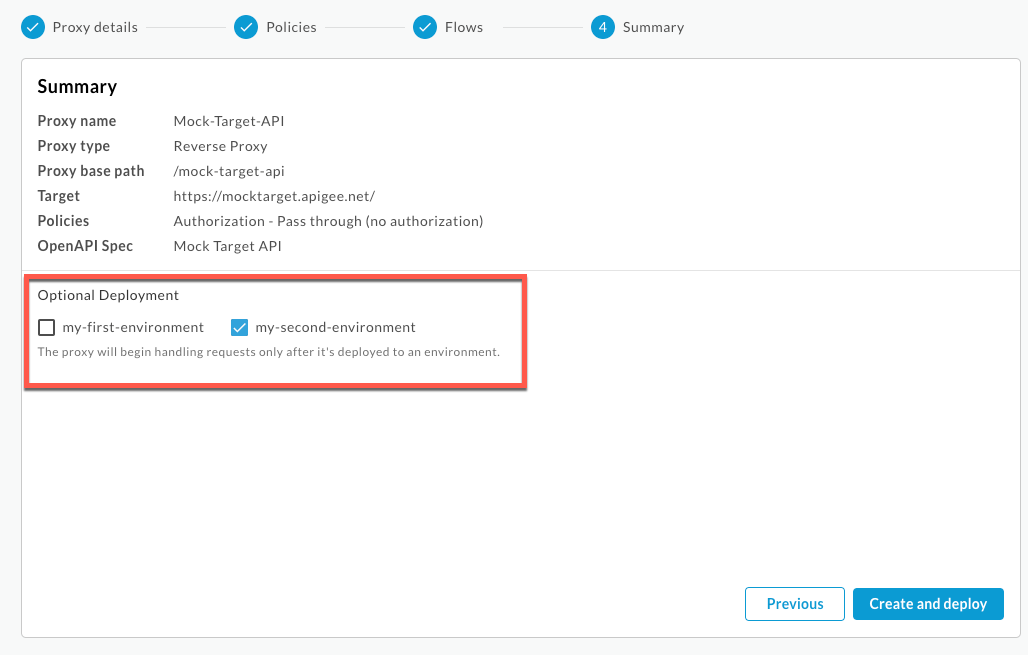
Cliquez sur Create and deploy (Créer et déployer).
Sur la page Résumé, un message de confirmation indique que votre nouveau proxy d'API a été créé et déployé dans l'environnement sélectionné.
Étape 2 : Créer un produit d'API
Créez un produit d'API contenant les ressources d'API que vous souhaitez exposer aux utilisateurs de l'API.
Pour créer un produit d'API :
Dans la console Cloud Apigee, accédez à la page Distribution > Produits d'API.
Cliquez sur Créer. La page Informations sur le produit s'affiche. Saisissez les détails du produit API.
Champ Valeur Nom Hello World Nom à afficher Hello World Description Exemple "Hello World" simple Environnement Sélectionnez l'environnement dans lequel le proxy d'API est déployé. Accès Public Approuver automatiquement les requêtes d'accès Activé Quota (laissez le champ vide) Champs d'application OAuth autorisés (laissez le champ vide) Dans la section Opérations, cliquez sur Ajouter une opération pour identifier les opérations à ajouter à votre produit d'API.
- Sous Source, sélectionnez Proxy d'API, puis Mock-Target-API dans le menu déroulant.
- Sous Operation (Opération), saisissez une barre oblique (
/) dans le champ Path (Chemin d'accès). Ignorez les autres champs.
Cliquez sur Enregistrer pour enregistrer l'opération.
Cliquez sur Enregistrer pour enregistrer le produit.
Étape 3 : Publier l'API sur votre portail
Publiez l'API sur votre portail pour permettre à vos clients de se familiariser avec celle-ci et de l'utiliser.
Pour publier l'API sur votre portail :
Interface utilisateur de la console Cloud
Dans la console Apigee dans Cloud, accédez à la page Distribution > Portails.
Cliquez sur la ligne Mon premier portail pour ouvrir le portail.
Cliquez sur l'onglet API.
Cliquez sur + API.
Pour Produit d'API, sélectionnez Hello World.
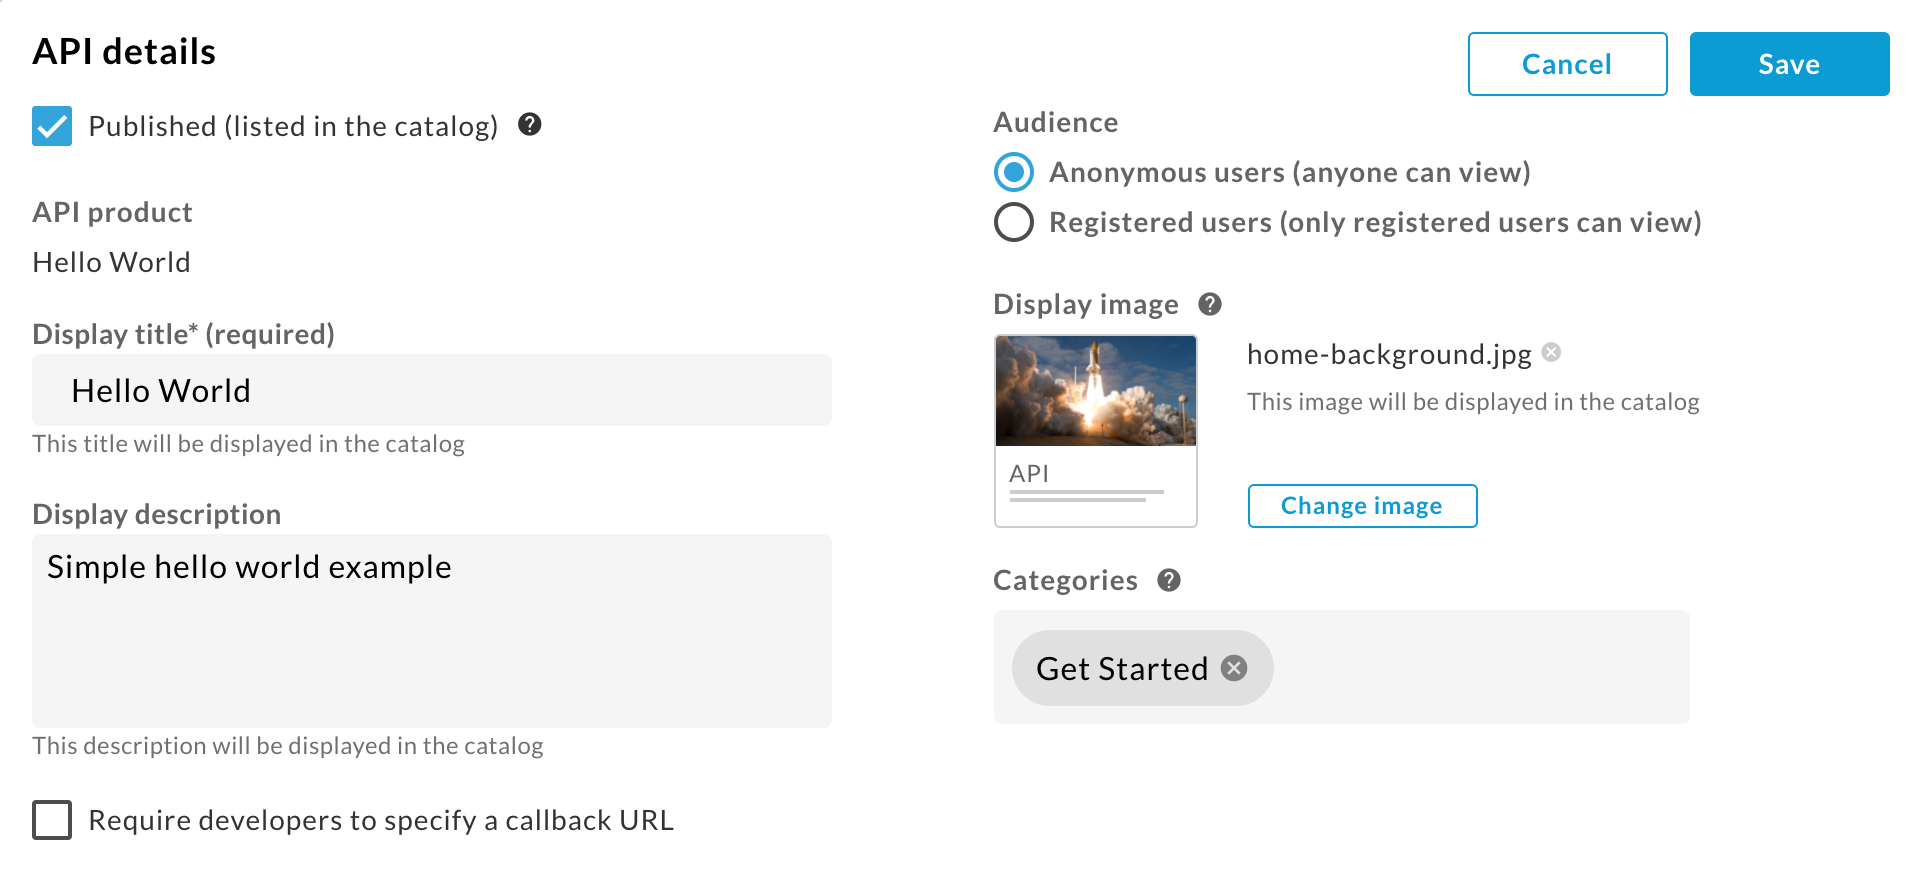
Sélectionnez Published (listed in the catalog) (Publié [répertorié dans le catalogue]) pour publier l'API sur votre portail.
Dans le champ Titre à afficher, saisissez Hello World.
Pour Image à afficher, cliquez sur Sélectionner.
Cliquez sur Composants.
Cliquez sur Aperçu pour
home-background.jpg.Cliquez sur Sélectionner.
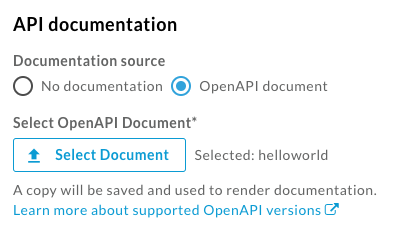
Pour API documentation (Documentation de l'API), afin de générer automatiquement la documentation de référence de l'API à partir d'un instantané de votre spécification OpenAPI :
- Sélectionnez OpenAPI document (Document OpenAPI).
- Cliquez sur Sélectionner.
- Cliquez sur l'onglet URL.
- Saisissez helloworld dans le champ Nom de la spécification.
- Copiez et collez l'URL suivante dans le champ URL :
https://raw.githubusercontent.com/apigee/api-platform-samples/master/default-proxies/helloworld/openapi/mocktarget3.0.yaml
- Cliquez sur Sélectionner.
Cliquez sur Enregistrer.
UI classique
- Dans l'UI d'Apigee, accédez à la page des API de votre portail :
- Sélectionnez Publier > Portails dans la barre de navigation de gauche.
- Cliquez sur la ligne Mon premier portail pour ouvrir le portail.
- Cliquez sur Catalogue d'API pour afficher la page des API.
- Cliquez sur le signe +.
- Sélectionnez Hello World dans la boîte de dialogue Ajouter un produit d'API au catalogue, puis cliquez sur Suivant.
- Sous Détails de l'API, configurez les options suivantes :
- Sélectionnez Published (listed in the catalog) (Publié [répertorié dans le catalogue]) pour publier l'API sur votre portail.
- Pour Display image (Image à afficher) :
- Cliquez sur Select image (Sélectionner une image).
- Cliquez sur
home-background.jpgdans la liste des images existantes de la boîte de dialogue Select image. - Cliquez sur Sélectionner.
- Prévisualisez l'image et cliquez sur Select (Sélectionner).
- Pour Categories (Catégories), saisissez Get Started (Premiers pas) et appuyez sur Entrée.
Conservez toutes les autres valeurs par défaut.
- Sous API documentation (Documentation de l'API), pour générer automatiquement la documentation de référence de l'API à partir d'un instantané de votre spécification OpenAPI :
- Sélectionnez OpenAPI document (Document OpenAPI).
- Cliquez sur Select Document (Sélectionner un document).
- Sélectionnez l'onglet Import from a URL (Importer à partir d'une URL).
- Saisissez helloworld dans le champ Spec name (Nom de la spécification).
- Copiez et collez l'URL suivante dans le champ URL, puis appuyez sur Entrée :
https://raw.githubusercontent.com/apigee/api-platform-samples/master/default-proxies/helloworld/openapi/mocktarget3.0.yaml
- Cliquez sur Sélectionner.
- Cliquez sur Enregistrer.
Étape 4 : Consultez la documentation de référence de l'API
Pour afficher la documentation de référence de l'API, procédez comme suit :
- Dans l'UI Apigee, cliquez sur Live Portal (Portail actif) pour afficher les modifications apportées à celui-ci (ou actualisez le portail s'il est déjà ouvert dans un autre onglet).
- Dans le portail en ligne :
- Cliquez sur API dans la barre de navigation supérieure pour afficher l'API publiée.
- Cliquez sur la fiche Hello World pour afficher la documentation de référence de l'API.
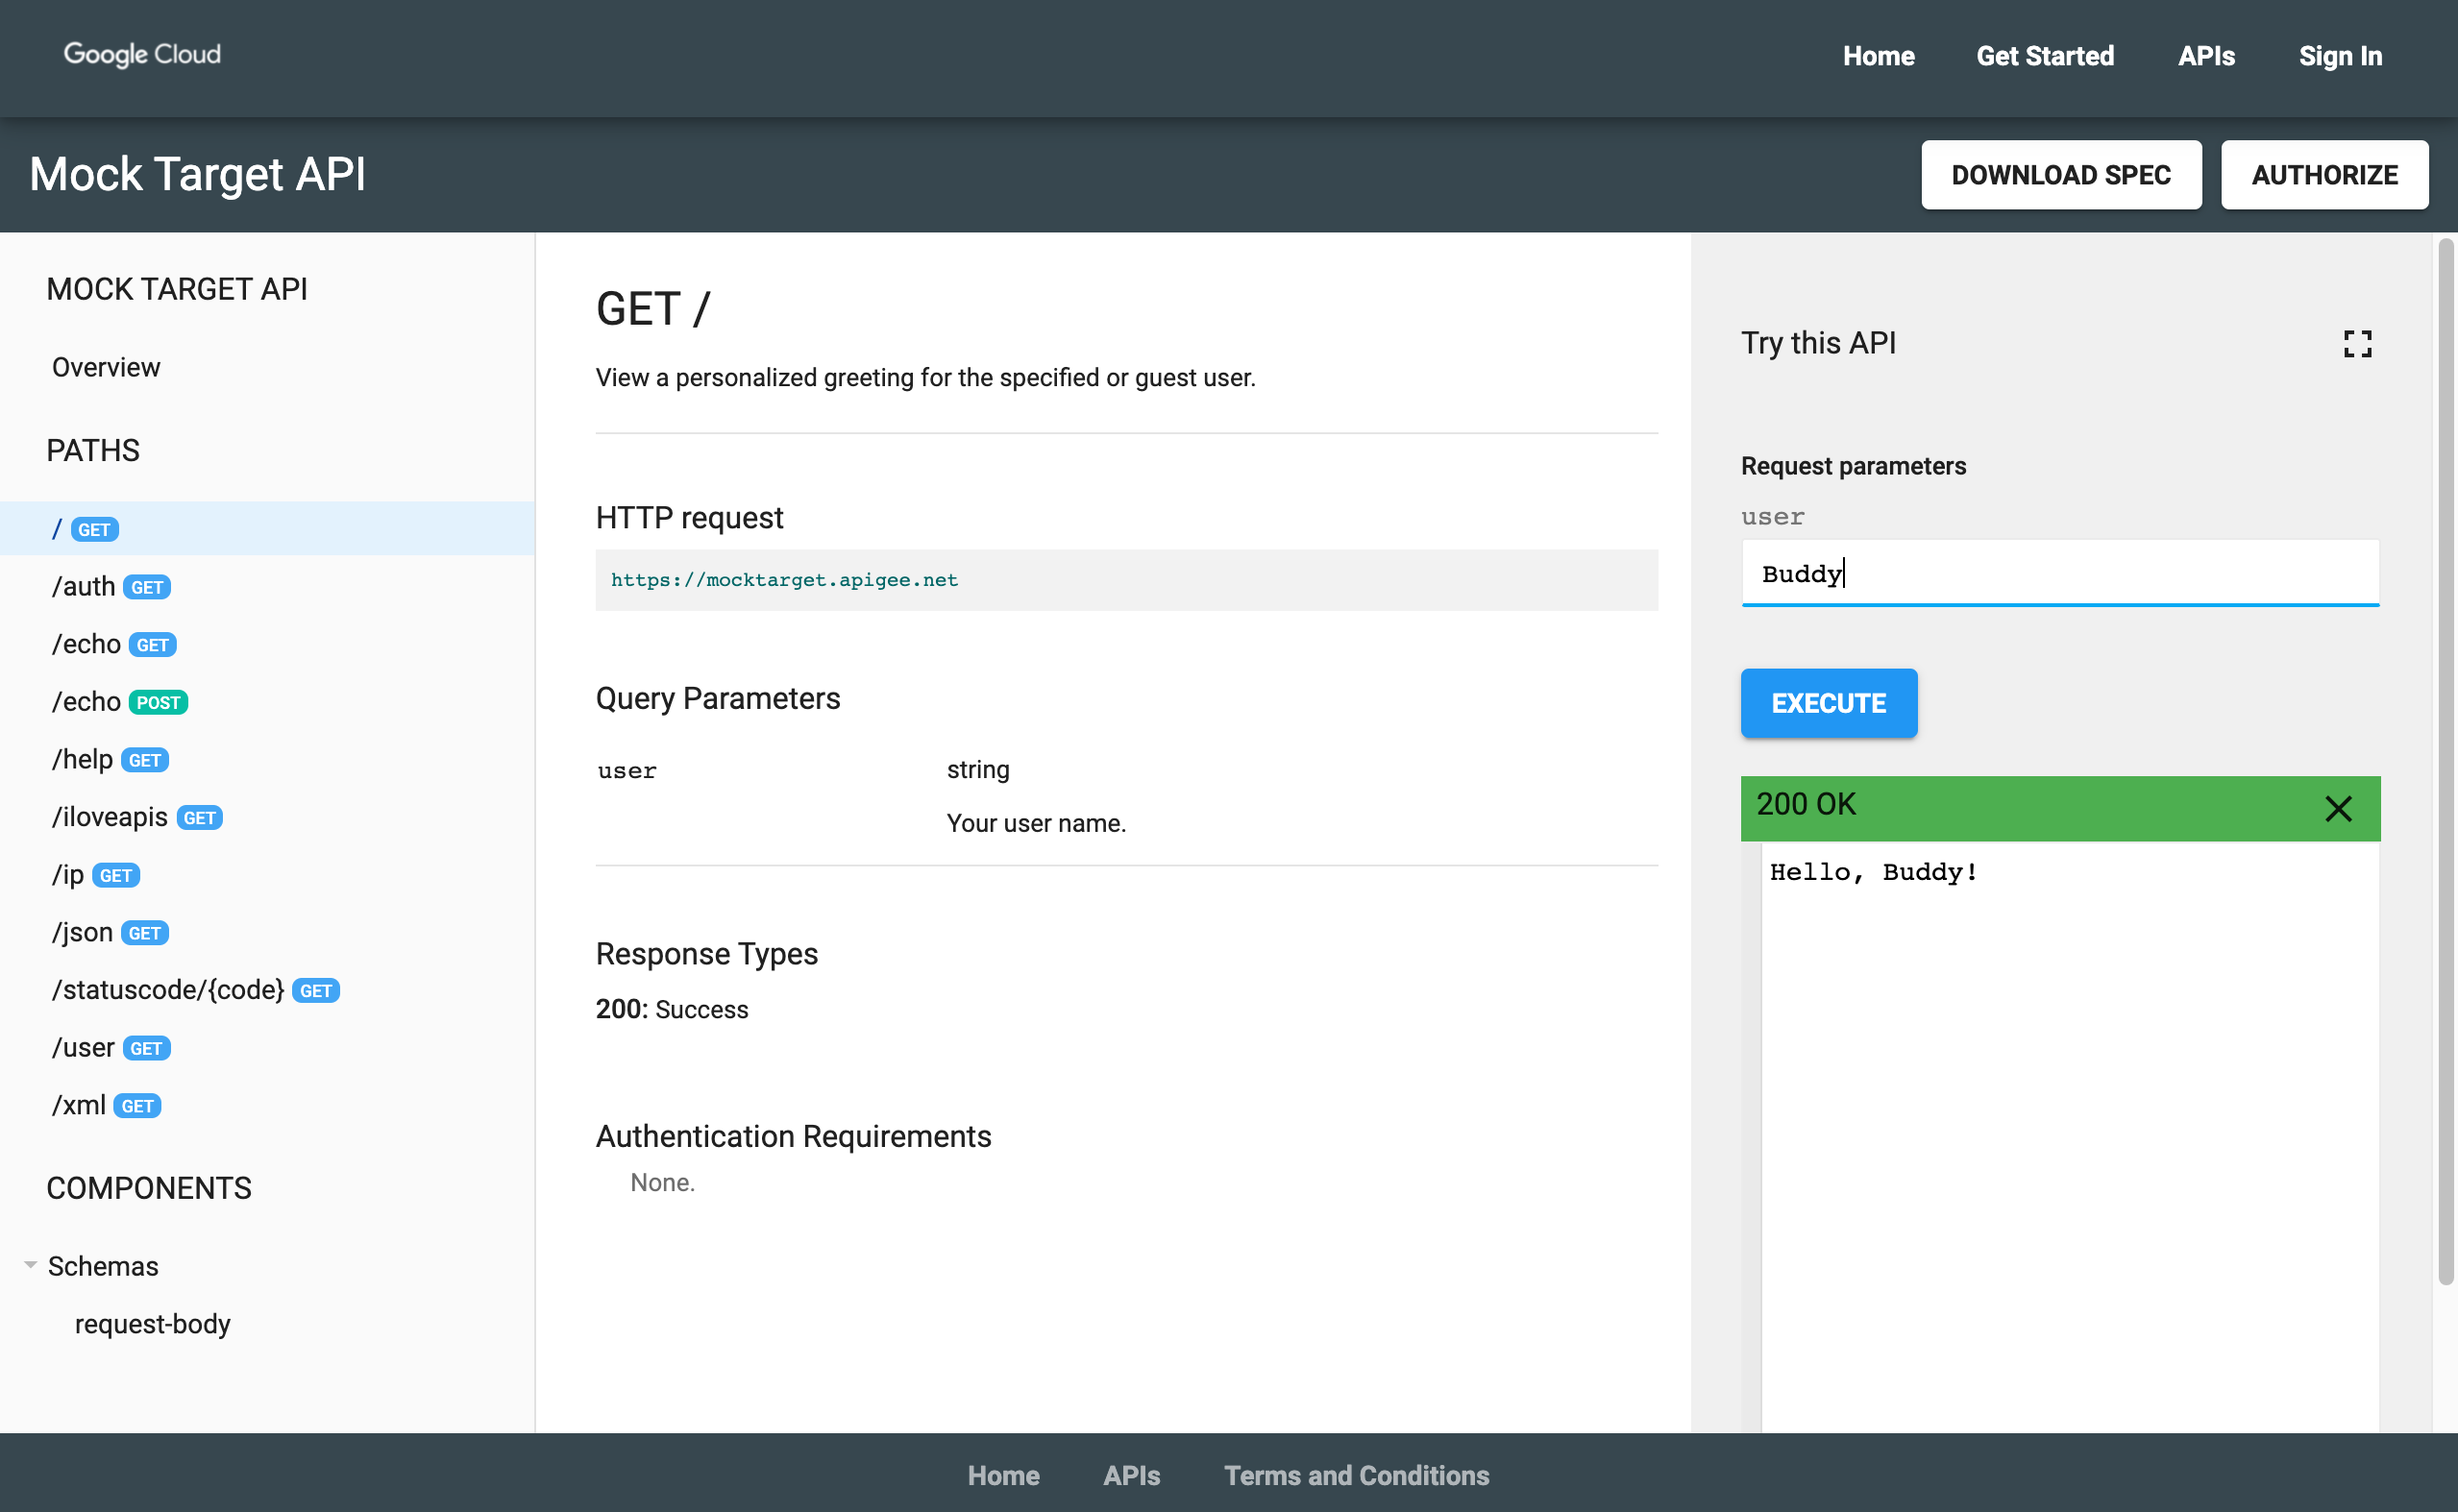
- Essayez votre API !