Pour tester l'API helloworld déployée, cliquez sur l'onglet Terminal dans Apigee dans Cloud Code, puis saisissez l'appel curl suivant :
curl 0:8998/helloworld
Le message d'erreur suivant s'affiche :
Comme vous avez activé l'authentification basée sur une clé API lors de la création du proxy d'API, vous devez transmettre une clé API à l'aide du paramètre de requête apikey lors de l'appel d'API.
Pour obtenir une clé API, vous devez créer un groupe de test et configurer les ressources de test suivantes:
le produit d'API utilisé pour encapsuler l'API et la mettre à la disposition des développeurs ;
le développeur, qui va créer une application pour accéder à l'API ;
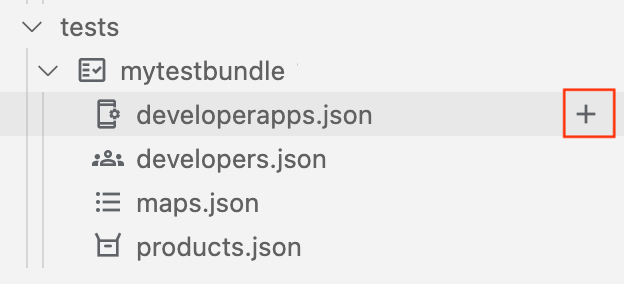
l'application de développement, qui va permettre d'accéder à l'API à l'aide d'une clé API.
Créer et exporter des ressources de test
Créez un groupe de test :
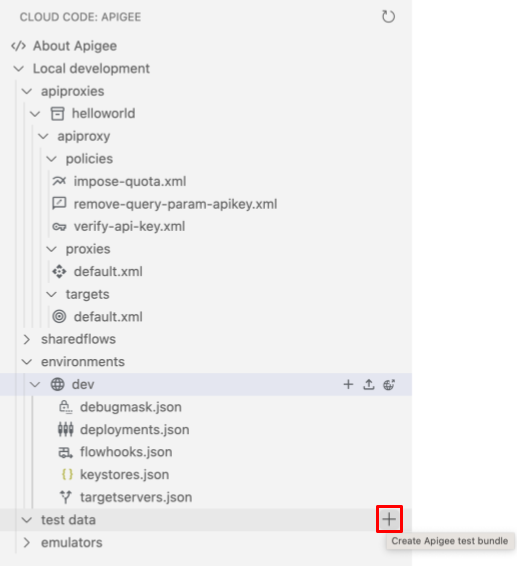
Placez le curseur sur le dossier tests, puis cliquez sur .
L'assistant Créer un groupe de test apparaît.
Saisissez mytestbundle comme nom de groupe de test et appuyez sur Entrée.
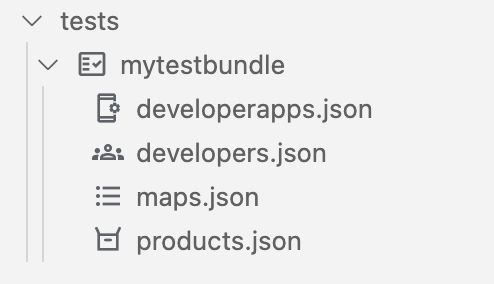
Le groupe de test est créé.
Développez le dossier mytestbundle pour afficher son contenu.
Configurez la ressource de test de produit d'API :
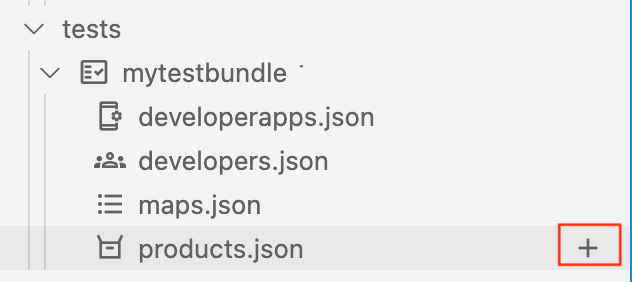
Placez le curseur sur le fichier products.json, puis cliquez sur .
L'assistant Créer un produit API s'affiche.
Saisissez myproduct comme nom du produit API, puis appuyez sur Entrée pour confirmer et continuer.
Saisissez myproduct pour la description du produit d'API, puis appuyez sur Entrée pour confirmer et continuer.
Sélectionnez helloworld pour ajouter le proxy d'API au produit d'API, puis cliquez sur OK.
Le fichier products.json est ouvert dans l'éditeur avec le nouveau produit d'API configuré :
Exportez les ressources de test vers l'émulateur Apigee.
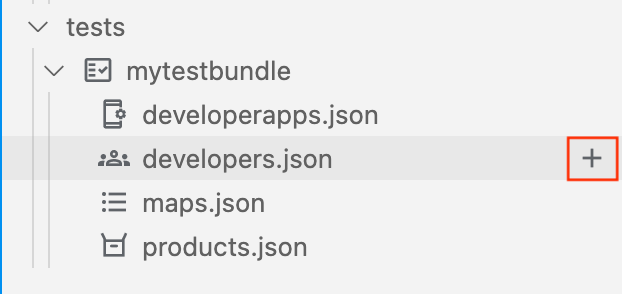
Placez le curseur sur le groupe de test mytestbundle, puis cliquez sur .
Les ressources de test actives apparaissent dans la section des émulateurs Apigee, comme illustré dans la figure suivante.
Obtenir la clé API
Récupérez les identifiants de clé API pour votre application de développement :
Dans la section émulateurs, sous Données de test actives, cliquez sur Applications de développement actives.
Le fichier de configuration des applications de développement actives est ouvert dans l'éditeur. Le fichier contient les identifiants de myproduct, comme indiqué dans la figure suivante.
<p><img src="/apigee/docs/api-platform/images/vscode-consumerkey.png" alt="Developer apps with the consumerKey value highlighted."></p>
Copiez la valeur consumerKey (sans les guillemets) pour le produit d'API myproduct.
Tester votre API
Testez votre API avec la clé API :
Transmettez la clé API dans votre appel curl à l'aide du paramètre de requête apikey, comme suit:
curl 0:8998/helloworld?apikey=API_KEY
La réponse suivante est renvoyée:
Hello, Guest!
Félicitations ! Vous avez réussi à exécuter une API dans votre environnement local.
À l'étape suivante, vous allez apprendre à modifier le point de terminaison cible.
Sauf indication contraire, le contenu de cette page est régi par une licence Creative Commons Attribution 4.0, et les échantillons de code sont régis par une licence Apache 2.0. Pour en savoir plus, consultez les Règles du site Google Developers. Java est une marque déposée d'Oracle et/ou de ses sociétés affiliées.
Dernière mise à jour le 2025/08/07 (UTC).
[[["Facile à comprendre","easyToUnderstand","thumb-up"],["J'ai pu résoudre mon problème","solvedMyProblem","thumb-up"],["Autre","otherUp","thumb-up"]],[["Difficile à comprendre","hardToUnderstand","thumb-down"],["Informations ou exemple de code incorrects","incorrectInformationOrSampleCode","thumb-down"],["Il n'y a pas l'information/les exemples dont j'ai besoin","missingTheInformationSamplesINeed","thumb-down"],["Problème de traduction","translationIssue","thumb-down"],["Autre","otherDown","thumb-down"]],["Dernière mise à jour le 2025/08/07 (UTC)."],[[["\u003cp\u003eThis guide is relevant for both Apigee and Apigee hybrid users, providing instructions on local API testing.\u003c/p\u003e\n"],["\u003cp\u003eTo successfully test an API secured with API key authentication, you must create and configure an API product, a developer, and a developer app.\u003c/p\u003e\n"],["\u003cp\u003eYou create a test bundle where you will configure your test resources, including API products, developers, and developer apps.\u003c/p\u003e\n"],["\u003cp\u003eAfter configuring the test resources, export the test bundle to the Apigee Emulator to make the active test data available, enabling you to retrieve the API key from the active developer app.\u003c/p\u003e\n"],["\u003cp\u003eOnce you have the API key, use it as a query parameter in a curl call to successfully test your API, receiving the "Hello, Guest!" response.\u003c/p\u003e\n"]]],[],null,["*This page\napplies to **Apigee** and **Apigee hybrid**.*\n\n\n*View [Apigee Edge](https://docs.apigee.com/api-platform/get-started/what-apigee-edge) documentation.*\n\n\u003cbr /\u003e\n\nTo test the deployed `helloworld` API, click the **Terminal** tab\nin Apigee in Cloud Code and enter the following curl call: \n\n```\ncurl 0:8998/helloworld\n```\n\nThe following error message is displayed:\n\nBecause you enabled API key-based authentication when creating the API proxy, you need to pass an API key using the `apikey` query parameter when calling the API.\n\nTo obtain an API key, you need to create a test bundle and configure the following test resources:\n\n- **API product** used to bundle the API and make it available to developers.\n\n- **Developer** that will create an app to access the API.\n\n- **Developer app** that will enable access to the API using an API key.\n\n| **Note:** The examples in this section use `0` for the host value and `8998` for the port value. You can configure the port values, as described in [Managing the Apigee Emulator.](/apigee/docs/api-platform/local-development/vscode/manage-apigee-emulator) If you get an error when using `0`, substitute `localhost` for the `0`: \n|\n| ```\n| curl localhost:8998/helloworld\n| ```\n\nBuild and Export test resources\n\n1. Create a test bundle:\n 1. Position your cursor over the **test data** folder and click .\n\n The **Create test bundle** wizard opens.\n 2. Enter **mytestbundle** for the test bundle name and press **Enter** .\n\n The test bundle is created.\n 3. Expand the **mytestbundle** folder to view its contents.\n\n2. Configure the API product test resource:\n 1. Position your cursor over the **products.json** file and click .\n\n The **Create API product** wizard opens.\n\n\n 2. Enter **myproduct** for the name of the API product and press **\u003ckbd\u003eEnter\u003c/kbd\u003e** to confirm and proceed.\n 3. Enter **myproduct** for the description of the API product and press **\u003ckbd\u003eEnter\u003c/kbd\u003e** to confirm and proceed.\n 4. Select **helloworld** to add the API proxy to the API product and click **OK** .\n\n The `products.json` file is opened in the editor with the new API product configured: \n\n ```\n [\n {\n \"attributes\": [\n {\n \"name\": \"sample_attribute_0\",\n \"value\": \"sample_attribute_value_0\"\n }\n ],\n \"scopes\": [],\n \"environments\": [],\n \"apiResources\": [\n \"/\",\n \"/*\",\n \"/**\"\n ],\n \"quota\": \"100\",\n \"quotaInterval\": \"1\",\n \"quotaTimeUnit\": \"minute\",\n \"name\": \"myproduct\",\n \"displayName\": \"myproduct\",\n \"proxies\": [\n \"helloworld\"\n ]\n }\n ]\n ```\n3. Configure the developer test resource:\n 1. Position your cursor over the **developers.json** file and click .\n\n\n The **Create developer** wizard opens.\n\n\n 2. Enter the following values at the prompts and press **\u003ckbd\u003eEnter\u003c/kbd\u003e** to confirm and proceed:\n - Developer email: **ahamilton@example.com**\n - Username: **ahamilton**\n - First name: **Alex**\n - Last name: **Hamilton**\n\n The `developers.json` file is opened in the editor with the new developer configured: \n\n ```\n [\n {\n \"attributes\": [\n {\n \"name\": \"sample_attribute_0\",\n \"value\": \"sample_attribute_value_0\"\n }\n ],\n \"email\": \"ahamilton@example.com\",\n \"userName\": \"ahamilton\",\n \"firstName\": \"Alex\",\n \"lastName\": \"Hamilton\"\n }\n ]\n ```\n4. Configure the developer app test resource:\n 1. Position your cursor over the **developerapps.json** file and click .\n\n\n The **Create developer app** wizard opens.\n\n\n 2. Select **ahamilton@example.com** as the owner of the app.\n 3. Enter the following values at the next set of prompts and press **Enter** to confirm and proceed:\n - App name: **myapp**\n - Description: **myapp**\n - Callback URL: **Leave blank**\n - Select **myproduct** to add it to the app and click **OK**.\n - Select **never** for the expiry value.\n\n The `developerapps.json` file is opened in the editor with the new app configured: \n\n ```\n [\n {\n \"attributes\": [\n {\n \"name\": \"sample_attribute_0\",\n \"value\": \"sample_attribute_value_0\"\n }\n ],\n \"developerEmail\": \"ahamilton@example.com\",\n \"name\": \"myapp\",\n \"displayName\": \"myapp\",\n \"callbackUrl\": \"\",\n \"apiProducts\": [\n \"myproduct\"\n ],\n \"expiryType\": \"never\"\n }\n ]\n ```\n5. Export the test resources to the Apigee Emulator. Position the cursor over the **mytestbundle** test bundle and click .\n\n\n | **Note:** If multiple [containers for the Apigee Emulator](/apigee/docs/api-platform/local-development/vscode/manage-apigee-emulator#add-container) are running, you are prompted to select the container to which you want to deploy the environment.\n\n The active test resources appears in the Apigee Emulators section, as shown in the following figure.\n\nObtain the API key\n\nObtain the API key credentials for your developer app:\n\n1. In the **emulators** section, under **Active test data** , click **Active developer apps** .\n\n The active developer apps configuration file is opened in the editor. The file contains credentials for `myproduct`, as highlighted in the following figure.\n2. Copy the `consumerKey` value (without the quotes) for the `myproduct` API product.\n\n\u003cbr /\u003e\n\nTest your API\n\nTest your API with the API key:\n\n1. Pass the API key in your curl call using the `apikey` query parameter, as follows: \n\n ```\n curl 0:8998/helloworld?apikey=\u003cvar translate=\"no\"\u003eAPI_KEY\u003c/var\u003e\n ```\n\n\n The following response is returned: \n\n ```\n Hello, Guest!\n ```\n\n\u003cbr /\u003e\n\n**Congratulations!** You've successfully run an API in your local environment.\n\nIn the next step, you'll learn how to change the target endpoint.\n\n\n[1](/apigee/docs/api-platform/local-development/vscode/tutorial-create-workspace)\n\n\n[2](/apigee/docs/api-platform/local-development/vscode/tutorial-create-proxy)\n\n\n[3](/apigee/docs/api-platform/local-development/vscode/tutorial-deploy)\n\n\n[4](/apigee/docs/api-platform/local-development/vscode/tutorial-test)\n\n\n[(NEXT) Step 5: Change the target endpoint](/apigee/docs/api-platform/local-development/vscode/tutorial-change-target-endpoint)\n\n\n[6](/apigee/docs/api-platform/local-development/vscode/tutorial-attach-policy)\n\n\n[7](/apigee/docs/api-platform/local-development/vscode/tutorial-deploy-apigee)\n\n\n[8](/apigee/docs/api-platform/local-development/vscode/tutorial-promote)\n\n\u003cbr /\u003e"]]


 .
.


 .
.
