환경을 그룹에 연결하면 그룹의 호스트 이름을 통해 해당 환경의 프록시가 라우팅됩니다. 이는 완료하는 데 몇 분 정도 걸릴 수 있는 장기 실행 작업을 트리거합니다. 다음 단계로 계속하기 전에 1~2분 정도 기다리는 것이 좋습니다. 그 동안 이전과 마찬가지로 작업 상태를 확인해도 좋습니다.
로컬 개발 환경에서 새 prod 환경을 만듭니다.
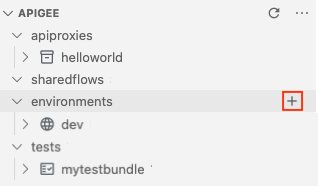
VS Code의 Apigee에서 Apigee 섹션의 environments 폴더 위에 커서를 놓고 를 클릭합니다.
환경 만들기 마법사가 열립니다.
환경 이름으로 prod를 입력하고 Enter 키를 누릅니다.
환경이 생성됩니다.
콘텐츠를 보려면 Apigee 섹션에서 prod 환경 폴더를 펼칩니다.
Apigee 섹션에서 deployments.json 파일 위에 커서를 놓고 를 클릭합니다.
배포 마법사가 열립니다.
helloworld API 프록시를 선택하여 배포에 추가하고 확인을 클릭합니다.
편집기에 deployments.json 파일이 열립니다. 아래와 같이 proxies 배포 배열에 helloworld API 프록시를 포함하도록 파일이 업데이트되었습니다.
state가 보관 파일 배포가 완료되었음을 나타내는 FINISHED로 설정될 때까지 이전 단계를 반복합니다.
다음 명령어를 실행하여 prod 환경의 모든 보관 파일 배포를 확인합니다.
gcloud beta apigee archives list --environment=prod
다음은 응답의 예시입니다.
Using Apigee organization 'prod'
ARCHIVE ID ENVIRONMENT DEPLOYED AT LABELS OPERATION STATUS
vrytwbhso558oil53m prod 2021-04-20 21:20:53 release=052021.1 Deployed
수고하셨습니다. 성공적으로 API 보관 파일을 Apigee 프로덕션 환경으로 승격했습니다.
[[["이해하기 쉬움","easyToUnderstand","thumb-up"],["문제가 해결됨","solvedMyProblem","thumb-up"],["기타","otherUp","thumb-up"]],[["이해하기 어려움","hardToUnderstand","thumb-down"],["잘못된 정보 또는 샘플 코드","incorrectInformationOrSampleCode","thumb-down"],["필요한 정보/샘플이 없음","missingTheInformationSamplesINeed","thumb-down"],["번역 문제","translationIssue","thumb-down"],["기타","otherDown","thumb-down"]],["최종 업데이트: 2025-07-21(UTC)"],[[["\u003cp\u003eThis page details the process of promoting an API proxy configuration archive to a production environment in Apigee or Apigee hybrid.\u003c/p\u003e\n"],["\u003cp\u003eThe process includes creating a new "prod" environment in your Apigee organization and attaching it to a runtime instance and environment group.\u003c/p\u003e\n"],["\u003cp\u003eA new "prod" environment is then set up in the local development environment using Apigee in VS Code.\u003c/p\u003e\n"],["\u003cp\u003eAn archive of the API proxy configuration is deployed to the newly created "prod" environment within the Apigee organization using the \u003ccode\u003egcloud\u003c/code\u003e command.\u003c/p\u003e\n"],["\u003cp\u003eThe procedure uses the \u003ccode\u003egcloud\u003c/code\u003e command to monitor the status of the long-running archive deployment operation, which involves checking the state until it reaches \u003ccode\u003eFINISHED\u003c/code\u003e, as well as listing out the existing archives.\u003c/p\u003e\n"]]],[],null,["# Step 8: Promote an archive to production\n\n*This page\napplies to **Apigee** and **Apigee hybrid**.*\n\n\n*View [Apigee Edge](https://docs.apigee.com/api-platform/get-started/what-apigee-edge) documentation.*\n\n\u003cbr /\u003e\n\n|\n| **Preview\n| --- Archive deployment**\n|\n|\n| This feature is subject to the \"Pre-GA Offerings Terms\" in the General Service Terms section\n| of the [Service Specific Terms](/terms/service-terms#1).\n|\n| Pre-GA features are available \"as is\" and might have limited support.\n|\n| For more information, see the\n| [launch stage descriptions](/products#product-launch-stages).\n\nIn this step, you'll promote an archive of your API proxy configuration to a production environment in your Apigee organization.\n\n1. Follow the steps in [Create an environment](https://cloud.google.com/apigee/docs/api-platform/get-started/install-cli#create-environment) to perform the following:\n 1. Create a new **prod** environment in your Apigee organization, enabling **Archive** as the deployment type. Use the [UI](https://cloud.google.com/apigee/docs/api-platform/fundamentals/environments-working-with#creating-a-new-environment-in-the-ui) or [API](/apigee/docs/reference/apis/apigee/rest/v1/organizations.environments/create).\n 2. Attach the environment to a runtime instance using the [Instances attachment API](/apigee/docs/reference/apis/apigee/rest/v1/organizations.instances.attachments).\n\n\n This command triggers a long-running operation. Ensure that the environment has been attached to the runtime before continuing.\n 3. Create an environment group if you do not already have one using the [Create environment groups API](/apigee/docs/reference/apis/apigee/rest/v1/organizations.envgroups/create).\n\n\n Ensure that the environment group has been created before continuing. You can check the status of your new group using a\n request like the following: \n\n ```\n curl -i -H \"$AUTH\" -H \"Content-Type:application/json\" \\\n \"https://apigee.googleapis.com/v1/organizations/$PROJECT_ID/environments/ENVIRONMENT_NAME\"\n ```\n 4. Attach the new environment to the environment group using the [Environment group attachment API](/apigee/docs/reference/apis/apigee/rest/v1/organizations.envgroups.attachments).\n\n Attaching an environment to the group makes the proxies in that environment\n routable via the hostnames in the group. This triggers a long-running operation that can take several minutes to complete. We recommend that you wait a minute or two before continuing to the next step. In the meantime you can check the status of the operation as before.\n2. Create a new **prod** environment in your local development environment:\n 1. In Apigee in VS Code, position your cursor over the **environments** folder in the Apigee section and click .\n\n \u003cbr /\u003e\n\n The Create environment wizard opens.\n 2. Enter **prod** for the environment name and press **\u003ckbd\u003eEnter\u003c/kbd\u003e** .\n\n The environment is created.\n 3. Expand the **prod** environment folder in the Apigee section to view its contents.\n 4. Position your cursor over the **deployments.json** file in the Apigee section and click .\n\n The Deployments wizard opens.\n\n \u003cbr /\u003e\n\n 5. Select the **helloworld** API proxy to add it to the deployment and click **OK** .\n\n The `deployments.json` file is opened in the editor. The file has been updated to include the `helloworld` API proxy in the `proxies` deployment array, as shown below: \n\n ```\n {\n \"proxies\": [\n \"helloworld\"\n ],\n \"sharedflows\": []\n }\n ```\n3. Deploy an archive of your API proxy configuration to the `prod` environment in your Apigee organization.\n 1. In the **Terminal** tab in Apigee VS Code, navigate to the **myapigeeworkspace** directory. \n\n ```\n cd myapigeeworkspace\n ```\n 2. Run the following command: \n\n ```\n gcloud beta apigee archives deploy --environment=prod --labels=release=052021.1\n ```\n\n\n The following provides an example of the response: \n\n ```\n Using Apigee organization dev\n Waiting for operation [$OPERATION_ID] to complete...⠹\n ```\n 3. Run the following command to check the status of the operation, replacing \u003cvar translate=\"no\"\u003e$OPERATION_ID\u003c/var\u003e with the operation ID returned in the previous call: \n\n ```\n gcloud beta apigee operations describe $OPERATION_ID\n ```\n\n\n The following provides an example of the response. Note that `state` is set to `IN_PROGRESS`. \n\n ```\n Using Apigee organization 'prod'\n done: true\n metadata:\n '@type': type.googleapis.com/google.cloud.apigee.v1.OperationMetadata\n operationType: INSERT\n state: IN_PROGRESS\n targetResourceName: uri\n name: organizations/prod/operations/$OPERATION_ID\n organization: prod\n response:\n '@type': type.googleapis.com/google.cloud.apigee.v1.CanaryEvaluation\n control: 1-5-0-20210319-071117-ghq74\n endTime: '2021-03-20T06:15:44.329363950Z'\n metricLabels:\n env: test\n location: us-central1\n name: uri\n startTime: '2021-03-20T06:14:44.306534584Z'\n treatment: 1-5-0-20210319-190954-if0wk\n verdict: NONE\n uuid: $OPERATION_ID\n ```\n 4. Repeat the previous step until `state` is set to `FINISHED` indicating that the archive depoloyment is complete.\n 5. Run the following command to view all archive deployments in the `prod` environment: \n\n ```\n gcloud beta apigee archives list --environment=prod\n ```\n\n\n The following provides an example of the response: \n\n ```\n Using Apigee organization 'prod'\n ARCHIVE ID ENVIRONMENT DEPLOYED AT LABELS OPERATION STATUS\n vrytwbhso558oil53m prod 2021-04-20 21:20:53 release=052021.1 Deployed\n ```\n\n\u003cbr /\u003e\n\n**Congratulations!** You've successfully promoted your API archive to an Apigee production environment!"]]