Konfigurasi dan deploy lingkungan yang menyertakan proxy API helloworld.
Membuat lingkungan:
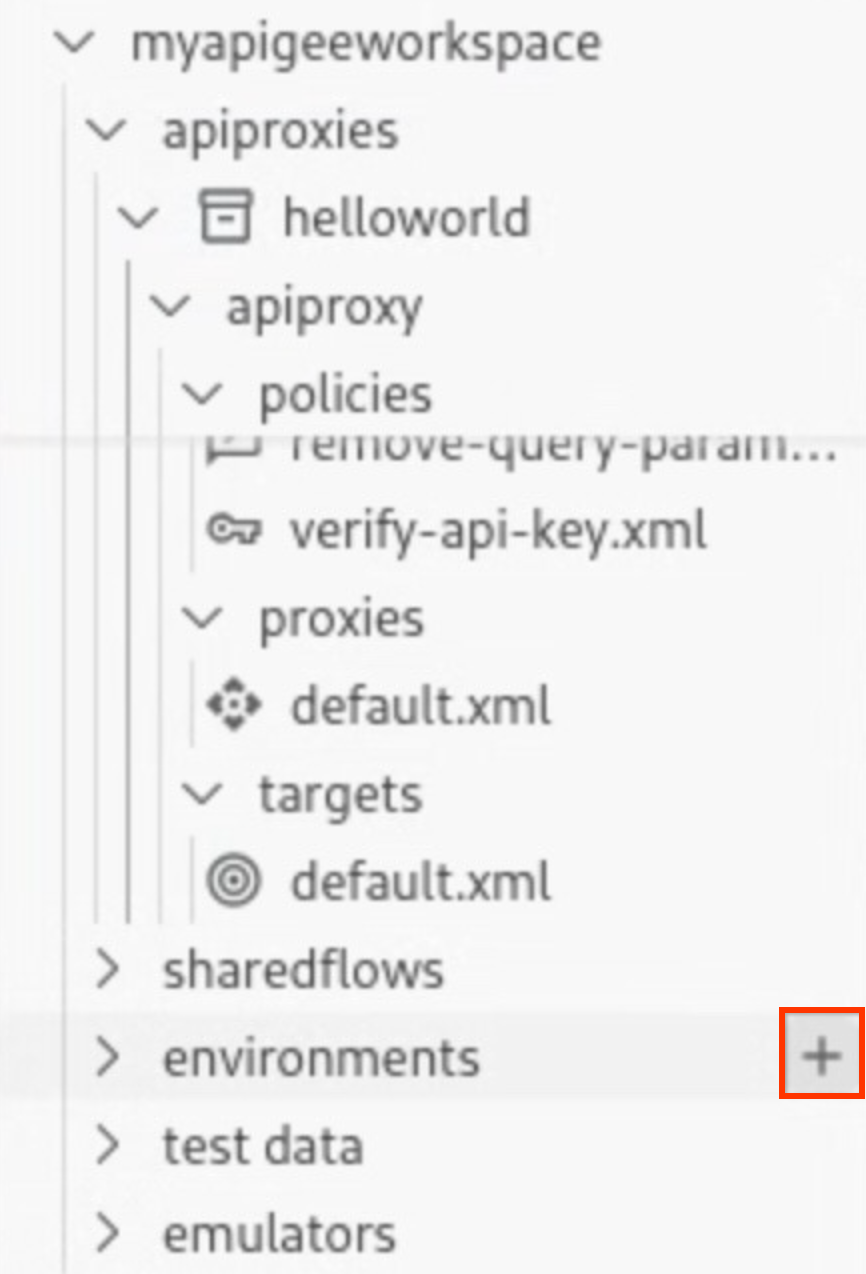
Arahkan kursor ke folder environments, lalu klik
.
Wizard Create environment akan terbuka.
Masukkan dev untuk nama lingkungan, lalu tekan Enter.
Lingkungan dibuat.
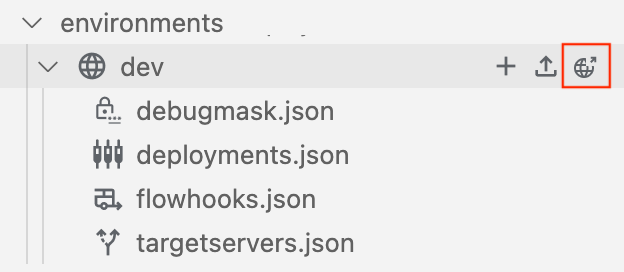
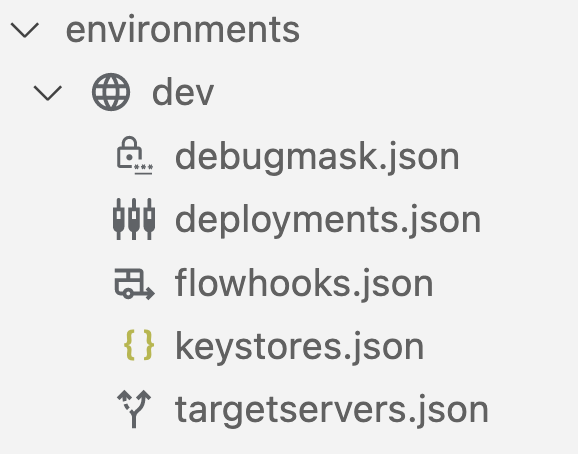
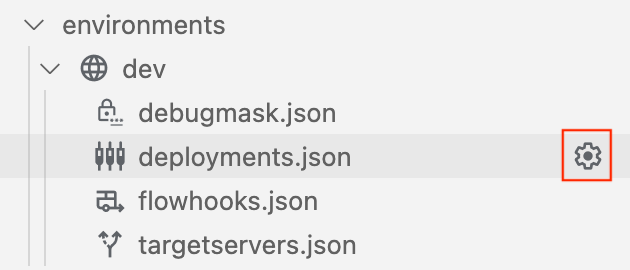
Luaskan folder lingkungan dev untuk melihat kontennya.
Saat Anda membuat lingkungan, sekumpulan file konfigurasi akan
disertakan secara default dalam folder lingkungan dev untuk
mengonfigurasi deployment dan mask debug, hook alur, atau server target yang diperlukan.
Konfigurasikan detail deployment untuk proxy API helloworld di lingkungan:
Arahkan kursor ke file deployments.json, lalu klik .
Wizard Deployments akan terbuka.
Pilih proxy API helloworld untuk menambahkannya ke deployment, lalu klik OK.
File deployments.json akan terbuka di editor. File telah diperbarui untuk menyertakan proxy helloworld API dalam array deployment proxies:
[[["Mudah dipahami","easyToUnderstand","thumb-up"],["Memecahkan masalah saya","solvedMyProblem","thumb-up"],["Lainnya","otherUp","thumb-up"]],[["Sulit dipahami","hardToUnderstand","thumb-down"],["Informasi atau kode contoh salah","incorrectInformationOrSampleCode","thumb-down"],["Informasi/contoh yang saya butuhkan tidak ada","missingTheInformationSamplesINeed","thumb-down"],["Masalah terjemahan","translationIssue","thumb-down"],["Lainnya","otherDown","thumb-down"]],["Terakhir diperbarui pada 2025-08-18 UTC."],[[["\u003cp\u003eThis guide focuses on configuring and deploying an environment, specifically for the \u003ccode\u003ehelloworld\u003c/code\u003e API proxy, within Apigee or Apigee hybrid.\u003c/p\u003e\n"],["\u003cp\u003eThe process involves creating a 'dev' environment folder, where default configuration files are generated to manage deployment settings.\u003c/p\u003e\n"],["\u003cp\u003eThe \u003ccode\u003edeployments.json\u003c/code\u003e file is used to configure which API proxies, such as \u003ccode\u003ehelloworld\u003c/code\u003e, will be deployed to the designated environment.\u003c/p\u003e\n"],["\u003cp\u003eDeployment of the 'dev' environment results in a successful deployment message and the display of deployed application information within the emulators section.\u003c/p\u003e\n"],["\u003cp\u003ePrior to initiating the deployment process, it is recommended that the user has installed the Apigee Emulator.\u003c/p\u003e\n"]]],[],null,["*This page\napplies to **Apigee** and **Apigee hybrid**.*\n\n\n*View [Apigee Edge](https://docs.apigee.com/api-platform/get-started/what-apigee-edge) documentation.*\n\n\u003cbr /\u003e\n\nConfigure and deploy an environment that includes the `helloworld` API proxy.\n| **Note:** Before deploying an environment, ensure that you have [installed the Apigee Emulator](/apigee/docs/api-platform/local-development/vscode/manage-apigee-emulator#install).\n\n1. Create an environment:\n 1. Position your cursor over the **environments** folder and click .\n\n The **Create environment** wizard opens.\n 2. Enter **dev** for the environment name and press **Enter** .\n\n The environment is created.\n 3. Expand the **dev** environment folder to view its contents.\n\n When you create an environment, a set of configuration files are\n included by default in the `dev` environment folder for\n configuring your deployment and any required debug masks, flow hooks,\n or target servers.\n2. Configure the deployment details for the `helloworld` API proxy in the environment:\n 1. Position your cursor over the **deployments.json** file and click .\n\n The Deployments wizard opens.\n 2. Select the **helloworld** API proxy to add it to the deployment and click **OK** .\n\n The `deployments.json` file is opened in the editor. The file has been updated to include the `helloworld` API proxy in the `proxies` deployment array: \n\n ```\n {\n \"proxies\": [\n {\n \"name\": \"helloworld\"\n }\n ],\n \"sharedflows\": []\n }\n ```\n3. Deploy the **dev** environment:\n 1. Position your cursor over the **dev** environment folder in the Apigee section and click .\n\n | **Note:** If prompted to select a test bundle to export, click **Deploy without a test bundle** . This prompt displays only if you have created a test bundle in your Apigee workspace. You'll create and export a test bundle in the next step. \n\n The `dev` environment is deployed and the **Output** tab shows a success message.\n\n The `helloworld` deployed application information is displayed in the **emulators** section:\n\n**Congratulations!** You've deployed your first API proxy application. In the next step, you'll test the API proxy using curl.\n\n\n[1](/apigee/docs/api-platform/local-development/vscode/tutorial-create-workspace)\n\n\n[2](/apigee/docs/api-platform/local-development/vscode/tutorial-create-proxy)\n\n\n[3](/apigee/docs/api-platform/local-development/vscode/tutorial-deploy)\n\n\n[(NEXT) Step 4: Test your API](/apigee/docs/api-platform/local-development/vscode/tutorial-test)\n\n\n[5](/apigee/docs/api-platform/local-development/vscode/tutorial-change-target-endpoint)\n\n\n[6](/apigee/docs/api-platform/local-development/vscode/tutorial-attach-policy)\n\n\n[7](/apigee/docs/api-platform/local-development/vscode/tutorial-deploy-apigee)\n\n\n[8](/apigee/docs/api-platform/local-development/vscode/tutorial-promote)\n\n\u003cbr /\u003e"]]

 .
.
 .
.
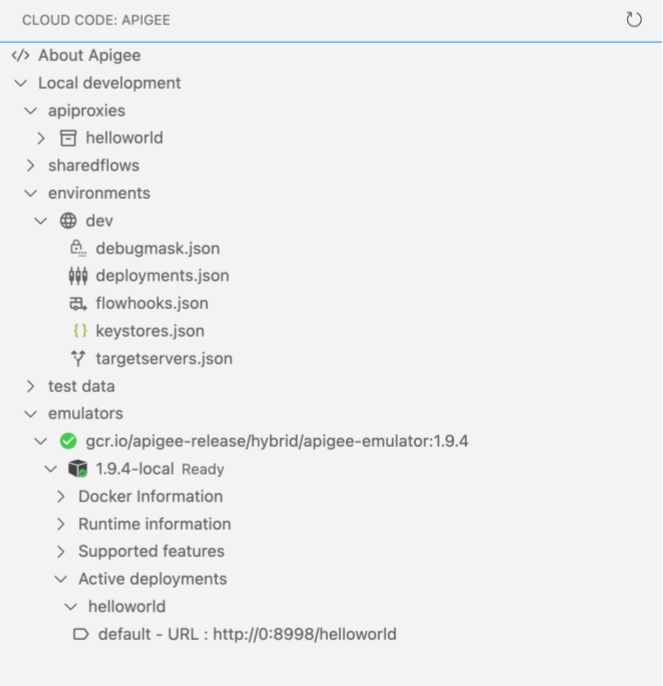
 .
.