このページは Apigee と Apigee ハイブリッドに適用されます。
Apigee Edge のドキュメントを表示します。

API を開発するための Apigee ワークスペースを作成します。
Cloud Code 内で Apigee にアクセスするには、VS Code を起動して、アクティビティ バーの
 Cloud Code アイコンをクリックし、[Apigee] セクションを選択します。
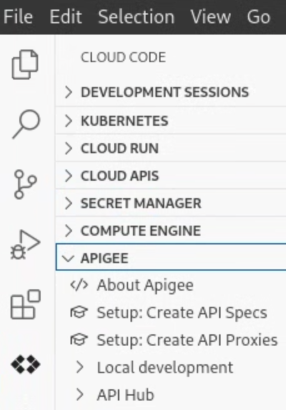
[Local Development] をクリックし、フォルダ内の [Create Apigee workspace] アイコン(
![[Create Apigee workspace] アイコン](https://cloud.google.com/static/apigee/docs/api-platform/images/create-workspace-icon.png?authuser=19&hl=ja) )をクリックします。または、[View] > [Command Palette] を選択してコマンド パレットを開き、[Cloud Code: Open Apigee workspace] を選択します。
)をクリックします。または、[View] > [Command Palette] を選択してコマンド パレットを開き、[Cloud Code: Open Apigee workspace] を選択します。お好みの開発スタイルと一致するワークスペースの種類を選択します。単一リポジトリ ワークスペースまたはマルチリポジトリ ワークスペースを選択できます。
プロンプトで「myapigeeworkspace」と入力し、Enter キーを押します。
Apigee ワークスペースを保存するディレクトリに移動します。ソース コントロール管理を使用している場合は、ソース コントロール リポジトリ内の場所を選択します。
[Select workspace folder] をクリックします。
Apigee ワークスペースが作成され、指定したローカル ディレクトリに格納されて、[Apigee] セクションに表示されます。
![apiproxies、sharedflows、environments、tests を含む Apigee ワークスペース フォルダが表示されている [Apigee] セクション。](https://cloud.google.com/static/apigee/docs/api-platform/local-development/vscode/images/vscode-workspace.png?authuser=19&hl=ja)
ここに示すように、API プロキシと共有フローの開発、デプロイ環境の構成、テストリソースの構築を行うための一連のフォルダが作成されます。
1 (次)ステップ 2: API プロキシを作成する 3 4 5 6 7 8