Esta página se aplica a Apigee, pero no a Apigee Hybrid.
Consulta la documentación de
Apigee Edge.

Un proxy de API debe desplegarse para que los desarrolladores puedan acceder a él y usarlo.
Apigee en la consola de Cloud
- En la consola de Google Cloud , vaya a la página Apigee > Desarrollo de proxies > Proxies de API.
- Asegúrate de que esté seleccionado el mismo Google Cloud proyecto en el que has creado el proxy de API en el menú desplegable de la parte superior de la página.
- Seleccione myproxy en la lista de proxies.
- Haz clic en Implementar para que se muestre el cuadro de diálogo Implementar e introduce la siguiente información:
- Revisión: selecciona el número de revisión del proxy que quieras implementar. Si estás haciendo este tutorial desde cero, solo hay una revisión entre la que elegir.
- Entorno: selecciona el entorno en el que quieras desplegar el proxy. Un entorno es un contexto de ejecución del tiempo de ejecución de los proxies de API de una organización de Apigee. Debes desplegar un proxy de API en un entorno para poder acceder a él.
- Cuenta de servicio (opcional): una cuenta de servicio para el proxy. La cuenta de servicio representa la identidad del proxy implementado y determina los permisos que tiene. Se trata de una función avanzada que puedes ignorar en este tutorial.
- Haz clic en Desplegar.
Cuando se implementa el proxy, en la columna Estado de la sección Implementaciones se muestra un icono verde para indicar que se ha implementado la revisión del proxy de API. Puede colocar el cursor sobre el icono de estado para ver más información sobre la implementación.
IU de Apigee clásica
- Abre la interfaz de usuario de Apigee en un navegador.
- En la interfaz de usuario de Apigee, selecciona Desarrollar > Proxies de API.
Asegúrate de que esté seleccionado el entorno de prueba.
La interfaz de usuario muestra el nuevo proxy en la lista de proxies:

Haz clic en el proxy "myproxy".
La interfaz de usuario muestra la pestaña Información general de los proxies de API de ese proxy en el editor de proxies.
En Implementaciones, la columna Revisión muestra el valor "No implementado".
- En la columna Revisión, despliega el selector para elegir la revisión que quieras implementar.
En la lista desplegable solo se muestran las opciones "1" y "Undeploy":
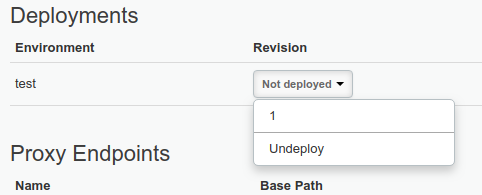
En la lista desplegable, selecciona "1", la revisión que quieras implementar.
La interfaz de usuario te pedirá que confirmes la implementación:
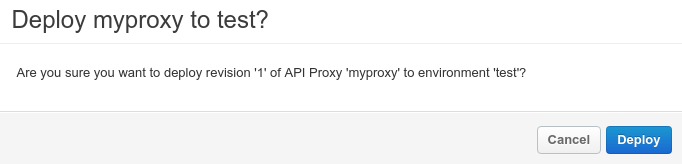
- Haz clic en Desplegar.
Apigee inicia el proceso de implementación de la revisión 1 de tu nuevo proxy.
En el siguiente paso se explica cómo llamar al proxy de API que acabas de implementar.
1 2 Paso 3(SIGUIENTE): prueba el proxy de API 4 5