本页面适用于 Apigee,但不适用于 Apigee Hybrid。
查看 Apigee Edge 文档。

必须先部署 API 代理,然后开发者才能访问和使用它。
Cloud 控制台中的 Apigee
- 在 Google Cloud 控制台中,前往 Apigee > 代理开发 > API 代理页面。
- 确保从页面顶部的下拉菜单中选择您在其中创建了 API 代理的 Google Cloud 项目。
- 在代理列表中选择 myproxy。
- 点击部署以显示部署对话框,然后输入以下信息:
- 修订版本:选择要部署的代理的修订版本号。如果您是从头开始学习本教程,则只有一个修订版本可供选择。
- 环境:选择要在其中部署代理的环境。环境是 Apigee 组织中 API 代理的运行时执行上下文。您必须先将 API 代理部署到环境,然后才能对其进行访问。
- 服务账号(可选):代理的服务账号。 服务账号代表已部署代理的身份,并决定了该代理拥有的权限。这是一项高级功能,在本教程中,您可以忽略它。
- 点击部署。
部署代理后,部署部分中的状态列会显示一个绿色图标,表明已部署 API 代理修订版本。您可以将光标悬停在状态图标上,查看有关部署的更多信息。
经典版 Apigee IU
- 在浏览器中打开 Apigee 界面。
- 在 Apigee 界面中,依次选择开发 > API 代理。
确保选择“test”环境。
界面会在代理列表中显示您的新代理:

点击“myproxy”代理。
该界面会在代理编辑器中显示该代理的 API 代理概览标签页。
请注意,在部署下,修订版本列将显示“未部署”。
- 在修订版本列中,展开下拉选择器以选择要部署的修订版本。
此下拉列表仅显示“1”和“取消部署”:
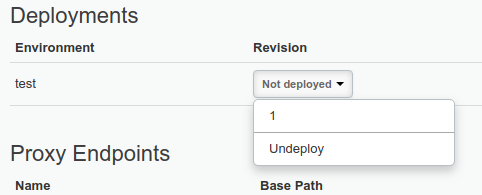
从下拉列表中选择“1”(您要部署的修订版本)。
界面会提示您确认部署:
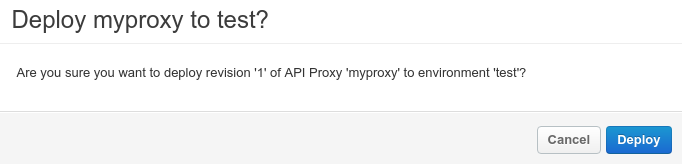
- 点击部署。
Apigee 开始部署新代理修订版本 1 的流程。
下一步介绍如何调用刚部署的 API 代理。
1 2 (下一步)第 3 步:测试 API 代理 4 5