Halaman ini berlaku untuk Apigee, tetapi tidak untuk Apigee Hybrid.
Lihat dokumentasi
Apigee Edge.

Proxy API harus di-deploy sebelum developer dapat mengakses dan menggunakannya.
Apigee di Konsol Cloud
- Di konsol Google Cloud , buka halaman Apigee > Proxy development > API proxies.
- Pastikan project Google Cloud yang sama tempat Anda membuat proxy API dipilih dari dropdown di bagian atas halaman.
- Pilih myproxy dalam daftar proxy.
- Klik Deploy untuk menampilkan dialog Deploy, lalu masukkan informasi berikut:
- Revisi: Pilih nomor revisi proxy yang ingin Anda deploy. Jika Anda melakukan tutorial ini dari awal, hanya ada satu revisi yang dapat dipilih.
- Lingkungan: Pilih lingkungan tempat Anda ingin men-deploy proxy. Lingkungan adalah konteks eksekusi runtime untuk proxy API dalam organisasi Apigee. Anda harus men-deploy proxy API ke lingkungan sebelum dapat diakses.
- Akun layanan (opsional): Akun layanan untuk proxy. Akun layanan mewakili identitas proxy yang di-deploy, dan menentukan izin yang dimilikinya. Ini adalah fitur lanjutan, dan untuk tujuan tutorial ini, Anda dapat mengabaikannya.
- Klik Deploy.
Saat proxy di-deploy, kolom Status di bagian Deployments akan menampilkan ikon hijau untuk menunjukkan bahwa revisi proxy API telah di-deploy. Anda dapat mengarahkan kursor ke ikon status untuk melihat informasi selengkapnya tentang deployment.
IU Apigee Klasik
- Buka Apigee UI di browser.
- Di UI Apigee, pilih Develop > API Proxies.
Pastikan lingkungan "test" dipilih.
UI menampilkan proxy baru Anda dalam daftar proxy:

Klik proxy "myproxy".
UI menampilkan tab API Proxies Overview untuk proxy tersebut di Editor Proxy.
Perhatikan bahwa di bagian Deployments, kolom Revision menampilkan "Not deployed".
- Di kolom Revisi, luaskan pemilih drop-down untuk memilih revisi yang akan di-deploy.
Daftar drop-down hanya menampilkan "1" dan "Undeploy":
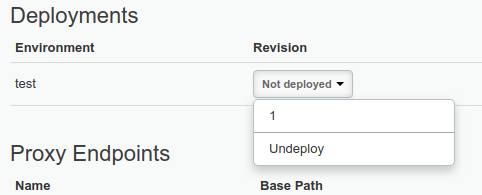
Pilih "1"—revisi yang ingin Anda deploy—dari daftar drop-down.
UI akan meminta Anda untuk mengonfirmasi deployment:
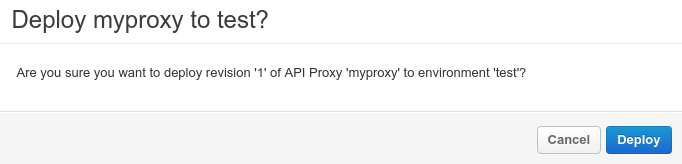
- Klik Deploy.
Apigee memulai proses men-deploy revisi 1 proxy baru Anda.
Langkah berikutnya menjelaskan cara memanggil proxy API yang baru saja Anda deploy.
1 2 (BERIKUTNYA) Langkah 3: Uji proxy API 4 5