Halaman ini berlaku untuk Apigee dan Apigee Hybrid.
Lihat dokumentasi
Apigee Edge.

Proxy API Apigee memiliki dua endpoint: endpoint proxy dan endpoint target. Endpoint proxy adalah antarmuka klien. Server ini menerima permintaan dari klien dan mengirimkan respons kembali ke klien. Endpoint target adalah antarmuka produsen API. Kebijakan ini berkomunikasi dari Apigee ke produsen API, seperti layanan backend atau API. Untuk mempelajari endpoint lebih lanjut, lihat Apa yang dimaksud dengan proxy API?
Pada langkah ini, Anda akan mengubah endpoint target proxy API menjadi https://mocktarget.apigee.net/xml, sebuah resource yang
menampilkan data XML pengujian. Setelah melakukan perubahan, Anda akan men-deploy ulang dan menguji proxy API yang direvisi.
Apigee di Konsol Cloud
Di konsol Google Cloud , buka halaman Proxy development > API proxies.
- Pastikan project Google Cloud yang sama tempat Anda membuat proxy API dipilih dari dropdown di bagian atas halaman.
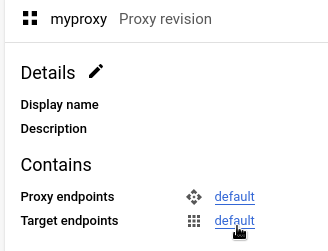
- Di tabel proxy, pilih proxy myproxy, yang Anda buat di Langkah 1: Buat proxy API.
- Klik tab Mengembangkan.
Menjelajahi tampilan Develop
Di panel kiri tampilan Develop, Anda dapat:
- Telusuri teks di proxy di kolom Telusuri proxy.
- Tambahkan kebijakan baru.
- Tambahkan endpoint proxy dan target.
- Tambahkan resource lainnya.
Jika tidak ingin melihat panel sebelah kiri, Anda dapat menciutkannya dengan mengklik tombol tutup  .
.
Panel sebelah kanan tampilan Develop menampilkan editor visual dan teks untuk proxy:
- Editor visual menyediakan tampilan grafis dari alur permintaan dan respons.
- Editor teks memungkinkan Anda mengedit XML untuk proxy atau target.
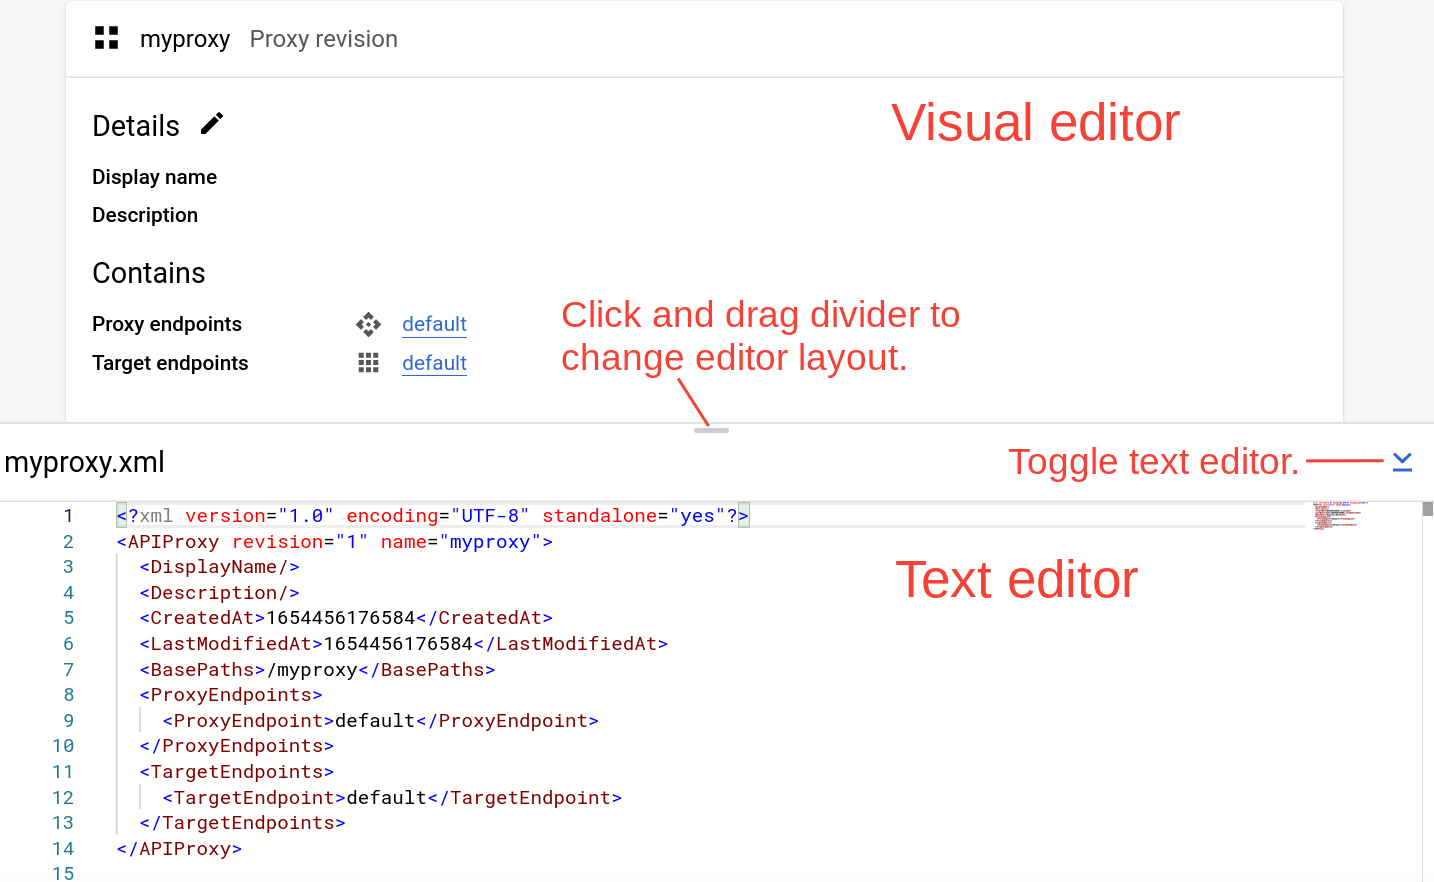
Catatan:
- Anda dapat mengklik dan menarik pemisah di antara kedua editor ke atas atau ke bawah untuk meluaskan area tampilan salah satu editor.
- Anda dapat memperluas area tampilan editor visual dengan mengklik tombol alih di sisi kanan editor teks, yang akan menutup panel editor teks. Klik tombol alih lagi untuk membuka kembali panel editor teks.
Mengubah endpoint target
Untuk mengubah endpoint target proxy:
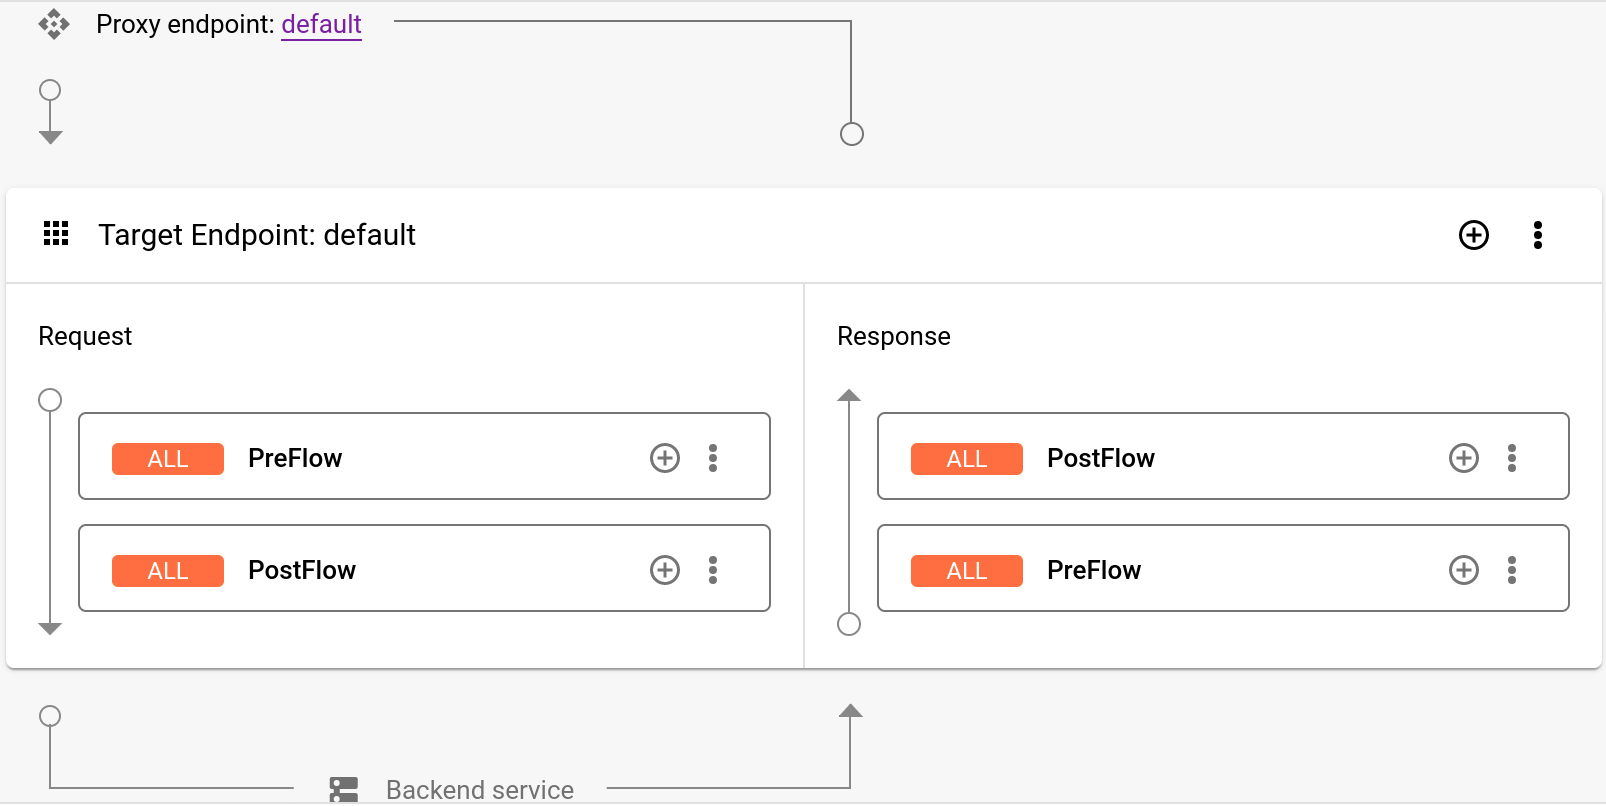
- Di panel Proxy revision, pilih Target Endpoints > default.
Tindakan ini akan menampilkan diagram endpoint target di editor visual:
Di bawah editor visual, kode XML untuk endpoint target ditampilkan di editor teks:
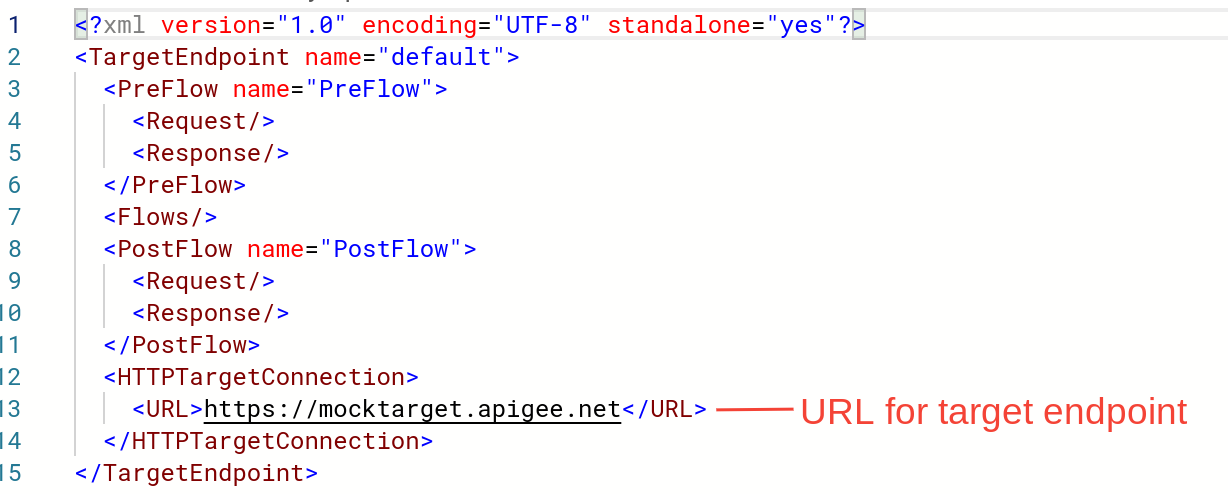
Di editor teks, ubah
<URL>menjadihttps://mocktarget.apigee.net/xml. (Tambahkan "/xml" ke URL yang ada.)URL baru ditampilkan di bawah:
...
<HTTPTargetConnection>
  <Properties/>
  <URL>https://mocktarget.apigee.net/xml</URL>
</HTTPTargetConnection>
...
- Klik panah di samping Simpan di kanan atas Editor Proxy, lalu pilih Simpan sebagai revisi baru.
- Untuk men-deploy perubahan, klik Deploy.
- Pada dialog Deploy, pilih revisi dan lingkungan tempat deployment, lalu klik Deploy.
UI Apigee Klasik
Untuk mengubah endpoint target proxy:
- Login ke UI Apigee.
- Pilih Develop > API Proxies.
- Pilih proxy dari daftar untuk menampilkan detail proxy API. Jika Anda tidak melihat proxy di daftar, pastikan Anda memilih organisasi yang tepat, seperti yang dijelaskan dalam Beralih antar-organisasi.
Klik tab Develop:

Tindakan ini akan mengarahkan Anda ke Editor Proxy API. Proxy Editor memungkinkan Anda melihat struktur proxy API dan mengonfigurasi alurnya. (Flow hanyalah jalur bertahap yang diambil permintaan proxy API melalui platform Apigee. Tutorial lainnya akan membahas konsep flow.)
- Di panel Navigator, pilih Target Endpoints >
default > PreFlow:
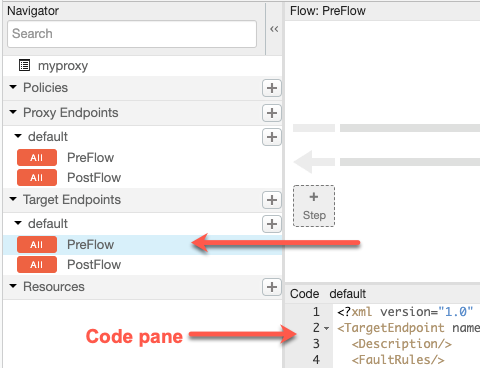
Apigee menampilkan setelan endpoint di panel Code:
<TargetEndpoint name="default">
  <Description/>
  <FaultRules/>
  <PreFlow name="PreFlow">
    <Request/>
    <Response/>
  </PreFlow>
  <PostFlow name="PostFlow">
    <Request/>
    <Response/>
  </PostFlow>
  <Flows/>
  <HTTPTargetConnection>
    <Properties/>
    <URL>https://mocktarget.apigee.net</URL>
  </HTTPTargetConnection>
</TargetEndpoint>
Endpoint target ditentukan oleh elemen
<HTTPTargetConnection>. Ubah URL menjadi
"https://mocktarget.apigee.net/xml". (Tambahkan "/xml" ke URL yang ada.)URL baru menampilkan blok kecil XML dalam isi respons.
Konfigurasi endpoint Anda sekarang akan terlihat seperti berikut:
...
<HTTPTargetConnection>
  <Properties/>
  <URL>https://mocktarget.apigee.net/xml</URL>
</HTTPTargetConnection>
...
Untuk menyimpan perubahan pada konfigurasi proxy, klik tombol Simpan.
Apigee menyimpan perubahan Anda dalam revisi proxy baru.
- Untuk men-deploy revisi baru, pilih Deploy ke: test, lalu klik Deploy 2.
- Pada dialog konfirmasi, klik Deploy.
Jika terjadi error, Apigee akan menyimpan perubahan Anda, tetapi tidak men-deploy proxy. Jika terjadi error:
- Perbaiki konfigurasi proxy Anda. Apigee dapat memberikan panduan sintaksis sebagai pop-up.
- Deploy perubahan Anda secara manual ke lingkungan
testdengan mengklik Deployment > test jika Apigee tidak otomatis men-deploy-nya.
Anda dapat memeriksa apakah revisi proxy berhasil di-deploy dengan melihat status revisi deployment di samping drop-down Deploy. Contoh:

Menguji proxy
Untuk menguji revisi proxy API, panggil proxy seperti yang Anda lakukan di Memanggil proxy API.
Kali ini, endpoint mocktarget menampilkan XML dalam isi respons:
<?xml version="1.0" encoding="UTF-8"?>
<root>
  <city>San Jose</city>
  <firstName>John</firstName>
  <lastName>Doe</lastName>
  <state>CA</state>
</root>
Setelah proxy API menampilkan data XML, di langkah berikutnya Anda akan menambahkan kebijakan yang mengonversi XML ke JSON.
1 2 3 4 (BERIKUTNYA) Langkah 5: Tambahkan kebijakan