환경 드롭다운 목록에서 새 API 프록시를 만들 환경을 선택합니다. 이 섹션에서는 환경 이름을 'test'라고 가정합니다. 5단계: 환경 추가에서 하나 이상의 환경을 만들었습니다.
하이브리드 UI는 해당 환경의 API 프록시 목록을 표시합니다. 아직 프록시를 만들지 않았다면 목록은 비어 있습니다.
오른쪽 상단에서 +프록시를 클릭합니다. API 프록시 마법사가 시작됩니다.
역방향 프록시(가장 일반적)를 선택하고 다음을 클릭합니다.
프록시 세부정보 뷰가 표시됩니다.
다음 설정으로 프록시를 구성합니다.
프록시 이름: 'myproxy'를 입력합니다. 이 섹션의 나머지 단계에서는 이를 프록시 ID라고 가정합니다.
프록시 기본 경로: '/myproxy'로 자동 설정됩니다. 프록시 기본 경로는 API에 요청을 수행하는 데 사용되는 URL의 일부입니다. Edge는 URL을 사용하여 수신 요청을 적절한 API 프록시로 일치시키며 라우팅합니다.
(선택사항) 설명: '간단한 프록시로 Apigee 하이브리드 테스트'와 같이 새 API 프록시에 설명을 입력합니다.
대상(기존 API): https://mocktarget.apigee.net을 입력합니다. 이는 Apigee가 API 프록시에 대한 요청에서 호출하는 대상 URL을 정의합니다. mocktarget 서비스는 Apigee에서 호스팅되며 간단한 데이터를 반환합니다. API 키 또는 액세스 토큰이 필요하지 않습니다.
API 프록시의 세부정보는 다음과 같아야 합니다.
다음을 클릭합니다.
정책 화면에서 보안 옵션으로 통과(승인 없음)을 선택합니다.
다음을 클릭합니다.
요약 화면에서 만들기를 클릭합니다.
하이브리드는 프록시를 생성합니다. 이는 프록시 번들이라고도 합니다.
프록시 목록으로 이동을 클릭합니다.
하이브리드는 API 프록시 목록을 표시하는 프록시 뷰를 표시합니다. 새 프록시는 아직 배포되지 않았음을 의미하는 회색 상태 표시기와 함께 목록 상단에 있어야 합니다.
2. 하이브리드 UI를 사용하여 클러스터에 프록시 배포
새 프록시를 만든 후에는 이를 사용해 볼 수 있도록 배포해야 합니다. 이 섹션에서는 하이브리드 UI를 사용하여 새 프록시를 배포하는 방법을 설명합니다.
하이브리드 UI로 API 프록시를 배포하려면 다음 안내를 따르세요.
Apigee UI에서 개발 > API 프록시를 선택합니다.
'test' 환경이 선택되어 있는지 확인합니다.
UI의 프록시 목록에 새 프록시가 표시됩니다.
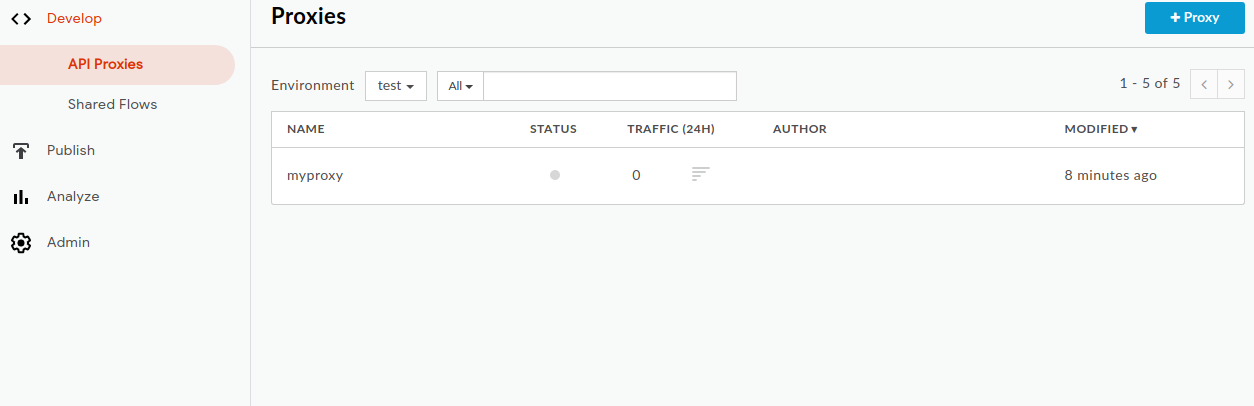
'myproxy' 프록시를 클릭합니다.
UI에 프록시의 API 프록시 개요 탭이 표시됩니다.
배포 아래의 버전 열에 '배포되지 않음'이 표시됩니다.
버전 열에서 드롭다운 선택기를 펼쳐 배포할 버전을 선택합니다.
드롭다운 목록에는 '1'과 '배포 취소'만 표시됩니다.
드롭다운 목록에서 배포하려는 버전인 '1'을 선택합니다.
UI에 배포를 확인하라는 메시지가 표시됩니다.
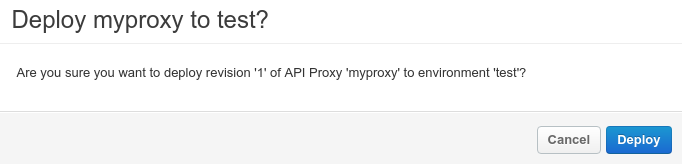
배포를 클릭합니다.
UI에서 새 프록시의 버전 1을 클러스터에 배포하는 프로세스를 시작합니다.
배포는 즉각적인 프로세스가 아닙니다. 하이브리드의 '최종 일관성' 배포 모델은 새 배포가 즉시가 아니라 짧은 시간 동안 클러스터에 출시됨을 의미합니다.
UI에서 프록시의 배포 상태를 확인하는 방법에는 여러 가지가 있지만, 다음 두 단계에서는 방금 배포한 API 프록시를 호출하는 방법과 Apigee API를 호출하여 배포 상태를 확인하는 방법을 설명합니다.
[[["이해하기 쉬움","easyToUnderstand","thumb-up"],["문제가 해결됨","solvedMyProblem","thumb-up"],["기타","otherUp","thumb-up"]],[["이해하기 어려움","hardToUnderstand","thumb-down"],["잘못된 정보 또는 샘플 코드","incorrectInformationOrSampleCode","thumb-down"],["필요한 정보/샘플이 없음","missingTheInformationSamplesINeed","thumb-down"],["번역 문제","translationIssue","thumb-down"],["기타","otherDown","thumb-down"]],["최종 업데이트: 2025-08-21(UTC)"],[[["\u003cp\u003eThis guide walks through creating a new API proxy named "myproxy" using the Apigee hybrid UI's API Proxy Wizard.\u003c/p\u003e\n"],["\u003cp\u003eThe created proxy is initially not deployed, and the guide explains how to deploy it to the cluster using the hybrid UI.\u003c/p\u003e\n"],["\u003cp\u003eAfter deployment, the guide provides instructions on how to test and call the deployed API proxy using cURL, including troubleshooting for self-signed certificate issues.\u003c/p\u003e\n"],["\u003cp\u003eThe target of the new API Proxy is set to the mocktarget service at "https://mocktarget.apigee.net", which requires no API key or access token.\u003c/p\u003e\n"],["\u003cp\u003eThe current version of the documentation is version 1.3, and it is end-of-life, therefore the user should upgrade to a newer version.\u003c/p\u003e\n"]]],[],null,["# Create and deploy a new API proxy\n\n| You are currently viewing version 1.3 of the Apigee hybrid documentation. **This version is end of life.** You should upgrade to a newer version. For more information, see [Supported versions](/apigee/docs/hybrid/supported-platforms#supported-versions).\n\nNow that you've configured and the hybrid UI, and installed and configured the\nruntime, you're ready to see how it all works together.\n\nThis section walks you through the following:\n\n1. **[Create a new API proxy](#create-proxy)** in the Apigee UI using the API Proxy Wizard\n2. **[Deploy your new proxy](#deploy)** to your cluster with the UI\n\n1. Create a new API proxy using the hybrid UI\n---------------------------------------------\n\nThis section describes how to create a new API proxy in the UI by using the API Proxy Wizard.\n\n**To create a simple API proxy using the API Proxy Wizard:**\n\n1. Open [Apigee UI](https://apigee.google.com) in a browser.\n2. Select **Develop \\\u003e API Proxies** in the main view.\n3. From the **Environment** drop-down list, select the environment in which you want to create a new API proxy. This section assumes the name of the environment is \"test\". You created at least one environment in [Step 5: Add an environment](/apigee/docs/hybrid/v1.3/precog-add-environment).\n\n The hybrid UI displays a list of API proxies for that environment. If you haven't created any\n proxies yet, the list is empty.\n4. Click **+Proxy** in the upper right. The API Proxy Wizard starts.\n5. Select **Reverse proxy** (most common), and click **Next** .\n\n The **Proxy details** view is displayed.\n6. Configure your proxy with the following settings:\n - **Proxy Name:** Enter \"myproxy\". The remaining steps in this section assume that this is your proxy's ID.\n - **Proxy Base Path:** Automatically set to \"/myproxy\". The **Proxy Base\n Path** is part of the URL used to make requests to your API. Edge uses the URL to match and route incoming requests to the proper API proxy.\n - (Optional)**Description:** Enter a description for your new API proxy, such as \"Testing Apigee hybrid with a simple proxy\".\n - **Target (Existing API):** Enter \"https://mocktarget.apigee.net\". This defines the target URL that Apigee invokes on a request to the API proxy. The mocktarget service is hosted at Apigee and returns simple data. It requires no API key or access token.\n\n Your API proxy's details should look like the following:\n\n7. Click **Next**.\n8. On the **Policies** screen, select **Pass through (no authorization)** as the security option.\n9. Click **Next**.\n10. On the **Summary** screen, click **Create** .\n\n Hybrid generates the proxy (sometimes referred to as *the proxy bundle*):\n\n | **NOTE:** In this case, the hybrid UI does *not* deploy the proxy to your cluster. You will do this in [the next step](#deploy).\n11. Click **Go to proxy list** .\n\n Hybrid displays the **Proxies** view, which displays a list of API proxies. The\n new proxy should be at the top of the list, with a gray status indicator, meaning that it has\n not yet been deployed.\n\n2. Deploy your proxy to the cluster using the hybrid UI\n-------------------------------------------------------\n\nAfter creating a new proxy, you must deploy it so that you can try it out. This section\ndescribes how to deploy your new proxy using the hybrid UI.\n\n**To deploy an API proxy in the hybrid UI:**\n\n1. In the hybrid UI, select **Develop \\\u003e API Proxies** .\n\n Be sure the \"test\" environment is selected.\n\n The UI displays your new proxy in the proxies list:\n\n2. Click on the \"myproxy\" proxy.\n\n The UI displays the **API Proxies Overview** tab for that proxy.\n\n Notice that under **Deployments** , the **Revision** column shows\n \"Not deployed\".\n3. In the **Revision** column, expand the drop-down selector to choose the revision to deploy.\n\n The drop down list displays only \"1\" and \"Undeploy\".\n4. Select \"1\"---the revision that you want to deploy---from the drop down list.\n\n The UI prompts you to confirm the deployment:\n\n5. Click **Deploy** .\n\n The UI begins the process of deploying revision 1 of your new proxy to the cluster.\n\n Note that deployment is not an instantaneous process. Hybrid's \"eventually consistent\"\n deployment model means that a new deployment will be rolled out to the cluster over a short\n period of time and not immediately.\n\nWhile there are [several ways](/apigee/docs/api-platform/deploy/ui-deploy-overview#viewing-deployment-status) to check the\ndeployment status of a proxy in the UI, the next two steps explain how to call the API proxy\nyou just deployed and how\nto check the deployment status with a call to the [Apigee APIs](/apigee/docs/reference/apis/apigee/rest).\n\n3. Call the API proxy\n---------------------\n\nWhen the [UI indicates\nyour proxy is deployed](/apigee/docs/api-platform/deploy/ui-deploy-overview#viewing-deployment-status), you can try calling it using cURL or the REST client of your choice.\nFor example:\n\n1. Export your environment group's host alias to a variable: \n\n ```\n $HOSTALIAS=your_host_alias\n ```\n2. Call the API proxy: \n\n ```\n curl -k https://$HOSTALIAS/myproxy\n ```\n\n\n For example: \n\n ```\n curl -v -k https://apitest.acme.com/myproxy\n ```\n\n If the call succeeds, you will see the following output: \n\n ```\n Hello, Guest!\n ```\n\n\nIf you used a self-signed certificate and you get a TLS/SSL error, try these steps instead:\n\n1. Export your environment group's host alias to a variable: \n\n ```\n $HOSTALIAS=your_host_alias\n ```\n2. Export the ingress host: \n\n ```\n export INGRESS_HOST=$(kubectl -n istio-system get service \\\n istio-ingressgateway -o jsonpath='{.status.loadBalancer.ingress[0].ip}')\n ```\n3. Export the secure ingress port number: \n\n ```\n export SECURE_INGRESS_PORT=$(kubectl -n istio-system get \\\n service istio-ingressgateway -o jsonpath='{.spec.ports[?(@.name==\"https\")].port}')\n ```\n4. Call the API proxy: \n\n ```\n curl -H Host:$HOSTALIAS --resolve \\\n $HOSTALIAS:$SECURE_INGRESS_PORT:$INGRESS_HOST \\\n https://$HOSTALIAS:$SECURE_INGRESS_PORT/myproxy -k\n ```\n\n*[Google Cloud]: Google Cloud"]]