Clique em Selecionar.
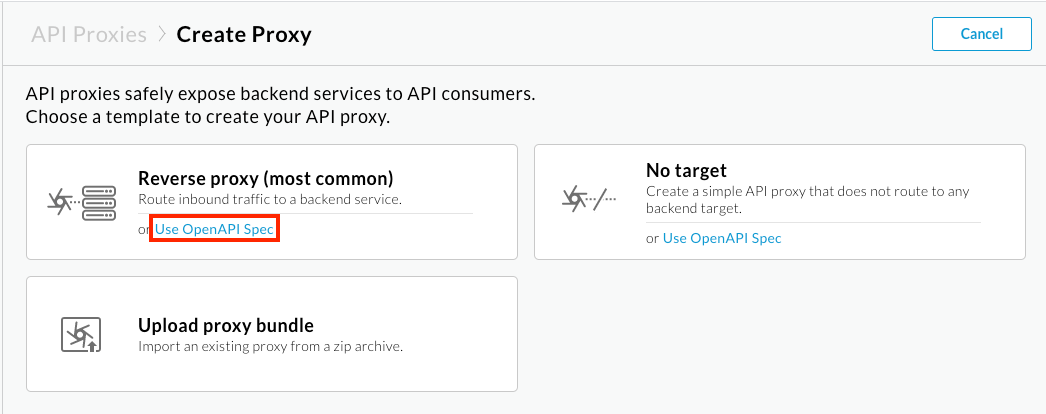
O assistente Create Proxy é aberto, e a página Proxy details é preenchida com valores da especificação OpenAPI.
Edite o campo Descrição da seguinte maneira: proxy de API para hello world.
Clique em Próxima.
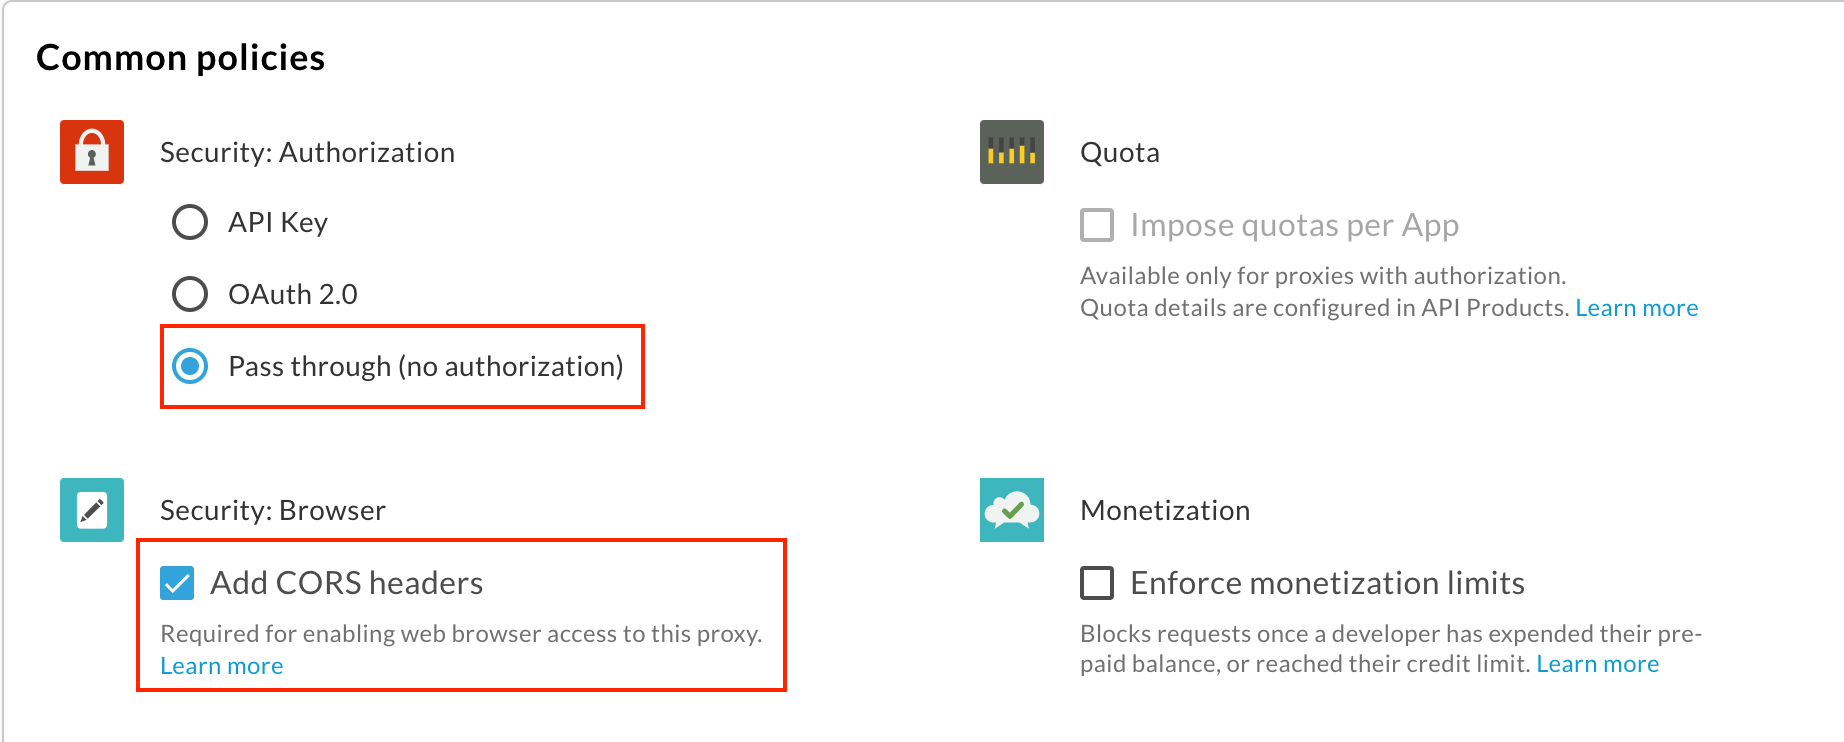
Na página Políticas:
Em Segurança: autorização, selecione Passagem (sem autorização).
Em Segurança: navegador, selecione Adicionar cabeçalhos CORS.
Clique em Próxima.
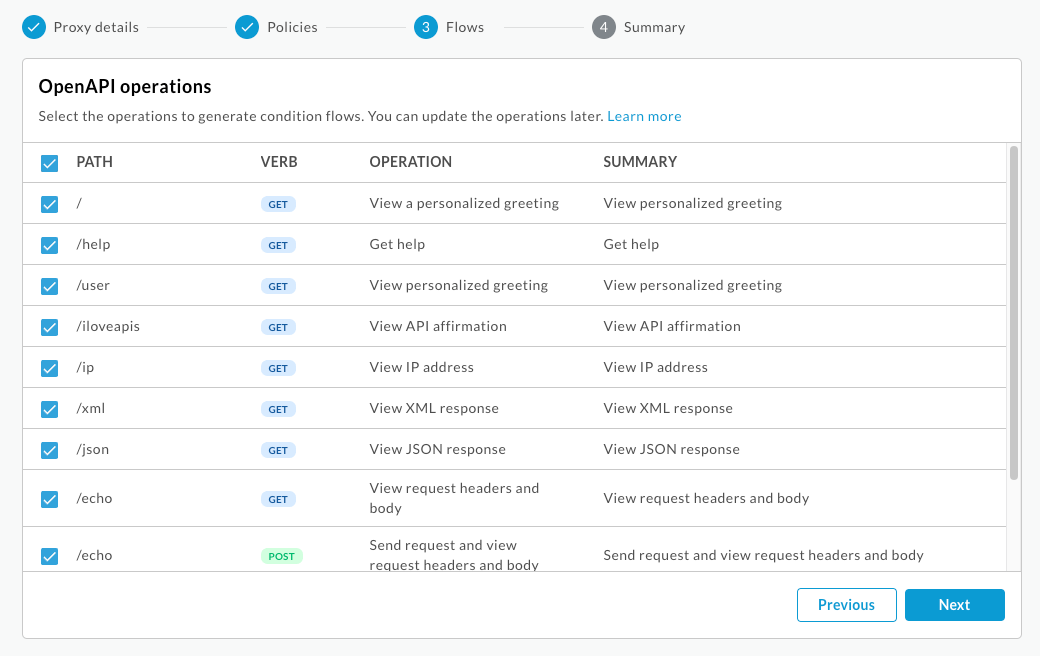
Na página Fluxos, verifique se todas as operações estão selecionadas e clique em Avançar.
Na página Resumo, selecione o ambiente em que você quer implantar em Implantação opcional.
Clique em Criar e implantar.
Na página Resumo, você verá uma confirmação de que o novo proxy da API foi criado com sucesso e implantado no ambiente selecionado.
Etapa 2: criar um produto da API
Crie um produto de API com os recursos que você quer expor aos consumidores da API.
Para criar um produto de API:
Na IU da Apigee, selecione Publish > API Products na barra de navegação à esquerda para abrir a página "API Products".
Clique em +CRIAR.
A página do produto será exibida.
Insira os detalhes do produto do produto de API. Observação: os campos Display Name e Description são exibidos no portal quando você publica o produto de API, por padrão. Edite os valores na Etapa 3: publicar a API no seu portal.
Campo
Valor
Nome
Hello World
Nome de exibição
Hello World
Descrição
Exemplo simples do hello world
Ambiente
Selecione o ambiente em que o proxy de API está implantado.
Acesso
Público
Aprovar automaticamente solicitações de acesso
Ativada
Cota
(deixe em branco)
Escopos do OAuth permitidos
(deixe em branco)
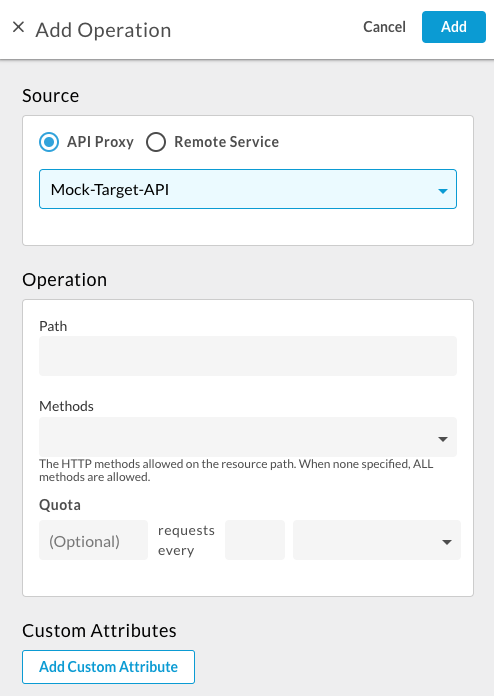
Na seção Operações, clique em ADICIONAR UMA OPERAÇÃO para identificar as operações a serem adicionadas ao produto da API.
Em Origem, clique em Proxy de API e selecione Mock-Target-API na lista suspensa.
Em Operação, digite uma barra (/) no campo Path. Ignore os outros campos.
Clique em Salvar para salvar a operação.
A caixa de diálogo Adicionar operação será exibida.
Clique em Adicionar.
Clique em Salvar.
Etapa 3: publicar a API no portal
Publique a API no seu portal para que seus clientes possam aprender a usá-la.
Para publicar a API no seu portal:
Na IU da Apigee, navegue até a página "APIs" no seu portal:
Selecione Publicar > Portais na barra de navegação à esquerda.
Clique na linha Meu primeiro portal para abrir o portal.
Clique em Catálogo de APIs para exibir a página de APIs.
Clique em +.
Selecione Hello World na caixa de diálogo Adicionar um produto de API ao catálogo e clique em Próximo.
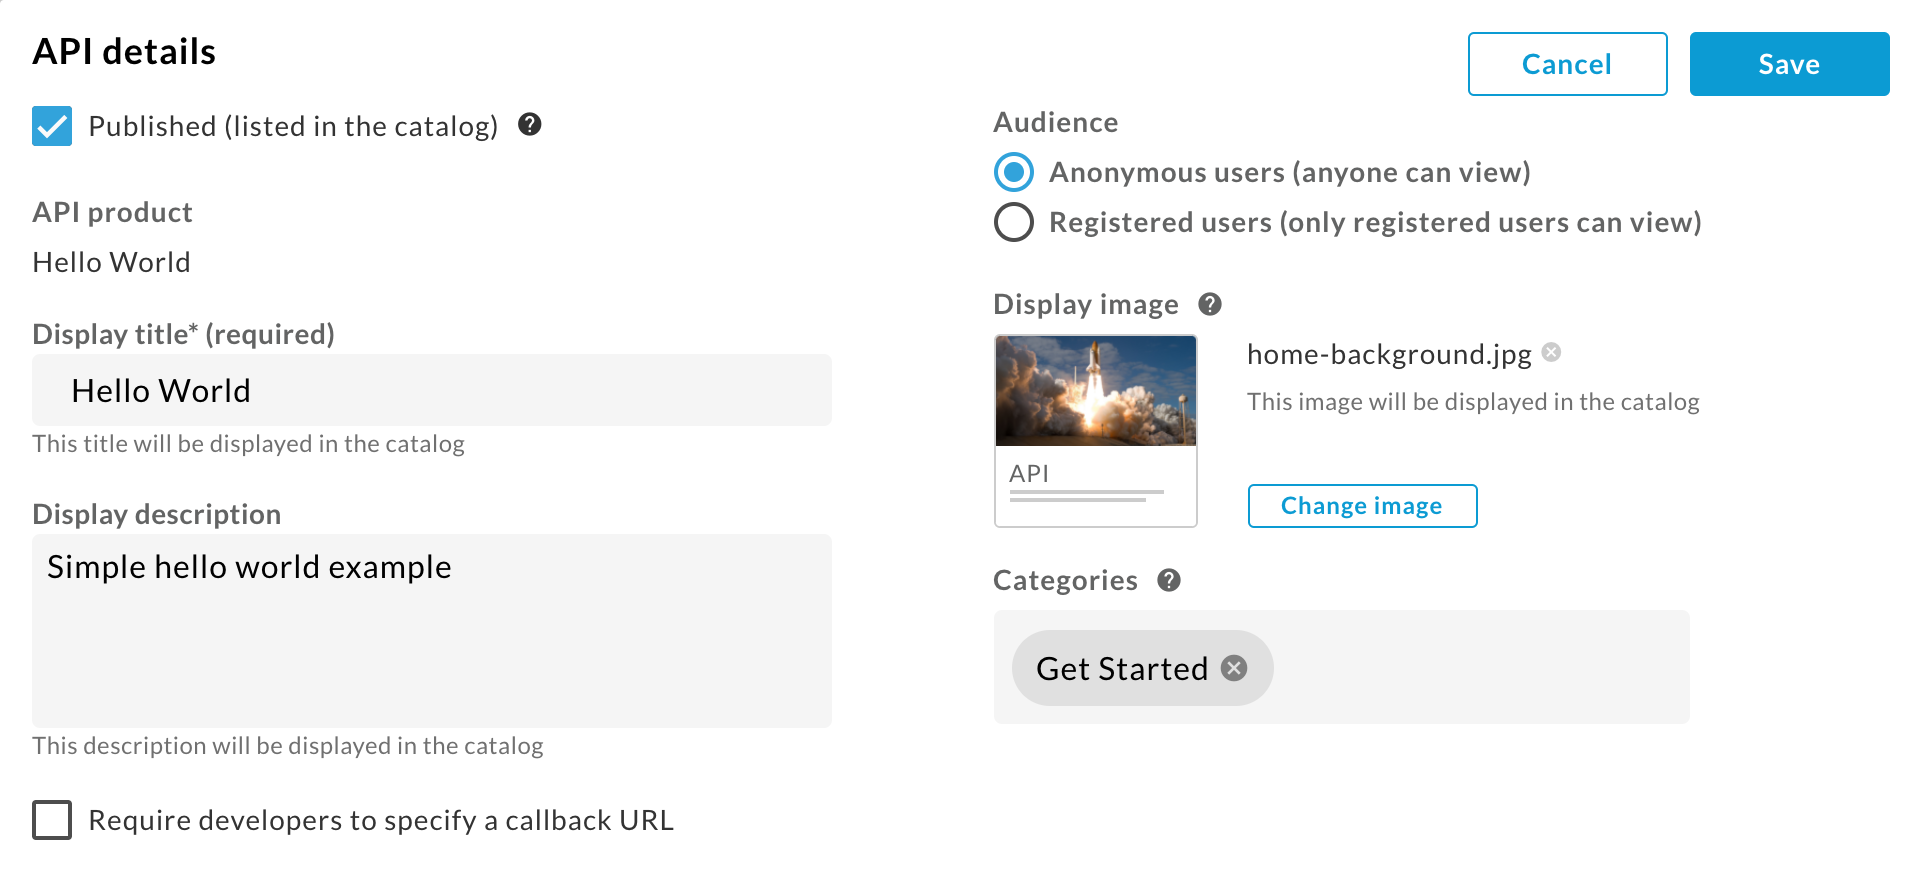
Em Detalhes da API, configure as seguintes opções:
Selecione Publicadas (listadas no catálogo) para publicar a API no seu portal.
Em Imagem de exibição:
Clique em Selecionar imagem.
Clique em home-background.jpg na lista de imagens existentes na caixa de diálogo Selecionar imagem.
Clique em Selecionar.
Visualize a imagem e clique em Selecionar.
Em Categorias, digite Primeiros passos e pressione Enter.
Deixe todos os outros valores definidos como padrão.
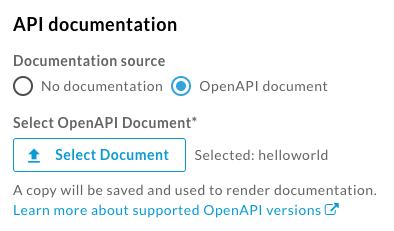
Na documentação da API, para gerar automaticamente a documentação de referência da API com base em um snapshot da sua especificação OpenAPI:
Selecione o documento da OpenAPI.
Clique em Selecionar documento.
Selecione a guia Importar de um URL.
Digite helloworld no campo Nome da especificação.
Copie e cole o seguinte URL no campo URL e pressione Enter:
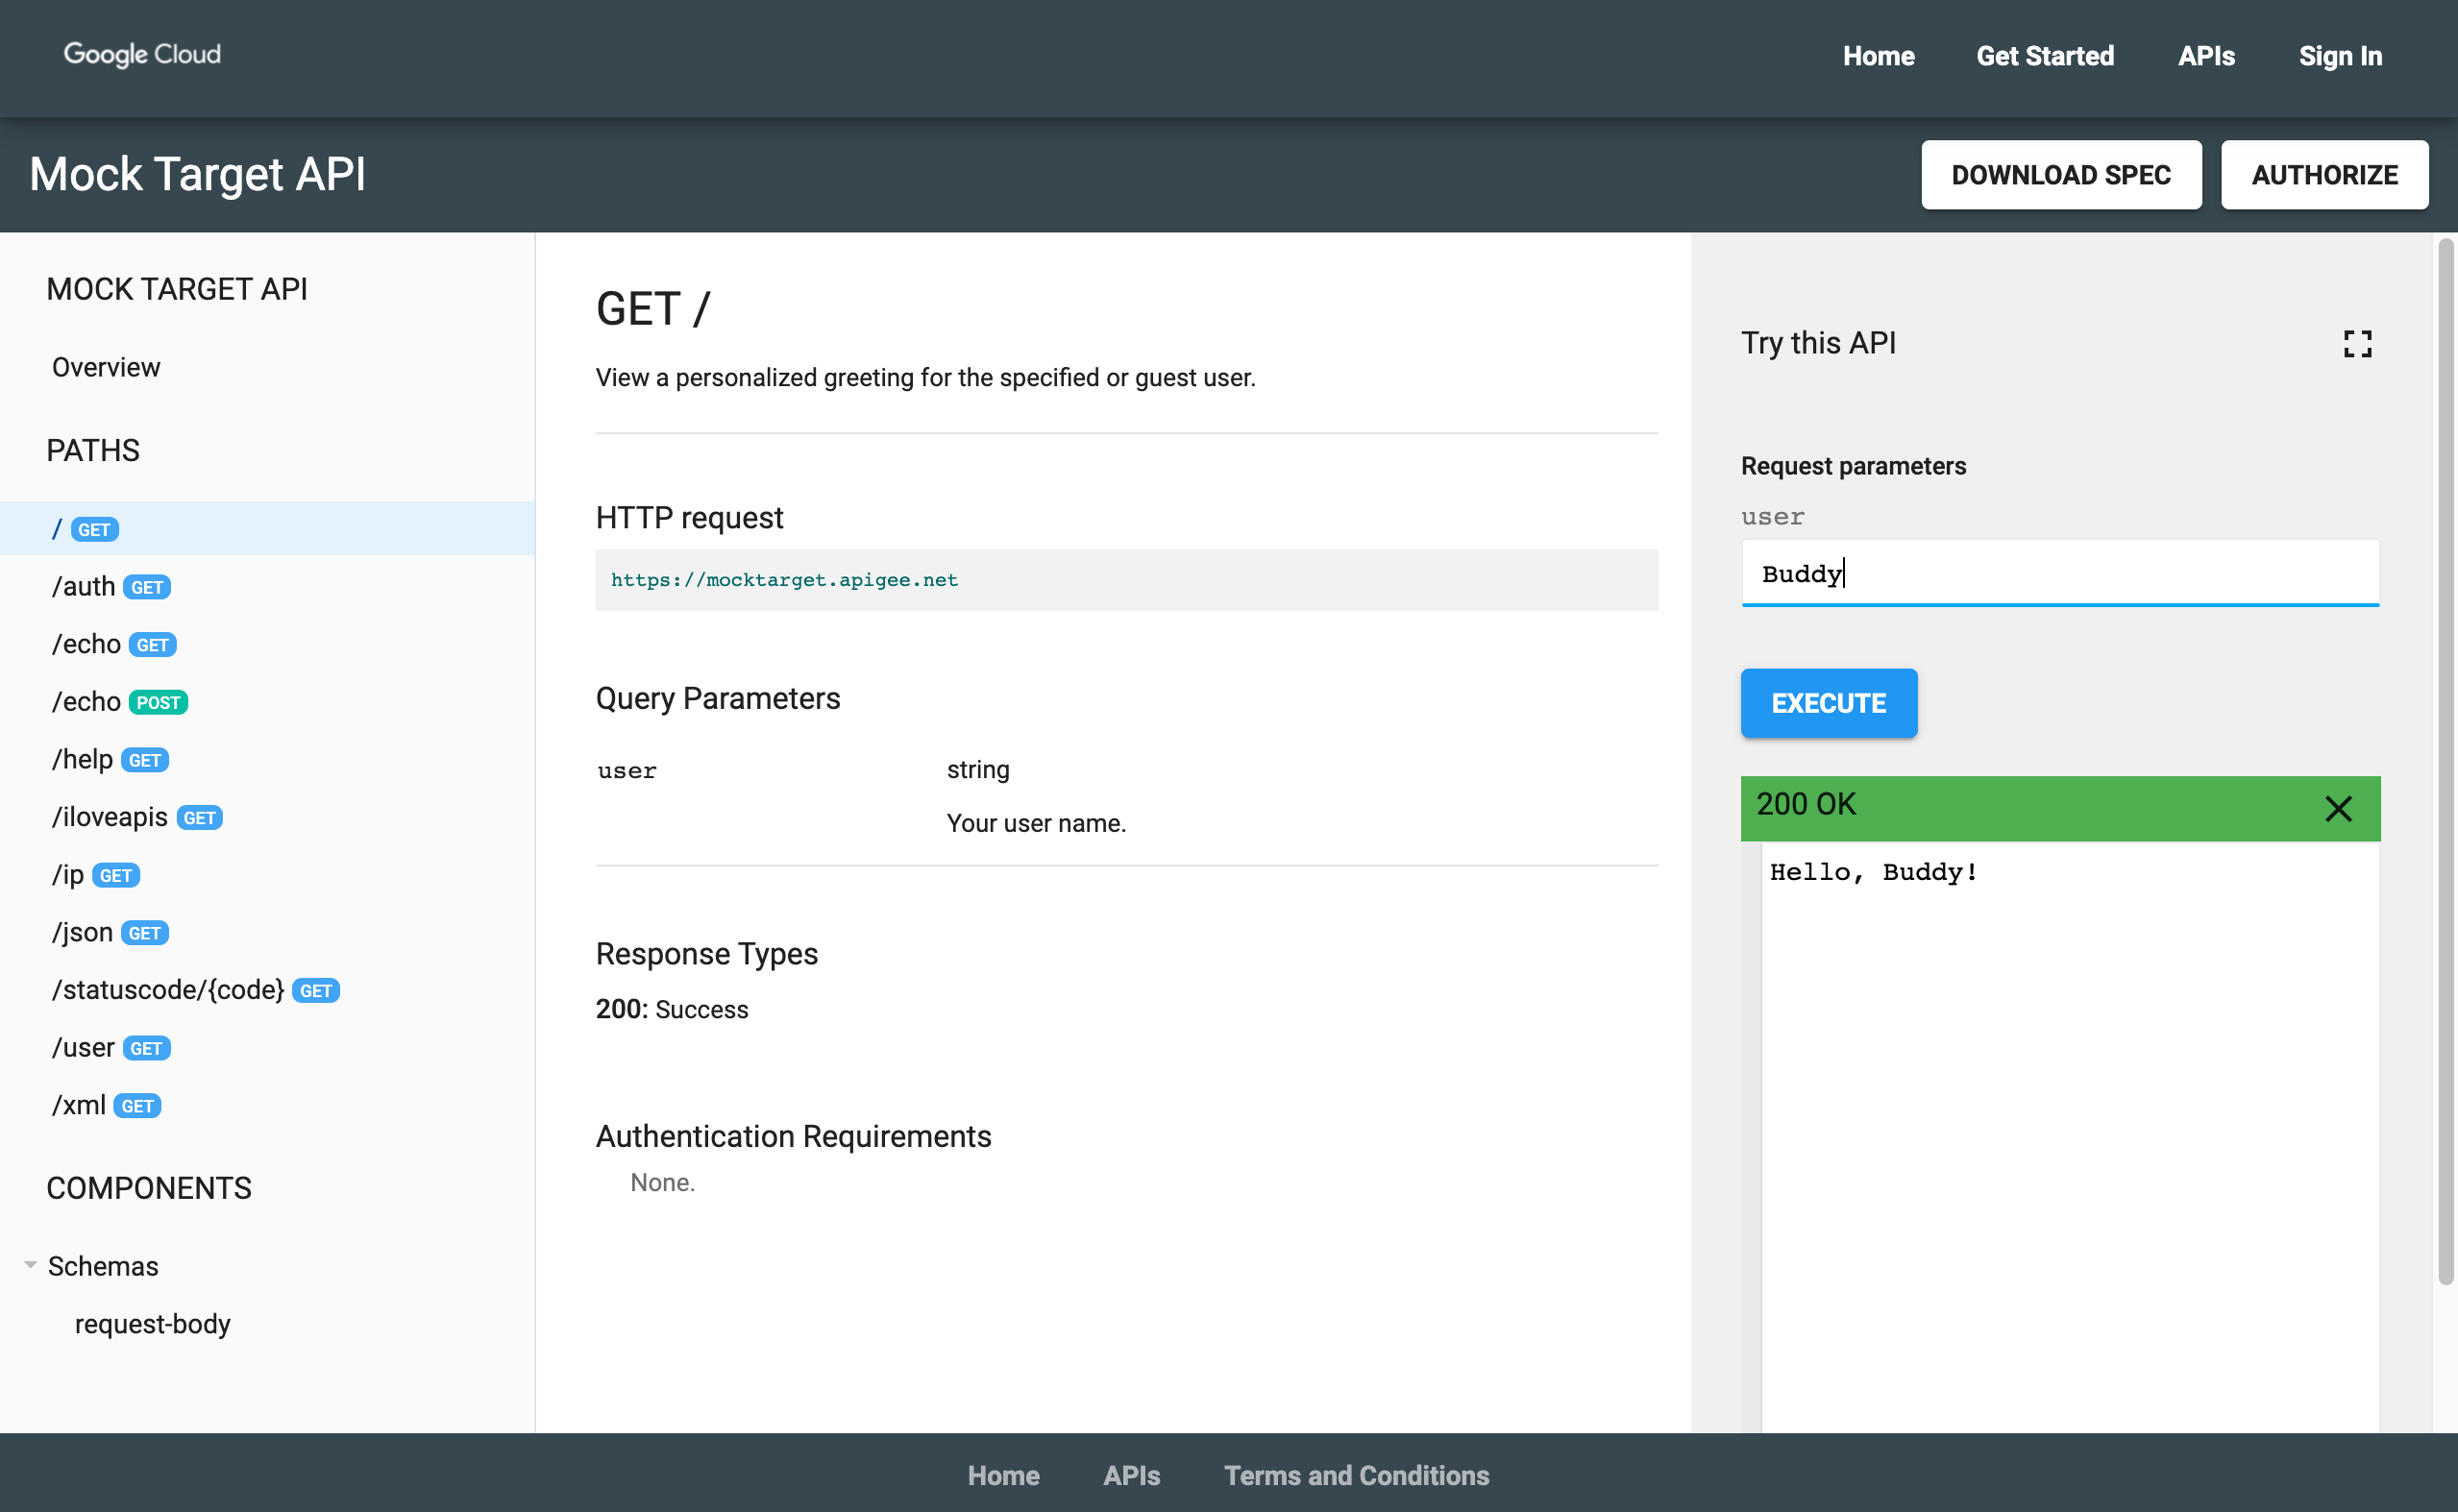
Para visualizar a documentação de referência da API:
Na IU da Apigee, clique em Live Portal para ver as alterações no portal ou atualizar o portal em tempo real se ele já estiver aberto em outra guia.
No portal em tempo real:
a. Clique em APIs na barra de navegação superior para ver a API publicada.
b. Clique no cartão Hello World para ver a documentação de referência da API.
c. Teste sua API.
[[["Fácil de entender","easyToUnderstand","thumb-up"],["Meu problema foi resolvido","solvedMyProblem","thumb-up"],["Outro","otherUp","thumb-up"]],[["Difícil de entender","hardToUnderstand","thumb-down"],["Informações incorretas ou exemplo de código","incorrectInformationOrSampleCode","thumb-down"],["Não contém as informações/amostras de que eu preciso","missingTheInformationSamplesINeed","thumb-down"],["Problema na tradução","translationIssue","thumb-down"],["Outro","otherDown","thumb-down"]],["Última atualização 2025-09-04 UTC."],[[["\u003cp\u003eThis guide walks through publishing an API to a portal using Apigee or Apigee hybrid.\u003c/p\u003e\n"],["\u003cp\u003eThe process involves creating an API proxy from an OpenAPI Specification within the Apigee UI.\u003c/p\u003e\n"],["\u003cp\u003eAn API product is generated, defining the resources to be exposed to API consumers through the portal.\u003c/p\u003e\n"],["\u003cp\u003eFinally, the API is published to the portal, enabling customers to learn about and utilize it, including generating API reference documentation.\u003c/p\u003e\n"]]],[],null,["# Step 6: Publish an API\n\n*This page\napplies to **Apigee** and **Apigee hybrid**.*\n\n\n*View [Apigee Edge](https://docs.apigee.com/api-platform/get-started/what-apigee-edge) documentation.*\n\n\u003cbr /\u003e\n\nIn this step, you'll publish an API to the portal by performing the following steps:\n\n1. [Create an API proxy from a spec](#proxy)\n2. [Create an API product](#product)\n3. [Publish the API to your portal](#publish)\n\nStep 1: Create an API Proxy from a spec\n---------------------------------------\n\nCreate an API proxy from an OpenAPI Specification that describes the API.\n\nTo create an API proxy from an OpenAPI Specification: \n\n### Cloud Console UI\n\n1. In the Apigee in Cloud console, go to the **Proxy Development \\\u003e API proxies** page.\n\n [Go to API proxies](https://console.cloud.google.com/apigee/proxies)\n2. Click **Create** .\n The **Create a proxy** wizard opens prompting you to select the type of API\n proxy to create.\n\n3. Click in the **Proxy template** box.\n\n4. Click **OpenAPI spec template, Reverse Proxy (most common)**.\n\n5. Open the following file in a browser, and then save it:\n\n ```text\n https://raw.githubusercontent.com/apigee/api-platform-samples/master/default-proxies/helloworld/openapi/mocktarget3.0.yaml\n ```\n\n \u003cbr /\u003e\n\n6. In **Step 1 OpenAPI Specs** , click **Browse**.\n\n7. Navigate to an OpenAPI Spec file you just downloaded, select it, and then\n click **Open**.\n\n8. Click **Next**.\n\n9. In **Step 2 Proxy details** , the fields are prepopulated using values from\n the OpenAPI Specification. Edit the **Description** field as follows: **API proxy for hello world.**\n\n10. Click **Next**.\n\n11. In **Step 3 Flows**, select all operations.\n\n12. Click **Next**.\n\n13. In **Step 4 Deploy**, select the environment to which you want to deploy.\n\n14. Click **OK**.\n\n15. Click **Create**.\n\n| **Note:** It may take a few moments for Apigee to deploy the new proxy.\n\nWhen the proxy is deployed, the **Status** column in the **Deployments**\nsection displays a green icon to show that the API proxy revision is deployed.\nYou can hold the pointer over the status icon to see more information about\nthe deployment.\n\n### Classic UI\n\n1. In the Apigee UI, select **Develop \\\u003e API proxies** in the left navigation bar to open the API proxies page.\n2. Click **Create New** .\n\n The Create Proxy wizard opens prompting you to select the type of API proxy to create.\n3. Under **Reverse Proxy (most common)** , click **Use OpenAPI Spec** .\n\n The **Use OpenAPI Spec** dialog displays.\n4. Copy and paste the following URL in **OpenAPI Spec URL** field on the **URL** tab:\n\n ```text\n https://raw.githubusercontent.com/apigee/api-platform-samples/master/default-proxies/helloworld/openapi/mocktarget3.0.yaml\n ```\n5. Click **Select** .\n The **Create Proxy** wizard opens and the **Proxy details** page is prepopulated using values from the OpenAPI Specification.\n\n6. Edit the **Description** field as follows: **API proxy for hello world.**\n\n7. Click **Next**.\n\n8. On the **Policies** page:\n\n - Under **Security: Authorization** , select **Pass through (no authorization)**.\n - Under **Security: Browser** , select **Add CORS headers** .\n\n9. Click **Next**.\n\n10. On the **Flows** page, make sure all operations are selected and click **Next** .\n\n11. On the **Summary** page, select the environment to which you want to deploy under **Optional Deployment**.\n\n12. Click **Create and deploy**.\n\nOn the **Summary** page, you'll see an acknowledgement that your new API proxy was created successfully\nand deployed to the selected environment.\n\nStep 2: Create an API product\n-----------------------------\n\nCreate an API product that contains the API resources that you want to expose to your API consumers.\n\nTo create an API product:\n\n1. In the Apigee in Cloud console, go to the **Distribution \\\u003e API products** page.\n\n [Go to API products](https://console.cloud.google.com/apigee/apiproducts)\n2. Click **Create** . The **Product details** page is displayed.\n Enter the **Product Details** for your API product. \n\n | **Note:** The **Display Name** and **Description** fields are displayed in the portal when you publish the API product, by default. You can edit the values in [Step 3: Publish the API to your portal](#publish).\n\n \u003cbr /\u003e\n\n \u003cbr /\u003e\n\n3. In the **Operations** section, click **Add an operation** to identify the\n operations to add to your API product.\n\n - Under **Source** , select **API proxy** and then select **Mock-Target-API** from the drop-down.\n - Under **Operation** , enter a forward slash (`/`) in the **Path** field. Ignore the other fields.\n4. Click **Save** to save the operation.\n\n5. Click **Save** to save the product.\n\nStep 3: Publish the API to your portal\n--------------------------------------\n\nPublish the API to your portal to enable your customers to learn about and use it.\n\nTo publish the API to your portal: \n\n### Cloud Console UI\n\n1. In the Apigee in Cloud console, go to the **Distribution \\\u003e Portals** page.\n\n [Go to Portals](https://console.cloud.google.com/apigee/portals)\n2. Click in the **My first portal** row to open the portal.\n\n3. Click the **APIs** tab.\n\n4. Click **+ API**.\n\n5. For **API product** select **Hello World**.\n\n6. Select **Published (listed in the catalog)** to publish the API to your portal.\n\n7. For **Display title** , enter **Hello World**.\n\n8. For **Display image** , click **Select**.\n\n9. Click **Assets**.\n\n10. Click **Preview** for `home-background.jpg`.\n\n11. Click **Select**.\n\n12. For **API documentation**, to auto-generate API reference documentation\n from a snapshot of your OpenAPI Specification:\n\n 1. Select **OpenAPI document**.\n 2. Click **Select**.\n 3. Click the **URL** tab.\n 4. Type **helloworld** in the **Spec name** field.\n 5. Copy and paste the following URL in the **URL** field: \n\n ```text\n https://raw.githubusercontent.com/apigee/api-platform-samples/master/default-proxies/helloworld/openapi/mocktarget3.0.yaml\n ```\n 6. Click **Select**.\n13. Click **Save**.\n\n### Classic UI\n\n1. In the Apigee UI, navigate to the APIs page in your portal:\n 1. Select **Publish \\\u003e Portals** in the left navigation bar.\n 2. Click in the **My first portal** row to open the portal.\n 3. Click **API Catalog** to display the APIs page.\n2. Click **+**.\n3. Select **Hello World** in the **Add an API product to the catalog** dialog and click **Next**.\n4. Under **API details** , configure the following options:\n - Select **Published (listed in the catalog)** to publish the API to your portal.\n - For **Display image** :\n 1. Click **Select image**.\n 2. Click `home-background.jpg` from the list of existing images in the **Select image** dialog.\n 3. Click **Select**.\n 4. Preview the image and click **Select**.\n - For **Categories** , enter **Get Started** and press **Enter**.\n\n Leave all other values set to their defaults.\n\n\n5. Under **API documentation** , to auto-generate API reference documentation from a snapshot of your OpenAPI Specification:\n 1. Select **OpenAPI document**.\n 2. Click **Select Document**.\n 3. Select the **Import from a URL** tab.\n 4. Enter **helloworld** in the **Spec name** field.\n 5. Copy and paste the following URL in the **URL** field and press **Enter** : \n\n ```text\n https://raw.githubusercontent.com/apigee/api-platform-samples/master/default-proxies/helloworld/openapi/mocktarget3.0.yaml\n ```\n 6. Click **Select**.\n\n\n6. Click **Save**.\n\nStep 4: View the API reference documentation\n--------------------------------------------\n\nTo view the API reference documentation:\n\n1. In the Apigee UI, click **Live Portal** to view the changes in the live portal (or refresh the live portal if it is already open in another tab).\n2. In the live portal:\n 1. Click **APIs** in the top navigation bar to the view published API.\n 2. Click the **Hello World** card to view the API reference documentation.\n 3. Give your API a try!\n\n| **Congratulations!** You have successfully completed the tutorial. Ready to learn more? Go to the [Apigee portal documentation](/apigee/docs/api-platform/publish/portal/build-integrated-portal)."]]