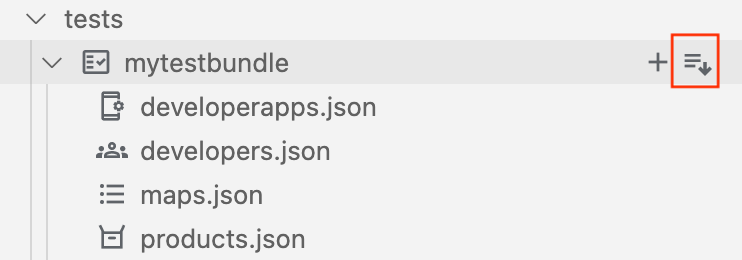
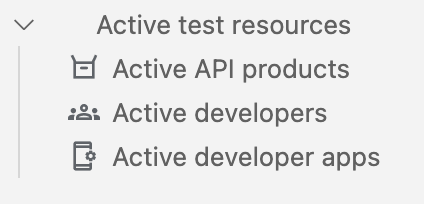
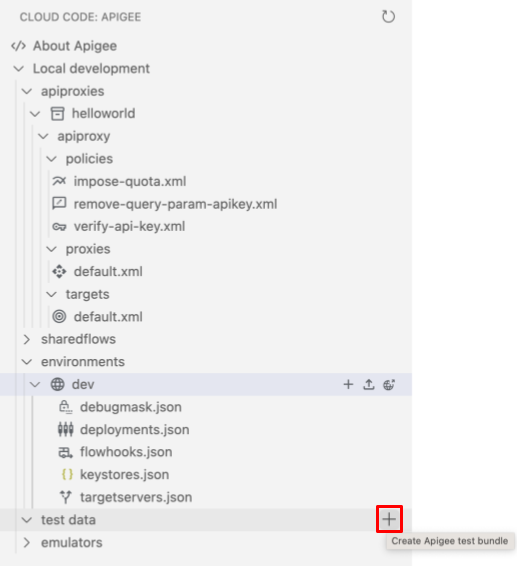
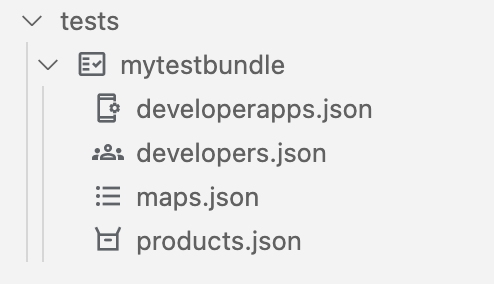
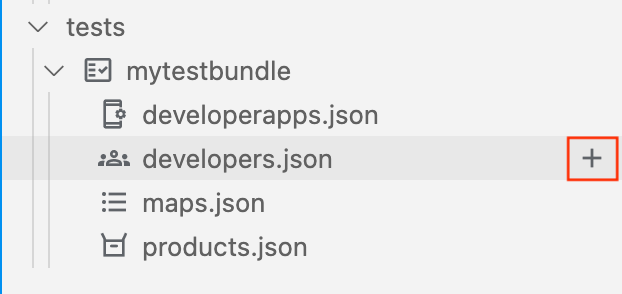
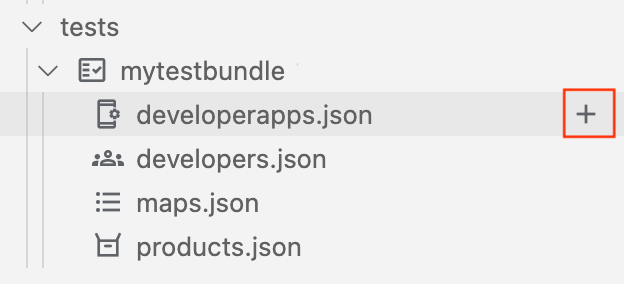
[[["易于理解","easyToUnderstand","thumb-up"],["解决了我的问题","solvedMyProblem","thumb-up"],["其他","otherUp","thumb-up"]],[["很难理解","hardToUnderstand","thumb-down"],["信息或示例代码不正确","incorrectInformationOrSampleCode","thumb-down"],["没有我需要的信息/示例","missingTheInformationSamplesINeed","thumb-down"],["翻译问题","translationIssue","thumb-down"],["其他","otherDown","thumb-down"]],["最后更新时间 (UTC):2025-08-07。"],[[["\u003cp\u003eThis guide is relevant for both Apigee and Apigee hybrid users, providing instructions on local API testing.\u003c/p\u003e\n"],["\u003cp\u003eTo successfully test an API secured with API key authentication, you must create and configure an API product, a developer, and a developer app.\u003c/p\u003e\n"],["\u003cp\u003eYou create a test bundle where you will configure your test resources, including API products, developers, and developer apps.\u003c/p\u003e\n"],["\u003cp\u003eAfter configuring the test resources, export the test bundle to the Apigee Emulator to make the active test data available, enabling you to retrieve the API key from the active developer app.\u003c/p\u003e\n"],["\u003cp\u003eOnce you have the API key, use it as a query parameter in a curl call to successfully test your API, receiving the "Hello, Guest!" response.\u003c/p\u003e\n"]]],[],null,["*This page\napplies to **Apigee** and **Apigee hybrid**.*\n\n\n*View [Apigee Edge](https://docs.apigee.com/api-platform/get-started/what-apigee-edge) documentation.*\n\n\u003cbr /\u003e\n\nTo test the deployed `helloworld` API, click the **Terminal** tab\nin Apigee in Cloud Code and enter the following curl call: \n\n```\ncurl 0:8998/helloworld\n```\n\nThe following error message is displayed:\n\nBecause you enabled API key-based authentication when creating the API proxy, you need to pass an API key using the `apikey` query parameter when calling the API.\n\nTo obtain an API key, you need to create a test bundle and configure the following test resources:\n\n- **API product** used to bundle the API and make it available to developers.\n\n- **Developer** that will create an app to access the API.\n\n- **Developer app** that will enable access to the API using an API key.\n\n| **Note:** The examples in this section use `0` for the host value and `8998` for the port value. You can configure the port values, as described in [Managing the Apigee Emulator.](/apigee/docs/api-platform/local-development/vscode/manage-apigee-emulator) If you get an error when using `0`, substitute `localhost` for the `0`: \n|\n| ```\n| curl localhost:8998/helloworld\n| ```\n\nBuild and Export test resources\n\n1. Create a test bundle:\n 1. Position your cursor over the **test data** folder and click .\n\n The **Create test bundle** wizard opens.\n 2. Enter **mytestbundle** for the test bundle name and press **Enter** .\n\n The test bundle is created.\n 3. Expand the **mytestbundle** folder to view its contents.\n\n2. Configure the API product test resource:\n 1. Position your cursor over the **products.json** file and click .\n\n The **Create API product** wizard opens.\n\n\n 2. Enter **myproduct** for the name of the API product and press **\u003ckbd\u003eEnter\u003c/kbd\u003e** to confirm and proceed.\n 3. Enter **myproduct** for the description of the API product and press **\u003ckbd\u003eEnter\u003c/kbd\u003e** to confirm and proceed.\n 4. Select **helloworld** to add the API proxy to the API product and click **OK** .\n\n The `products.json` file is opened in the editor with the new API product configured: \n\n ```\n [\n {\n \"attributes\": [\n {\n \"name\": \"sample_attribute_0\",\n \"value\": \"sample_attribute_value_0\"\n }\n ],\n \"scopes\": [],\n \"environments\": [],\n \"apiResources\": [\n \"/\",\n \"/*\",\n \"/**\"\n ],\n \"quota\": \"100\",\n \"quotaInterval\": \"1\",\n \"quotaTimeUnit\": \"minute\",\n \"name\": \"myproduct\",\n \"displayName\": \"myproduct\",\n \"proxies\": [\n \"helloworld\"\n ]\n }\n ]\n ```\n3. Configure the developer test resource:\n 1. Position your cursor over the **developers.json** file and click .\n\n\n The **Create developer** wizard opens.\n\n\n 2. Enter the following values at the prompts and press **\u003ckbd\u003eEnter\u003c/kbd\u003e** to confirm and proceed:\n - Developer email: **ahamilton@example.com**\n - Username: **ahamilton**\n - First name: **Alex**\n - Last name: **Hamilton**\n\n The `developers.json` file is opened in the editor with the new developer configured: \n\n ```\n [\n {\n \"attributes\": [\n {\n \"name\": \"sample_attribute_0\",\n \"value\": \"sample_attribute_value_0\"\n }\n ],\n \"email\": \"ahamilton@example.com\",\n \"userName\": \"ahamilton\",\n \"firstName\": \"Alex\",\n \"lastName\": \"Hamilton\"\n }\n ]\n ```\n4. Configure the developer app test resource:\n 1. Position your cursor over the **developerapps.json** file and click .\n\n\n The **Create developer app** wizard opens.\n\n\n 2. Select **ahamilton@example.com** as the owner of the app.\n 3. Enter the following values at the next set of prompts and press **Enter** to confirm and proceed:\n - App name: **myapp**\n - Description: **myapp**\n - Callback URL: **Leave blank**\n - Select **myproduct** to add it to the app and click **OK**.\n - Select **never** for the expiry value.\n\n The `developerapps.json` file is opened in the editor with the new app configured: \n\n ```\n [\n {\n \"attributes\": [\n {\n \"name\": \"sample_attribute_0\",\n \"value\": \"sample_attribute_value_0\"\n }\n ],\n \"developerEmail\": \"ahamilton@example.com\",\n \"name\": \"myapp\",\n \"displayName\": \"myapp\",\n \"callbackUrl\": \"\",\n \"apiProducts\": [\n \"myproduct\"\n ],\n \"expiryType\": \"never\"\n }\n ]\n ```\n5. Export the test resources to the Apigee Emulator. Position the cursor over the **mytestbundle** test bundle and click .\n\n\n | **Note:** If multiple [containers for the Apigee Emulator](/apigee/docs/api-platform/local-development/vscode/manage-apigee-emulator#add-container) are running, you are prompted to select the container to which you want to deploy the environment.\n\n The active test resources appears in the Apigee Emulators section, as shown in the following figure.\n\nObtain the API key\n\nObtain the API key credentials for your developer app:\n\n1. In the **emulators** section, under **Active test data** , click **Active developer apps** .\n\n The active developer apps configuration file is opened in the editor. The file contains credentials for `myproduct`, as highlighted in the following figure.\n2. Copy the `consumerKey` value (without the quotes) for the `myproduct` API product.\n\n\u003cbr /\u003e\n\nTest your API\n\nTest your API with the API key:\n\n1. Pass the API key in your curl call using the `apikey` query parameter, as follows: \n\n ```\n curl 0:8998/helloworld?apikey=\u003cvar translate=\"no\"\u003eAPI_KEY\u003c/var\u003e\n ```\n\n\n The following response is returned: \n\n ```\n Hello, Guest!\n ```\n\n\u003cbr /\u003e\n\n**Congratulations!** You've successfully run an API in your local environment.\n\nIn the next step, you'll learn how to change the target endpoint.\n\n\n[1](/apigee/docs/api-platform/local-development/vscode/tutorial-create-workspace)\n\n\n[2](/apigee/docs/api-platform/local-development/vscode/tutorial-create-proxy)\n\n\n[3](/apigee/docs/api-platform/local-development/vscode/tutorial-deploy)\n\n\n[4](/apigee/docs/api-platform/local-development/vscode/tutorial-test)\n\n\n[(NEXT) Step 5: Change the target endpoint](/apigee/docs/api-platform/local-development/vscode/tutorial-change-target-endpoint)\n\n\n[6](/apigee/docs/api-platform/local-development/vscode/tutorial-attach-policy)\n\n\n[7](/apigee/docs/api-platform/local-development/vscode/tutorial-deploy-apigee)\n\n\n[8](/apigee/docs/api-platform/local-development/vscode/tutorial-promote)\n\n\u003cbr /\u003e"]]


 。
。


 。
。