Esta página aplica-se ao Apigee e ao Apigee Hybrid.
Veja a documentação do
Apigee Edge.

Configure e implemente um ambiente que inclua o proxy da API helloworld.
- Crie um ambiente:
- Posicione o cursor sobre a pasta environments e clique em
 .
.

O assistente Criar ambiente é aberto.
- Introduza dev para o nome do ambiente e prima Enter.
O ambiente é criado.
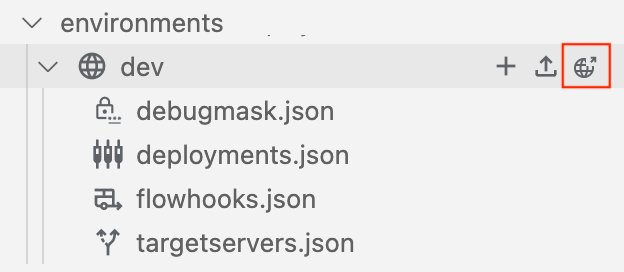
- Expanda a pasta do ambiente dev para ver o respetivo conteúdo.

Quando cria um ambiente, é incluído um conjunto de ficheiros de configuração por predefinição na pasta do ambiente
devpara configurar a implementação e quaisquer máscaras de depuração, hooks de fluxo ou servidores de destino necessários.
- Posicione o cursor sobre a pasta environments e clique em
- Configure os detalhes da implementação do proxy de API
helloworldno ambiente:- Posicione o cursor sobre o ficheiro deployments.json e clique em
 .
.

É aberto o assistente Implementações.
- Selecione o proxy da API helloworld para o adicionar à implementação e clique em OK.
O ficheiro
deployments.jsoné aberto no editor. O ficheiro foi atualizado para incluir o proxy da APIhelloworldna matriz de implementaçãoproxies:{ "proxies": [ { "name": "helloworld" } ], "sharedflows": [] }
- Posicione o cursor sobre o ficheiro deployments.json e clique em
- Implemente o ambiente dev:
- Posicione o cursor sobre a pasta do ambiente dev na secção do Apigee e clique em
 .
.
O ambiente
devé implementado e o separador Output mostra uma mensagem de êxito.As informações da aplicação implementada são apresentadas na secção emuladores:
helloworld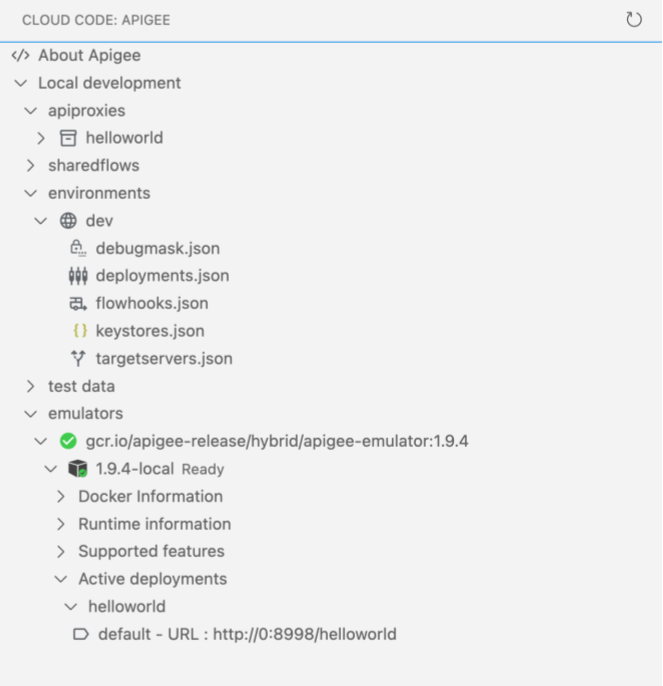
- Posicione o cursor sobre a pasta do ambiente dev na secção do Apigee e clique em
Parabéns! Implementou a sua primeira aplicação de proxy de API. No passo seguinte, vai testar o proxy da API através do curl.
1 2 3 (NEXT) Passo 4: teste a sua API 5 6 7 8