Esta página se aplica à Apigee, mas não à Apigee híbrida.
Confira a documentação da
Apigee Edge.

Um proxy de API precisa ser implantado antes que os desenvolvedores possam acessar e usar.
Apigee no console do Cloud
- No console do Google Cloud , acesse a página Apigee > Desenvolvimento de proxy > Proxies de API.
- Verifique se o mesmo projeto Google Cloud em que você criou o proxy de API está selecionado no menu suspenso na parte de cima da página.
- Selecione myproxy na lista de proxies.
- Clique em Implantar para exibir a caixa de diálogo Implantar e insira as seguintes informações:
- Revisão: selecione o número da revisão do proxy que você quer implantar. Se você estiver fazendo este tutorial do zero, haverá apenas uma revisão para escolher.
- Ambiente: selecione o ambiente em que você quer implantar o proxy. Um ambiente é um contexto de execução de ambiente para os proxies de API em uma organização da Apigee. Você precisa implantar um proxy de API em um ambiente antes de poder ser acessado.
- Conta de serviço (opcional): uma conta de serviço para o proxy. A conta de serviço representa a identidade do proxy implantado e determina quais permissões ele tem. Esse é um recurso avançado, mas você pode ignorá-lo para este tutorial.
- Clique em Implantar.
Quando o proxy é implantado, a coluna Status na seção Implantações exibe um ícone verde para mostrar que a revisão do proxy de API está implantada. Passe o cursor sobre o ícone de status para ver mais informações sobre a implantação.
IU clássica da Apigee
- Abra a interface da Apigee em um navegador.
- Na IU híbrida, selecione Desenvolver > Proxies de API.
Verifique se o ambiente "teste" está selecionado.
A IU exibe o novo proxy na lista de proxies:

Clique no proxy "myproxy".
A IU exibe a guia Visão geral dos proxies da API desse proxy no Editor de proxy.
Em Implantações, a coluna Revisão mostra "Não implantado".
- Na coluna Revisão, expanda o seletor suspenso para escolher a revisão
a ser implantada.
A lista suspensa exibe apenas "1" e "Cancelar implantação":
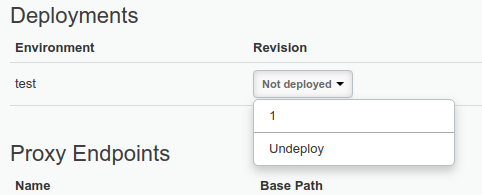
Selecione "1", a revisão que você quer implantar, na lista suspensa.
A IU solicita que você confirme a implantação:
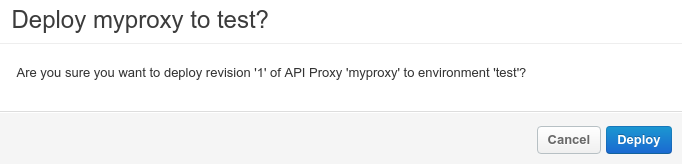
- Clique em Implantar.
A Apigee inicia o processo de implantação da revisão 1 do novo proxy.
A próxima etapa explica como chamar o proxy de API que você acabou de implantar.
1 2 (PRÓXIMA) Etapa 3: testar o proxy de API 4 5