이 페이지는 Apigee 및 Apigee Hybrid에 적용됩니다.
Apigee Edge 문서 보기

Apigee API 프록시에는 프록시 엔드포인트와 대상 엔드포인트라는 두 개의 엔드포인트가 있습니다. 프록시 엔드포인트는 클라이언트 인터페이스입니다. 클라이언트로부터 요청을 수신하고 클라이언트에 응답을 다시 보냅니다. 대상 엔드포인트는 API 프로듀서 인터페이스입니다. Apigee에서 백엔드 서비스나 API와 같은 API 프로듀서에게 통신합니다. 엔드포인트에 대해 자세히 알아보려면 API 프록시란 무엇인가요?를 참고하세요.
이 단계에서는 API 프록시의 대상 엔드포인트를 테스트 XML 데이터를 반환하는 리소스인 https://mocktarget.apigee.net/xml로 변경합니다. 변경한 후 수정된 API 프록시를 재배포하고 테스트합니다.
Cloud 콘솔의 Apigee
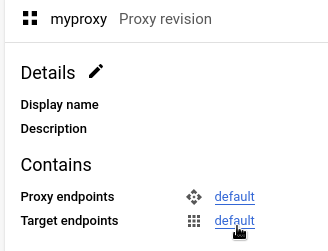
Google Cloud 콘솔에서 프록시 개발 > API 프록시 페이지로 이동합니다.
- API 프록시를 만든 Google Cloud 프로젝트가 페이지 상단의 드롭다운에서 선택되어 있는지 확인합니다.
- 프록시 테이블에서 1단계: API 프록시 만들기에서 만든 프록시 myproxy를 선택합니다.
- 개발 탭을 클릭합니다.
개발 뷰 살펴보기
개발 뷰의 왼쪽 창에서 다음을 수행할 수 있습니다.
- 프록시 검색 필드에서 프록시의 텍스트를 검색합니다.
- 새 정책을 추가합니다.
- 프록시 및 대상 엔드포인트를 추가합니다.
- 다른 리소스를 추가합니다.
왼쪽 창을 표시하지 않으려면 닫기 버튼  을 클릭하여 접을 수 있습니다.
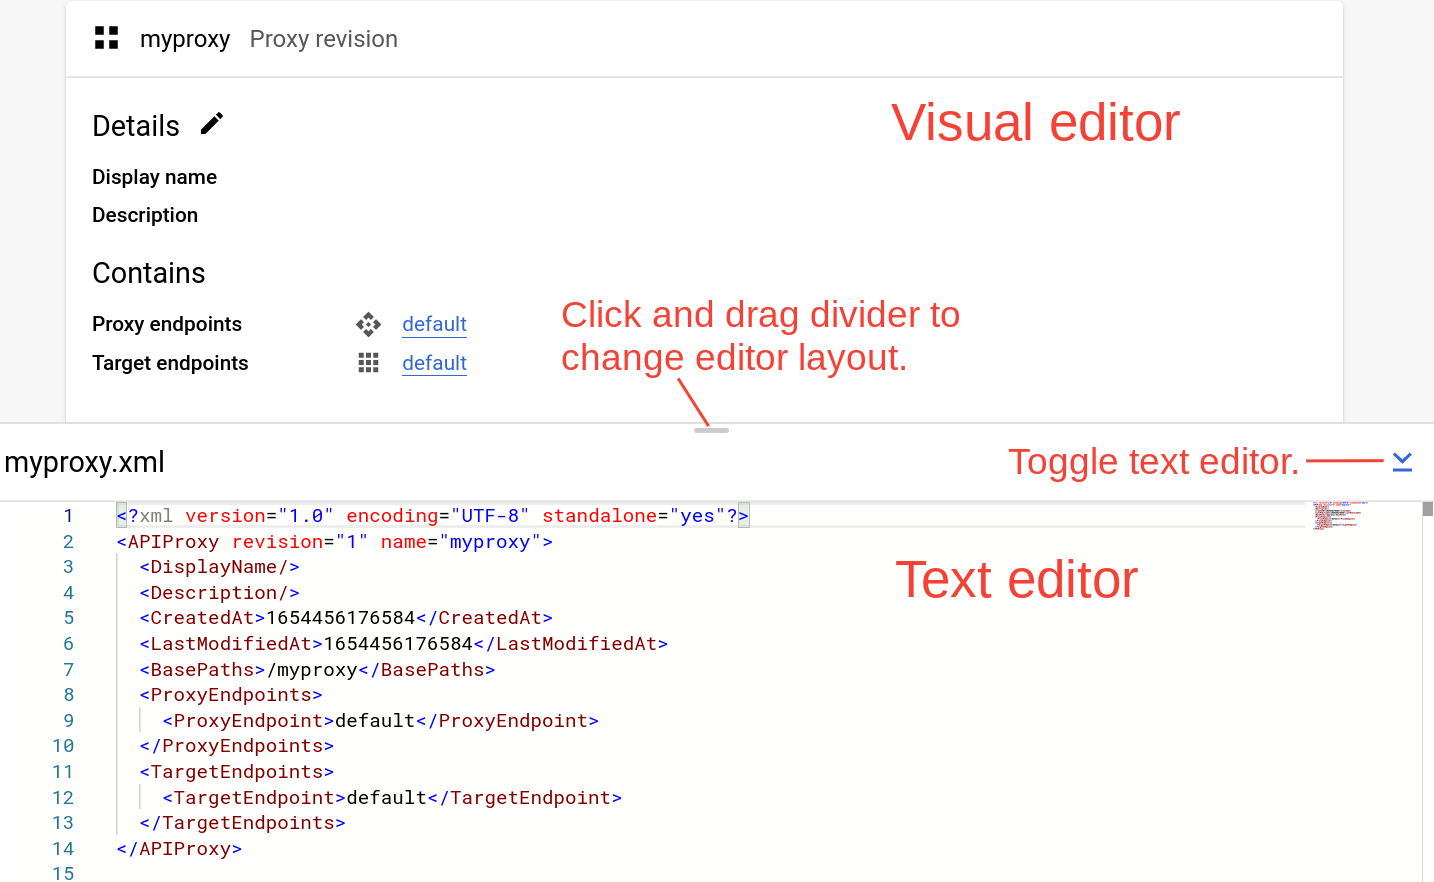
개발 뷰의 오른쪽 창에는 프록시의 비주얼 및 텍스트 편집기가 표시됩니다.
- 비주얼 편집기에서는 요청 및 응답 흐름의 그래픽 뷰를 제공합니다.
- 텍스트 편집기를 사용하면 프록시 또는 대상의 XML을 수정할 수 있습니다.
참고:
- 두 편집기의 구분선을 클릭하고 드래그하여 위 또는 아래로 편집기의 표시 영역을 확장할 수 있습니다.
- 텍스트 편집기의 오른쪽에 있는 전환 버튼을 클릭하여 텍스트 편집기 창을 닫고 시각적 편집기의 표시 영역을 확장할 수 있습니다. 전환 버튼을 다시 클릭하여 텍스트 편집기 창을 다시 엽니다.
대상 엔드포인트 변경
프록시의 대상 엔드포인트를 변경하려면 다음 단계를 따르세요.
- 프록시 버전 창에서 대상 엔드포인트 > 기본값을 선택합니다.
그러면 비주얼 편집기에 대상 엔드포인트의 다이어그램이 표시됩니다.
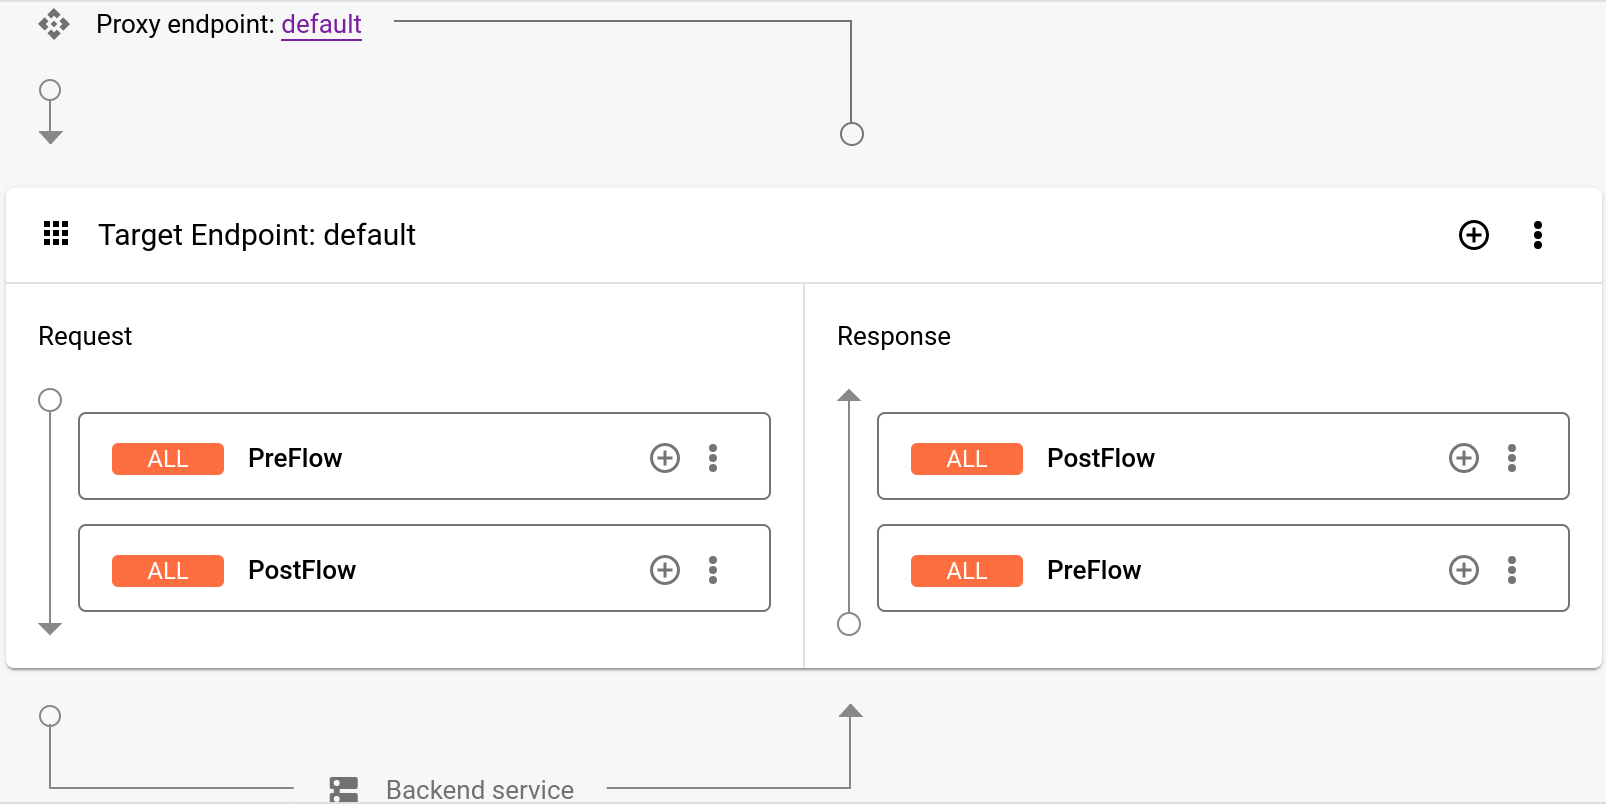
비주얼 편집기 아래의 텍스트 편집기에 대상 엔드포인트의 XML 코드가 표시됩니다.
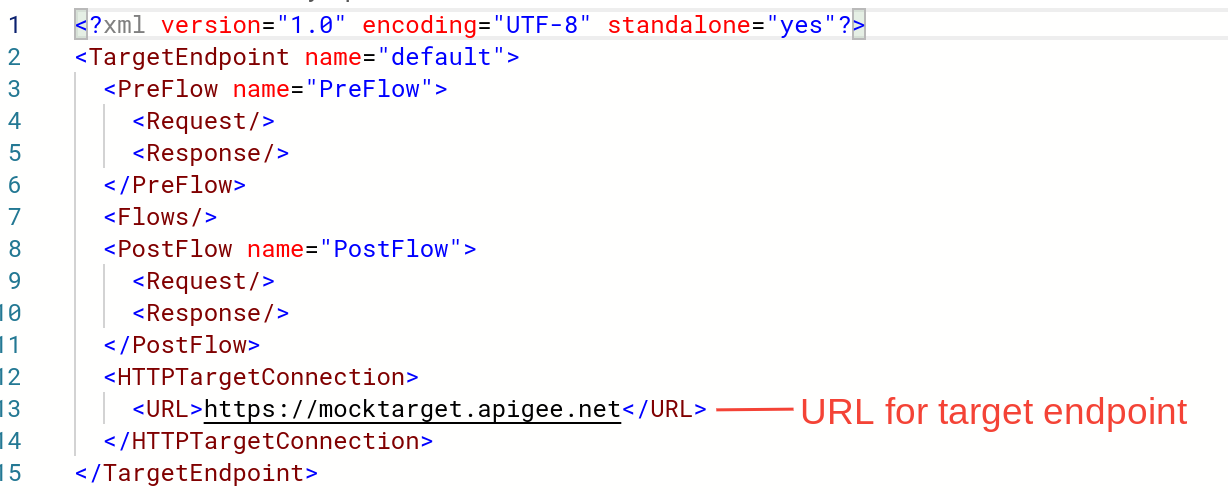
텍스트 편집기에서
<URL>을https://mocktarget.apigee.net/xml로 변경합니다. 기존 URL에 '/xml'을 추가합니다.새 URL이 아래에 표시됩니다.
...
<HTTPTargetConnection>
  <Properties/>
  <URL>https://mocktarget.apigee.net/xml</URL>
</HTTPTargetConnection>
...
- 프록시 편집기 오른쪽 상단의 저장 옆에 있는 화살표를 클릭하고 새 버전으로 저장을 선택합니다.
- 변경사항을 배포하려면 배포를 클릭합니다.
- 배포 대화상자에서 배포할 버전과 환경을 선택하고 배포를 클릭합니다.
기본 Apigee UI
프록시의 대상 엔드포인트를 변경하려면 다음 안내를 따르세요.
- Apigee UI에 로그인합니다.
- 개발 > API 프록시를 선택합니다.
- 목록에서 프록시를 선택하여 API 프록시 세부정보를 표시합니다. 목록에 프록시가 표시되지 않으면 조직 간 전환에 설명된 대로 올바른 조직을 선택했는지 확인하세요.
개발 탭을 클릭합니다.

그러면 API 프록시 편집기로 이동합니다. 프록시 편집기에서는 API 프록시 구조를 보고 흐름을 구성할 수 있습니다. 흐름은 API 프록시 요청이 Apigee 플랫폼을 통해 거치는 단계별 경로입니다. 다른 튜토리얼에서는 흐름 개념을 다룹니다.
- 탐색기 창에서 대상 엔드포인트 > 기본값 > PreFlow를 선택합니다.
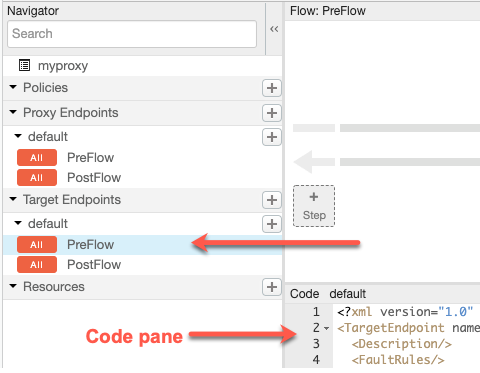
Apigee는 코드 창에 엔드포인트 설정을 표시합니다.
<TargetEndpoint name="default">
  <Description/>
  <FaultRules/>
  <PreFlow name="PreFlow">
    <Request/>
    <Response/>
  </PreFlow>
  <PostFlow name="PostFlow">
    <Request/>
    <Response/>
  </PostFlow>
  <Flows/>
  <HTTPTargetConnection>
    <Properties/>
    <URL>https://mocktarget.apigee.net</URL>
  </HTTPTargetConnection>
</TargetEndpoint>
대상 엔드포인트는
<HTTPTargetConnection>요소에 의해 정의됩니다. URL을
"https://mocktarget.apigee.net/xml"로 변경합니다. 기존 URL에 '/xml'을 추가합니다.새 URL이 응답 본문에 XML의 작은 블록을 반환합니다.
이제 엔드포인트 구성이 다음과 같이 표시됩니다.
...
<HTTPTargetConnection>
  <Properties/>
  <URL>https://mocktarget.apigee.net/xml</URL>
</HTTPTargetConnection>
...
프록시 구성에 대한 변경사항을 저장하려면 저장 버튼을 클릭합니다.
Apigee는 변경사항을 새 프록시 버전에 저장합니다.
- 새 버전을 배포하려면 배포 대상: 테스트를 선택하고 배포 2를 클릭합니다.
- 확인 대화상자에서 배포를 클릭합니다.
오류가 발생한 경우 Apigee는 변경사항을 저장하지만 프록시는 배포하지 않습니다. 오류가 발생하면 다음 안내를 따르세요.
- 프록시 구성을 수정합니다. Apigee는 팝업으로 구문 안내를 제공할 수 있습니다.
- Apigee가 자동으로 배포하지 않는 경우 배포 > 테스트를 클릭하여
test환경에 변경사항을 수동으로 배포합니다.
배포 드롭다운 옆에 있는 배포 버전 상태를 확인하여 프록시 버전이 성공적으로 배포되었는지 확인할 수 있습니다. 예를 들면 다음과 같습니다.

프록시 테스트
API 프록시 버전을 테스트하려면 API 프록시 호출에서와 같이 프록시를 호출합니다.
이번에는 mocktarget 엔드포인트가 응답의 본문에 XML을 반환합니다.
<?xml version="1.0" encoding="UTF-8"?>
<root>
  <city>San Jose</city>
  <firstName>John</firstName>
  <lastName>Doe</lastName>
  <state>CA</state>
</root>
이제 API 프록시가 XML 데이터를 반환하였으므로 다음 단계에서는 XML을 JSON으로 변환하는 정책을 추가합니다.
1 2 3 4 (다음) 5단계: 정책 추가