Diese Seite gilt für Apigee und Apigee Hybrid.
Apigee Edge-Dokumentation aufrufen

Ein Apigee API-Proxy hat zwei Endpunkte: einen Proxy-Endpunkt und einen Zielendpunkt. Der Proxy-Endpunkt ist die Clientschnittstelle. Er empfängt Anfragen von Clients und sendet Antworten an Clients zurück. Der Zielendpunkt ist die API-Erstellerschnittstelle. Sie kommuniziert von Apigee mit einem API-Ersteller, z. B. einem Backend-Dienst oder einer API. Weitere Informationen zu Endpunkten finden Sie unter Was ist ein API-Proxy?
In diesem Schritt ändern Sie den Zielendpunkt des API-Proxy in https://mocktarget.apigee.net/xml, eine Ressource, die XML-Testdaten zurückgibt. Nachdem Sie die Änderung vorgenommen haben, stellen Sie den überarbeiteten API-Proxy noch einmal bereit und testen ihn.
Apigee in der Cloud Console
Rufen Sie in der Google Cloud Console die Seite Proxy-Entwicklung > API-Proxys auf.
- Achten Sie darauf, dass in der Drop-down-Liste oben auf der Seite dasselbe Google Cloud-Projekt ausgewählt ist, in dem Sie den API-Proxy erstellt haben.
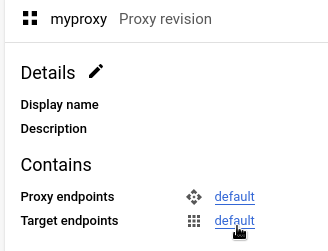
- Wählen Sie in der Proxytabelle den Proxy myproxy aus, den Sie in Schritt 1: API-Proxy erstellen erstellt haben.
- Klicken Sie auf den Tab Entwickeln.
Entwickeln-Ansicht
Im linken Bereich der Ansicht Entwickeln haben Sie folgende Möglichkeiten:
- Im Feld Such-Proxy nach Text im Proxy suchen.
- Neue Richtlinien hinzufügen.
- Proxy- und Zielendpunkte hinzufügen.
- Weitere Ressourcen hinzufügen.
Wenn Sie den linken Bereich nicht sehen möchten, können Sie ihn minimieren, indem Sie auf die Schaltfläche zum Schließen  klicken.
Im rechten Bereich der Ansicht Entwickeln werden der visuelle Editor und der Texteditor für den Proxy angezeigt:
- Der visuelle Editor bietet eine grafische Ansicht des Anfrage- und Antwortablaufs.
- Mit dem Texteditor können Sie die XML-Datei für den Proxy oder das Ziel bearbeiten.

Hinweise:
- Sie können auf die Trennzeichen zwischen den beiden Editoren klicken und sie nach oben oder unten ziehen, um den Anzeigebereich eines der Editoren zu erweitern.
- Sie können den Anzeigebereich des visuellen Editors erweitern, indem Sie auf die Ein/Aus-Schaltfläche auf der rechten Seite des Texteditors klicken, um den Bereich des Texteditors zu schließen. Klicken Sie noch einmal auf die Ein/Aus-Schaltfläche, um den Bereich mit dem Texteditor wieder zu öffnen.
Zielendpunkt ändern
So ändern Sie den Zielendpunkt des Proxys:
- Wählen Sie im Bereich Proxy-RevisionZielendpunkte > Standard aus.
Dadurch wird ein Diagramm des Zielendpunkts im visuellen Editor angezeigt:
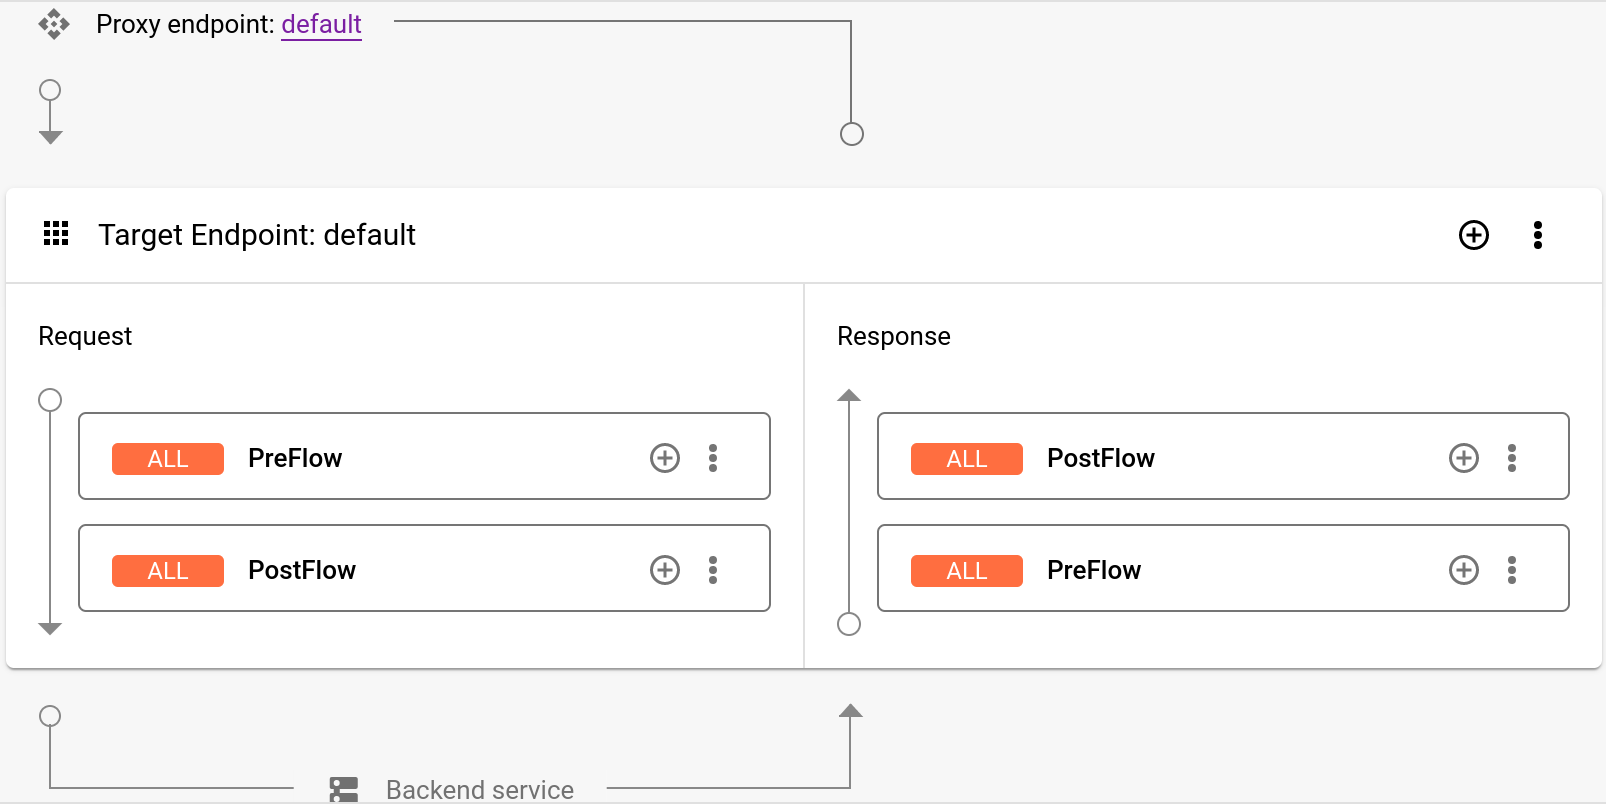
Unter dem visuellen Editor wird der XML-Code für den Zielendpunkt im Texteditor angezeigt:
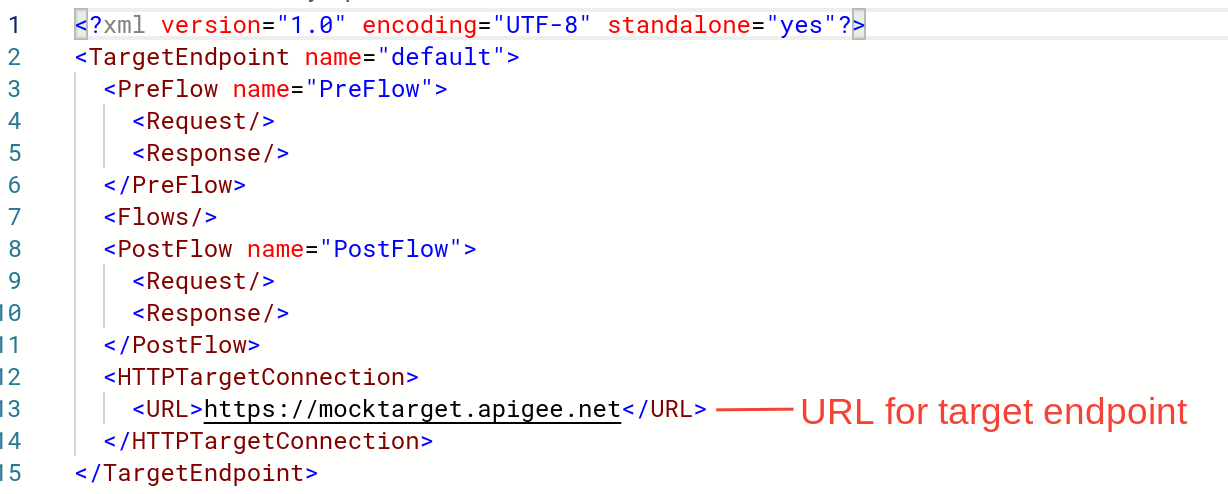
Ändern Sie im Texteditor
<URL>inhttps://mocktarget.apigee.net/xml. (Hängen Sie „/xml“ an die bestehende URL an.)Die neue URL ist unten zu sehen:
...
<HTTPTargetConnection>
  <Properties/>
  <URL>https://mocktarget.apigee.net/xml</URL>
</HTTPTargetConnection>
...
- Klicken Sie oben rechts im Proxy-Editor auf den Pfeil neben Speichern und wählen Sie Als neue Überarbeitung speichern aus.
- Klicken Sie auf Bereitstellen, um die Änderungen bereitzustellen.
- Wählen Sie im Dialogfeld Bereitstellen die Überarbeitung und Umgebung aus, in der Sie die Bereitstellung vornehmen möchten, und klicken Sie auf Bereitstellen.
Klassische Apigee-UI
So ändern Sie den Zielendpunkt Ihres Proxys:
- Melden Sie sich bei der Apigee-UI an.
- Wählen Sie Entwickeln > API-Proxies.
- Wählen Sie Ihren Proxy aus der Liste aus, um die API-Proxydetails anzuzeigen. Wenn Ihr Proxy nicht in der Liste angezeigt wird, prüfen Sie, ob Sie die richtige Organisation ausgewählt haben. Weitere Informationen hierzu finden Sie unter Zwischen Organisationen wechseln.
Klicken Sie auf den Tab Entwickeln:

Dadurch gelangen Sie zum API-Proxy-Editor. Mit dem Proxy-Editor können Sie die Struktur Ihres API-Proxys sehen und seinen Ablauf konfigurieren. Ein Ablauf ist der Schritt, den eine API-Proxyanfrage über die Apigee-Plattform durchläuft. In anderen Anleitungen wird das Konzept von Flows behandelt.
- Wählen Sie im Bereich Navigator die Option Zielendpunkte > Standard > PreFlow aus.
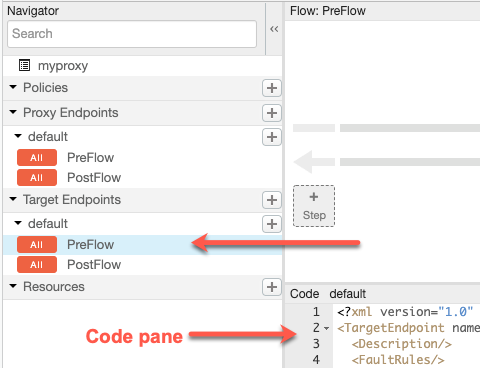
Apigee zeigt die Endpunkteinstellungen im Bereich Code an:
<TargetEndpoint name="default">
  <Description/>
  <FaultRules/>
  <PreFlow name="PreFlow">
    <Request/>
    <Response/>
  </PreFlow>
  <PostFlow name="PostFlow">
    <Request/>
    <Response/>
  </PostFlow>
  <Flows/>
  <HTTPTargetConnection>
    <Properties/>
    <URL>https://mocktarget.apigee.net</URL>
  </HTTPTargetConnection>
</TargetEndpoint>
Der Zielendpunkt wird durch das Element
<HTTPTargetConnection>definiert. Ändern Sie die URL in
"https://mocktarget.apigee.net/xml". (Hängen Sie "/xml" an die bestehende URL an.)Die neue URL gibt einen kleinen XML-Block im Textkörper der Antwort zurück.
Die Endpunktkonfiguration sollte nun so aussehen:
...
<HTTPTargetConnection>
  <Properties/>
  <URL>https://mocktarget.apigee.net/xml</URL>
</HTTPTargetConnection>
...
Klicken Sie auf die Schaltfläche Speichern, um die Änderungen an der Proxykonfiguration zu speichern.
Apigee speichert Ihre Änderungen in einer neuen Proxy-Überarbeitung.
- Wählen Sie zum Bereitstellen der neuen Überarbeitung Folgendes aus: Bereitstellen für: Test und klicken Sie auf Bereitstellung 2.
- Klicken Sie im Bestätigungsdialogfeld auf Bereitstellen.
Wenn ein Fehler auftritt, speichert Apigee Ihre Änderungen, stellt den Proxy jedoch nicht bereit. Bei einem Fehler:
- Beheben Sie die Probleme mit der Proxykonfiguration. Apigee stellt Syntaxinformationen in einem Pop-up-Fenster zur Verfügung.
- Stellen Sie Ihre Änderungen manuell in der Umgebung
testbereit. Klicken Sie dazu auf Bereitstellung > Test, wenn Apigee sie nicht automatisch bereitstellt.
Sie können prüfen, ob die Proxyüberarbeitung erfolgreich bereitgestellt wurde, indem Sie den Status der Bereitstellungsüberarbeitung neben dem Drop-down-Menü "Bereitstellen" aufrufen. Beispiel:

Proxy testen
Um die API-Proxy-Überarbeitung zu testen, rufen Sie den Proxy wie im Abschnitt API-Proxy aufrufen beschrieben auf.
Dieses Mal gibt der Endpunkt des simulierten Zieldiensts XML im Text der Antwort zurück:
<?xml version="1.0" encoding="UTF-8"?>
<root>
  <city>San Jose</city>
  <firstName>John</firstName>
  <lastName>Doe</lastName>
  <state>CA</state>
</root>
Da der API-Proxy nun XML-Daten zurückgibt, fügen Sie im nächsten Schritt eine Richtlinie hinzu, die XML in JSON konvertiert.
1 2 3 4 (WEITER) Schritt 5: Richtlinie hinzufügen