Questa pagina si applica ad Apigee e Apigee hybrid.
Visualizza la documentazione di
Apigee Edge.

Configura la navigazione per collegare le pagine che hai sviluppato al tuo portale, come descritto nelle sezioni seguenti.
Esplorare la pagina Menu
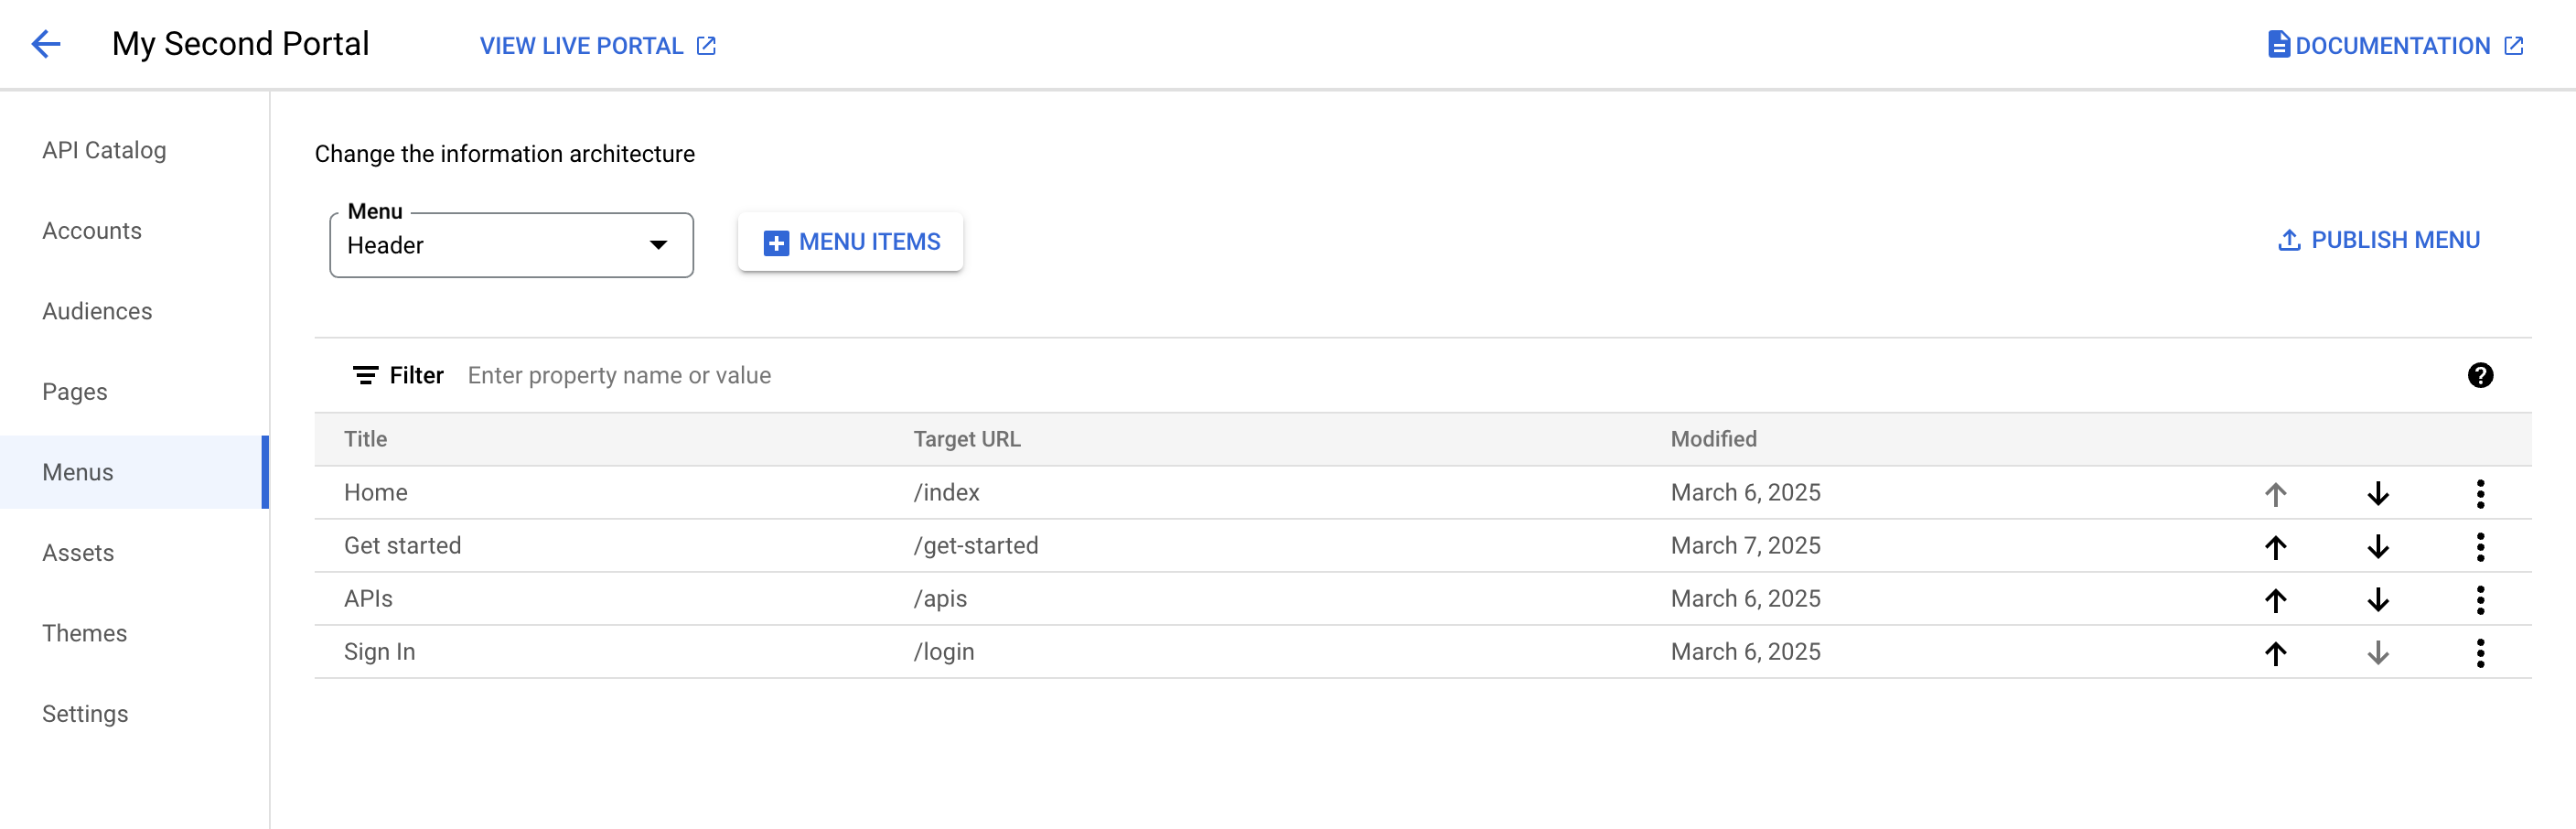
Configura e pubblica i menu di navigazione nel tuo portale utilizzando l'editor del menu di navigazione nella pagina Menu.
Per accedere alla pagina Menu:
UI di Cloud Console
- Nella console Apigee in Cloud, vai alla pagina Distribuzione > Portali.
Vai a Portali - Fai clic sul portale.
Fai clic su Menu.
UI classica
- Seleziona Pubblica > Portali nella barra di navigazione laterale, seleziona il portale e fai clic su Menu nella pagina di destinazione.
Quando modifichi il portale, seleziona Menu nel menu a discesa della barra di navigazione in alto.
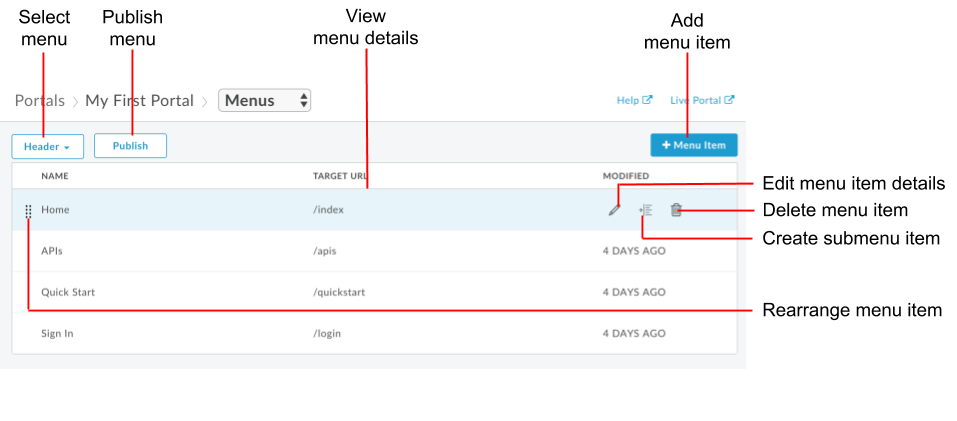
L'editor del menu di navigazione ti consente di:
- Seleziona il menu da modificare (intestazione o piè di pagina) e visualizza i dettagli della voce di menu.
- Aggiungere elementi a un menu di navigazione
- Creare sottomenu
- Modificare o eliminare una voce del menu
- Riordinare le voci di menu
- Pubblicare un menu
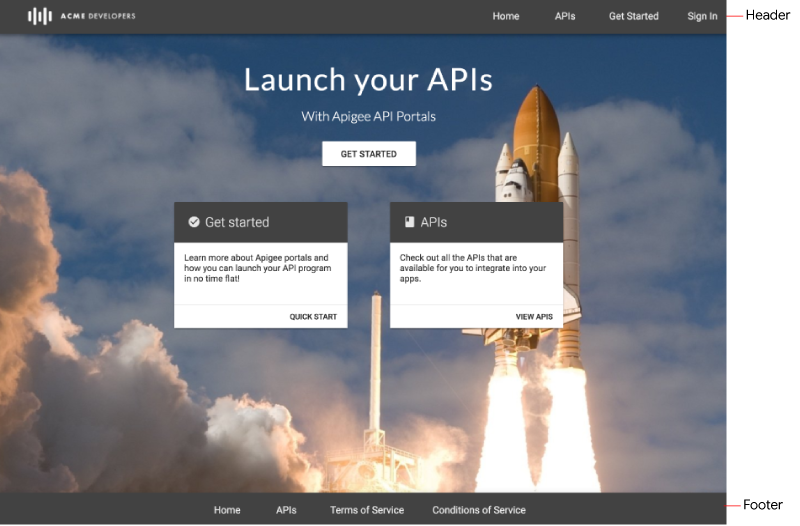
Informazioni sui menu di navigazione predefiniti
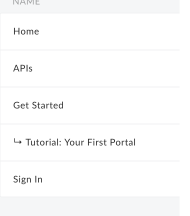
Per impostazione predefinita, vengono forniti due menu di navigazione: Intestazione e Piè di pagina. I menu di navigazione predefiniti vengono visualizzati e rimandano al set di pagine iniziali fornite, come mostrato nella figura seguente.
Aggiungere elementi a un menu di navigazione
Per aggiungere un elemento a un menu di navigazione:
- Accedi alla pagina Menu.
- Seleziona il menu che vuoi modificare nell'elenco a discesa (intestazione o piè di pagina).
- Fai clic su + Elemento del menu.
Nella finestra di dialogo del menu di navigazione, inserisci i seguenti dettagli:
Campo Descrizione Obbligatorio? Nome Nome della voce di menu come verrà visualizzata nel portale. Questo valore può essere diverso dal nome effettivo della pagina. Sì Percorso o URL della pagina Inserisci un URL assoluto a una pagina esterna, un URL assoluto o relativo a una pagina del tuo portale oppure fai clic sul campo di testo e seleziona una pagina del tuo portale dall'elenco a discesa. Sì Fai clic su Crea.
Fai clic su Pubblica per pubblicare le modifiche nel portale online.
Riorganizzare le voci di menu
Per riorganizzare un elemento in un menu di navigazione:
- Accedi alla pagina Menu.
- Seleziona il menu che vuoi modificare nell'elenco a discesa.
Sposta la voce di menu.
UI di Cloud Console
Fai clic sulla freccia su in una riga per spostare l'elemento verso l'alto. In alternativa, fai clic sulla Freccia giù in una riga per spostare l'elemento verso il basso.
UI classica
- Posiziona il cursore sull'elemento di menu che vuoi spostare per visualizzare le azioni.
- Fai clic e tieni premuto il pulsante del mouse su
 , a sinistra del nome della voce di menu.
 - Trascina la voce di menu nella nuova posizione nell'elenco delle voci di menu e rilascia il pulsante del mouse.
Fai clic su Pubblica per pubblicare le modifiche nel portale online.
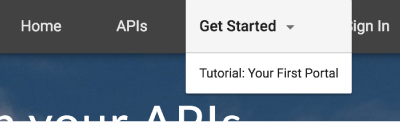
Creare un sottomenu
Un sottomenu viene visualizzato come menu a discesa quando sovrapponi l'elemento principale.
Per creare un sottomenu:
- Accedi alla pagina Menu.
- Seleziona il menu che vuoi modificare nell'elenco a discesa.
- Aggiungi una voce di menu che fungerà da menu principale.
- Aggiungi altre voci di menu che fungeranno da sottomenu.
- Riordina le voci del sottomenu in modo che si trovino sotto il menu principale nell'ordine in cui vuoi che vengano visualizzate nel menu.
Trasforma una voce di menu in un sottomenu.
UI di Cloud Console
Fai clic su Altro, Converti in elemento del sottomenu.
Per spostare una voce del sottomenu nella gerarchia del menu di primo livello:
Fai clic su Altro, Converti in elemento di primo livello.
UI classica
Posiziona il cursore sulla voce di menu che vuoi aggiungere come sottomenu e fai clic su
 per rientrare di un livello sotto il menu principale.
Per spostare una voce del sottomenu nella gerarchia del menu di primo livello, fai clic su
 .
.La figura seguente mostra come viene visualizzato un elemento del sottomenu nell'elenco dei menu:
Fai clic su Pubblica per pubblicare le modifiche nel portale online.
Modificare una voce del menu di navigazione
Per modificare un elemento nel menu di navigazione:
- Accedi alla pagina Menu.
- Seleziona il menu che vuoi modificare nell'elenco a discesa.
Apri l'editor.
UI di Cloud Console
Per l'elemento che vuoi modificare, fai clic su Altro, Modifica.
UI classica
Posiziona il cursore sopra la voce di menu che vuoi modificare e fai clic su
 .
.Modifica i dettagli dell'elemento del menu.
Fai clic su Salva.
Fai clic su Pubblica per pubblicare le modifiche nel portale online.
Pubblicare un menu di navigazione
Per pubblicare un menu di navigazione:
- Accedi alla pagina Menu.
- Seleziona il menu che vuoi pubblicare dall'elenco a discesa.
- Fai clic su Pubblica per pubblicare il menu di navigazione.
Eliminare un elemento da un menu di navigazione
Per eliminare un elemento da un menu di navigazione:
- Accedi alla pagina Menu.
- Seleziona il menu che vuoi modificare dall'elenco a discesa.
Elimina la voce di menu.
UI di Cloud Console
Per l'elemento che vuoi eliminare, fai clic su Altro, Elimina.
UI classica
- Posiziona il cursore sull'elemento di menu nell'elenco per visualizzare il menu delle azioni.
- Fai clic su
 .
.
Fai clic su Elimina per confermare l'operazione di eliminazione.
Fai clic su Pubblica per pubblicare le modifiche nel portale online.
Personalizzare le voci di menu e la barra di navigazione
Personalizza le dimensioni e lo stile del carattere delle voci di menu e altri aspetti dell'aspetto della barra di navigazione, come descritto in Personalizzare la barra di navigazione.