本页面适用于 Apigee 和 Apigee Hybrid。
查看 Apigee Edge 文档。

在此步骤中,您将通过执行以下步骤,将 API 发布到门户:
第 1 步:根据规范创建 API 代理
根据描述 API 的 OpenAPI 规范创建 API 代理。
如需根据 OpenAPI 规范创建 API 代理,请执行以下操作:
Cloud 控制台界面
在 Cloud 控制台中的 Apigee 中,依次前往代理开发 > API 代理页面。
点击创建。系统会打开创建代理向导,提示您选择要创建的 API 代理的类型。
点击代理模板框。
点击 OpenAPI 规范模板,反向代理(最常见)。
在浏览器中打开以下文件,然后保存该文件:
https://raw.githubusercontent.com/apigee/api-platform-samples/master/default-proxies/helloworld/openapi/mocktarget3.0.yaml
在第 1 步:OpenAPI 规范中,点击浏览。
找到您刚下载的 OpenAPI 规范文件,选择该文件,然后点击打开。
点击下一步。
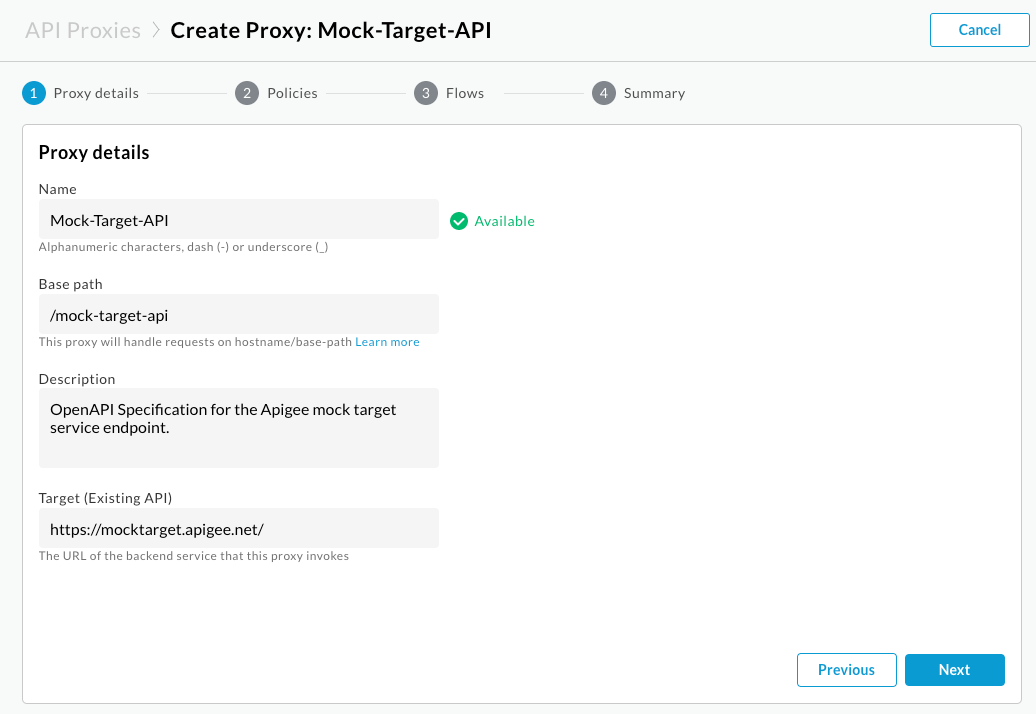
在第 2 步:代理详情中,系统会使用 OpenAPI 规范中的值预填充字段。按照以下说明修改说明字段:适用于 Hello World 的 API 代理。
点击下一步。
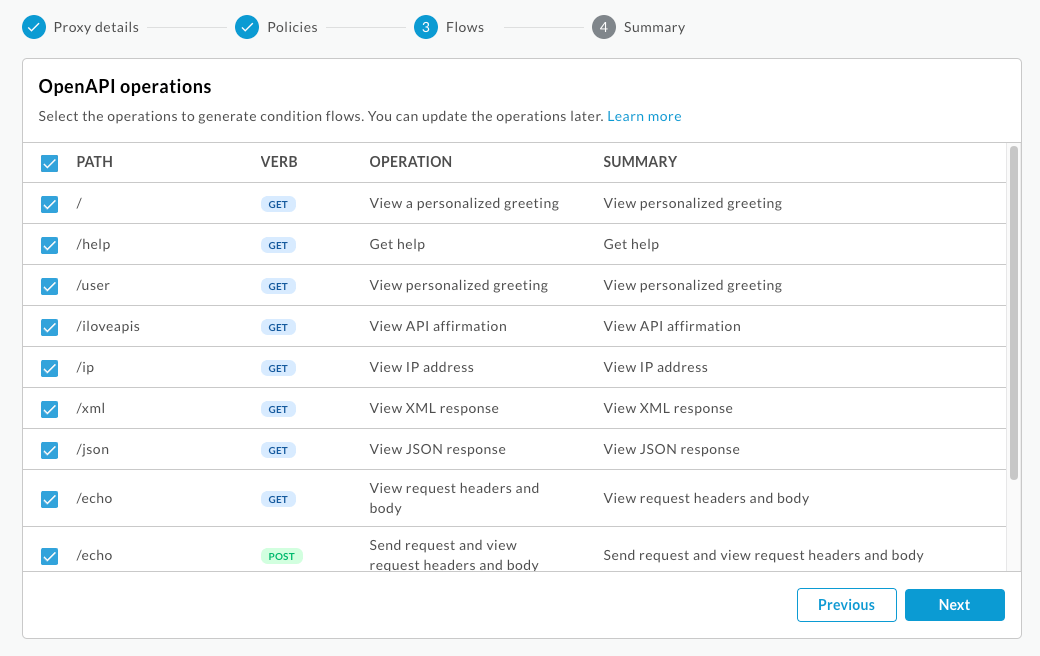
在第 3 步:流中,选择所有操作。
点击下一步。
在第 4 步:部署中,选择要部署到的环境。
点击确定。
点击创建。
部署代理后,部署部分中的状态列会显示一个绿色图标,表明已部署 API 代理修订版本。您可以将指针悬停在状态图标上,查看有关部署的更多信息。
经典版界面
- 在 Apigee 界面中,选择左侧导航栏中的开发 > API 代理以打开 API 代理页面。
点击新建。
 。
。系统会打开“创建代理”向导,提示您选择要创建的 API 代理的类型。
在反向代理(最常见)下,点击使用 OpenAPI 规范。

此时将显示使用 OpenAPI 规范对话框。
将以下网址复制并粘贴到网址标签页上的 OpenAPI 规范网址 (OpenAPI Spec URL) 字段中:
https://raw.githubusercontent.com/apigee/api-platform-samples/master/default-proxies/helloworld/openapi/mocktarget3.0.yaml
点击选择。 系统会打开创建代理向导,并使用 OpenAPI 规范中的值预填充代理详情页面。
按照以下说明修改说明字段:适用于 Hello World 的 API 代理。
点击下一步。
在政策页面上,执行以下操作:
- 在安全性:授权 (Security: Authorization) 下,选择直通(无授权)(Pass through (no authorization))。
- 在安全性:浏览器下,选择添加 CORS 标头。

点击下一步。
在流 (Flows) 页面上,确保选中所有操作,然后点击下一步 (Next)。
在摘要页面上,在可选部署 (Optional Deployment) 下选择要部署到的环境。

点击创建并部署。
在摘要页面上,您会看到一条确认消息,表示新的 API 代理已成功创建并部署到所选环境。
第 2 步:创建 API 产品
创建一个 API 产品,其中包含您要向 API 使用方公开的 API 资源。
如需创建 API 产品,请执行以下操作:
在 Cloud 控制台的 Apigee 中,依次前往分发 > API 产品页面。
点击创建。系统会显示产品详情页面。输入 API 产品的产品详情。
字段 值 名称 Hello World 显示名称 Hello World 说明 简单的 hello world 示例 环境 选择在其中部署 API 代理的环境。 访问 公开 自动批准访问请求 已启用 配额 (留空) 允许的 OAuth 范围 (留空) 在操作部分中,点击添加操作以标识要添加到 API 产品的操作。
- 在来源下,选择 API 代理,然后从下拉列表中选择 Mock-Target-API。
- 在操作 (Operation) 下的路径 (Path) 字段中输入正斜杠 (
/)。 忽略其他字段。
点击保存以保存该操作。
点击保存以保存该产品。
第 3 步:将 API 发布到您的门户
将 API 发布到您的门户,以便您的客户了解并使用 API。
如需将 API 发布到您的门户,请执行以下操作:
Cloud 控制台界面
在 Cloud 控制台的 Apigee 中,前往分发 > 门户页面。
点击我的第一个门户 (My first portal) 行以打开该门户。
点击 API 标签页。
点击添加 API。
在 API 产品部分,选择 Hello World。
选择已发布(在目录中列出) (Published (listed in the catalog)) 以将 API 发布到您的门户。
在显示标题部分,输入 Hello World。
在显示图片部分,点击选择。
点击素材资源。
点击
home-background.jpg对应的预览。点击选择。
在 API 文档部分,如需通过 OpenAPI 规范的快照自动生成 API 参考文档,请执行以下操作:
- 选择 OpenAPI 文档 (OpenAPI document)。
- 点击选择。
- 点击网址标签页。
- 在helloworld字段中输入 helloworld。
- 将以下网址复制并粘贴到网址字段中:
https://raw.githubusercontent.com/apigee/api-platform-samples/master/default-proxies/helloworld/openapi/mocktarget3.0.yaml
- 点击选择。
点击保存。
经典版界面
- 在 Apigee 界面中,导航到门户中的 API 页面:
- 在左侧导航栏中选择发布 > 门户。
- 点击我的第一个门户 (My first portal) 行以打开该门户。
- 点击 API 目录 (API Catalog) 以显示 API 页面。
- 点击 +。
- 在将 API 产品添加到目录 (Add an API product to the catalog) 对话框中,选择 Hello World,然后点击下一步。
- 在 API 详细信息下,配置以下选项:
- 选择已发布(在目录中列出) (Published (listed in the catalog)) 以将 API 发布到您的门户。
- 在显示图片部分,执行以下操作:
- 点击选择图片。
- 在选择图片对话框中,点击现有图片列表中的
home-background.jpg。 - 点击选择。
- 预览图片,然后点击选择。
- 对于类别部分,输入开始使用,然后按 Enter 键。
让所有其他值保留为默认值。

- 在 API 文档下,如需通过 OpenAPI 规范的快照自动生成 API 参考文档,请执行以下操作:
- 选择 OpenAPI 文档 (OpenAPI document)。
- 点击选择文档。
- 选择从网址导入 (Import from a URL) 标签页。
- 在helloworld (Spec name) 字段中输入 helloworld。
- 将以下网址复制并粘贴到网址 (URL) 字段中,然后按 Enter 键:
https://raw.githubusercontent.com/apigee/api-platform-samples/master/default-proxies/helloworld/openapi/mocktarget3.0.yaml
- 点击选择。

- 点击保存。
第 4 步:查看 API 参考文档
如需查看 API 参考文档,请执行以下操作:
- 在 Apigee 界面中,点击实时门户以查看实时门户中的更改(如果实时门户已在另一个标签页中打开,请进行刷新)。
- 在实时门户中,请执行以下操作:
- 在顶部导航栏中点击 API 以查看已发布的 API。
- 点击 Hello World 卡片以查看 API 参考文档。
- 试用您的 API!
