Halaman ini berlaku untuk Apigee dan Apigee Hybrid.
Lihat dokumentasi
Apigee Edge.

Pada langkah ini, Anda akan memublikasikan API ke portal dengan melakukan langkah-langkah berikut:
Langkah 1: Buat Proxy API dari spesifikasi
Buat proxy API dari Spesifikasi OpenAPI yang mendeskripsikan API.
Untuk membuat proxy API dari Spesifikasi OpenAPI:
UI Konsol Cloud
Di konsol Apigee di Cloud, buka halaman Proxy Development > API proxies.
Klik Buat. Wizard Create a proxy akan terbuka dan meminta Anda memilih jenis proxy API yang akan dibuat.
Klik di kotak Template proxy.
Klik OpenAPI spec template, Reverse Proxy (most common).
Buka file berikut di browser, lalu simpan:
https://raw.githubusercontent.com/apigee/api-platform-samples/master/default-proxies/helloworld/openapi/mocktarget3.0.yaml
Di Step 1 OpenAPI Specs, klik Browse.
Buka file Spesifikasi OpenAPI yang baru saja Anda download, pilih, lalu klik Open.
Klik Berikutnya.
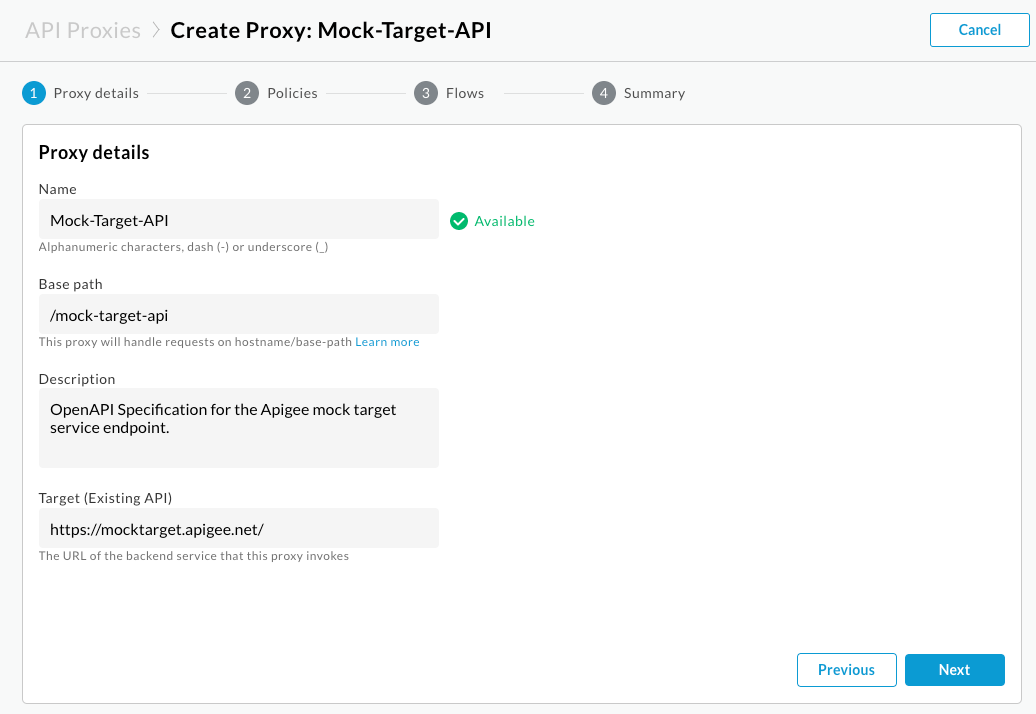
Di Step 2 Proxy details, kolom akan diisi otomatis menggunakan nilai dari Spesifikasi OpenAPI. Edit kolom Description sebagai berikut: API proxy for hello world.
Klik Berikutnya.
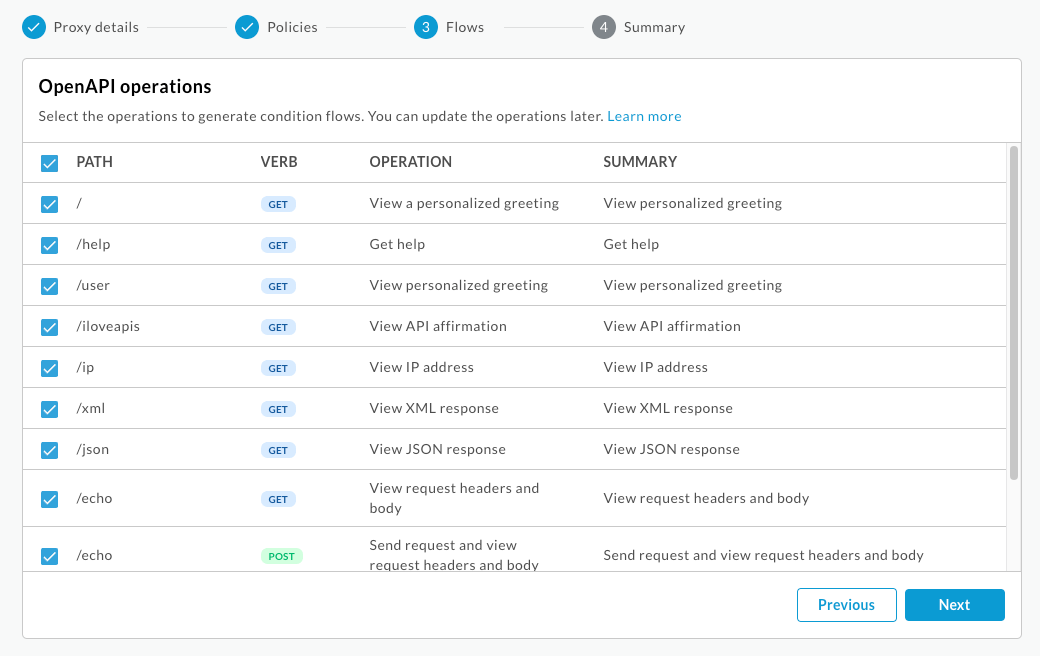
Di Step 3 Flows, pilih semua operasi.
Klik Berikutnya.
Di Langkah 4 Deploy, pilih lingkungan tempat Anda ingin melakukan deployment.
Klik Oke.
Klik Buat.
Saat proxy di-deploy, kolom Status di bagian Deployments akan menampilkan ikon hijau untuk menunjukkan bahwa revisi proxy API telah di-deploy. Anda dapat mengarahkan kursor ke ikon status untuk melihat informasi selengkapnya tentang deployment.
UI Klasik
- Di UI Apigee, pilih Develop > API proxies di menu navigasi sebelah kiri untuk membuka halaman API proxies.
Klik Buat Baru.

Wizard Create Proxy akan terbuka dan meminta Anda memilih jenis proxy API yang akan dibuat.
Di bagian Reverse Proxy (paling umum), klik Gunakan Spesifikasi OpenAPI.

Dialog Gunakan Spesifikasi OpenAPI akan ditampilkan.
Salin dan tempel URL berikut di kolom URL Spesifikasi OpenAPI pada tab URL:
https://raw.githubusercontent.com/apigee/api-platform-samples/master/default-proxies/helloworld/openapi/mocktarget3.0.yaml
Klik Pilih. Wizard Create Proxy akan terbuka dan halaman Proxy details akan diisi otomatis menggunakan nilai dari Spesifikasi OpenAPI.
Edit kolom Description sebagai berikut: API proxy for hello world.
Klik Berikutnya.
Di halaman Kebijakan:
- Di bagian Security: Authorization, pilih Pass through (no authorization).
- Di bagian Keamanan: Browser, pilih Tambahkan header CORS .

Klik Berikutnya.
Di halaman Flows, pastikan semua operasi dipilih, lalu klik Next.
Di halaman Summary, pilih lingkungan tempat Anda ingin men-deploy di bagian Optional Deployment.

Klik Buat dan deploy.
Di halaman Summary, Anda akan melihat konfirmasi bahwa proxy API baru Anda telah berhasil dibuat dan di-deploy ke lingkungan yang dipilih.
Langkah 2: Buat produk API
Buat produk API yang berisi resource API yang ingin Anda ekspos ke konsumen API.
Untuk membuat produk API:
Di konsol Apigee di Cloud, buka halaman Distribution > API products.
Klik Buat. Halaman Detail produk akan ditampilkan. Masukkan Detail Produk untuk produk API Anda.
Kolom Nilai Nama Halo Dunia Nama Tampilan Halo Dunia Deskripsi Contoh hello world sederhana Lingkungan Pilih lingkungan tempat proxy API di-deploy. Akses Public Menyetujui permintaan akses secara otomatis Enabled Kuota (biarkan kosong) Cakupan OAuth yang Diizinkan (biarkan kosong) Di bagian Operations, klik Add an operation untuk mengidentifikasi operasi yang akan ditambahkan ke produk API Anda.
- Di bagian Sumber, pilih Proxy API, lalu pilih Mock-Target-API dari drop-down.
- Di bagian Operation, masukkan garis miring (
/) di kolom Path. Abaikan kolom lainnya.
Klik Simpan untuk menyimpan operasi.
Klik Simpan untuk menyimpan produk.
Langkah 3: Publikasikan API ke portal Anda
Publikasikan API ke portal Anda agar pelanggan dapat mempelajari dan menggunakannya.
Untuk memublikasikan API ke portal Anda:
UI Konsol Cloud
Di konsol Apigee di Cloud, buka halaman Distribution > Portals.
Klik baris My first portal untuk membuka portal.
Klik tab APIs.
Klik + API.
Untuk API product, pilih Hello World.
Pilih Dipublikasikan (tercantum dalam katalog) untuk memublikasikan API ke portal Anda.
Untuk Judul tampilan, masukkan Hello World.
Untuk Tampilkan gambar, klik Pilih.
Klik Aset.
Klik Pratinjau untuk
home-background.jpg.Klik Pilih.
Untuk dokumentasi API, guna membuat dokumentasi referensi API secara otomatis dari snapshot Spesifikasi OpenAPI Anda:
- Pilih Dokumen OpenAPI.
- Klik Pilih.
- Klik tab URL.
- Ketik helloworld di kolom Spec name.
- Salin dan tempel URL berikut di kolom URL:
https://raw.githubusercontent.com/apigee/api-platform-samples/master/default-proxies/helloworld/openapi/mocktarget3.0.yaml
- Klik Pilih.
Klik Simpan.
UI Klasik
- Di UI Apigee, buka halaman API di portal Anda:
- Pilih Publikasikan > Portal di menu navigasi sebelah kiri.
- Klik baris My first portal untuk membuka portal.
- Klik API Catalog untuk menampilkan halaman API.
- Klik +.
- Pilih Hello World dalam dialog Add an API product to the catalog, lalu klik Next.
- Di bagian API details, konfigurasi opsi berikut:
- Pilih Dipublikasikan (tercantum dalam katalog) untuk memublikasikan API ke portal Anda.
- Untuk Gambar tampilan:
- Klik Pilih gambar.
- Klik
home-background.jpgdari daftar gambar yang ada di dialog Pilih gambar. - Klik Pilih.
- Pratinjau gambar, lalu klik Pilih.
- Untuk Categories, masukkan Get Started, lalu tekan Enter.
Biarkan semua nilai lainnya ditetapkan ke defaultnya.

- Di bagian Dokumentasi API, untuk membuat dokumentasi referensi API secara otomatis dari snapshot Spesifikasi OpenAPI:
- Pilih Dokumen OpenAPI.
- Klik Pilih Dokumen.
- Pilih tab Impor dari URL.
- Masukkan helloworld di kolom Spec name.
- Salin dan tempel URL berikut di kolom URL, lalu tekan Enter:
https://raw.githubusercontent.com/apigee/api-platform-samples/master/default-proxies/helloworld/openapi/mocktarget3.0.yaml
- Klik Pilih.

- Klik Simpan.
Langkah 4: Lihat dokumentasi referensi API
Untuk melihat dokumentasi referensi API:
- Di UI Apigee, klik Live Portal untuk melihat perubahan di portal aktif (atau muat ulang portal aktif jika sudah terbuka di tab lain).
- Di portal live:
- Klik API di menu navigasi atas untuk melihat API yang dipublikasikan.
- Klik kartu Hello World untuk melihat dokumentasi referensi API.
- Coba API Anda.
