이 페이지는 Apigee 및 Apigee Hybrid에 적용됩니다.
Apigee Edge 문서 보기

API 프록시에 정책 기반 기능을 추가하려면 두 단계를 거쳐야 합니다.
- 정책 유형의 인스턴스를 구성합니다.
- 흐름에 정책 인스턴스를 연결합니다.
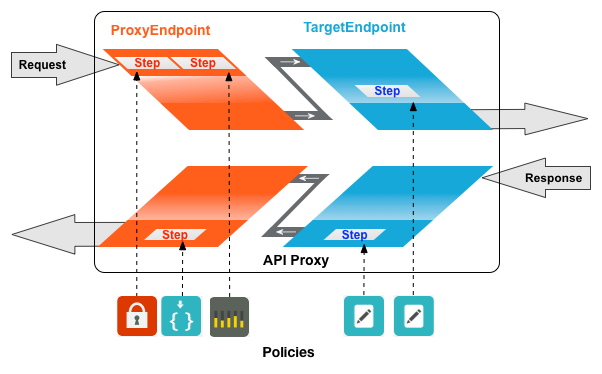
아래 다이어그램은 정책과 흐름 사이의 관계를 보여줍니다. 표시된 것처럼 정책은 흐름에 처리 단계로 연결됩니다. API에 원하는 동작을 구성하려면 흐름에 대한 약간의 이해가 필요합니다. (이 항목은 이전의 흐름 구성에서 다뤄졌습니다.)
일반적으로 사용되는 한 가지 정책 유형은 SpikeArrest 정책입니다. SpikeArrest는 백엔드 서비스의 용량 부족을 발생하는 메시지 트래픽의 급증을 방지합니다.
흐름에 정책 연결
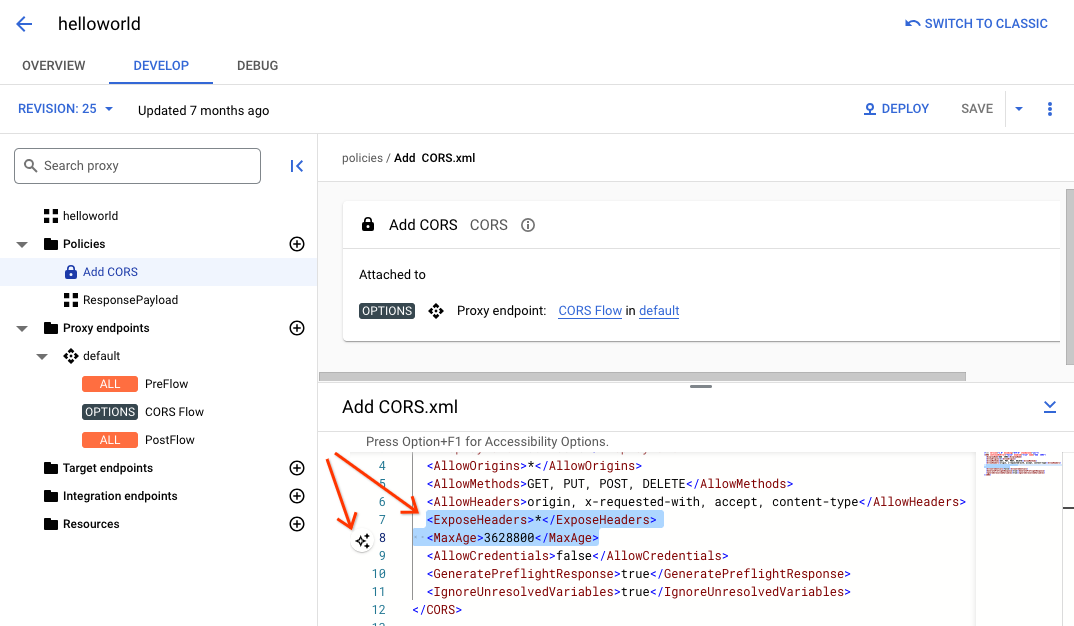
Cloud 콘솔의 Apigee
흐름에 정책을 연결하려면 다음 안내를 따르세요.
- API 프록시를 선택하고 개발 뷰로 이동합니다.
- 왼쪽 창에서 정책 행에 있는 + 버튼을 클릭합니다.
정책 만들기 대화상자에서 정책 유형 선택 필드를 클릭하고 트래픽 관리로 스크롤하고 SpikeArrest를 선택합니다.
원하는 경우 정책의 표시 이름 및 이름을 변경할 수 있습니다.
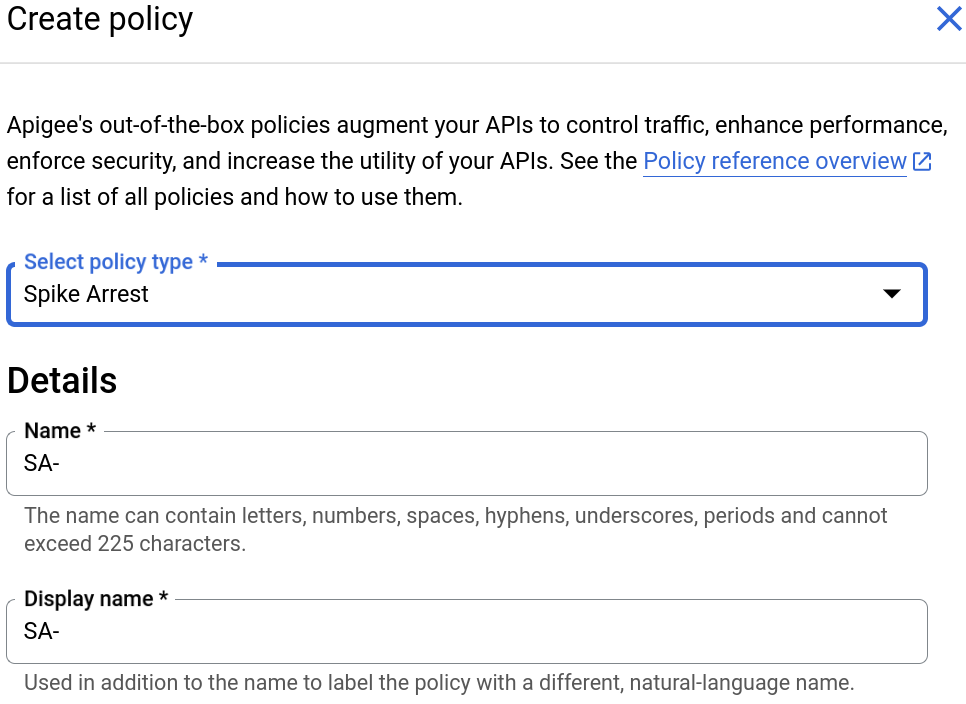
완료되면 만들기를 클릭하여 정책을 만듭니다.
- 이제 Spike Arrest 정책을 만들었으므로 PreFlow의 단계에 이를 연결할 수 있습니다. 이렇게 하려면 왼쪽 창에서 프록시 엔드포인트 > 기본값 > PreFlow를 선택합니다.
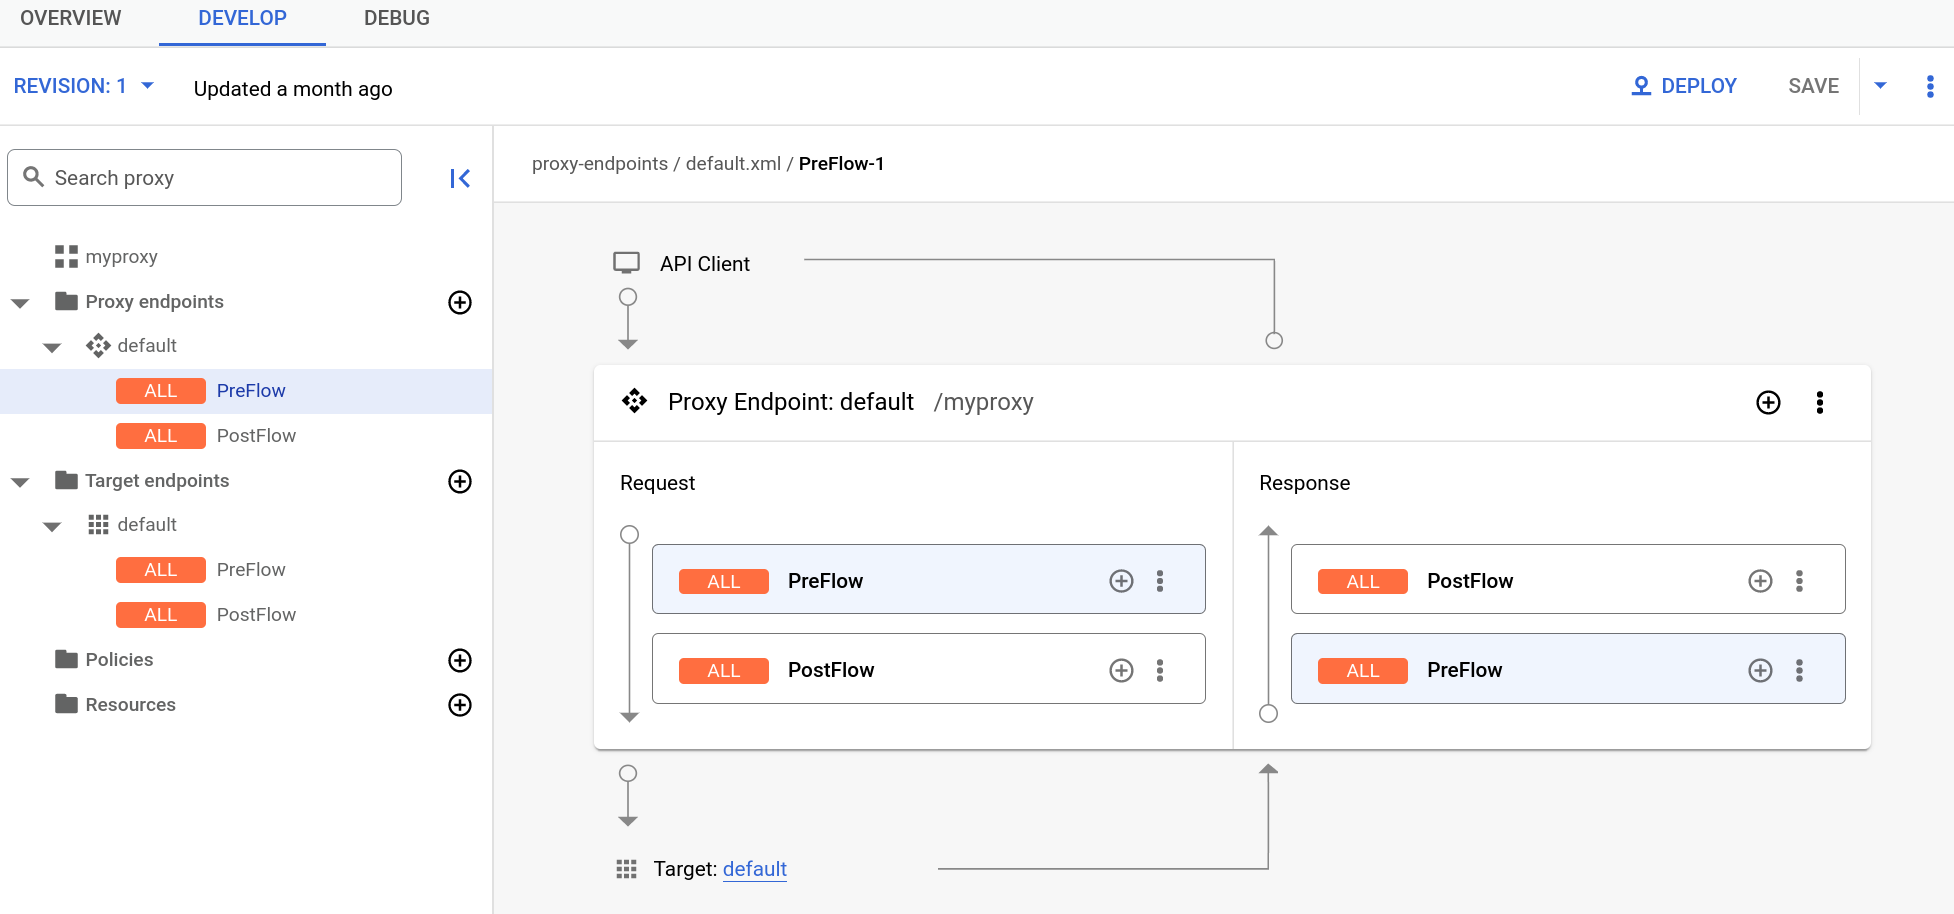
- 비주얼 편집기 하단의 응답 창에서 PreFlow 옆에 있는 + 버튼을 클릭합니다.
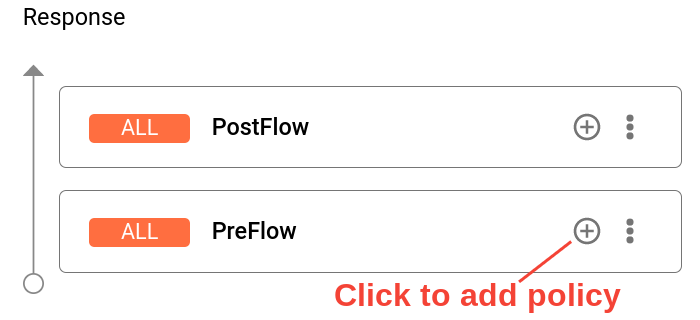
- 정책 단계 추가 대화상자에서 Spike Arrest 정책을 선택합니다.
추가를 클릭하여 정책을 연결합니다.
이제 Spike Arrest 정책이 응답 창에 표시됩니다.
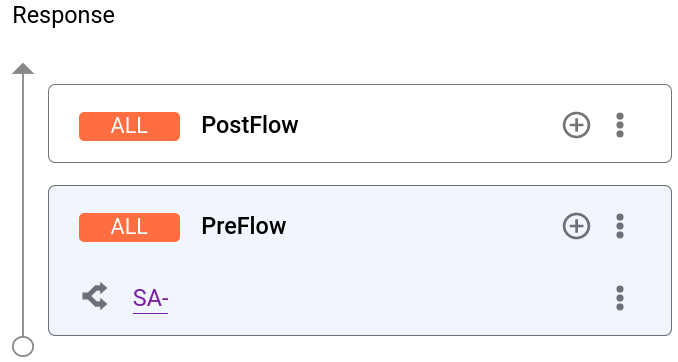
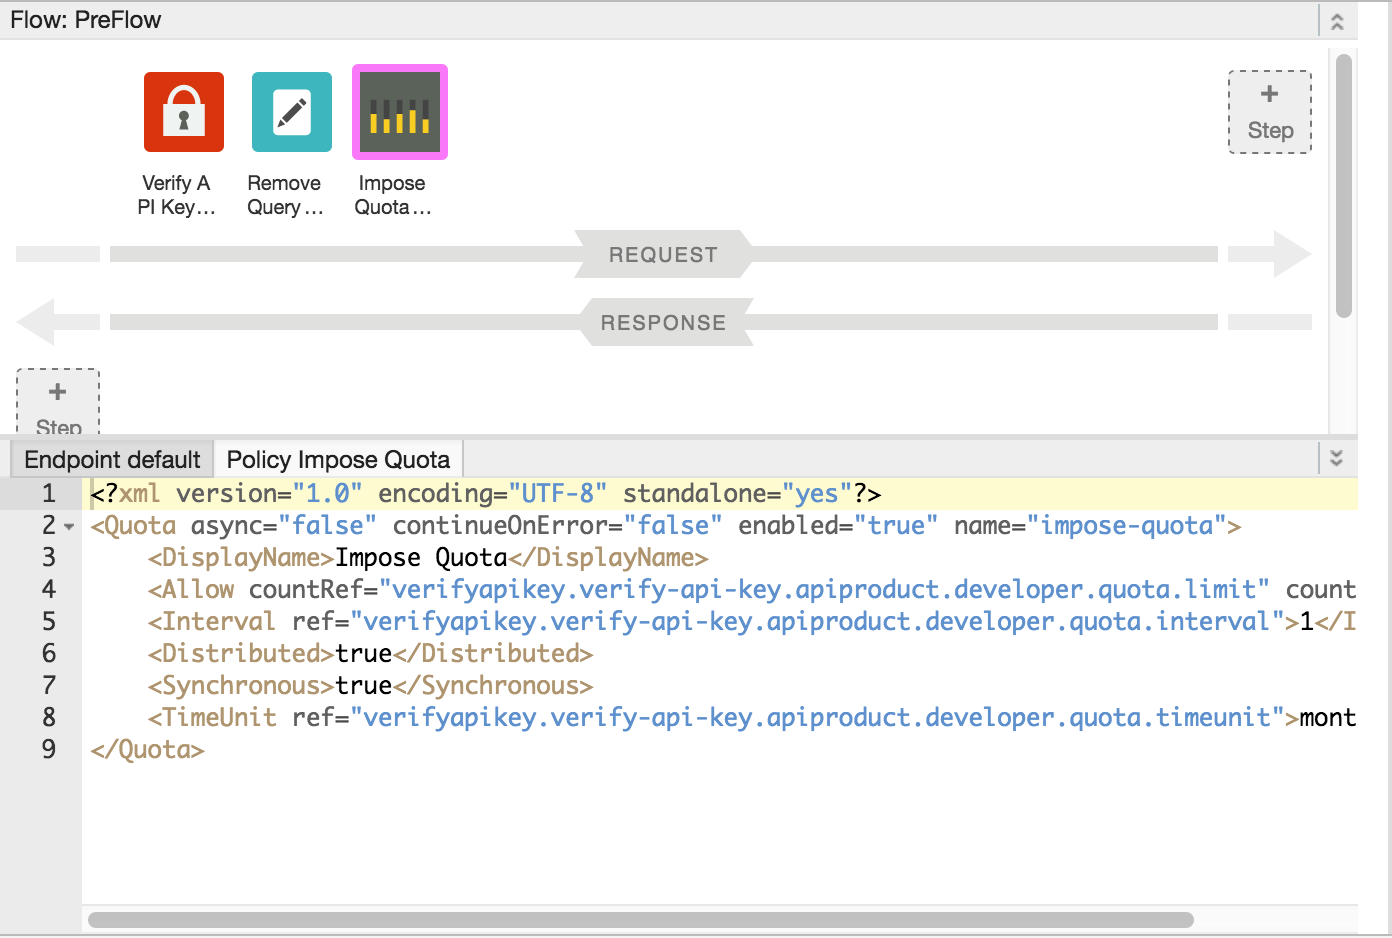
프록시에 다음과 같은 XML 코드가 텍스트 편집기에 표시됩니다.
<ProxyEndpoint name="default">
  <PreFlow name="PreFlow">
    <Request/>
    <Response>
      <Step><
        <Name>SA-</Name>
      </Step>
    </Response>
  </PreFlow>
  <Flows/>
  <PostFlow name="PostFlow">
    <Request/>
    <Response/>
  </PostFlow>
  <HTTPProxyConnection>
    <BasePath>/myproxy</BasePath>
  </HTTPProxyConnection>
  <RouteRule name="default">
    <TargetEndpoint>default</TargetEndpoint>
  </RouteRule>
</ProxyEndpoint>
Detaching policies from a flow
To detach a policy from a flow, click the three-dot menu next to the flow and select Delete policy step
Classic UI
To attach a policy to a flow:
- Select an API proxy and navigate to the Develop view.
- In the API Proxy Editor, select the flow to which you want to attach a policy in the
Navigator pane.
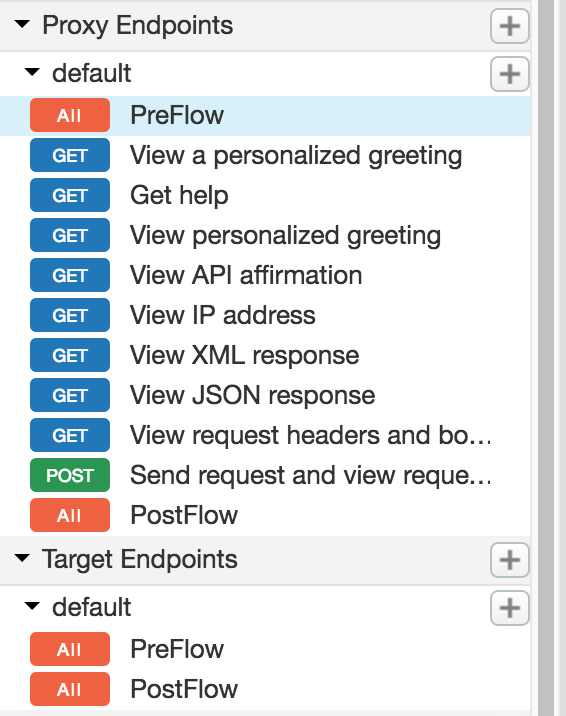
For example, the PreFlow flow is selected for the default API proxy endpoint in the following figure:
- In the Design view, click +Step associated with the request or response
flow to attach a policy. For example:

The Add Step dialog opens displaying a categorized list of policies.
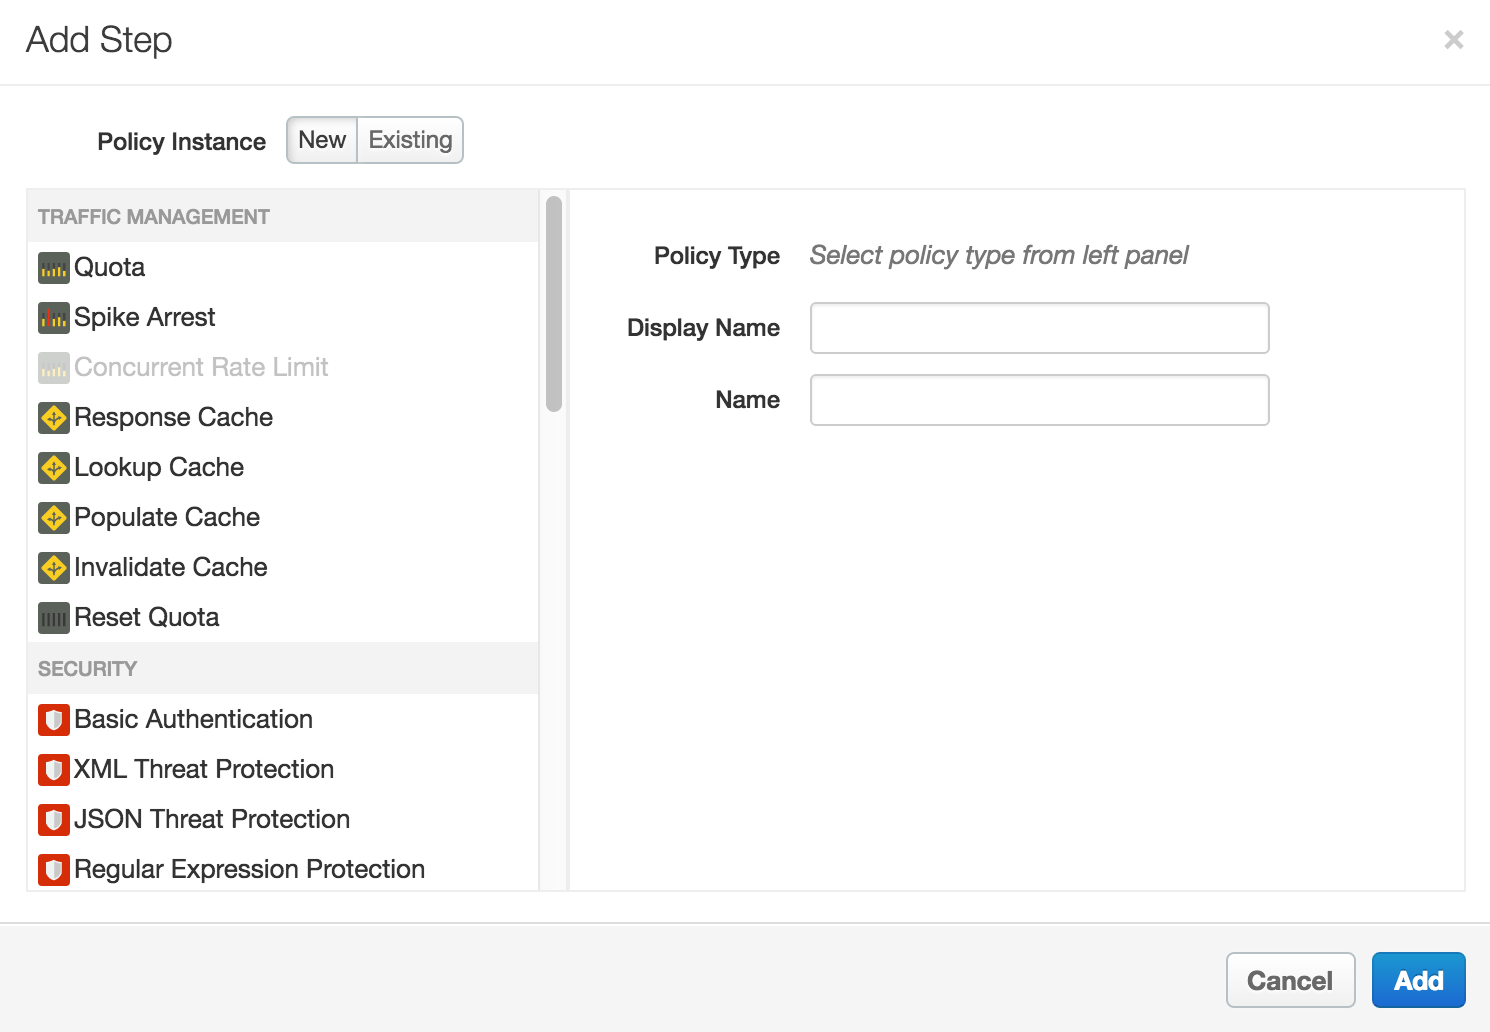
- Scroll and select the policy type that you want to attach to the selected flow.
- Modify the following fields.
-
Display Name: Unique display name for the policy. The UI will generate a default name, but it is advisable to create a descriptive name for the policy. This will ensure that other developers in your organization have an easy time understanding what the policy is intended to do.
-
Name: Unique name for the policy. The policy name matches the display name with the following exceptions:
-
Spaces are replaced by dashes.
-
Consecutive dashes are replaced by a single dash.
-
Except for dashes, underscores, and spaces (which are replaced, as noted above), characters that are not alphanumeric, such as pound signs, percent signs, ampersands, and so on, are removed.
-
-
- Click Add.
The policy is attached to the selected flow.
After the policy is attached, you’ll see the policy displayed in the Designer view for the flow, in this example the PreFlow of the default proxy endpoint, and in the Policies list in the Navigation pane. The Code view, which displays the XML for the newly attached policy, displays below the Designer view. Apigee generates an instance of the policy that contains a set of reasonable default values.
Adding a policy without attaching it to a flow
To add a policy without attaching it to a flow, which is useful for Handling faults, click + in the Policies bar in the Navigator view to open the Add Policy dialog and add the policy (as described in steps 4 through 6 in the previous section).
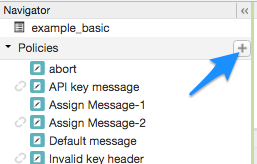
A policy that is not attached to any flow is flagged with the detached icon in the Policies list, as shown adjacent to the API key message policy shown in the previous figure.
After you create the policy, you can attach it to a flow by dragging and dropping it from the Policies list to the desired flow in the Designer view.
Detaching policies from a flow
To detach a policy from a Flow, select the Flow. Mouse over the icon for the policy in the Designer view of the Flow. Click the X in the circle that appears in the icon.
Deleting a policy instance
To delete a policy instance, mouse over the entry for the policy in the Navigator view. Click the X in the circle that appears to the right of the entry.
Configuring policies in the UI
When the UI generates a policy instance, it applies reasonable default values for common settings. You may need to modify these settings to meet your requirements.
For example:<?xml version="1.0" encoding="UTF-8" standalone="yes"?> <SpikeArrest async="false" continueOnError="false" enabled="true" name="spikearrest-1"> <DisplayName>SpikeArrest-1</DisplayName> <FaultRules/> <Properties/> <Identifier ref="request.header.some-header-name"/> <MessageWeight ref="request.header.weight"/> <Rate>30ps</Rate> </SpikeArrest>
코드 보기에서 XML 구성을 직접 수정하여 정책을 구성할 수 있습니다. 예를 들어 Spike Arrest 정책의 최대 메시지 비율은 처음에 초당 30개 메시지로 설정됩니다. 정책의 XML에서 <Rate> 요소 값을 변경하여 최대 비율을 변경할 수 있습니다. 정책 구성에 대한 자세한 내용은 정책 참조를 참조하세요.
정책을 잘라내어 코드 뷰에 붙여넣을 수도 있습니다. 이렇게 하면 GitHub에 제공되는 샘플의 정책을 재사용할 수 있습니다.
코드 뷰에서 정책 정의를 변경하면 변경사항이 속성 검사기에 반영됩니다. 반대의 경우도 마찬가지입니다. 속성 검사기에서 변경하면 XML 코드가 코드 뷰의 XML에 표시됩니다.
이 주제에서 사용된 할당량 정책에 대한 문서는 할당량 정책을 참조하세요.
정책과 함께 Gemini Code Assist 코드 설명 사용
Gemini Code Assist가 있는 경우 이를 사용하여 Cloud 콘솔의 Apigee UI에서 직접 정책과 정책 요소를 이해할 수 있습니다.
정책과 함께 Gemini Code Assist 코드 설명 사용
- 코드 뷰에서 정책을 수정하는 동안 XML 요소 또는 속성과 같은 정책 코드의 일부를 강조 표시합니다. 여러 요소를 강조 표시할 수도 있습니다.
- 아래와 같이 Gemini Code Assist 아이콘을 클릭합니다. 측면 패널에 정책 및 강조 표시된 요소에 대한 정보가 표시됩니다.