Esta página aplica-se ao Apigee e ao Apigee Hybrid.
Veja a documentação do
Apigee Edge.

Adicionar capacidades baseadas em políticas a um proxy de API é um processo de dois passos:
- Configure uma instância de um tipo de política.
- Associe a instância da política a um fluxo.
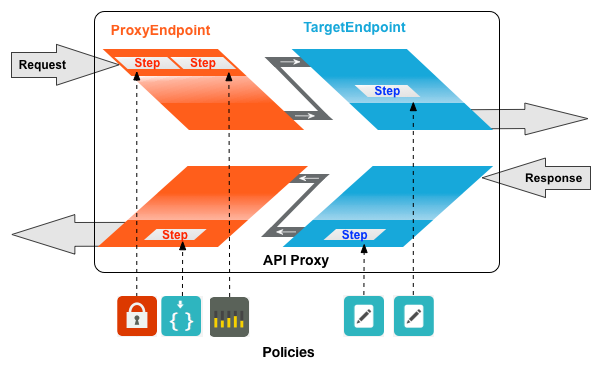
O diagrama abaixo mostra a relação entre as políticas e os fluxos. Como pode ver, uma política está anexada a um fluxo como um passo de processamento. Para configurar o comportamento pretendido para a sua API, tem de compreender um pouco sobre os fluxos. (Este tópico foi abordado anteriormente em Configurar fluxos.)
Um tipo de política usado frequentemente é a política SpikeArrest. O SpikeArrest impede aumentos súbitos no tráfego de mensagens que podem sobrecarregar os seus serviços de back-end.
Anexar uma política a um fluxo
Apigee na Cloud Console
Para anexar uma política a um fluxo:
- Selecione um proxy de API e navegue para a vista Desenvolver.
- No painel do lado esquerdo, clique no botão + na linha Políticas.
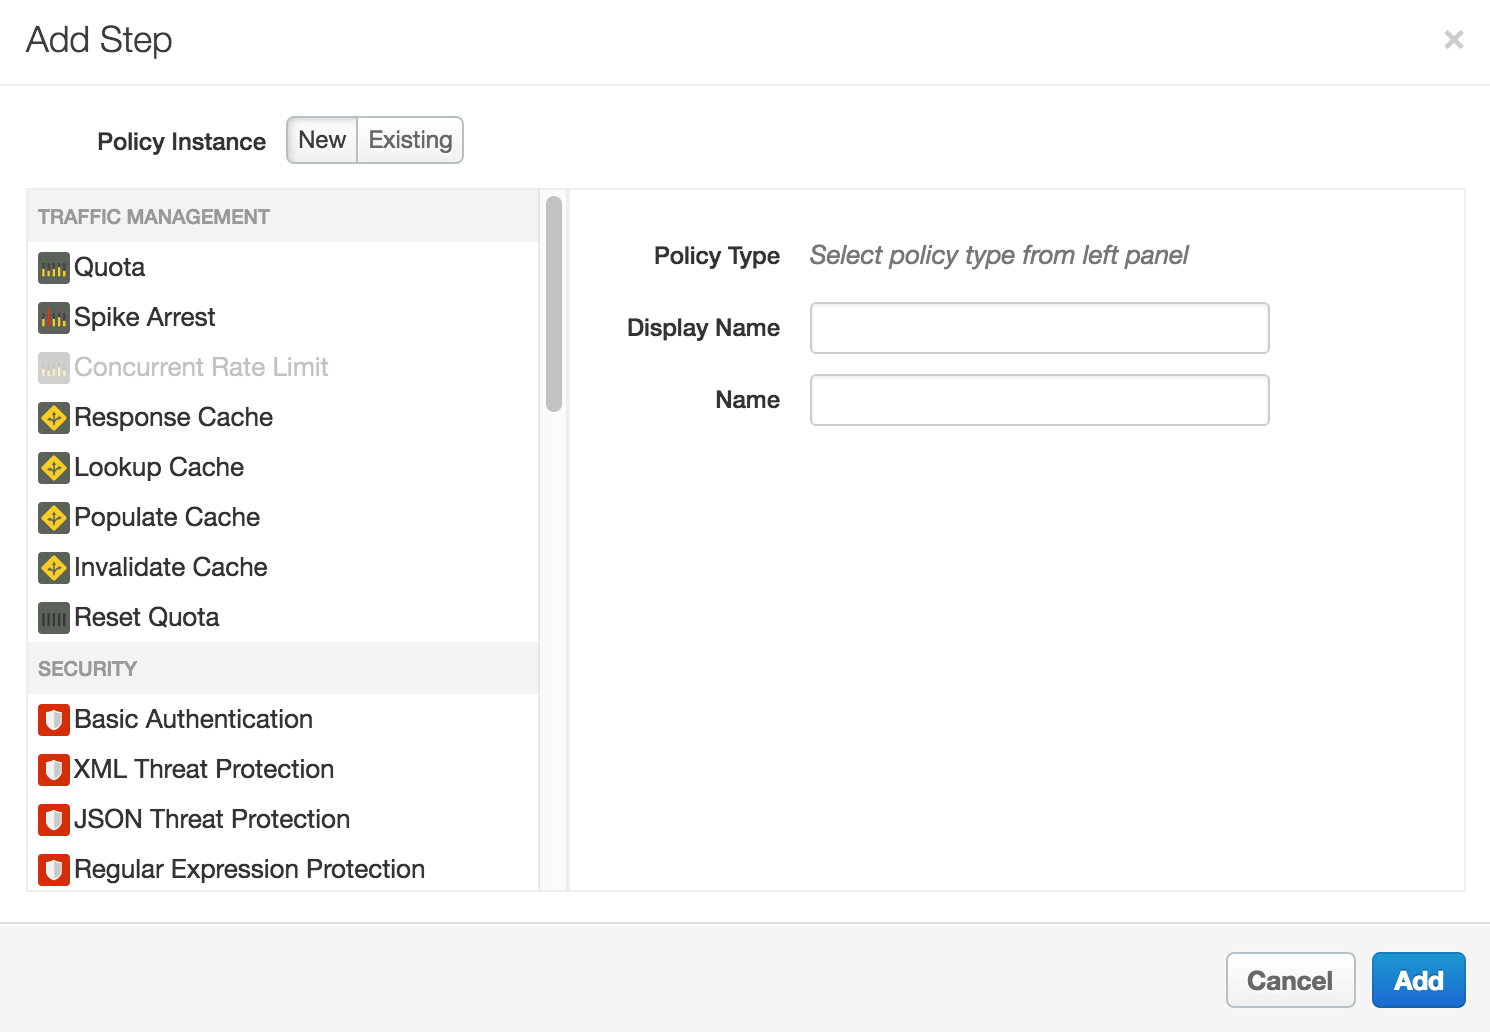
Na caixa de diálogo Criar política, clique no campo Selecionar tipo de política e desloque a página para baixo até Gestão de tráfego e selecione SpikeArrest.
Opcionalmente, pode alterar o Nome a apresentar e o Nome da política.
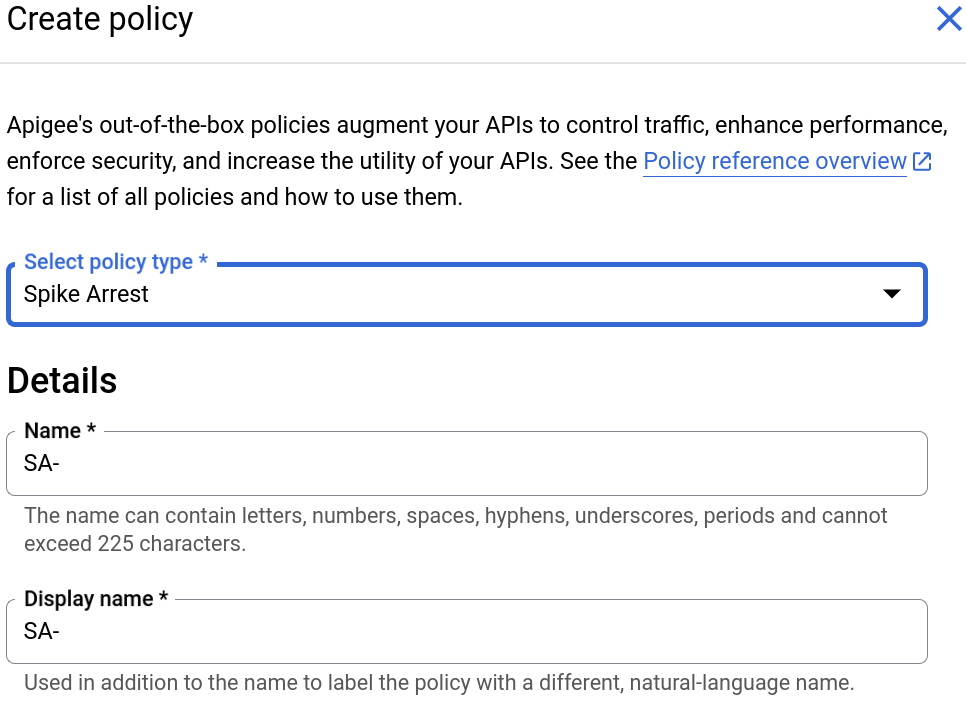
Quando terminar, clique em Criar para criar a política.
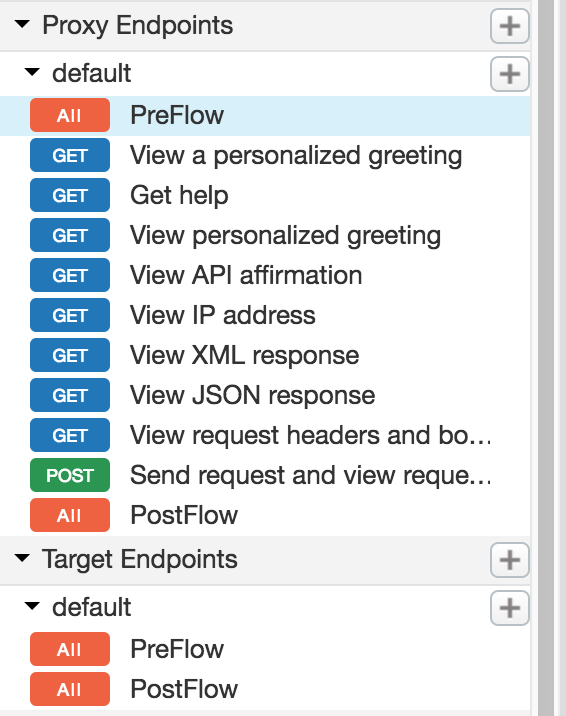
- Agora que criou a política Spike Arrest, pode anexá-la a um passo no
PreFlow. Para o fazer, selecione Proxy Endpoints > default > PreFlow no painel do lado esquerdo:
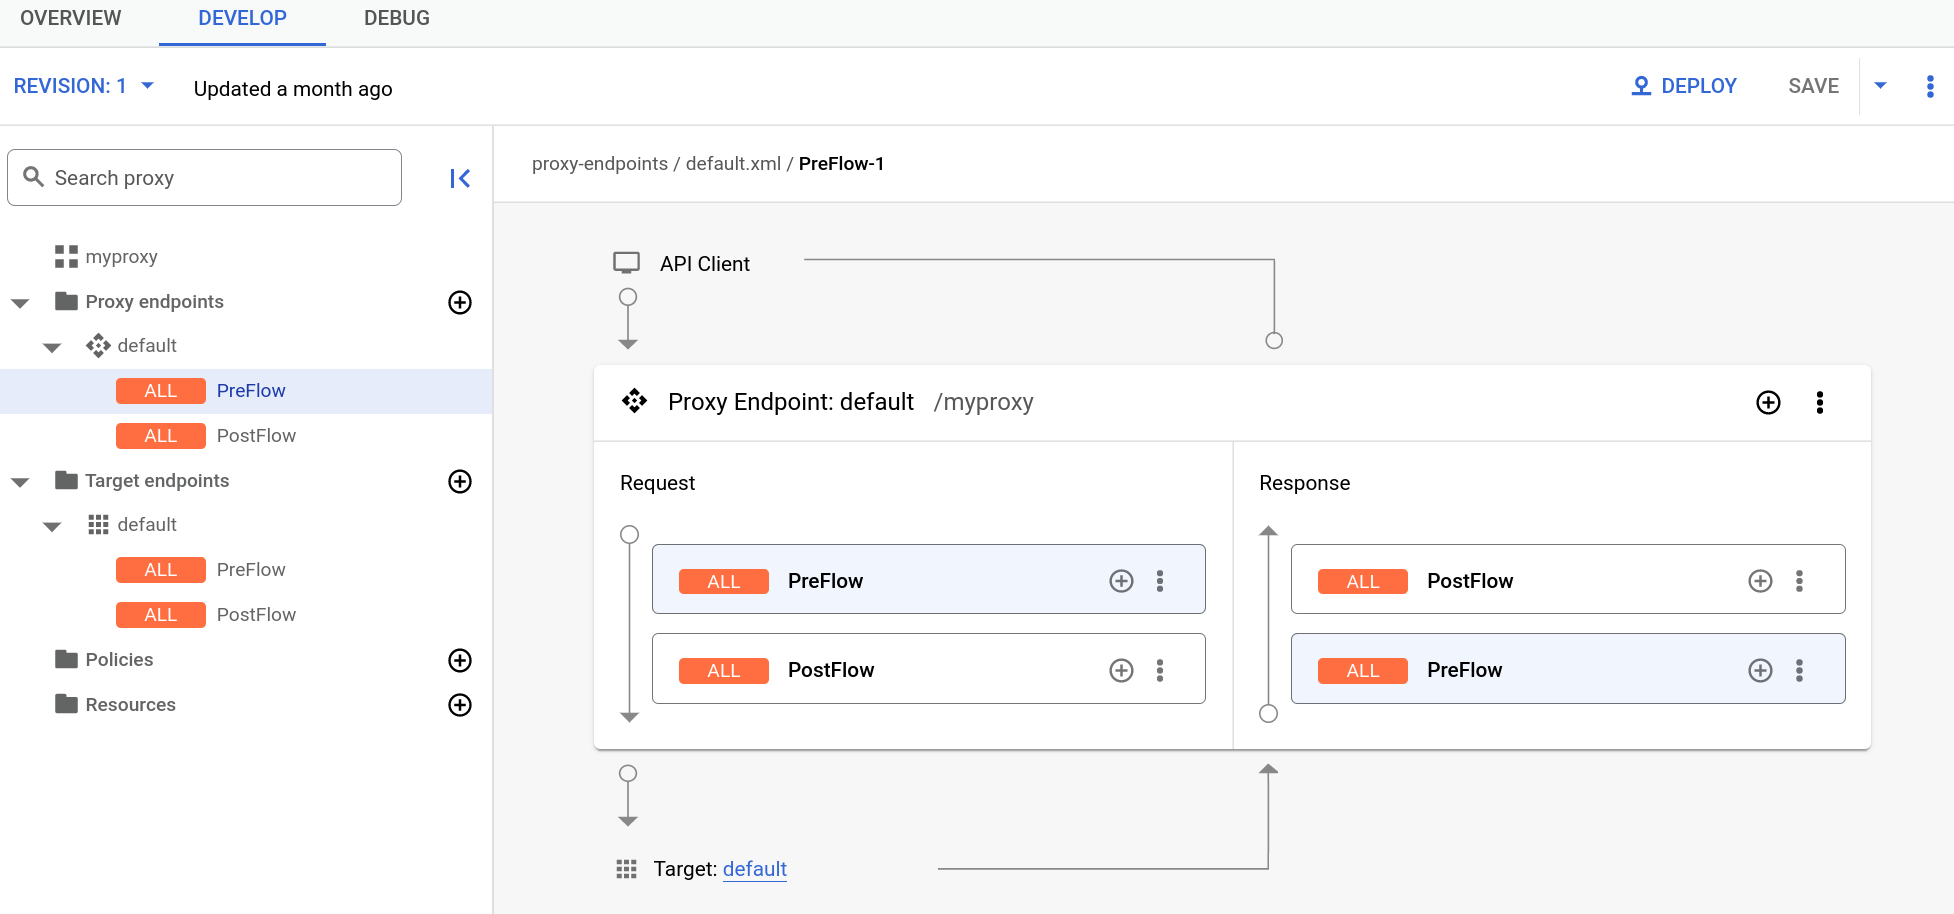
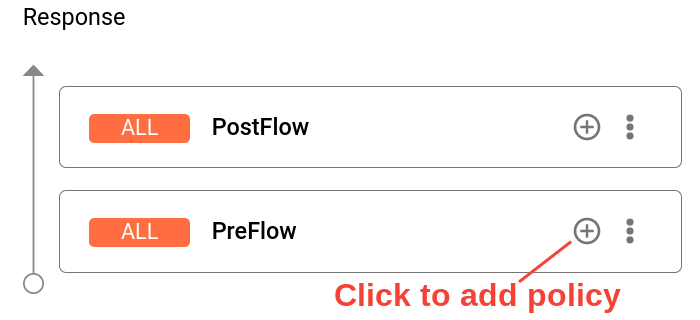
- Clique no botão + junto a PreFlow no painel Resposta
na parte inferior direita do editor visual:
- Na caixa de diálogo Passo Adicionar política, selecione a política Spike Arrest.
Clique em Adicionar para anexar a política.
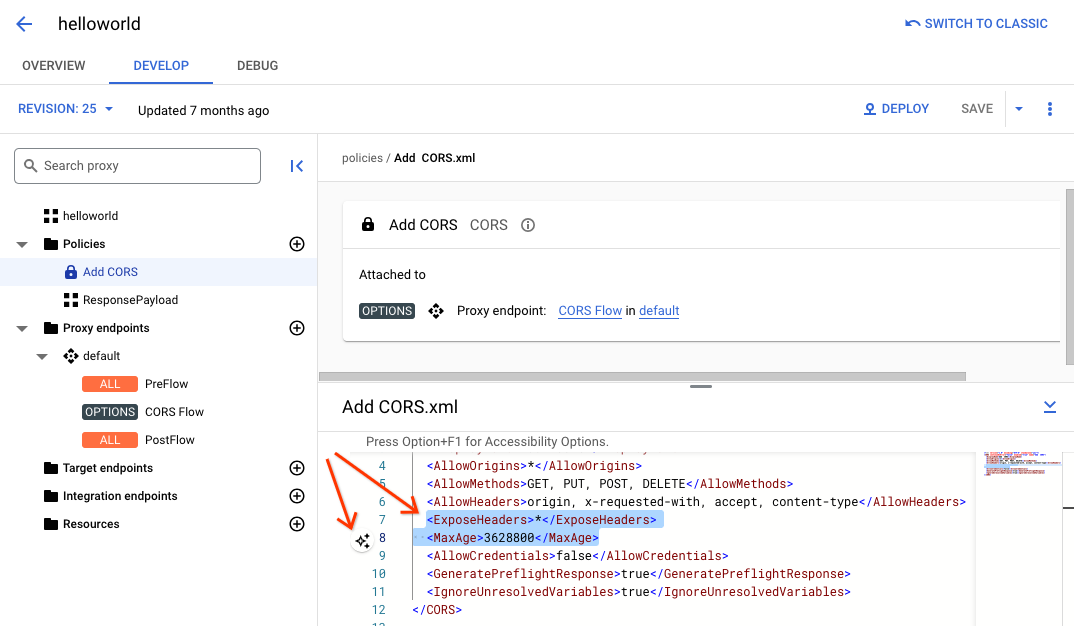
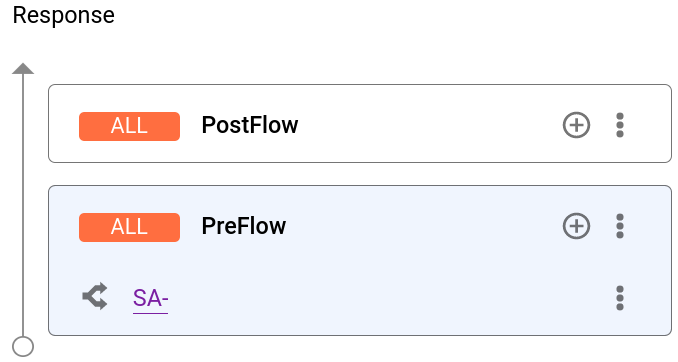
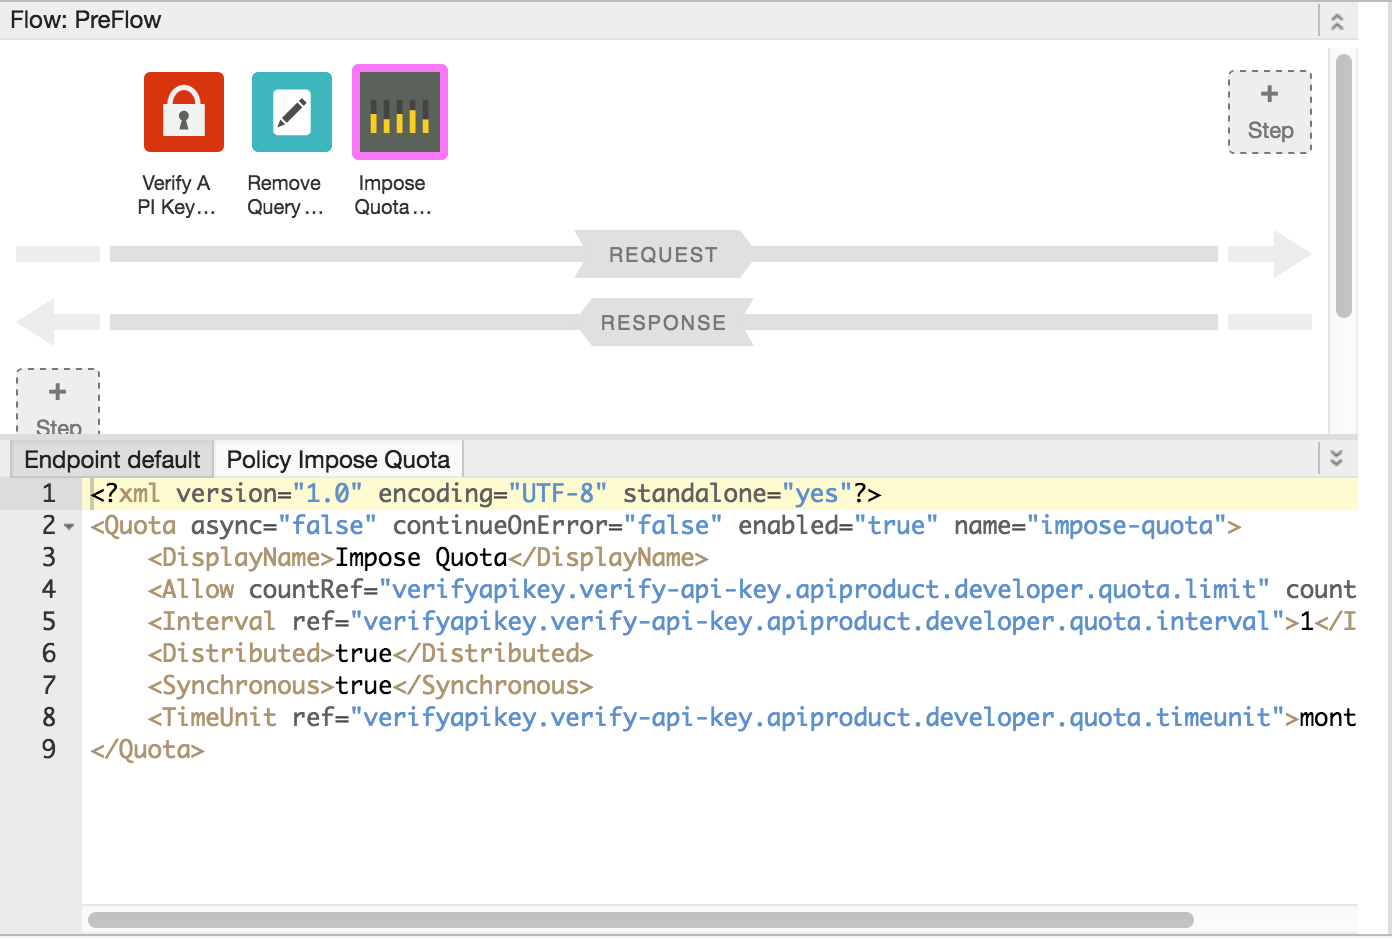
A política Spike Arrest é agora apresentada no painel Resposta:
O código XML seguinte para o proxy é apresentado no editor de texto:
<ProxyEndpoint name="default">
  <PreFlow name="PreFlow">
    <Request/>
    <Response>
      <Step><
        <Name>SA-</Name>
      </Step>
    </Response>
  </PreFlow>
  <Flows/>
  <PostFlow name="PostFlow">
    <Request/>
    <Response/>
  </PostFlow>
  <HTTPProxyConnection>
    <BasePath>/myproxy</BasePath>
  </HTTPProxyConnection>
  <RouteRule name="default">
    <TargetEndpoint>default</TargetEndpoint>
  </RouteRule>
</ProxyEndpoint>
Detaching policies from a flow
To detach a policy from a flow, click the three-dot menu next to the flow and select Delete policy step
Classic UI
To attach a policy to a flow:
- Select an API proxy and navigate to the Develop view.
- In the API Proxy Editor, select the flow to which you want to attach a policy in the
Navigator pane.
For example, the PreFlow flow is selected for the default API proxy endpoint in the following figure:
- In the Design view, click +Step associated with the request or response
flow to attach a policy. For example:
The Add Step dialog opens displaying a categorized list of policies.
- Scroll and select the policy type that you want to attach to the selected flow.
- Modify the following fields.
-
Display Name: Unique display name for the policy. The UI will generate a default name, but it is advisable to create a descriptive name for the policy. This will ensure that other developers in your organization have an easy time understanding what the policy is intended to do.
-
Name: Unique name for the policy. The policy name matches the display name with the following exceptions:
-
Spaces are replaced by dashes.
-
Consecutive dashes are replaced by a single dash.
-
Except for dashes, underscores, and spaces (which are replaced, as noted above), characters that are not alphanumeric, such as pound signs, percent signs, ampersands, and so on, are removed.
-
-
- Click Add.
The policy is attached to the selected flow.
After the policy is attached, you’ll see the policy displayed in the Designer view for the flow, in this example the PreFlow of the default proxy endpoint, and in the Policies list in the Navigation pane. The Code view, which displays the XML for the newly attached policy, displays below the Designer view. Apigee generates an instance of the policy that contains a set of reasonable default values.
Adding a policy without attaching it to a flow
To add a policy without attaching it to a flow, which is useful for Handling faults, click + in the Policies bar in the Navigator view to open the Add Policy dialog and add the policy (as described in steps 4 through 6 in the previous section).
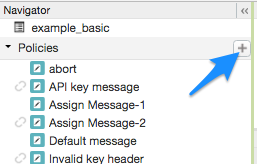
A policy that is not attached to any flow is flagged with the detached icon in the Policies list, as shown adjacent to the API key message policy shown in the previous figure.
After you create the policy, you can attach it to a flow by dragging and dropping it from the Policies list to the desired flow in the Designer view.
Detaching policies from a flow
To detach a policy from a Flow, select the Flow. Mouse over the icon for the policy in the Designer view of the Flow. Click the X in the circle that appears in the icon.
Deleting a policy instance
To delete a policy instance, mouse over the entry for the policy in the Navigator view. Click the X in the circle that appears to the right of the entry.
Configuring policies in the UI
When the UI generates a policy instance, it applies reasonable default values for common settings. You may need to modify these settings to meet your requirements.
For example:<?xml version="1.0" encoding="UTF-8" standalone="yes"?> <SpikeArrest async="false" continueOnError="false" enabled="true" name="spikearrest-1"> <DisplayName>SpikeArrest-1</DisplayName> <FaultRules/> <Properties/> <Identifier ref="request.header.some-header-name"/> <MessageWeight ref="request.header.weight"/> <Rate>30ps</Rate> </SpikeArrest>
Pode configurar uma política editando diretamente a respetiva configuração XML na vista Código. Por exemplo, a taxa de mensagens máxima para a política de restrição de picos é
inicialmente definida como 30 mensagens por segundo. Pode alterar a taxa máxima alterando o valor do elemento <Rate> no XML da política. Para mais detalhes sobre a configuração de políticas, consulte a Referência de políticas.
Também pode cortar e colar políticas na vista Código. Esta é uma excelente forma de reutilizar políticas dos exemplos disponíveis no GitHub.
Quando faz alterações a uma definição de política na vista Código, as alterações refletem-se no Inspetor de propriedades. O inverso também é verdadeiro: faça alterações no inspetor de propriedades e estas aparecem no XML na vista Código.
Para ver a documentação específica da política de quotas usada neste tópico, consulte o artigo Política de quotas.
Use a funcionalidade de explicação de código do Gemini Code Assist com políticas
Se tiver o Gemini Code Assist, pode usá-lo para compreender as políticas e os elementos das políticas diretamente na IU do Apigee na consola do Google Cloud.
Para usar a funcionalidade de explicação de código do Gemini Code Assist com políticas:
- Enquanto edita a política na vista Código, realce parte do código da política, como um elemento ou um atributo XML. Também pode realçar vários elementos.
- Clique no ícone do Gemini Code Assist, conforme mostrado abaixo. O painel lateral mostra informações sobre a política e o elemento que realçou. .