The object browser panel in the Looker IDE lets you view all the objects in your project in one place, along with the hierarchical relationships between those objects. This can be a useful alternative to navigating your project by file or folder.
Viewing the objects in a project
The object browser panel shows the models, Explores, views, and fields that have been defined in your project, along with the hierarchy of objects and the type of each object. If your project also includes imported files, you can read more details about viewing those objects below.
To use the object browser panel, select the Object Browser icon, which is below the folder icon in the IDE navigation bar.
The object browser panel groups objects by type, and objects are sorted alphabetically within each type. Using the object browser panel, you can show or hide the hierarchies of objects by expanding or collapsing objects.
You can collapse and expand models, Explores, and views to reveal or hide the objects they contain. Select the arrow to the left of an object's name in the object browser panel to collapse or expand the object. Any model in a project is expanded by default in the object browser panel, revealing a list of the Explores defined in the model.
Viewing the type of an object
The object browser panel lists the following object types:
You can view the type of an object in your project by hovering over that object's name in the object browser panel.
The icon to the left of each object's name also identifies the object type:
 — Model
 — Explore
 — View
 — Dimension
 — Dimension group
 — Measure
 — Filter
 — Parameter
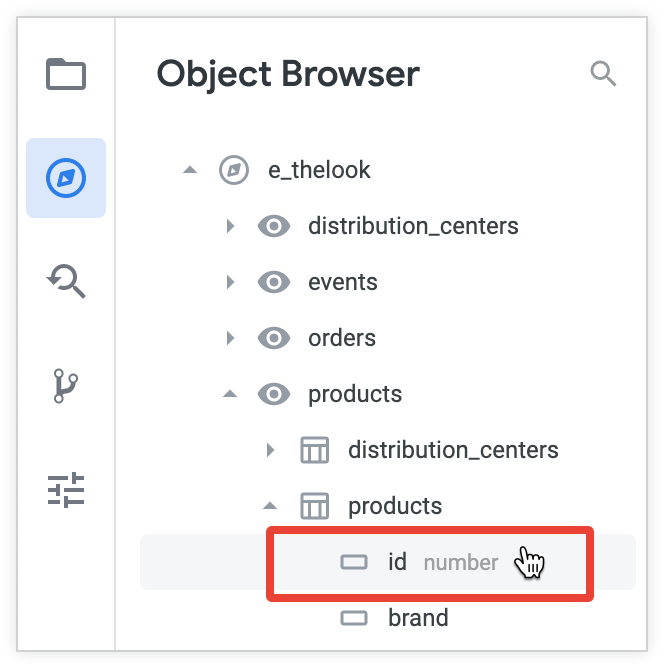
Hovering over the name of a field in the object browser panel reveals the value of the field's type subparameter. In the example below, the icon to the left of the id object indicates that it is a dimension, and hovering over the id dimension reveals that it is a type: number dimension:
Navigating to the LookML for an object
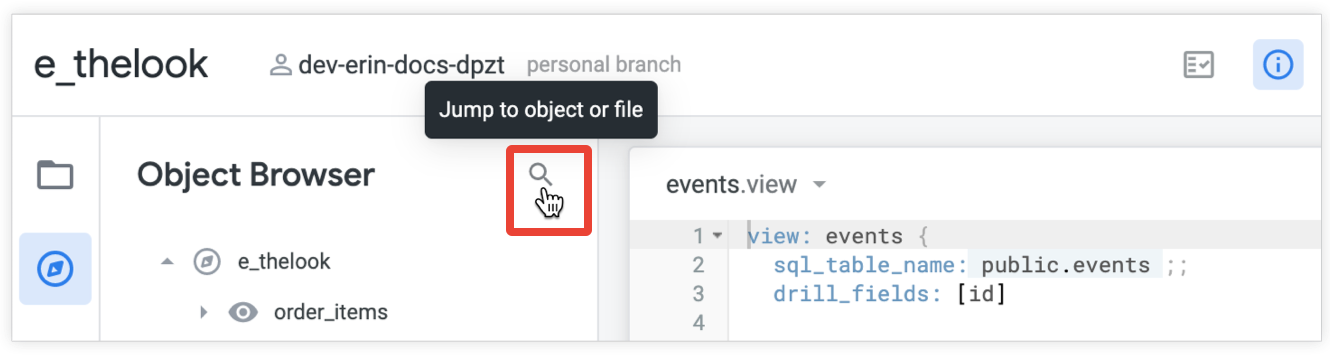
In the Looker IDE, you can do a quick search to navigate directly to LookML objects and project files using the Jump to object or file feature. Click the Jump to object or file icon in the object browser, or use the keyboard shortcut Command-J (Mac) or Ctrl+J (Windows):
See the Accessing LookML project files documentation page for more information.
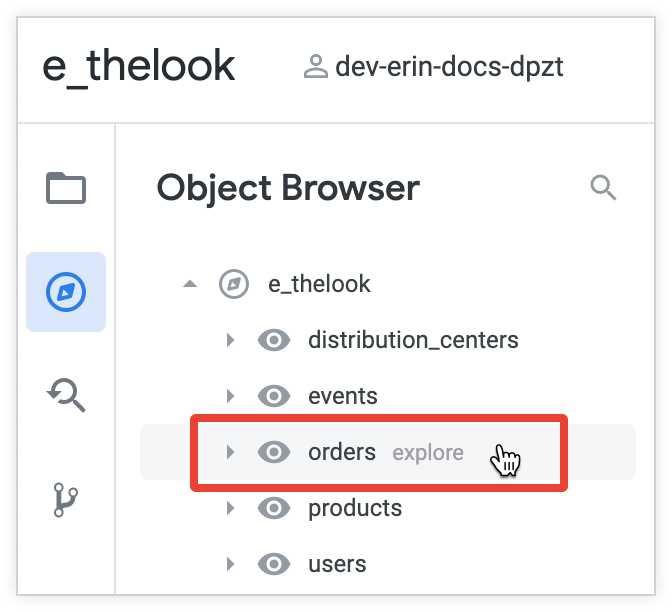
You can also navigate to an object by selecting the name of the object in the object browser panel. When you select an object, the IDE displays the file in which the object is defined and positions your cursor on the first line of the object's declaration.
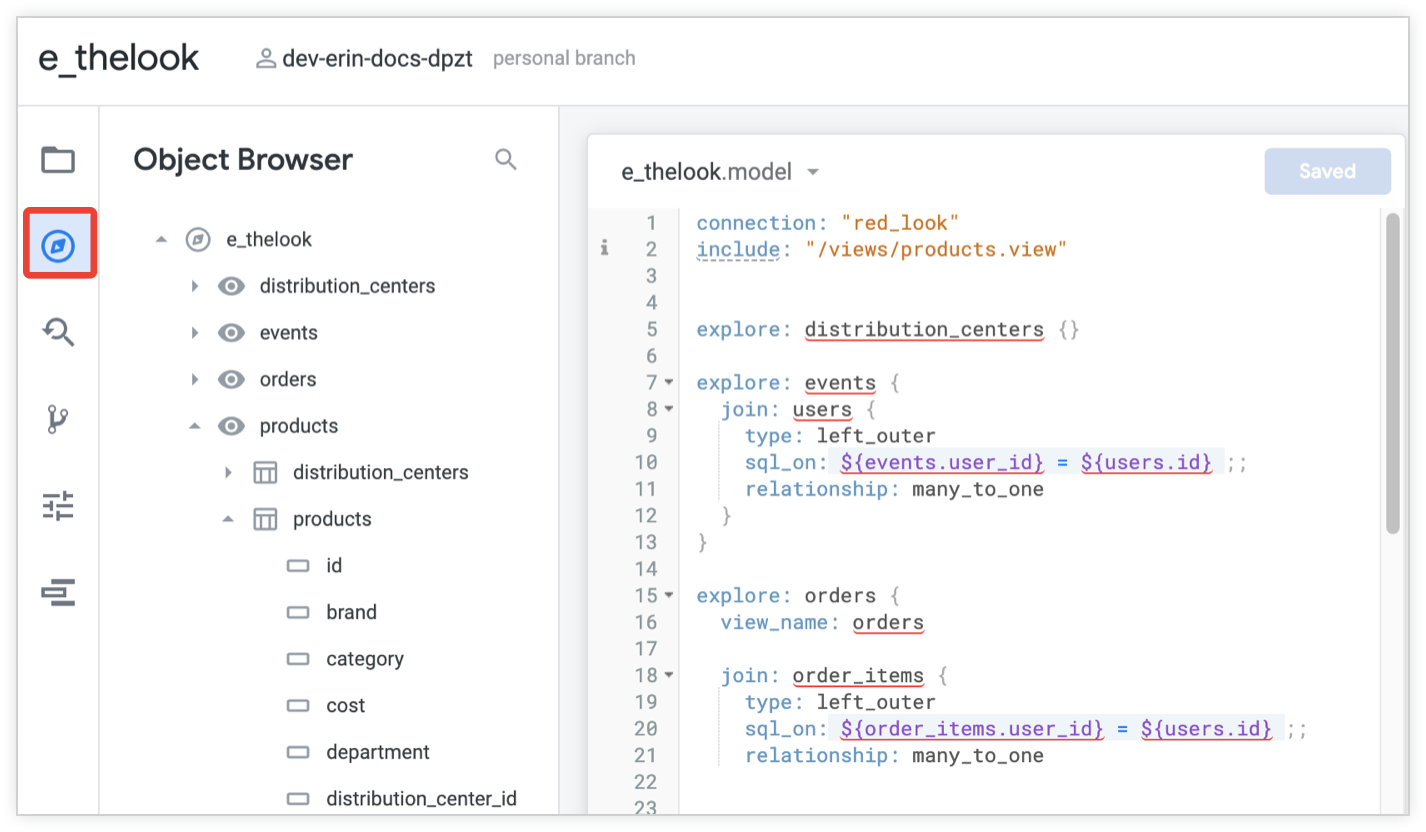
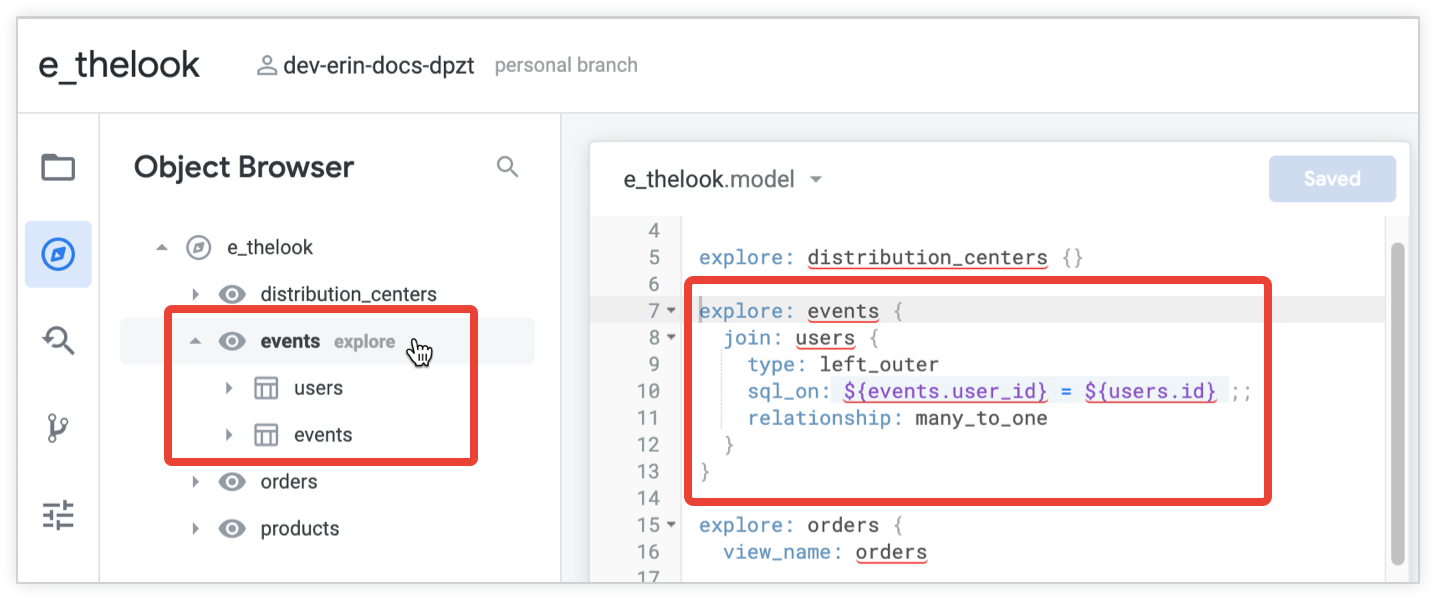
For example, selecting an Explore called events opens the model file in which that Explore is defined in the IDE and positions the cursor at the top of the explore declaration for events. The object browser panel shows the events Explore definition, including the joined users view.
Special situations
Viewing imported objects in the object browser panel
When you import files from another project and include those imported files in your active project, you can use the object browser panel to view imported objects as well.
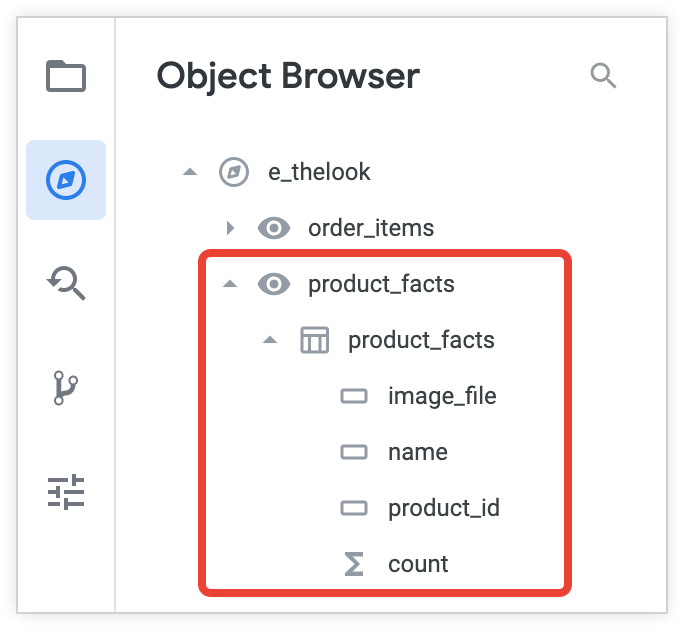
For example, suppose you have used the local_dependency parameter in your project's manifest file to import a local project called e_redlook, which contains a view called product_facts:
# Your project
project_name: "e_thelook"

# The project to import
local_dependency: {
 project: "e_redlook"
}
To make the product_facts view available to your model, you can include that view and create a product_facts Explore:
include: "//e_redlook/views/product_facts.view"
explore: product_facts {}
You can then view the product_facts Explore in the object browser panel and expand the Explore to show any views and fields it contains.
When you select an object from an imported project, Looker opens the file in which the object is defined. The file will be read-only because it is an imported project file.
Viewing extended objects in the object browser panel
If your project includes a view or an Explore that extends another view or Explore, you can use the object browser panel to view and navigate to the LookML for the extending object. When you expand a view that extends another, the object browser panel shows the fields from the base view along with any fields that you have added in the extending view.
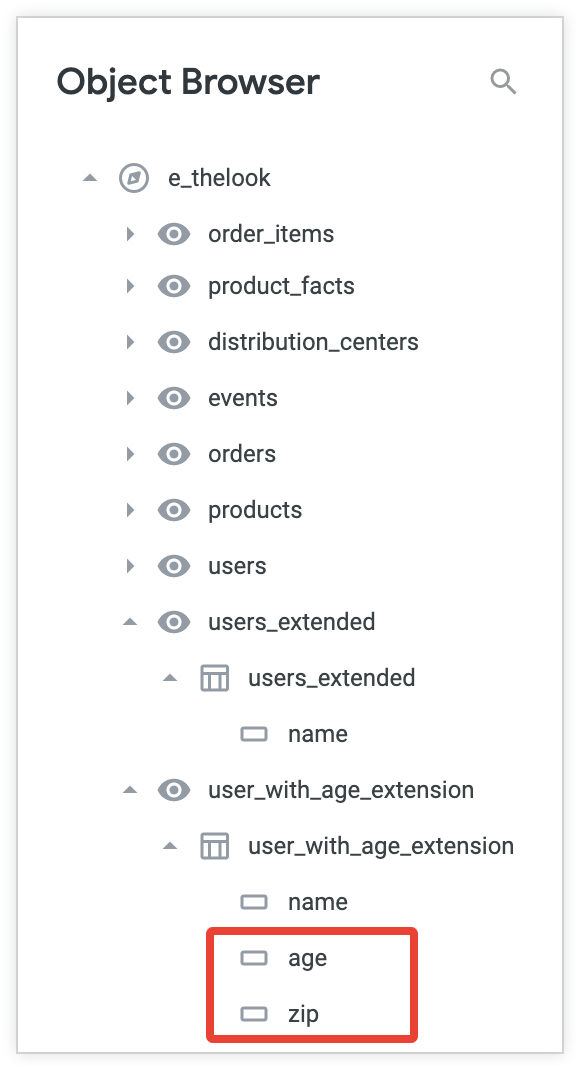
For example, the view file below defines a view called user_with_age_extension that extends another view called users_extended and adds new fields:
include: "/views/users_extended.view"

view: user_with_age_extension {
  extends: [users_extended]

  dimension: age {
    type: number
    sql: ${TABLE}.age ;;
  }

  dimension: zip {
    type: zipcode
    sql: ${TABLE}.zip ;;
  }
}
The object browser panel now shows both the fields that are defined in the base users_extended view and the new fields that are defined in the user_with_age_extension view.
You can navigate to the LookML for the extending object by selecting its name in the object browser panel.
Viewing refined objects in the object browser panel
You can use the object browser panel to view the contents of a refined view or Explore, or to navigate to the LookML for the refinements in your project.
The object browser panel lists refinements and the Explores or views they build upon as single objects, rather than displaying refinements and their base objects separately. If you use refinements to add fields to a view or to join views to an Explore, the fields or views you add will be displayed together with the contents of the original view.
When you select the name of a refined view or Explore in the object browser panel, the IDE opens to the line in your LookML on which the refinement is defined. If a view or an Explore has been refined multiple times, the IDE navigates to the last refinement of that object by include order.
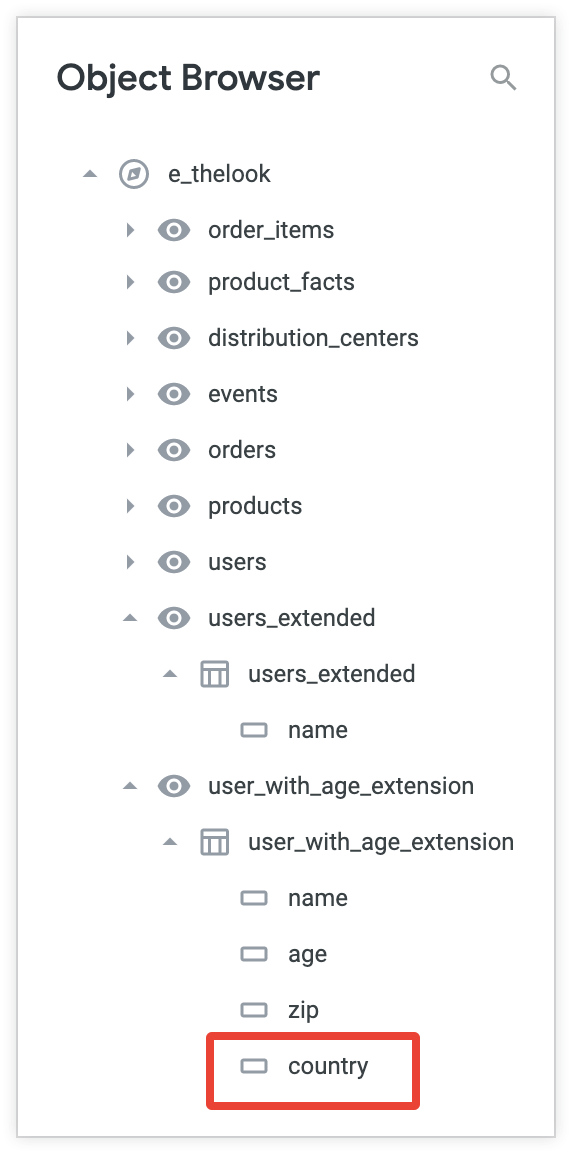
As an example, suppose you want to add a new dimension, country, to the view called user_with_age_extension without modifying the original LookML for the view. To refine the user_with_age_extension view, use the view parameter and add a plus sign (+) in front of the name of the view:
view: +user_with_age_extension {

  dimension: country {
    type: string
    map_layer_name: countries
    sql: ${TABLE}.country ;;
  }
}
When you expand the user_with_age_extension view in the object browser panel, the country field is now displayed along with the view's original fields.
When you're adding refinements to your project, be mindful of the order in which refinements are applied. Refinements are applied line by line going downwards within a single file, and by the order in which their files are included if an object is refined multiple times in multiple files. See the LookML refinements documentation page for information about the order in which refinements are applied.