Looker (Google Cloud core) instances that use private services access and are configured with private connections or hybrid connections may require additional configuration to connect to services or resources outside of the instance's VPC network. The following sections describe additional configuration options.
Connect to other VPCs using private services access
To use internal IPs to connect to services in other VPCs that are hosted by either Google or third parties, you can use private services access.
During Looker (Google Cloud core) instance creation, you created a private services access connection to connect your VPC to the Looker (Google Cloud core) service. You can also update the IP allocation of an existing private services access connection without disrupting traffic.
To set up a private services access connection:
- Allocate an internal IP range in your VPC network.
- Set up the private connection between your VPC network and service producer's network, using the allocated IP range. This private connection establishes a VPC Network Peering connection between your VPC and the other network.
Private connections are a one-to-one relationship between your VPC network and a service producer. If a single service producer offers multiple services, you only need one private connection for all of the producer's services.
Connect to on-premises resources or third-party services using private services access
If your instance was created to use private services access, with either private connections or hybrid connections, you can use either of the following two options to connect Looker (Google Cloud core) instances to on-premises resources or third-party services:
- Cloud Interconnect and Cloud Router
- Cloud VPN, specifically HA VPN, and Cloud Router
With either method, you will need to do the following:
- Configure a dynamic route in your Looker (Google Cloud core) VPC for each on-premises resource.
- Set up a custom advertised route of the Looker (Google Cloud core) private services access subnet on all Cloud Routers that are deployed in the Looker (Google Cloud core) VPC.
- Update your on-premises firewalls to allow traffic with the Looker (Google Cloud core) subnet.
- Configure DNS forwarding, which will let Looker (Google Cloud core) connect to any on-premises resources.
- Configure DNS Peering with the Service Networking Google Managed VPC for the Looker (Google Cloud core) instance to resolve the private hostnames.
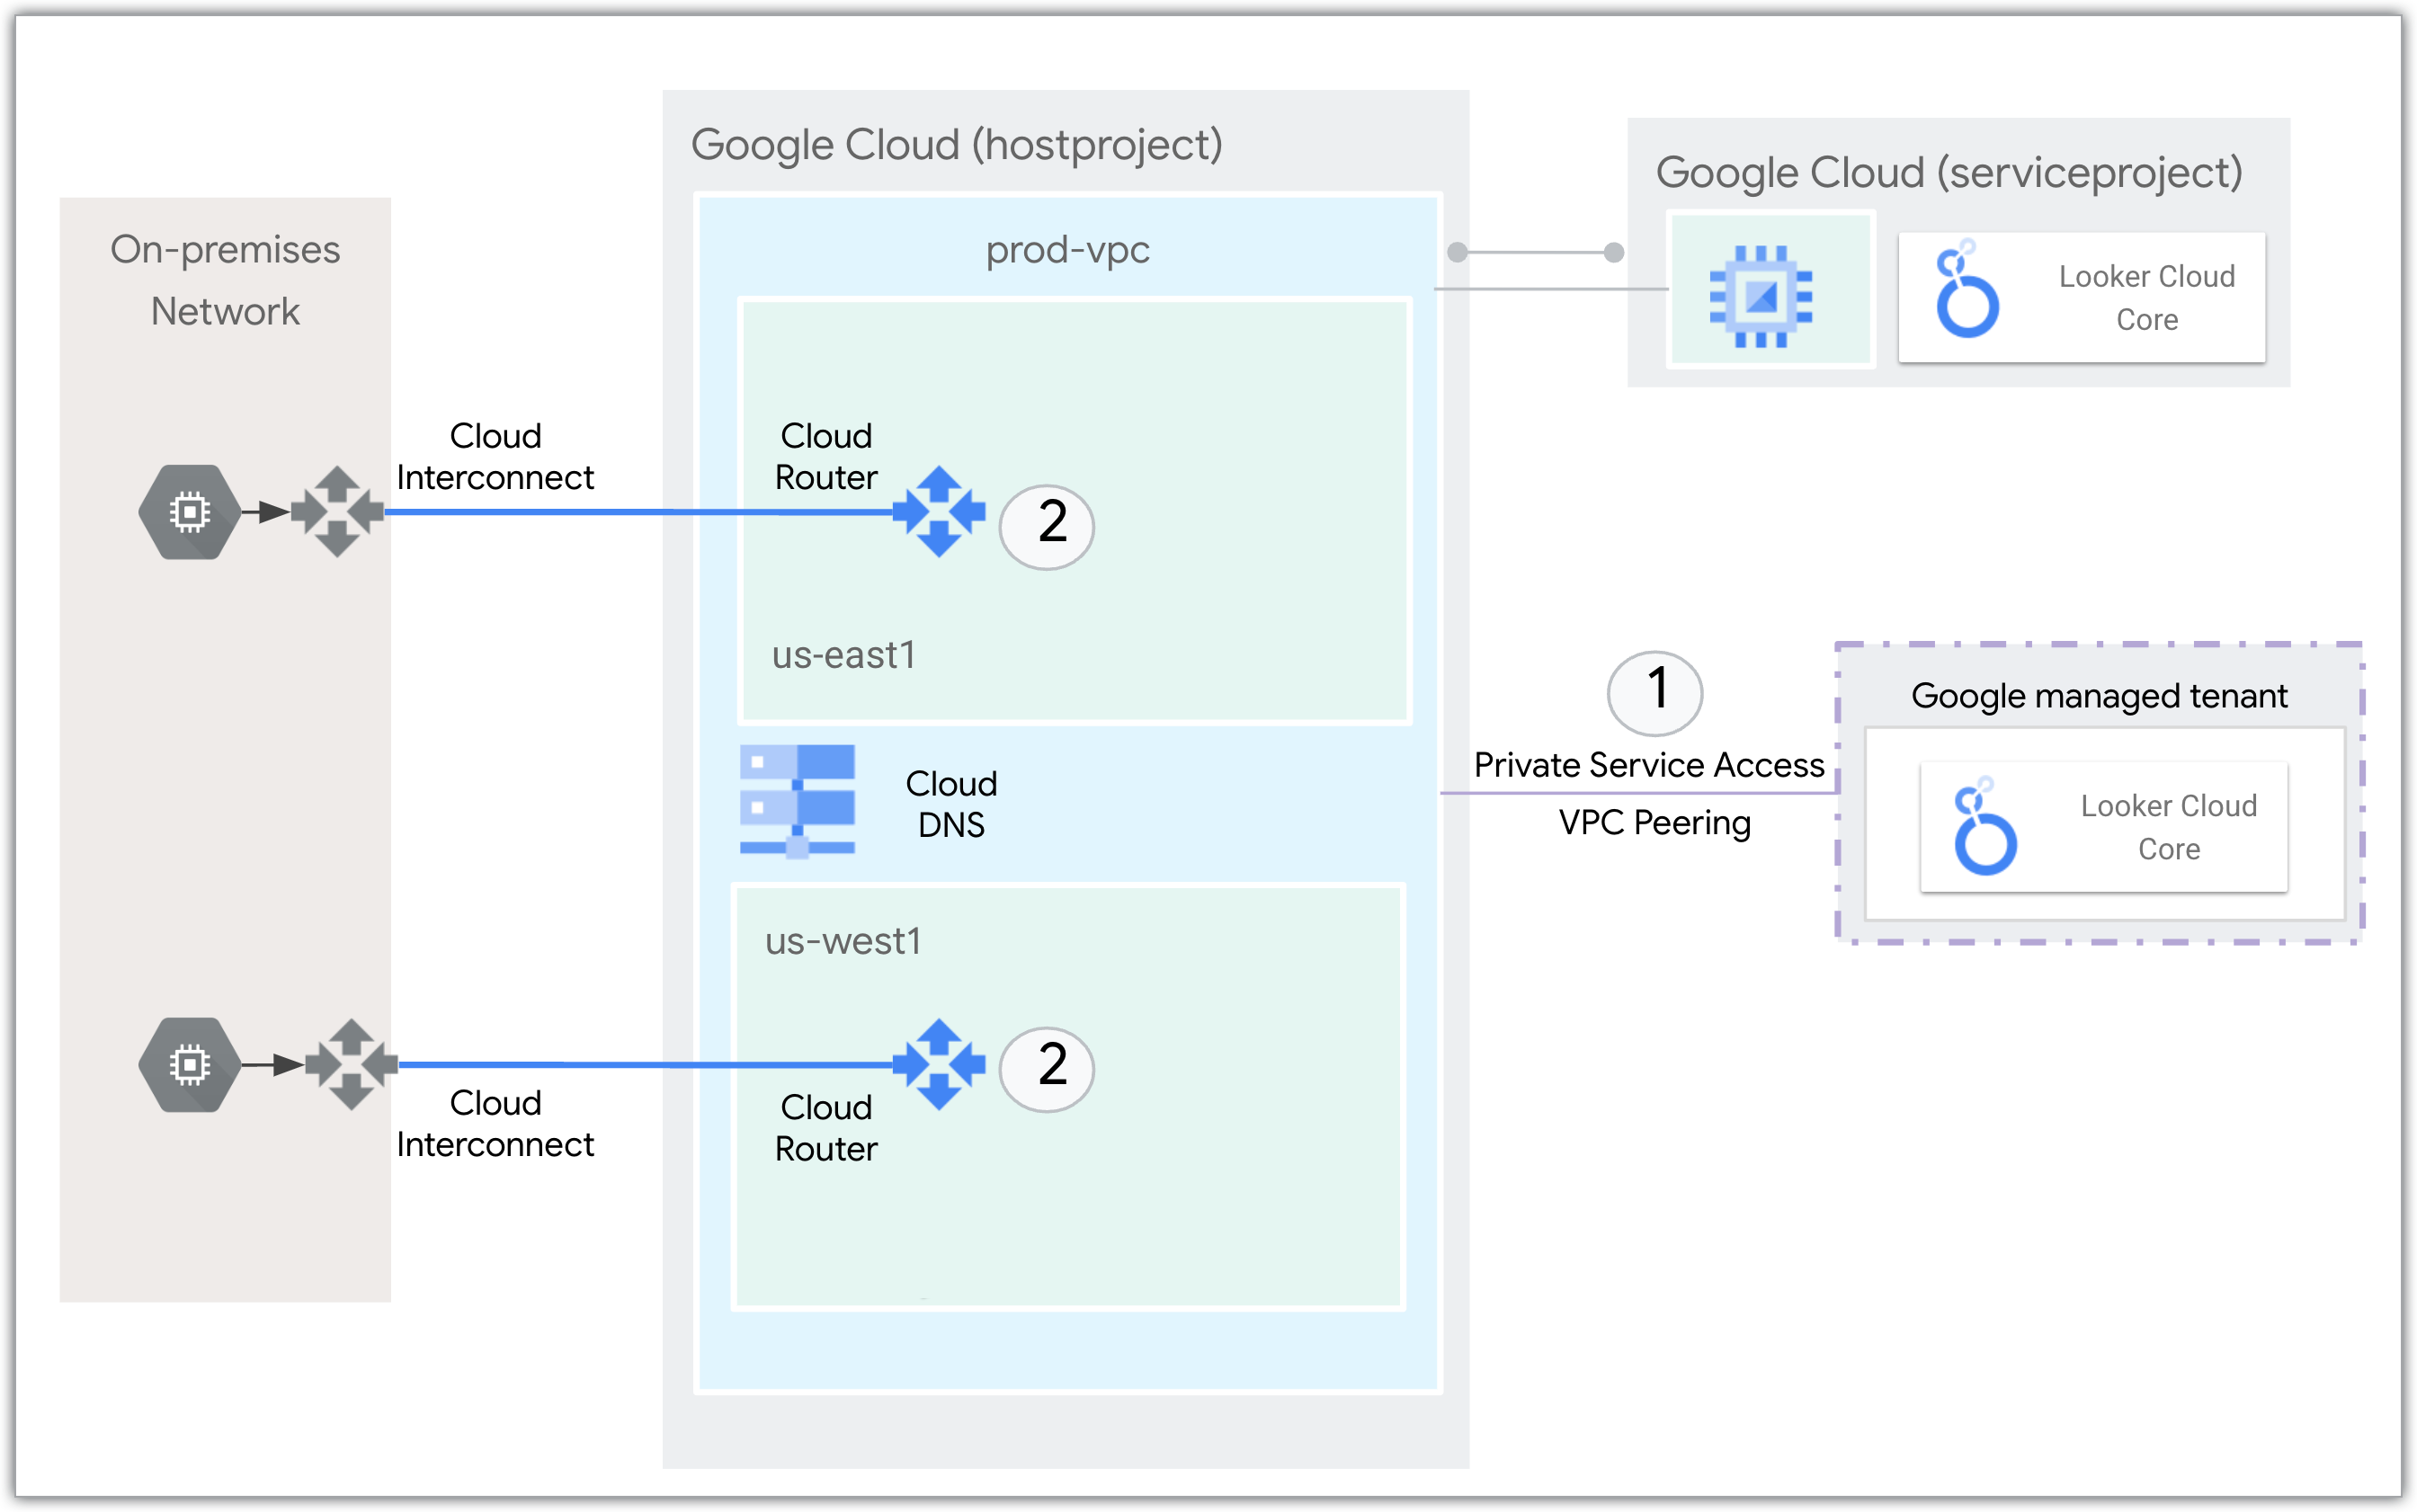
Cloud Interconnect and Cloud Router
The following network diagram shows how Cloud Interconnect and Cloud Router interact with the Looker (Google Cloud core) service to connect to an on-premises network:
- Private services access connects the Looker (Google Cloud core) service with the VPC over internal IP addresses using VPC peering.
- Cloud Router uses Border Gateway Protocol (BGP) to advertise the IP prefixes and program dynamic routes based on the BGP advertisements it receives from a peer. Cloud Interconnect is used to connect to the on-premises network.
Cloud VPN and Cloud Router
For a walkthrough of how to create a private and public IP Looker (Google Cloud core) instance and connect it to an on-premises database using Cloud VPN and Cloud Router, see the Connect Looker Cloud over hybrid networking codelab.
What's next?
- Connect Looker Cloud over hybrid networking
- Connecting Looker (Google Cloud core) to your database
- Prepare your Looker (Google Cloud core) instance for users
- For an example of how to manually install Looker Marketplace content, see the Looker Community article, Installing the Looker API Explorer on a Looker (Google Cloud core) instance on a private IP network.