Using Looker's API Explorer, users can test API calls nearly instantly without having to write a single line of code. If you have installed the API Explorer extension from the Looker Marketplace, you can click API Explorer in the Looker Applications menu to open the API Explorer and view current API documentation. If you have not installed the API Explorer extension, you can install it from the Applications section of the Looker Marketplace.
Maybe through using the API Explorer, you have figured out the best workflow for dynamically creating a Look, updating the underlying query, and scheduling it to various stakeholders at your company. A common next question is, how do I run these calls or functions outside of the API Explorer? There are three common ways to access the API:
- Looker's API software development kits (SDKs)
- HTTP requests
- Software development tools
This page walks you through how to use these methods.
Before you start: Authentication and ports
Regardless of how you access Looker's API, you will first need two pieces of information: your personal API authentication (in the form of a client ID and client secret) and the port number that your Looker instance uses.
To find a client ID and client secret:
- If you are a Looker admin, visit the Users page in the Looker UI for the user you are interested in and go to Edit keys.
- If you are not a Looker admin, you will have received your client ID and client secret from your Looker admin.
For Looker instances that are hosted on Google Cloud or Microsoft Azure, and for instances that are hosted on Amazon Web Service (AWS) that were created on or after 07/07/2020, the default Looker API path uses port 443. For Looker instances hosted on AWS that were created before 07/07/2020, the default Looker API path uses port 19999.
If you host your own instance, check with your system admin for the port number. It may be set in the API Host URL field of Looker's admin panel. You can see this by going to the Admin menu drop-down in Looker and selecting API.
For more information on ports, go to the Getting started with the Looker API documentation page. The following examples use an API port of 19999, but you should confirm the port being used by your instance.
Option 1: Use a Looker software development kit (SDK)
Looker offers official Looker API client SDKs in Python, Ruby, Typescript and JavaScript, Swift, Kotlin, and R. You can find source code and examples in Looker's sdk-examples GitHub repo.
An SDK provides tools or libraries that allow developers to interact with a given platform or application. In this case, Looker's SDKs generally contain APIs. To borrow an example from web developer and author Kristopher Sandoval, "APIs are telephone lines, allowing for communication in and out of the house. The SDK is the house itself and all of its contents." He explains what an SDK is and how that relates to APIs in a great article, What Is the Difference Between an API and an SDK?
Looker's SDKs house all the API endpoints you could want or need to use, and they are packaged in a manner that allows you to seamlessly interact with Looker using the programming language of your choice. The functions let you perform the following tasks:
- Send data to Looker
- Get data from Looker
- Update data in Looker
- Delete data in Looker
Here is an example of how you can update a user with the Python SDK:
-
Initialize the session with
looker_sdk.init. -
Update the user with
sdk.update_user. You pass theuser_idover to specify which user you want to update. -
Use
models.WriteUserto specify how you want to update the user.
    #### Initialize API/SDK for more info go here: https://pypi.org/project/looker-sdk
    from looker_sdk import methods40, models
    sdk = looker_sdk.init40()
    me = sdk.me()
    # print(me)
    new_friend = sdk.update_user(user_id=29,
    body=models.WriteUser(first_name="newnew", last_name="new_again"))
    print(new_friend)
While using one of our SDKs, if you use an IDE like Visual Studio Code and command-click (F12 in Visual Studio Code's default settings) and then select go to definitions, you can see all the methods and all the parameters accepted or returned by the methods. Or, you can see them in the SDK GitHub repo — look for methods and model files.
Option 2: HTTP requests with curl or a requests library
What if you do not want to write a script or spend months or years learning a new programming language? In that case, you can use curl to make HTTP requests to utilize Looker's API.
An HTTP request sends a message to a destination, which can be a server, a phone, or even your smart television. There are a few different types of HTTP requests. How you use these requests with Looker's API depends on the nature of the method you pass as part of the API call. Some methods give you data, some send data to Looker, some update data, and some delete or remove data from Looker.
| Action | Method |
| Create |
POST
|
| Read |
GET
|
| Update |
PUT
|
| Delete |
DELETE
|
Let's start curling. For some background, Zendesk has a great tutorial, Installing and using cURL.
To start making HTTP calls to the Looker API, the first thing you need to do is call the Looker API's login endpoint using your client ID and client secret. This creates an access token. Then, you take this access token and pass it with each call. The access token ensures that the call is coming from an authorized user.
This page uses a couple notations to indicate where you should replace the text in the code sample with your information. Looker-hosted instance URLs take the formhttps://<hostname>.<subdomain>.<domain>.com; where you see this notation in the examples on this page, replace the<hostname>.<subdomain>.<domain>.comsection with the URL to your Looker instance. In addition, we use the notation<value>to indicate where you should enter your appropriate value, replacing the<value>in the code sample. For example, in the following code, where it showsclient_id=<value>&client_secret=<value>, replace the first<value>with yourclient_idand the second<value>with yourclient_secret.
Here is the curl to get the access token:
curl -d "client_id=<value>&client_secret=<value>" https://<hostname>.<subdomain>.<domain>.com:19999/login
Here is the response:
{"access_token":"ABCDEFGHIJLMNOP1234","token_type":"Bearer","expires_in":3600}
Receiving the token tells you that Looker recognizes your API credentials. The token is returned with an expires_in value, which indicates how long the token is valid. It's often around 60 minutes (3,600 seconds).
Now that you have an access token, you're ready to make calls. All the endpoints are listed by API version in the Looker API 4.0 reference documentation. And remember, Looker's Community site is a great resource for asking other Looker users questions about how they leverage the API, for learning best practices, or for sharing successes you've had with the API with other users.
Let's say you want to create a new user. To do this:
- Write a curl
POSTrequest that passes over your token to tell Looker that you are authorized. - Include a body, in this case formatted as JSON, to tell Looker what attributes you want your new user to have. (There are some required fields for API calls, so please consult the Looker API 4.0 reference documentation.)
- End the curl notation with the endpoint you want to use, in this case,
users.
  curl -H "Authorization: token <value>
  " -H "Content-Type: application/json" -d "{\"first_name\": \"<value>\",\"last_name\": \"<value>\", \"email\":\"<value>\"}" https://<hostname>.<subdomain>.<domain>.com:19999/api/4.0/users
The -H stands for header, and the -d stands for data. For more information on curl commands, go to this GitHub gist.
You just created a user with the first name, last name, and email address that has the values you entered previously.
What if you want to write this in a script, so you do not have to write out these commands every time you want to complete this workflow? You can use a programming language and library like Python's requests library.
For example, here's a script that uses the requests library to get a Look using the Look ID (the <value> in the looks call), apply a new filter, and then download the results as a CSV file:
  import requests
  ID = '<value>'
  SECRET = '<value>'
  PARAMS = {'client_id':<value>,
            'client_secret': <value>}
  URL = "https://<hostname>.<subdomain>.<domain>.com:19999/api/4.0/login"
  r = requests.post(url = <value>, params = <value>, verify=False)
  data = r.json()
  token = data['access_token']
  print(token)
  headers = {'Authorization': "Bearer " + token}
  print(headers)
  look_url = "https://<hostname>.<subdomain>.<domain>.com:19999/api/4.0/looks/<value>"
  look = requests.get(look_url, headers=headers, verify=False)
  json = look.json()
  query = json['query']
  ### ADD MODEL HERE
  ### ADD FILTER
  body = {
      "model":"<value>",
      "view":query['view'],
      "fields":query['fields'],
      "filters":{<value>}
  }
  print(body)
  run_inline = "https://<hostname>.<subdomain>.<domain>.com:19999/api/4.0/queries/run/csv"
  run_query = requests.post(run_inline, headers = headers, json=body, verify=False)
  print(run_query._content)
  print(run_query.url)
Option 3: Software development tools
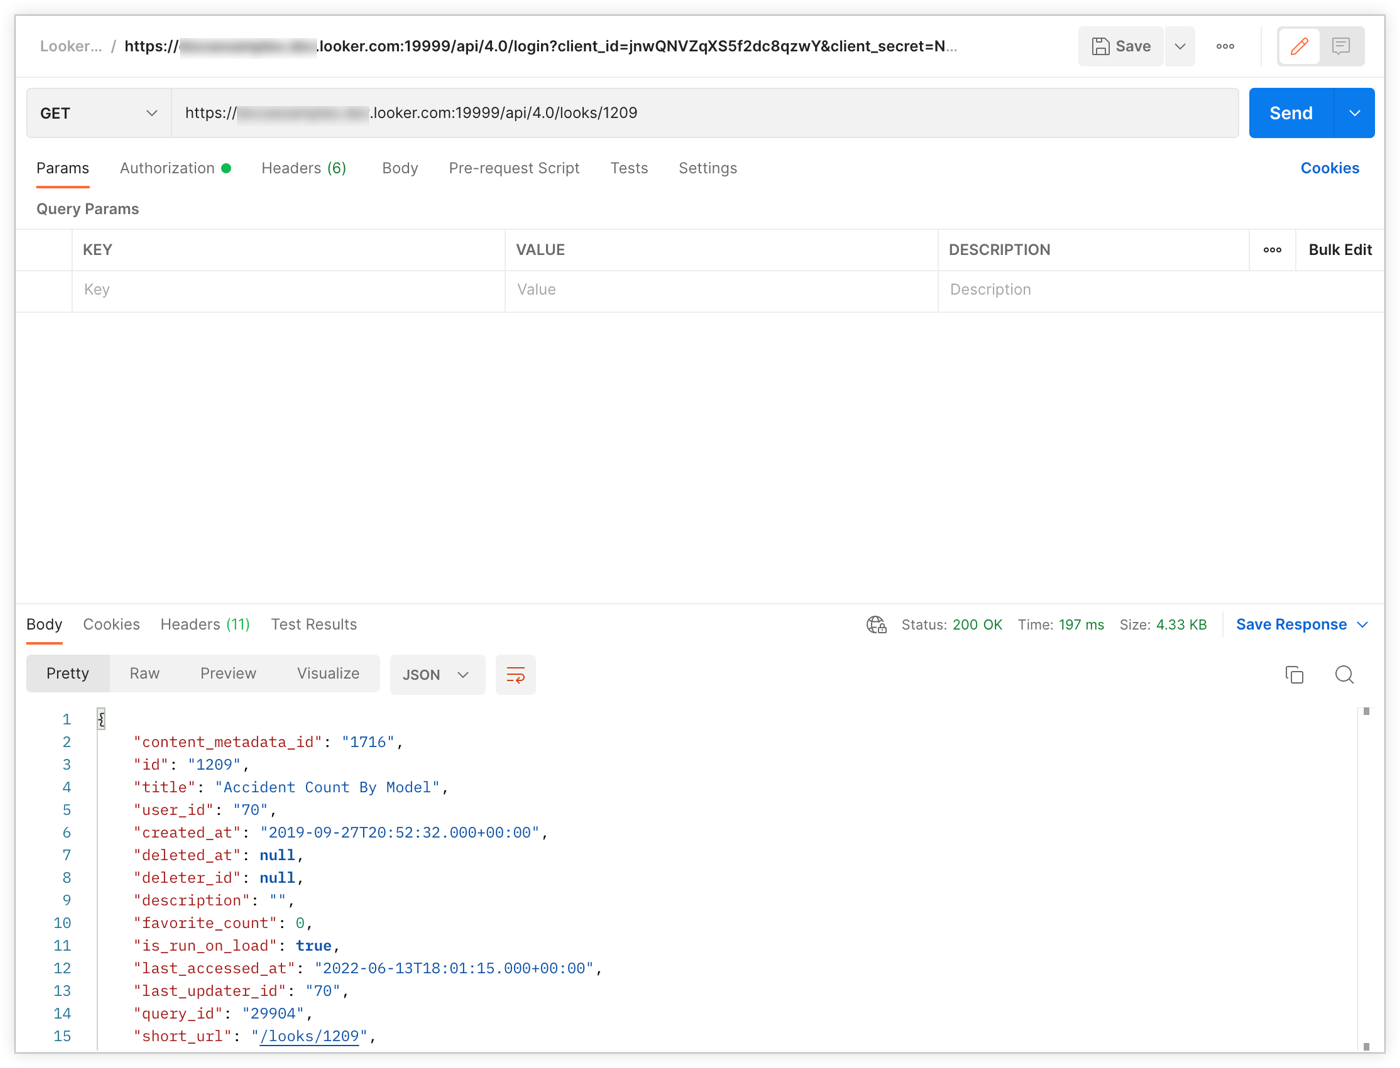
Tools such as Postman or Paw allow users to interact or leverage API endpoints through a graphical user interface (GUI). The same process applies to a software development tool as applies to HTTP requests. The first step is to log in with your client secret and client ID. Then, store the access token as a bearer token to authorize the API calls that follow, as shown here in Postman.
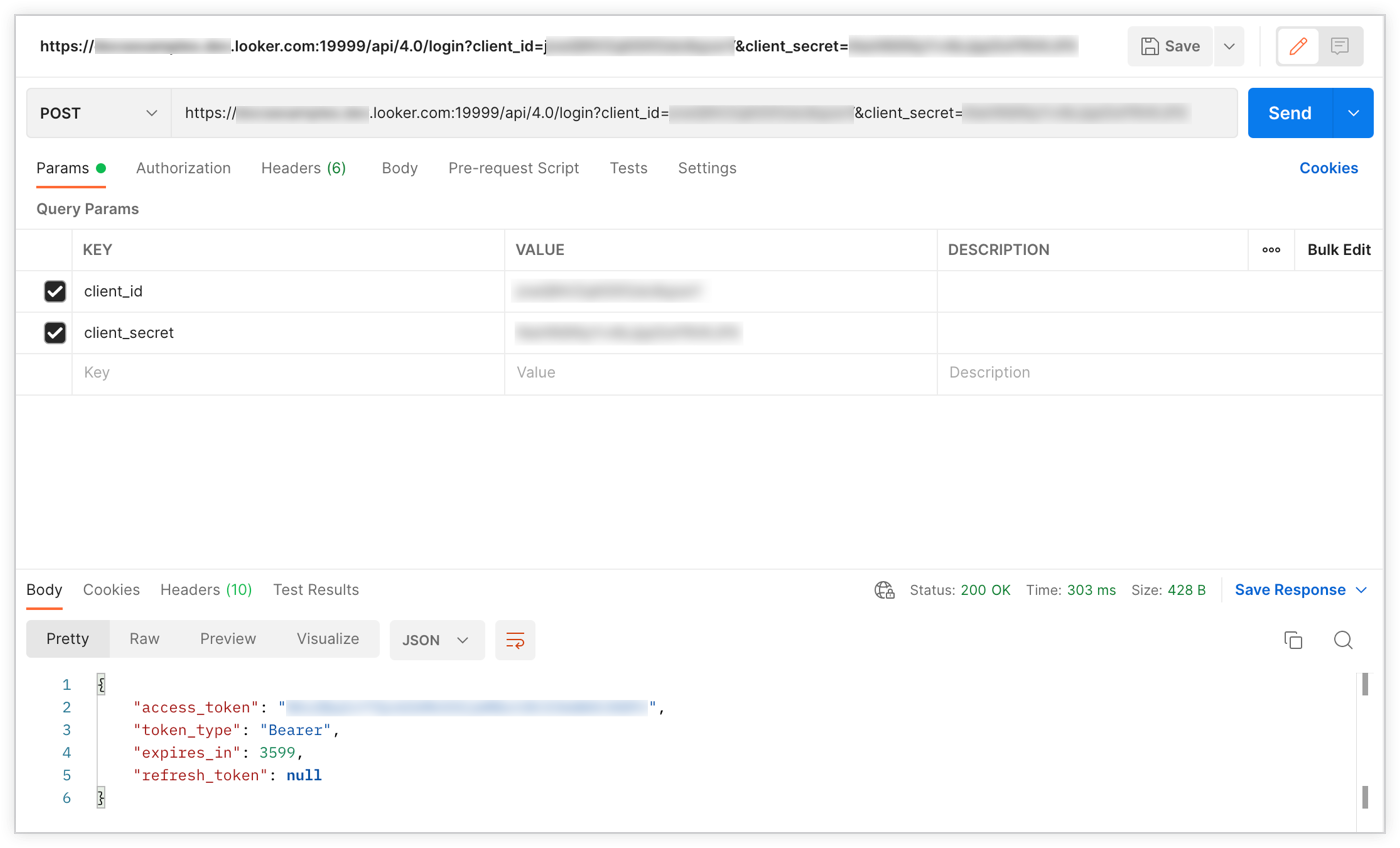
Postman or other software development tools (like Paw) let you specify the authorization, body, parameters, and headers all within their UIs and then generate the request for you. They will also execute the endpoint when you hit send.
Go forth! (But be careful)
Now that you can use Looker's API through an SDK, an HTTP request, and a software development tool, go forth and test things out! However, be aware that, while using the API can help automate processes like creating or reassigning a schedule after a user leaves your company, improper API usage can cause damage to an instance.
Some general things to remember:
- Be careful when editing permissions or deleting users, especially in bulk. It is possible to delete or lock out many users, including admins, and actions like this cannot easily be reversed.
- API calls increase instance usage, so try to schedule them for off hours for optimal performance.
- There is an open file limit on each instance server, so it is possible to crash an instance through irresponsible API usage.
- Test out workflows and functions on a small scale before adding them to production.
- Never share your API credentials or leave them in a file where other users can access them.
If you have a question or want to share a cool idea, check out the Looker Community. Feel free to let us know if there is anything we can improve or if there are any other examples you would like added to our documentation.