Looker 4.0 introduced a new LookML syntax that improved upon the original YAML-style LookML with familiar but easier syntax and a rich and assistive IDE to make LookML development easier. From Looker 4.4 onward, all new LookML projects have had to be created in new LookML; however, some projects that were created before the conversion may still be modeled in YAML (old) LookML.
Looker provides an automated way to convert a YAML LookML project to new LookML. This page explains how to perform that process. Each LookML project needs to be converted individually, and developers must prepare and coordinate efforts, so be sure to read all the way through this page before converting a project.
Prepare to convert
The task of converting a YAML LookML project to new LookML must be performed by only one LookML developer. The conversion takes place within that developer's Development Mode, and the changes are then committed and deployed like any ordinary LookML change.
That being said, the process requires the cooperation of all LookML developers. Because the conversion alters essentially every line of LookML, it is important to make sure that other LookML developers have committed and deployed all their changes to the project before the conversion process begins. Doing otherwise can result in some very nasty Git merge conflicts.
Although the conversion process is automated, new LookML is much more thorough about error checking than YAML LookML. This means that, after the conversion, errors may show up that weren't previously surfaced. Resolving these errors will improve the quality of the project. The number of errors will necessarily vary from project to project, which means that fixing them could take anywhere from a few minutes to a few hours. Either way, development on the project must remain paused by all LookML developers until the errors are fixed.
Find YAML projects on your Looker instance
To see the YAML projects on your Looker instance:
- From the Develop menu, select the Manage LookML Projects or the Projects option (the option is slightly different depending on where you access the Develop menu).
-
On the LookML Projects page, look for the
YAML LookML label in a project's table row:

TIP: You can select the project's name in the table to navigate to the project's LookML.
Coordinate with developers before converting
To prepare for converting to new LookML:
- Choose one LookML developer to run the conversion process.
- Make sure that the project is error-free by running the LookML Validator. Fix all errors, and then commit and deploy the changes before continuing to the next step.
- Designate a time to perform the conversion.
- Communicate to all other LookML developers that they need to have any changes they're working on committed and deployed by the designated time. That is, all Development Mode copies of the project should be in the Git state Up to Date with Production.
- Communicate to all other LookML developers that they should not make, commit, nor deploy any changes until the conversion is complete.
Convert to New LookML
To convert to new LookML, run the converter:
- Enter Development Mode.
- Open the project that is to be converted.
- Make sure that the Git status in the upper left corner shows Up to Date with Production.
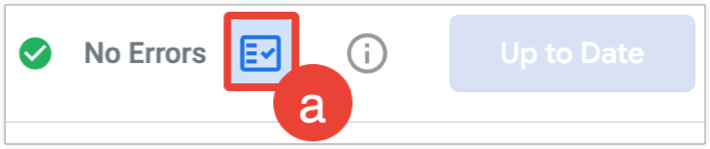
- Run the LookML Validator to ensure that there are no errors in the project — the result should be No LookML Issues. (To run the LookML Validator, select the Validate LookML button at the top right of the Looker IDE; or select the Project Health icon at the top of the IDE to open the Project Health panel, and then select Validate LookML.)
-
To convert the project from YAML LookML to new LookML:

-
Select the Git Actions icon from the navigation sidebar
of the Looker IDE.
-
Alternatively, select the Project Health icon
from the top of the IDE:
-
Alternatively, select the Project Health icon
from the top of the IDE:
- Select the Convert Project to New LookML option from the Git Actions panel or from the bottom of the Project Health panel.
- Select the Convert to New LookML button in the confirmation dialog.
-
Select the Git Actions icon from the navigation sidebar
of the Looker IDE.
Validate the new LookML
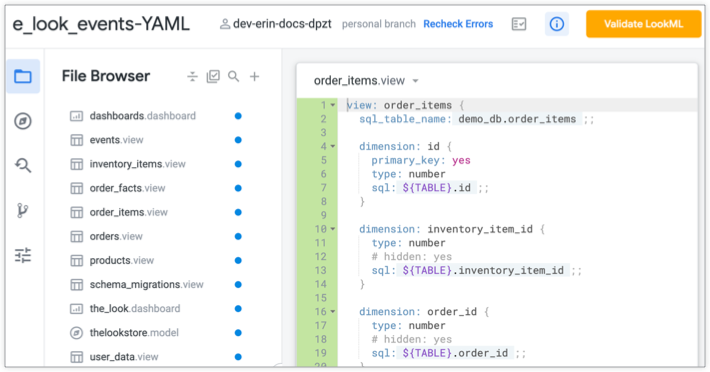
When the converter has finished running, the IDE will indicate that your files have changed with a dot next to each filename:
To validate the new LookML:
- Select the Validate LookML button to run the LookML Validator. If there are no errors, you can skip ahead to the Commit and deploy the new LookML section of this page.
- You may see errors where before you had none. As previously noted, new LookML is more thorough about checking for errors than YAML LookML. Go through and fix the errors. If you get stuck resolving them, refer to the Resolving errors section at the end of this page.
Commit and deploy the new LookML
At this point, commit and deploy as you would with any ordinary LookML change. Be aware: this commit will trigger a rebuild of your persistent derived tables (PDTs). Once the commit is deployed, let all the other LookML developers know that the conversion is done and that queries relying on PDTs may take a little longer than usual to run, at least until everything is rebuilt. Developers can pull from production in their Development Mode to bring in the changes and then continue developing — now with an improved and a more intuitive LookML syntax and a much more helpful and powerful IDE.
Resolving errors
As a result of new LookML's more thorough model validation, you may see errors
after you convert that weren't surfaced before. Additionally, new LookML's ad
hoc error checking requires a bit more information in some cases; the converter
attempts to figure this out for you, but in some cases you may need to add an
extra include line in a view file or two.
Invalid field references
In some contexts, YAML (old) LookML does not ensure that the fields or sets you reference are actually defined somewhere in the model. The most likely place this will surface is in drill field lists and sets.
For example, if your old LookML included
drill_fields: [id, name, email], but at some point in the development
of your model you removed the name field in favor of
first_name and last_name fields, YAML LookML will not
have warned you that you were referencing a field (name) in this
drill field list that does not exist. This can also occur if you are referencing
a field in a dimension group and your YAML LookML didn't specify the field the
way new LookML does.
New LookML, on the other hand, will display these types of errors. So, after converting your project and running the LookML Validator, you may see errors about invalid field references that you never saw before. Fixing these errors will improve the overall quality of your model.
Missing includes in view files
In some cases, new LookML's ad hoc error checking requires a bit more context
than was necessary in YAML LookML. Specifically, it may be necessary to place
an
include
line in some view files, most commonly when one view extends another.
When there is no ambiguity about which file needs to be included in a view, the
converter will automatically add the appropriate include declaration
in the new LookML view file, and you won't see any errors.
In some cases, however (such as with projects that contain multiple models), there may be two or more views with the same name declared in separate view files. The converter won't be able to determine which one is the correct one to include, so it will add a comment at the top of the new LookML file to indicate that only one of those views should be included. Resolve the resulting error by going to the view file and uncommenting the correct suggestion.
Stranded extension_required Explores
Like the invalid field references issue described previously, in new LookML the
LookML Validator will alert you to Explores that are declared with
extension: required
but that are not actually being extended. To resolve this error, either reconnect
these Explores to their extended objects or, if they're unused, remove them.
Version control
Because the LookML conversion process replaces your .lookml view
and model files with .lkml versions, if one or more developers commit
to your project during conversion, you will end up in the middle of a merge conflict.
For this reason, it is
extremely important that only one developer run the converter,
and they should coordinate to ensure that everyone's Development Mode copies
are clean and up to date prior to beginning the conversion process.
To avoid version-control issues, there must be a code freeze during conversion. Other developers should not check in changes during the time that is blocked off for conversion.
If the developer who executes the conversion runs into any issues during the conversion process but before committing changes and pushing to production, they may find it helpful to revert to production. This option from the drop-down (pictured in the Run the converter section of this page) will undo the conversion, allowing the developer to start the process over.