Google Cloud for Games
Google Cloud for Games helps you create exceptional player experiences by unifying performance and insights.


An ecosystem for live service games
Google operates live services used by billions. Harness world-class technology, performance, and scale with Google Cloud.
Elevate your live games to next generation living games with Google’s generative AI capabilities.
Google Cloud's solutions helps you serve exceptional games and uncover new ways to delight players, so they come back for more.
Cloud infrastructure for games
The world has more players with higher expectations
Google Cloud's ecosystem of solutions helps you serve players reliably everywhere in the world. Create, scale, and react—fast.
“Our goal is to continually find new ways to provide the highest-quality, most seamless services to our players so that they can focus on their games. …This collaboration makes it possible to combine Google Cloud’s expertise in deploying Kubernetes at scale with our deep knowledge of game development pipelines and technologies.”
Carl Dionne, Development Director, Online Technology Group, Ubisoft


Databases and analytics for games
As audiences grow, there’s more to know
Initially built for Google's own consumer services, Google Cloud's real-time databases scale like no other. Harness, secure, and scale all your data across regions and games.
“Our infrastructure needs to support hundreds of thousands of concurrent connections per second, as well as our data warehouse, and we saw that Google has the capability to handle our needs.”
Jacques Erasmus, CIO, King
Top solutions for games


Analytics and AI for games
The clues to gain and retain players are in your data
Successful games generate vast amounts of data. Google Cloud's AI and analytics solutions help you distill swaths of data into facts and insights.
Top solutions for games


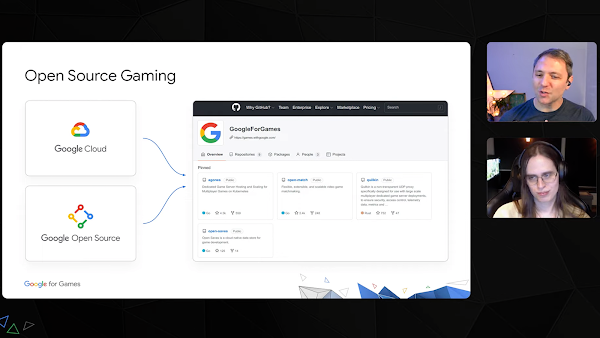
Open source for games
The largest games must integrate with existing tools and technology
Create custom solutions without starting from scratch. Use Google-founded open source projects: from game-specific projects like Open Match to industry standards like Kubernetes.
Top solutions for games


AI for games
Bring your games to life with cutting-edge generative AI
Integrate generative AI into your development pipeline with Vertex AI. Deploy AI models onto Google Kubernetes Engine to create entirely new player experiences.


Serve your players
Cloud infrastructure for games
The world has more players with higher expectations
Google Cloud's ecosystem of solutions helps you serve players reliably everywhere in the world. Create, scale, and react—fast.
“Our goal is to continually find new ways to provide the highest-quality, most seamless services to our players so that they can focus on their games. …This collaboration makes it possible to combine Google Cloud’s expertise in deploying Kubernetes at scale with our deep knowledge of game development pipelines and technologies.”
Carl Dionne, Development Director, Online Technology Group, Ubisoft
Know your game
Databases and analytics for games
As audiences grow, there’s more to know
Initially built for Google's own consumer services, Google Cloud's real-time databases scale like no other. Harness, secure, and scale all your data across regions and games.
“Our infrastructure needs to support hundreds of thousands of concurrent connections per second, as well as our data warehouse, and we saw that Google has the capability to handle our needs.”
Jacques Erasmus, CIO, King
Top solutions for games
Understand your players
Analytics and AI for games
The clues to gain and retain players are in your data
Successful games generate vast amounts of data. Google Cloud's AI and analytics solutions help you distill swaths of data into facts and insights.
Top solutions for games
Bolster your tech
Open source for games
The largest games must integrate with existing tools and technology
Create custom solutions without starting from scratch. Use Google-founded open source projects: from game-specific projects like Open Match to industry standards like Kubernetes.
Top solutions for games
Create living games
AI for games
Bring your games to life with cutting-edge generative AI
Integrate generative AI into your development pipeline with Vertex AI. Deploy AI models onto Google Kubernetes Engine to create entirely new player experiences.
Live service games need more than servers


Powering everlasting love for the game
The game industry's most successful game publishers, developers, and studios build on Google Cloud.


Creating better, together
Google Cloud collaborates with some of the game industry's most prominent enablers.