This documentation page describes the steps to automatically generate a basic LookML model from your database connection using the Create a Model page. The Create a Model page can also be used to create a project that will house your model.
There are other options for creating model files as well:
- You can manually create model files and other project files from the IDE.
You can use the legacy method for creating projects and generating models by clicking either of the following, which take you to the legacy New Project page:
- the link in the banner at the top of the Create a Model page
- the Add LookML button in the Pending Projects section of the Projects page
Once on the New Project page, follow the steps in the Creating a new LookML project documentation.
Accessing the Create a Model page
Access the Create a Model page in the following ways:
To access the Create a Model page, you must be in Development Mode.
To access the Create a Model page, you must be a Looker Admin or have the develop permission.
From the Develop section
To access the Create a Model page from the Develop section, complete the following steps.
Click Develop in the left navigation panel.
Select Projects from the Develop section in the navigation panel.
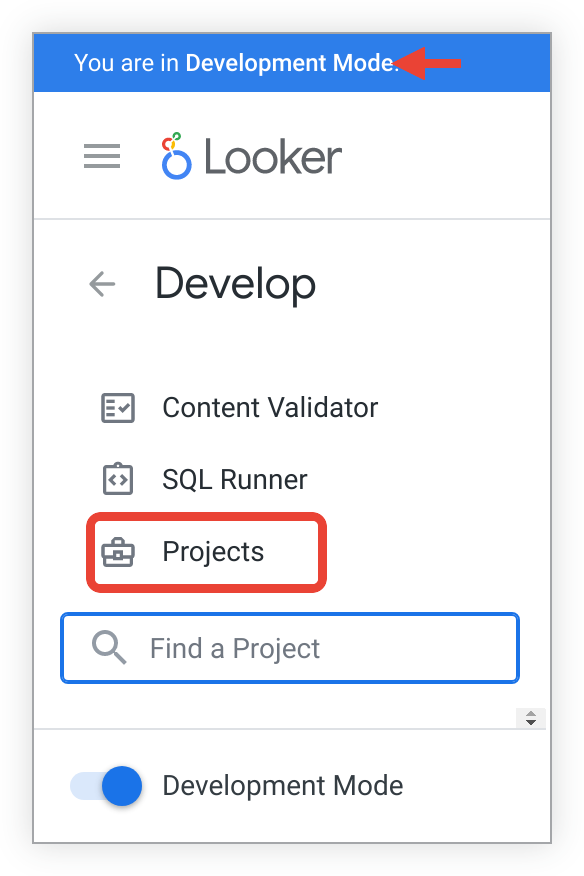
This selection opens the LookML Projects page. The LookML Projects page lets you view all of the projects that you have access to, along with their respective models. From the LookML Projects page, select the New Model button to open the Create a Model page.
From the Create button
To access the Create a Model page from the Create button, complete the following steps.
- From the main navigation menu, click the Create button.
- Select LookML Model from the drop-down menu. This opens the Create a Model page.
Generating a model
The Create a Model page is divided into sections. To generate a model, complete the steps in the following sections. After each section, click Next to save your input and move to the next section.
Select Database Connection:
- Select database connection: Select a database connection from the drop-down menu. You can also choose the Create New Connection option from the drop-down menu. This takes you to the Connect your database to Looker page where you can create a new connection.
If you have access to any projects that already use the connection, they appear once the connection is selected. You can choose to add your new model to an available existing project, or you can choose to create a new LookML project for your model.
LookML Project Name: If you want to create a new LookML project for the model, enter a project name in this field. Project names are case-sensitive and only allow alphanumeric characters,
_,., and-. Choose the project name carefully and consider it a permanent ID for the project. New projects are configured using a bare Git repository.Select the Generate a Readme file that gives more information about using LookML checkbox if you want Looker to add a README file to the new project. The README file contains an introduction to LookML along with links and resources to help new LookML developers.
Click the Next button to save your entries and move to the next section.
Select Tables:
- If you are using a BigQuery connection, select the Google Cloud project in which the dataset resides from the Select GCP project drop-down menu, or search for the project in the Search Project Name field. By default, the Google Cloud storage project is shown in the drop-down menu, if it exists; if it doesn't exist, the Google Cloud billing project is shown.
- In the table, select the datasets (BigQuery) or schemas (other dialects) to use in the model.
- Once the datasets or schemas are selected, use the arrow to the right of each dataset or schema name to open the Tables tab and select each table that you want to include. Views will be created from the tables.
- Once tables are selected, use the arrow to the right of each table name to open the Fields tab and select each field that you want to include.
- Ignore Prefixes: If you want to ignore the table prefixes in generated view file names, enter the database's prefixes in a comma-separated list in this field. This field is case-sensitive. You can list multiple prefixes, separated by commas. For example, your tables are titled
dwh_ordersandDBS_users. If you enterdwh, DBSin the Ignore Prefixes field, then Looker creates view files namedordersandusers. - Import field descriptions: Select this checkbox to use any available field descriptions in the database as LookML descriptions for generated dimensions.
- Click the Next button to save your entries and move to the next section.
Select Primary Keys:
- Select a primary key for each table that you selected. This helps Looker better join your tables together.
- This step is optional; to skip it, don't select any primary keys.
- Click the Next button to save your entries and move to the next section.
Select Explores to Create:
- Select each view that you want to use as the base view for an Explore. For each selected view, the system will automatically join as many other views as possible. Only views that have a primary key identified in the previous step can be used in a join.
- This step is optional; to skip it, don't select any views.
- Click the Next button to save your entries and move to the next section.
Enter Model Name:
- Enter the name that you want for the file in the Model Name field. Duplicate model names can't be used. Model names are case-sensitive and can't use spaces or certain special characters.
Click one of the following buttons to generate the model files and, if selected, the new project:
- Complete and View Model: Looker takes you to the files in the Looker IDE.
- Complete and Explore Data: Looker takes you to the Explore that corresponds to the first selected view file in the Select Explores to Create section.
If you created a new project and you want to connect it to a different repository than the bare Git repository that Looker used for project creation, click the Reset Git Connection button on the Configuration tab of the project's Project Settings page to complete that process.
When you need to configure models
Configuring a model is useful for the following reasons:
- It specifies that a given model name refers to a particular model in a particular project.
- It sets the connections that the model is allowed to use.
A model configuration is not needed for admins (or developers with the manage_models or manage_project_models permission) while they are in Development Mode. This lets LookML developers work while in Development Mode. However, if a model configuration does exist, any queries are constrained by that configuration even in Development Mode.
Although a LookML developer specifies the intended connection in the model file, an admin controls what connections are allowed on the LookML Projects page. If a model specifies the use of a connection that is not allowed in the model's configuration, then the connection is not allowed.
A model must have a configuration in the following scenarios:
- When a model is pushed to production for the first time. If the model is not configured, any queries on that model fail once the model is in Production Mode. When a model is pushed from Development Mode to production for the first time, Looker configures the model automatically if the model's name is unique for the Looker instance. However, if you have a configured model with the same name in another project, then Looker does not automatically configure the model.
- During development. If you have developers who were not given either the
manage_modelspermission (which is included in theadminrole) or themanage_project_modelspermission, then the model must be configured before those developers can run queries on that model. You can configure the model before the model exists or before the project exists. Then, when a LookML developer creates the model, the model's allowed connections are already configured, and the developer can run queries successfully.
Looker lets developers who have either the manage_models or the manage_project_models permission run queries on an unconfigured model in Development Mode. Looker does this by searching projects for a model with that name. The first model found with that name is used to run the query.
Configuring planned models
The Configure New Model button at the top of the LookML Projects page can be used by Looker admins to add a configuration for an existing model or for a planned model that doesn't exist yet.
Configuring a model in advance is useful if developers have not been given either the manage_models permission or the manage_project_models permission. If an admin configures the model for the developers, then they will be able to run queries as soon as they generate or create the model file.
Admins can also specify which database connections can be used by the model, or can specify that the model is allowed to use any current or future connections. Looker developers use the LookML connection parameter to specify in the model file which connection the model should use. If a developer specifies a connection that an admin hasn't allowed in the model's configuration, then any query on that model won't run.
When an admin configures a new model in advance and creates a new project as part of that configuration, that project is shown in the Pending Projects section of the Projects page.
Generating a blank project
Creating a blank, or empty, project can be useful when you want to create your LookML files from scratch.
The Create a Model page generates projects with LookML files included. However, you can minimize the LookML files that are generated by completing only the following sections in the Create a Model page:
- Select Database Connection
- Select Tables
- Enter Model Name
Leave the remaining sections uncompleted.
Click the Complete and View Model button, which takes you to the project in the Looker IDE. Once in the IDE, you can delete any LookML files that you don't want, to create a blank project.
Next steps
After a model or project is created, you can perform the following actions:
- Manually create additional new models for your project
- Edit existing LookML files using the Looker IDE
- Rename the project
- Connect the Looker project to Git