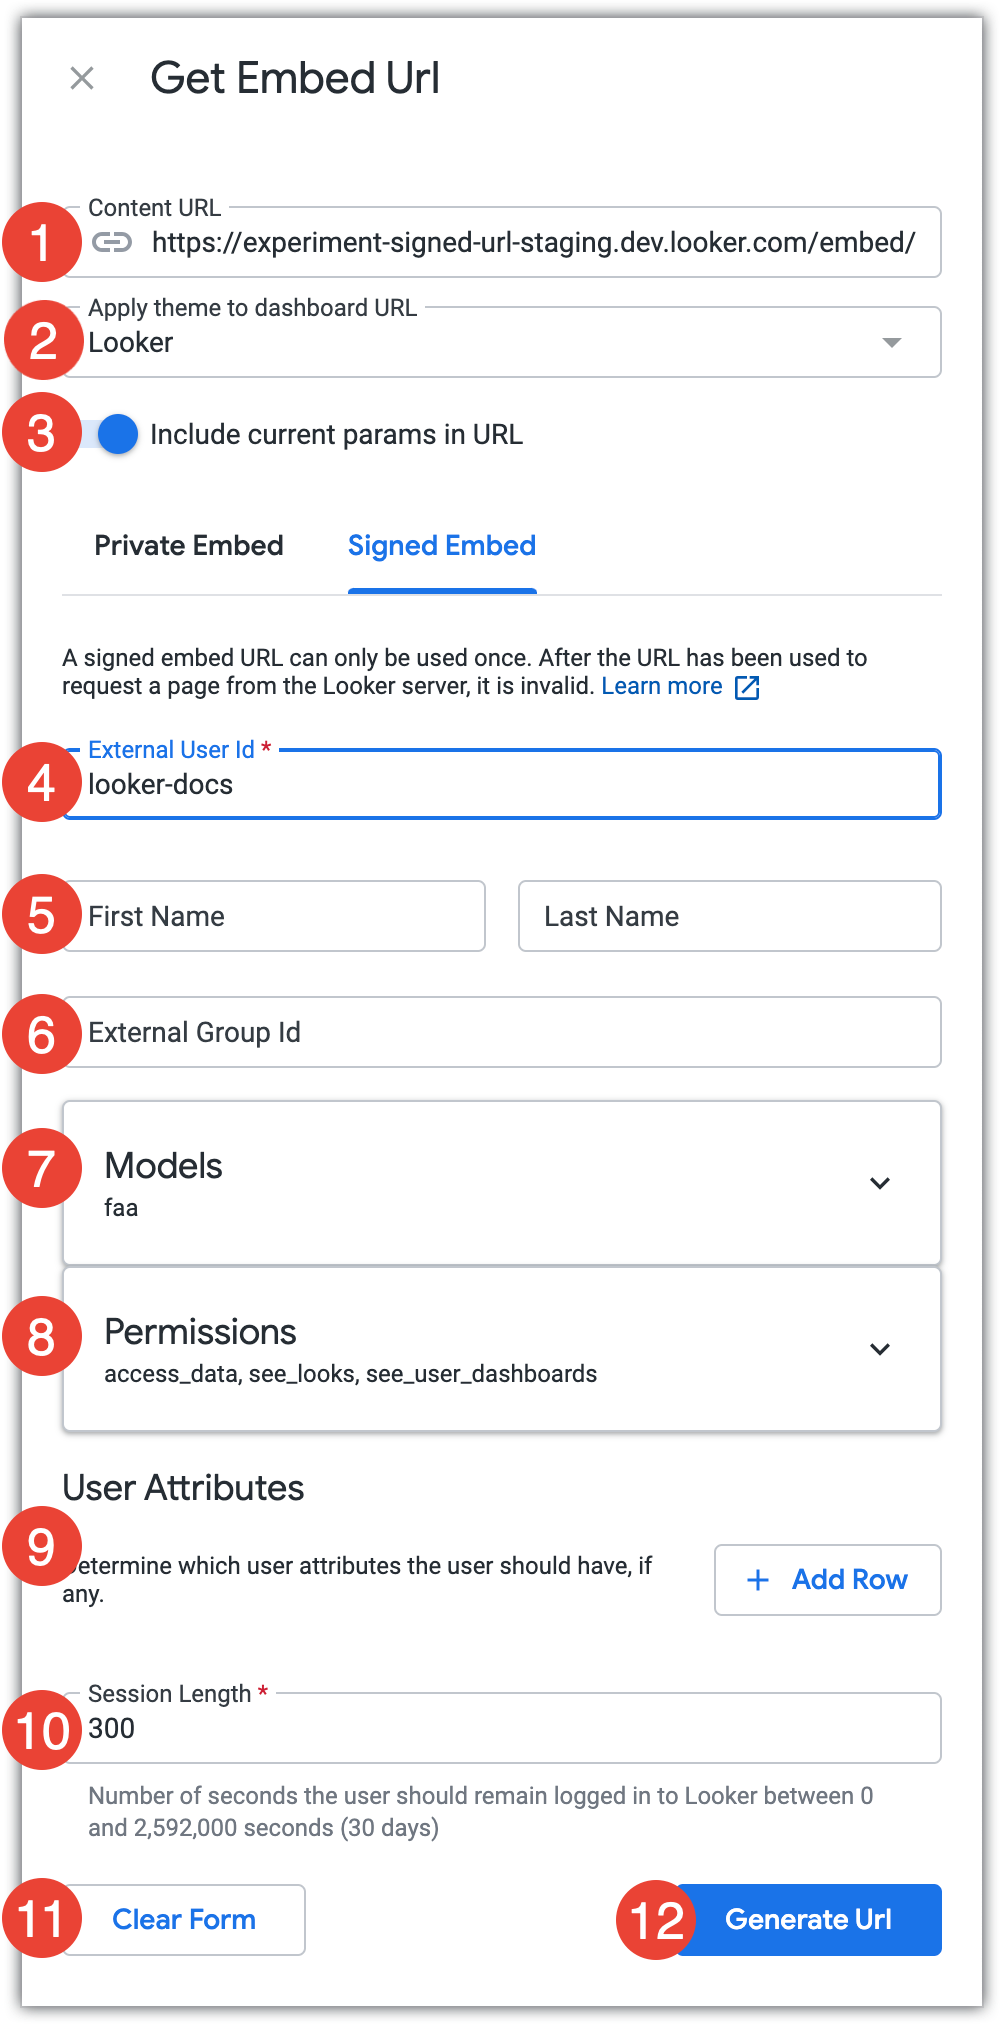
El campo URL del contenido muestra la URL del contenido completa, incluida la ruta de acceso /embed.
El campo Aplicar tema a la URL de panel, exploración o vista te permite seleccionar un tema para agregarlo a la URL de incorporación si estás generando una URL de incorporación de panel, exploración o vista, y tu instancia tiene habilitados los temas personalizados. El tema se aplicará cuando se vea el panel incorporado o Explorar.
El interruptor Incluir parámetros actuales en la URL te permite elegir si deseas aplicar los parámetros actuales, como los valores de filtro, a la URL de incorporación. Si están habilitados, esos parámetros se aplicarán cuando se vea el contenido incorporado.
Ingresa un identificador único para el usuario. Puedes asignarle al usuario cualquier cadena, siempre y cuando sea única. Consulta la definición del parámetro external_user_id para obtener más información.
Opcional: Ingresa el nombre y apellido del usuario. Si uno o ambos de estos campos se dejan en blanco, se conservará el valor de la última solicitud. Si nunca se estableció un valor, a cada campo se le asignará el valor "Incrustar".
Opcional: Ingresa un ID de grupo externo. Es un identificador único para el grupo al que pertenece el usuario en la aplicación que incorpora Looker.
Los usuarios que tengan permiso para guardar contenido y compartir un ID de grupo externo podrán guardar y editar contenido en una carpeta compartida de Looker llamada "Grupo". Un ID de grupo externo es el único método disponible para crear grupos externos de usuarios incorporados. No hay forma de configurar grupos de usuarios incorporados externos desde la IU de Looker.
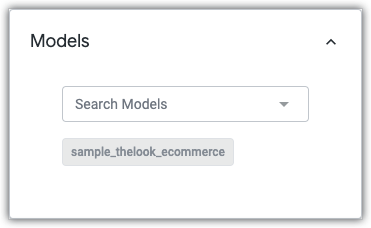
El modelo en el que se basan el panel, la vista o la exploración se muestra en el campo Modelos. Se le otorgará acceso a ese modelo. Para otorgarle al usuario acceso a modelos adicionales, en el campo desplegable Buscar modelos, haz clic en el campo Modelos para expandirlo y, luego, selecciona los modelos adicionales a los que deseas otorgarle acceso.
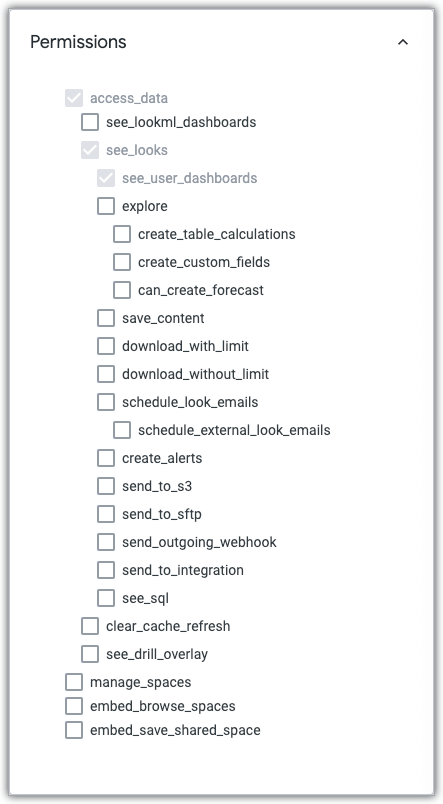
Los permisos mínimos que requiere el usuario para ver el contenido incorporado se seleccionarán de forma predeterminada. Para otorgarle permisos adicionales al usuario, haz clic en el campo Permisos para expandirlo y, luego, selecciona los permisos adicionales que quieras otorgarle.
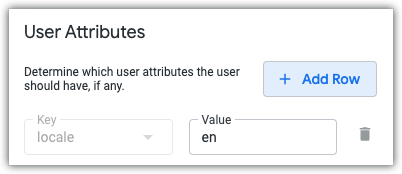
Para otorgarle uno o más atributos de usuario, haz clic en Agregar fila. Selecciona el atributo de usuario que deseas que tenga el usuario en el campo desplegable Clave y, luego, ingresa el valor del usuario para ese atributo en el campo Valor. Para agregar atributos de usuario adicionales, haz clic en Agregar fila. Para quitar un atributo de usuario, haz clic en el ícono de la papelera. No puedes agregar varios atributos de usuario con el mismo valor de Clave.
En el campo Duración de la sesión, ingresa la cantidad de segundos que pueden transcurrir antes de que se invalide la sesión de la URL de incorporación firmada.
Para restablecer todos los valores a la configuración predeterminada, haz clic en Borrar formulario. Todos los valores también se restablecerán si sales de la ventana Obtener URL de incorporación.
Haz clic en Generar URL.
Con los parámetros que especificaste, Looker generará una URL de incorporación firmada, una llamada firmada al SDK y una llamada firmada al SDK de incorporación.
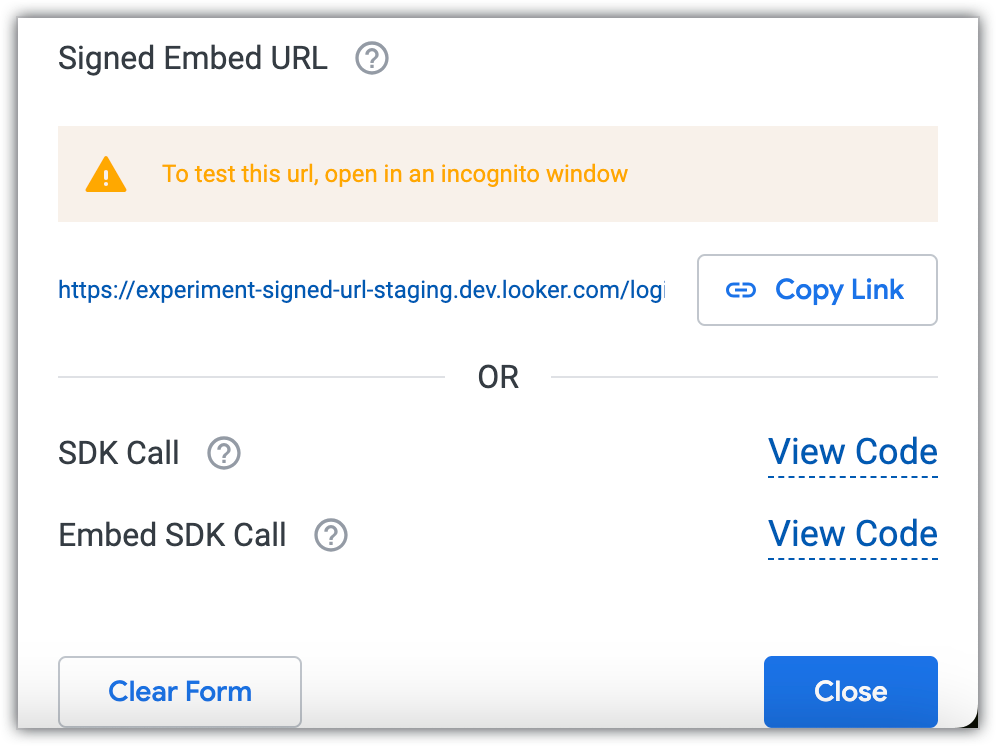
Para copiar la URL de incorporación firmada generada en el portapapeles, haz clic en Copiar vínculo.
Para ver la llamada al SDK o la llamada al SDK incorporado, haz clic en Ver código. Se abrirá una ventana de código.
Para copiar la llamada al SDK generada o los resultados de la llamada a la incorporación del SDK al portapapeles, haz clic en Copiar en el portapapeles desde la ventana de código.
[[["Fácil de comprender","easyToUnderstand","thumb-up"],["Resolvió mi problema","solvedMyProblem","thumb-up"],["Otro","otherUp","thumb-up"]],[["Difícil de entender","hardToUnderstand","thumb-down"],["Información o código de muestra incorrectos","incorrectInformationOrSampleCode","thumb-down"],["Faltan la información o los ejemplos que necesito","missingTheInformationSamplesINeed","thumb-down"],["Problema de traducción","translationIssue","thumb-down"],["Otro","otherDown","thumb-down"]],["Última actualización: 2025-07-31 (UTC)"],[],[],null,["# Getting a signed embed URL\n\nTo generate a [signed embed URL](/looker/docs/single-sign-on-embedding), select the **Get embed URL** option from the [three-dot dashboard menu](/looker/docs/viewing-dashboards#three-dot_dashboard_menu) on a dashboard, or from the [Explore actions gear menu](/looker/docs/viewing-looks#the_look_explore_actions_gear_menu) on a Look or Explore, and then click the **Signed Embed** tab.\n| **Note:** You must have the [`manage_embed_settings` permission](/looker/docs/admin-panel-users-roles#manage_embed_settings) to generate a signed embed URL.\n\n1. The **Content URL** field shows the full content URL, including the `/embed` path.\n\n2. The **Apply theme to dashboard/explore/look URL** field lets you select a theme to be added to the embed URL if you are generating a dashboard, an Explore, or a Look embed URL and your instance has [custom themes](/looker/docs/themes-for-embedded-dashboards-and-explores) enabled. The theme will be applied when the embedded dashboard or Explore is viewed.\n\n3. The **Include current params in URL** switch lets you choose whether to apply current parameters, such as filter values, to the embed URL. If enabled, those parameters will be applied when the embedded content is viewed.\n\n4. Enter a unique identifier for the user. You can assign the user any string, as long as it is unique. See the [`external_user_id` parameter definition](/looker/docs/single-sign-on-embedding#external_user_id) for more information.\n\n5. Optional: Enter the user's first name and last name. If one or both of these fields are left blank, they will retain the value from the last request. If no value has ever been set, each field will be assigned the value \"Embed\".\n\n6. Optional: Enter an **External Group ID**. This is a unique identifier for the group that the user belongs to in the application that is embedding Looker.\n Users who have permission to save content, and share an external group ID, will be able to save and edit content in a shared Looker folder called \"Group\". An external group ID is the only available method for creating external groups of embed users. There is no way to configure external embed user groups from within the Looker UI.\n\n7. The [model](/looker/docs/lookml-terms-and-concepts#model) on which the dashboard, Look, or Explore is based is listed in the **Models** field. The user will be granted access to that model. To grant the user access to additional models, from the **Search Models** drop-down field, click the **Models** field to expand it, and then select the additional models to which you want to grant the user access.\n\n8. The minimum [permissions](/looker/docs/single-sign-on-embedding#permissions) that are required by the user to view the embedded content will be selected by default. To grant the user additional permissions, click the **Permissions** field to expand it, and then select any additional permissions that you want to grant to the user.\n\n9. To grant the user one or more [user attributes](/looker/docs/admin-panel-users-user-attributes), click **Add Row** . Select the user attribute that you want the user to have in the **Key** drop-down field, and then enter the user's value for that user attribute in the **Value** field. You can add additional user attributes by clicking **Add Row** , or you can remove a user attribute by clicking the trash can icon. You cannot add multiple user attributes with the same **Key** value.\n\n10. In the **Session Length** field, enter the number of seconds that can elapse before the signed embed URL session should be invalidated.\n\n11. To return all values to default settings, click **Clear Form** . All values will also reset if you navigate away from the **Get Embed URL** window.\n\n12. Click **Generate URL**.\n\nUsing the parameters that you specified, Looker will generate a signed embed URL, a signed [SDK](/looker/docs/api-sdk) call, and a signed [embed SDK](/looker/docs/embed-sdk-intro) call.\n\n- To copy the generated signed embed URL to the clipboard, click **Copy Link**.\n- You can view either the [SDK](/looker/docs/api-sdk) call or the [embed SDK](/looker/docs/embed-sdk-intro) call by clicking **View Code**, which will open a code window.\n- From within the code window, to copy the generated SDK call or Embed SDK call results to your clipboard, click **Copy to Clipboard**."]]