您可以透過自訂網域提供執行個體,而非使用 Looker (Google Cloud Core) 提供的預設網域。
本文件頁面說明如何為符合下列任一條件的執行個體設定自訂網域:
- 執行個體使用公開安全連線。
- 執行個體使用混合式連線。
如果您使用公開網路連線建立執行個體的自訂網域,Google 會提供代管的自動續約式 SSL 憑證。
如要為這類執行個體實作自訂網域,請務必完成下列步驟:
設定自訂網域
Looker (Google Cloud Core) 執行個體建立完成後,即可設定自訂網域。
事前準備
自訂 Looker (Google Cloud Core) 執行個體的網域前,請先找出網域的 DNS 記錄儲存位置,以便更新記錄。
必要的角色
如要取得為 Looker (Google Cloud Core) 執行個體建立自訂網域所需的權限,請要求管理員授予您執行個體所在專案的 Looker 管理員 (roles/looker.admin) IAM 角色。如要進一步瞭解如何授予角色,請參閱「管理專案、資料夾和機構的存取權」。
建立自訂網域
在 Google Cloud 控制台中,按照下列步驟自訂 Looker (Google Cloud Core) 執行個體的網域:
- 在「執行個體」頁面中,按一下要設定自訂網域的執行個體名稱。
- 按一下「自訂網域」分頁標籤。
按一下「新增自訂網域」。

系統隨即會開啟「新增自訂網域」面板。
輸入要使用的網域主機名稱,最多 64 個字元,只能使用英文字母、數字和連字號,例如:
looker.examplepetstore.com。
按一下「Add a new custom domain」(新增自訂網域) 面板上的「DONE」(完成),返回「CUSTOM DOMAIN」(自訂網域) 分頁。
設定自訂網域後,該網域會顯示在 Google Cloud 控制台的 Looker (Google Cloud Core) 執行個體詳細資料頁面中,「自訂網域」分頁的「網域」欄。
存取自訂網域
如要為使用公開安全連線的 Looker (Google Cloud Core) 執行個體設定自訂網域存取權,請建立 DNS 記錄並更新 OAuth 憑證。
事前準備
如要取得設定公開安全連線自訂網域存取權所需的權限,請要求管理員在執行個體所在的專案中,授予您下列 IAM 角色:
-
Looker 管理員 (
roles/looker.admin) -
DNS 管理員 (
roles/dns.admin) -
使用 Google OAuth:
OAuth 設定編輯器 (
roles/oauthconfig.editor)
如要進一步瞭解如何授予角色,請參閱「管理專案、資料夾和機構的存取權」。
建立 DNS 記錄
無論 DNS 記錄儲存在何處,請在網域的 DNS 區域中建立 A 記錄。如果執行個體使用公開網路連線,請將 Looker (Google Cloud Core) 執行個體的連入公開 IP 做為 A 記錄的 IP 位址。您可以在 Google Cloud 控制台中,Looker (Google Cloud Core) 執行個體的「詳細資料」分頁中找到連入公開 IP。(「新增自訂網域」面板的「更新 DNS 記錄」部分中,「資料」欄位也會顯示這項資訊。)
如果 Looker (Google Cloud Core) 執行個體的「CUSTOM DOMAIN」(自訂網域)分頁中顯示「VERIFY DOMAIN」(驗證網域) 按鈕,表示 DNS 記錄可能需要額外設定。按一下「驗證網域」,完成自訂網域設定。
更新網域的 DNS 記錄,並在 Google Cloud 控制台中驗證網域後,對應至執行個體的自訂網域狀態就會在「自訂網域」分頁中,從「未驗證」更新為「可用」。
更新 OAuth 憑證
- 在 Google Cloud 控制台中依序前往「API 和服務」>「憑證」,然後選取 Looker (Google Cloud Core) 執行個體使用的 OAuth 用戶端 ID,即可存取 OAuth 用戶端。
按一下「新增 URI」按鈕,更新 OAuth 用戶端的「已授權的 JavaScript 來源」欄位,加入貴機構用來存取 Looker (Google Cloud Core) 的 DNS 名稱。舉例來說,如果您的自訂網域是
looker.examplepetstore.com,請輸入looker.examplepetstore.com做為 URI。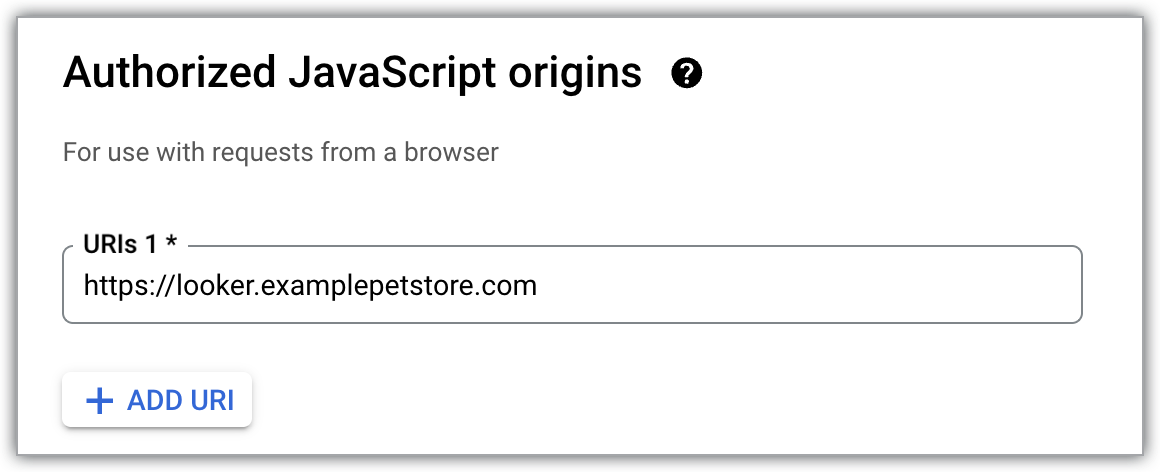
更新或新增自訂網域至「授權重新導向 URI」清單,該清單適用於您建立 Looker (Google Cloud Core) 執行個體時使用的 OAuth 憑證。在 URI 結尾新增
/oauth2callback。舉例來說,如果您的自訂網域是looker.examplepetstore.com,請輸入looker.examplepetstore.com/oauth2callback。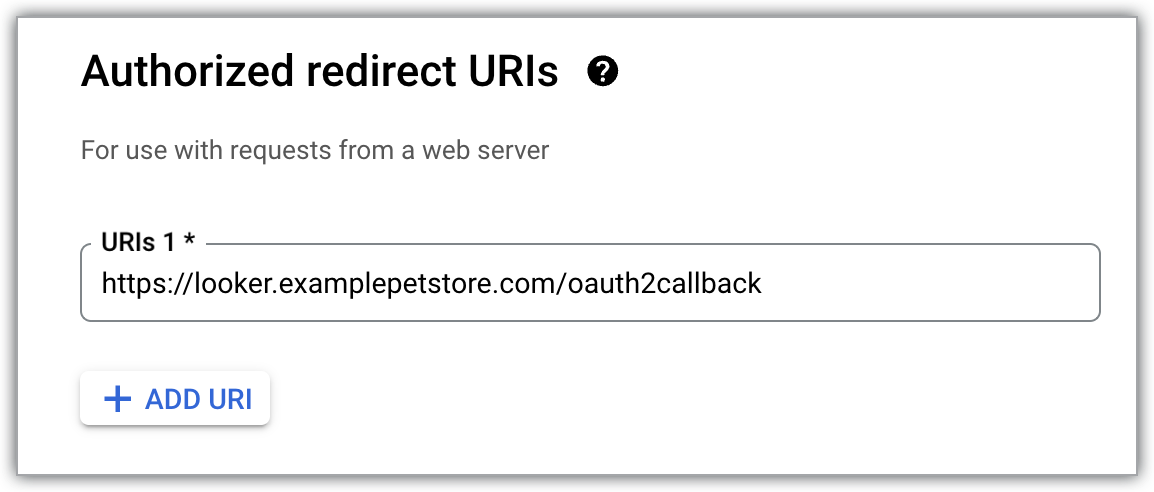
新增使用者
完成上述步驟後,使用者就能存取自訂網域網址。
將使用者新增至執行個體前,請務必為 Looker (Google Cloud Core) 執行個體完整設定使用者驗證方法。
後續步驟
- 在 Looker (Google Cloud Core) 中管理使用者
- 設定 Looker (Google Cloud Core) 執行個體
- 將 Looker (Google Cloud Core) 連線至資料庫