This document describes common errors that you may run into when connecting to virtual machine (VM) instances using SSH, ways to resolve errors, and methods for diagnosing failed SSH connections.
SSH troubleshooting tool
Use the SSH troubleshooting tool to help determine why an SSH connection failed. The troubleshooting tool performs the following tests to check for the cause of failed SSH connections:
- User permissions tests: Checks if you have the required IAM permissions to connect to the VM using SSH.
- Network connectivity tests: Checks if the VM is connected to the network.
- VM instance status tests: Checks the VM's CPU status to see if the VM is running.
- VPC settings tests: Checks the default SSH port.
Run the troubleshooting tool
You can use the Google Cloud console or the Google Cloud CLI to check for networking problems and user permission errors that might cause SSH connections to fail.
Console
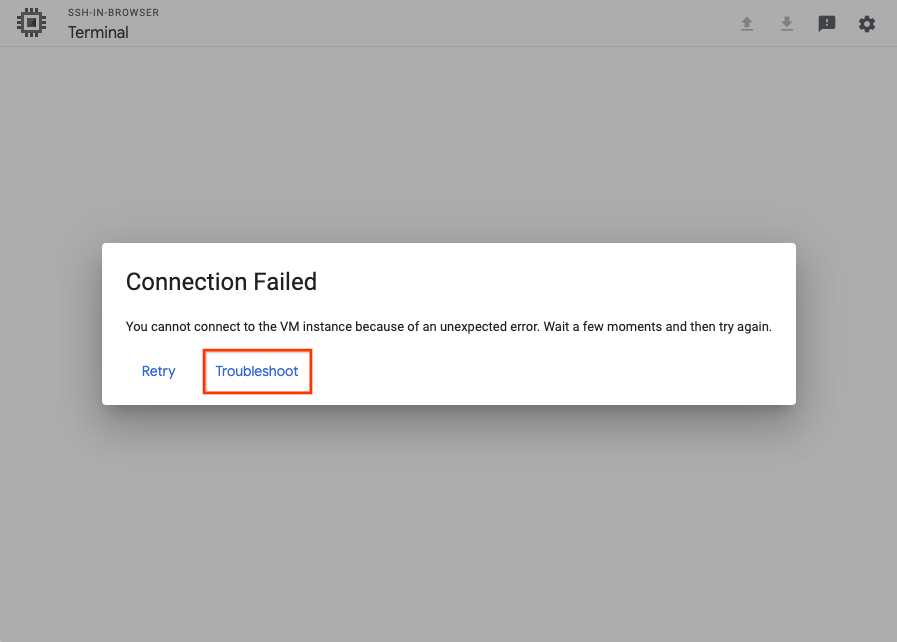
After an SSH connection fails, you have the option to Retry the connection, or Troubleshoot the connection using the SSH-in-browser troubleshooting tool.
To run the troubleshooting tool, click Troubleshoot.
gcloud
Run the troubleshooting tool by using the
gcloud compute ssh command:
gcloud compute ssh VM_NAME \
    --troubleshoot
Replace VM_NAME with the name of the VM that you
can't connect to.
The tool prompts you to provide permission to perform the troubleshooting tests.
Review the results
After running the troubleshooting tool, do the following:
- Review the test results to understand why the VM's SSH connection isn't working.
- Resolve SSH connections by performing the remediation steps provided by the tool.
Try reconnecting to the VM.
If the connection isn't successful, try manually troubleshooting by doing the following:
Common SSH errors
The following are examples of common errors you might encounter when you use SSH to connect to Compute Engine VMs.
SSH-in-Browser errors
Unauthorized
Error 401
The following error might occur when you connect to your VM using the SSH-in-browser from the Google Cloud console:
Unauthorized Error 401
This error occurs if your user is part of an organization that is managed from within Google Workspace and there is an active restriction in the Workspace policy that prevents users from accessing SSH-in-browser and the serial console within Google Cloud.
To resolve this issue, have a Google Workspace admin do the following:
Confirm that Google Cloud is enabled for the organization.
If Google Cloud is disabled, enable it and retry the connection.
Confirm that services that aren't controlled individually are enabled.
If these services are disabled, enable them and retry the connection.
If the problem persists after enabling Google Cloud settings in Google Workspace, do the following:
Capture the network traffic in an HTTP Archive Format (HAR) file starting from when you start the SSH-in-Browser SSH connection.
Create a Cloud Customer Care case and attach the HAR file.
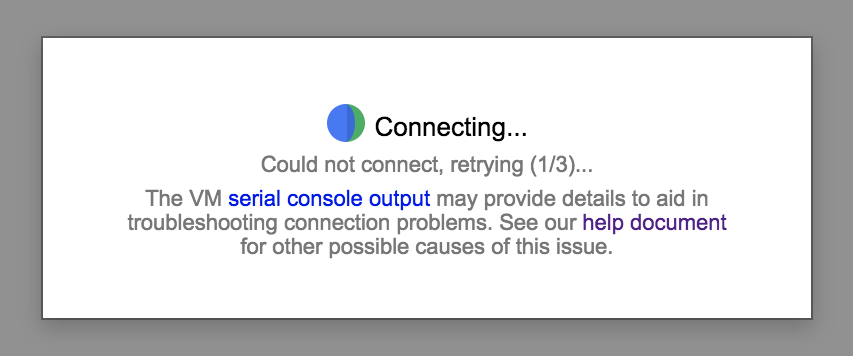
Could Not Connect, Retrying...
The following error might occur when you start an SSH session:
Could not connect, retrying ...
To resolve this issue, do the following:
After the VM has finished booting, retry the connection. If the connection is not successful, verify that the VM did not boot in emergency mode by running the following command:
gcloud compute instances get-serial-port-output VM_NAME \
| grep "emergency mode"
If the VM boots in emergency mode, troubleshoot the VM startup process to identify where the boot process is failing.
Verify that the
google-guest-agent.serviceservice is running, by running the following command in the serial console.systemctl status google-guest-agent.service
If the service is disabled, enable and start the service, by running the following commands:
systemctl enable google-guest-agent.service
systemctl start google-guest-agent.service
Verify that the Linux Google Agent scripts are installed and running. For more information, see Determining Google Agent Status. If the Linux Google Agent is not installed, re-install it.
Verify that you have the required roles to connect to the VM. If your VM uses OS Login, see Assign OS Login IAM role. If the VM doesn't use OS Login, you need the compute instance admin role or the service account user role (if the VM is set up to run as a service account). The roles are needed to update the instance or project SSH keys-metadata.
Verify that there is a firewall rule that allows SSH access by running the following command:
gcloud compute firewall-rules list | grep "tcp:22"
Verify that there is a default route to the Internet (or to the bastion host). For more information, see Checking routes.
Make sure that the root volume is not out of disk space. For more information, see Troubleshooting full disks and disk resizing.
Make sure the VM has not run out of memory, by running the following command:
gcloud compute instances get-serial-port-output instance-name \
| grep "Out of memory: Kill process" - e "Kill process" -e "Memory cgroup out of memory" -e "oom"
If the VM is out of memory, connect to serial console to troubleshoot.
Linux errors
Permission denied (publickey)
The following error might occur when you connect to your VM:
USERNAME@VM_EXTERNAL_IP: Permission denied (publickey).
This error can occur for several reasons. The following are some of the most common causes of this error:
You used an SSH key stored in metadata to connect to a VM that has OS Login enabled. If OS Login is enabled on your project, your VM doesn't accept SSH keys that are stored in metadata. If you aren't sure if OS Login is enabled, see Checking if OS Login is configured.
To resolve this issue, try one of the following:
- Connect to your VM using the Google Cloud console or the Google Cloud CLI. For more information, see Connecting to VMs.
- Add your SSH keys to OS Login. For more information, see Add keys to VMs that use OS Login.
- Disable OS Login. For more information, see Disabling OS Login.
You used an SSH key stored in an OS Login profile to connect to a VM that doesn't have OS Login enabled. If you disable OS Login, your VM doesn't accept SSH keys that were stored in your OS Login profile. If you aren't sure if OS Login is enabled, see Checking if OS Login is configured.
To resolve this issue, try one of the following:
- Connect to your VM using the Google Cloud console or the Google Cloud CLI. For more information, see Connecting to VMs.
- Enable OS Login. For more information, see Enabling OS Login.
- Add your SSH keys to metadata. For more information, see Add SSH keys to VMs that use metadata-based SSH keys.
The VM has OS Login enabled, but you don't have sufficient IAM permissions to use OS Login. To connect to a VM that has OS Login enabled, you must have the permissions required for OS Login. If you aren't sure if OS Login is enabled, see Checking if OS Login is configured.
To resolve this issue, grant the required OS Login IAM roles.
Your key expired and Compute Engine deleted your
~/.ssh/authorized_keysfile. If you manually added SSH keys to your VM and then connected to your VM using the Google Cloud console, Compute Engine created a new key pair for your connection. After the new key pair expired, Compute Engine deleted your~/.ssh/authorized_keysfile in the VM, which included your manually added SSH key.To resolve this issue, try one of the following:
- Connect to your VM using the Google Cloud console or the Google Cloud CLI. For more information, see Connecting to VMs.
- Re-add your SSH key to metadata. For more information, see Add SSH keys to VMs that use metadata-based SSH keys.
You connected using a third-party tool and your SSH command is misconfigured. If you connect using the
sshcommand but don't specify a path to your private key or you specify an incorrect path to your private key, your VM refuses your connection.To resolve this issue, try one of the following:
- Run the following command:
ssh -i PATH_TO_PRIVATE_KEY USERNAME@EXTERNAL_IP
Replace the following:PATH_TO_PRIVATE_KEY: the path to your private SSH key file.USERNAME: the username of the user connecting to the instance. If you manage your SSH keys in metadata, the username is what you specified when you created the SSH key. For OS Login accounts, the username is defined in your Google profile.EXTERNAL_IP: The external IP address for your VM.
- Connect to your VM using the Google Cloud console or the Google Cloud CLI. When you use these tools to connect, Compute Engine manages key creation for you. For more information, see Connecting to VMs.
- Run the following command:
Your VM's guest environment is not running. If this is the first time that you are connecting to your VM and the guest environment is not running, then the VM might refuse your SSH connection request.
To resolve this issue, do the following:
- Restart the VM.
- In the Google Cloud console, inspect the system startup logs in the serial port output to determine if the guest environment is running. For more information, see Validating the guest environment.
- If the guest environment is not running, manually install the guest environment by cloning VM's boot disk and using a startup script.
The OpenSSH Daemon (
sshd) isn't running or configured properly. Thesshdprovides secure remote access to the system via SSH protocol. If it's misconfigured or not running, you can't connect to your VM via SSH.To resolve this issue, try one or more of the following:
Review the user guide for your operating system to ensure that your
sshd_configis set up correctly.Ensure the you have the required ownership and permission settings for the following:
$HOMEand$HOME/.sshdirectories$HOME/.ssh/authorized_keysfile
Ownership
The guest environment stores authorized SSH public keys in the
$HOME/.ssh/authorized_keysfile. The owner of the$HOMEand$HOME/.sshdirectories and the$HOME/.ssh/authorized_keysfile must be the same as the user connecting to the VM.Permissions
The guest environment requires the following Linux permissions:
Path Permissions /home0755$HOME0700or0750or0755*$HOME/.ssh0700$HOME/.ssh/authorized_keys0600* To find out which of the options is the correct default permission for your
$HOMEdirectory, refer to the official documentation for your specific Linux distribution.
Alternatively, you can create a new VM based on the same image and check its default permissions for
$HOME.To learn how to change permissions and ownership, read about
chmodandchown.Restart the
sshdby running the following command:systemctl restart sshd.serviceCheck if there are any errors in the status by running the following command:
systemctl status sshd.serviceThe status output may contain information such as the exit code, the reason for the failure, etc. You can use these details for further troubleshooting.
The VM's boot disk is full. When an SSH connection is established, the guest environment adds the session's public SSH key to the
~/.ssh/authorized_keysfile. If the disk is full, the connection fails.To resolve this issue, do one or more of the following:
- Confirm the boot disk is full by
debugging with the serial console to identify
no space left errors. - Resize the disk.
- If you know which files are using the disk space,
create a startup script that deletes
unnecessary files and frees space. After the VM starts and you connect
to it, delete the
startup-scriptmetadata.
- Confirm the boot disk is full by
debugging with the serial console to identify
The permissions or ownership on
$HOME,$HOME/.ssh, or$HOME/.ssh/authorized_keysis wrong.Ownership
The guest environment stores authorized SSH public keys in the
$HOME/.ssh/authorized_keysfile. The owner of the$HOMEand$HOME/.sshdirectories and the$HOME/.ssh/authorized_keysfile must be the same as the user connecting to the VM.Permissions
The guest environment requires the following Linux permissions:
Path Permissions /home0755$HOME0700or0750or0755*$HOME/.ssh0700$HOME/.ssh/authorized_keys0600* To find out which of the options is the correct default permission for your
$HOMEdirectory, refer to the official documentation for your specific Linux distribution.
Alternatively, you can create a new VM based on the same image and check its default permissions for
$HOME.To learn how to change permissions and ownership, read about
chmodandchown.
Connection failed
The following errors might occur when you connect to your VM from the Google Cloud console or the gcloud CLI:
The Google Cloud console:
Connection Failed

We are unable to connect to the VM on port 22.
The gcloud CLI:
ERROR: (gcloud.compute.ssh) [/usr/bin/ssh] exited with return code [255].
These errors can occur for several reasons. The following are some of the most common causes of the errors:
The VM is booting up and
sshdis not running yet. You can't connect to a VM before it is running.To resolve this issue, wait until the VM has finished booting and try to connect again.
sshdis running on a custom port. If you configuredsshdto run on a port other than port 22, you won't be able to connect to your VM.To resolve this issue, create a custom firewall rule allowing
tcptraffic on the port that yoursshdis running on using the following command:gcloud compute firewall-rules create FIREWALL_NAME \ --allow tcp:PORT_NUMBER
For more information about creating custom firewall rules, see Creating firewall rules.
The SSH firewall rule is missing or doesn't allow traffic from IAP or the public internet. SSH connections are refused if firewall rules do not allow connections from IAP or TCP ingress traffic for IP range
0.0.0.0/0.To resolve this issue, do one of the following:
If you use Identity-Aware Proxy (IAP) for TCP forwarding, update your custom firewall rule to accept traffic from IAP, then check your IAM permissions.
- Update your custom firewall rule to allow traffic from
35.235.240.0/20, the IP address range that IAP uses for TCP forwarding. For more information, see Create a firewall rule. - Grant permissions to use IAP TCP forwarding, if you haven't already done so.
- Update your custom firewall rule to allow traffic from
If you don't use IAP update your custom firewall rule to allow ingress SSH traffic.
- Update your custom firewall rule to Allow ingress ssh connections to VMs.
The SSH connection failed after you upgraded the VM's kernel. A VM might experience a kernel panic after a kernel update, causing the VM to become inaccessible.
To resolve this issue, do the following:
- Mount the disk to another VM.
- Update the
grub.cfgfile to use the previous version of the kernel. - Attach the disk to the unresponsive VM.
- Verify that the status of the VM is
RUNNINGby using thegcloud compute instances describecommand. - Reinstall the kernel.
- Restart the VM.
Alternatively, if you created a snapshot of the boot disk before upgrading the VM, use the snapshot to create a VM.
The OpenSSH Daemon (
sshd) isn't running or configured properly. Thesshdprovides secure remote access to the system via SSH protocol. If it's misconfigured or not running, you can't connect to your VM via SSH.To resolve this issue, try one or more of the following:
Review the user guide for your operating system to ensure that your
sshd_configis set up correctly.Ensure the you have the required ownership and permission settings for the following:
$HOMEand$HOME/.sshdirectories$HOME/.ssh/authorized_keysfile
Ownership
The guest environment stores authorized SSH public keys in the
$HOME/.ssh/authorized_keysfile. The owner of the$HOMEand$HOME/.sshdirectories and the$HOME/.ssh/authorized_keysfile must be the same as the user connecting to the VM.Permissions
The guest environment requires the following Linux permissions:
Path Permissions /home0755$HOME0700or0750or0755*$HOME/.ssh0700$HOME/.ssh/authorized_keys0600* To find out which of the options is the correct default permission for your
$HOMEdirectory, refer to the official documentation for your specific Linux distribution.
Alternatively, you can create a new VM based on the same image and check its default permissions for
$HOME.To learn how to change permissions and ownership, read about
chmodandchown.Restart the
sshdby running the following command:systemctl restart sshd.serviceCheck if there are any errors in the status by running the following command:
systemctl status sshd.serviceThe status output may contain information such as the exit code, the reason for the failure, etc. You can use these details for further troubleshooting.
The VM isn't booting and you can't connect using SSH or the serial console. If the VM is inaccessible, then your OS might be corrupted. If the boot disk doesn't boot, you can diagnose the issue. If you want to recover the corrupted VM and retrieve data, see Recovering a corrupted VM or a full boot disk.
The VM is booting in maintenance mode. When booting in maintenance mode, the VM doesn't accept SSH connections, but you can connect to the VM's serial console and log in as the root user.
To resolve this issue, do the following:
If you haven't set a root password for the VM, use a metadata startup script to run the following command during boot:
echo "root:NEW_PASSWORD" | chpasswd
Replace NEW_PASSWORD` with a password of your choice.
Restart the VM.
Connect to the VM's serial console and log in as the root user.
Unexpected error
The following error might occur when you try to connect to a Linux VM:
Connection Failed
You cannot connect to the VM instance because of an unexpected error. Wait a few moments and then try again.
This issue can occur for several reasons. The following are some common causes of the error:
-
The OpenSSH Daemon (
sshd) isn't running or configured properly. Thesshdprovides secure remote access to the system via SSH protocol. If it's misconfigured or not running, you can't connect to your VM via SSH.To resolve this issue, try one or more of the following:
Review the user guide for your operating system to ensure that your
sshd_configis set up correctly.Ensure the you have the required ownership and permission settings for the following:
$HOMEand$HOME/.sshdirectories$HOME/.ssh/authorized_keysfile
Ownership
The guest environment stores authorized SSH public keys in the
$HOME/.ssh/authorized_keysfile. The owner of the$HOMEand$HOME/.sshdirectories and the$HOME/.ssh/authorized_keysfile must be the same as the user connecting to the VM.Permissions
The guest environment requires the following Linux permissions:
Path Permissions /home0755$HOME0700or0750or0755*$HOME/.ssh0700$HOME/.ssh/authorized_keys0600* To find out which of the options is the correct default permission for your
$HOMEdirectory, refer to the official documentation for your specific Linux distribution.
Alternatively, you can create a new VM based on the same image and check its default permissions for
$HOME.To learn how to change permissions and ownership, read about
chmodandchown.Restart the
sshdby running the following command:systemctl restart sshd.serviceCheck if there are any errors in the status by running the following command:
systemctl status sshd.serviceThe status output may contain information such as the exit code, the reason for the failure, etc. You can use these details for further troubleshooting.
Unknown SSH daemon issue. To diagnose an unknown SSH daemon issue, check the serial console logs for errors.
Depending on the output of the serial console logs, try to rescue the VM and fix the SSH daemon related issues by doing the following:
- Attach the disk to another Linux VM.
- Connect to the VM that has the mounted disk.
- Mount the disk inside OS to a directory MOUNT_DIR inside VM..
- View the SSH-related logs,
/var/log/secureor/var/log/auth.logfor any issues/errors. If you see any issues that you can fix, attempt to fix them. Otherwise, create a support case and attach the logs. Unmount the disk from the OS using
umountcommand:cd ~/ umount /mnt
Detach the disk from the VM.
Attach the disk to the original VM.
Start the VM.
Failed to connect to backend
The following errors might occur when you connect to your VM from the Google Cloud console or the gcloud CLI:
The Google Cloud console:
-- Connection via Cloud Identity-Aware Proxy Failed

-- Code: 4003

-- Reason: failed to connect to backend
The gcloud CLI:
ERROR: (gcloud.compute.start-iap-tunnel) Error while connecting [4003: 'failed to connect to backend'].
These errors occur when you try to use SSH to connect to a VM that doesn't have a public IP address and for which you haven't configured Identity-Aware Proxy on port 22.
To resolve this issue Create a firewall rule on port 22 that allows ingress traffic from Identity-Aware Proxy.
Host key does not match
The following error might occur when you connect to your VM:
Host key for server IP_ADDRESS does not match
This error occurs when the host key in the ~/.ssh/known_hosts file
doesn't match the VM's host key.
To resolve this issue, delete the host key from the ~/.ssh/known_hosts
file, then retry the connection.
Metadata value is too large
The following error might occur when you try to add a new SSH key to metadata:
ERROR:"Value for field 'metadata.items[X].value' is too large: maximum size 262144 character(s); actual size NUMBER_OF_CHARACTERS."
Metadata values have a maximum limit of 256 KB. To mitigate this limitation, do one of the following:
- Delete expired or duplicated SSH keys from project or instance metadata. For more information, see Update metadata on a running VM.
- Use OS Login.
Windows errors
Permission denied, please try again
The following error might occur when you connect to your VM:
USERNAME@compute.INSTANCE_ID's password:
Permission denied, please try again.
This error indicates the user trying to connect to the VM doesn't exist on the VM. The following are some of the most common causes of this error:
Your version of gcloud CLI is out of date
If gcloud CLI is out of date, you may be attempting to connect using a username that is not configured. To resolve this issue, update the gcloud CLI.
You tried to connect to a Windows VM that doesn't have SSH enabled.
To resolve this error, set the
enable-windows-sshkey toTRUEin project or instance metadata. For more information about setting medata, see Set custom metadata.
Permission denied (publickey,keyboard-interactive)
The following error might occur when you connect to a VM that doesn't have SSH enabled:
Permission denied (publickey,keyboard-interactive).
To resolve this error, set the enable-windows-ssh key to TRUE in project
or instance metadata. For more information about setting medata, see
Set custom metadata.
Could not SSH into the instance
The following error might occur when you connect to your VM from the gcloud CLI:
ERROR: (gcloud.compute.ssh) Could not SSH into the instance.
It is possible that your SSH key has not propagated to the instance yet.
Try running this command again.  If you still cannot connect, verify that the firewall and instance are set to accept ssh traffic.
This error can occur for several reasons. The following are some of the most common causes of the errors:
You tried to connect to a Windows VM that doesn't have SSH installed.
To resolve this issue, follow the instructions to Enable SSH for Windows on a running VM.
The OpenSSH Server (
sshd) isn't running or isn't configured properly. Thesshdprovides secure remote access to the system via SSH protocol. If it's misconfigured or not running, you can't connect to your VM via SSH.To resolve this issue, review OpenSSH Server configuration for Windows Server and Windows to ensure that
sshdis set up correctly.
Connection timed out
Timed out SSH connections might be caused by one of the following:
The VM hasn't finished booting. Allow a short time for the VM to boot.
To resolve this issue, wait until the VM has finished booting and try to connect again.
The SSH package isn't installed. Windows VMs require you to install the
google-compute-engine-sshpackage before you can connect using SSH.To resolve this issue, install the SSH package.
Diagnose failed SSH connections
The following sections describe steps you can take to diagnose the cause of failed SSH connections and the steps you can take to fix your connections.
Before you diagnose failed SSH connections, complete the following steps:
- Install or update to the latest version of the Google Cloud CLI.
- Run connectivity tests.
- If you are using a custom Linux image that isn't running the guest environment, Install the Linux guest environment.
- If you use OS Login, view Troubleshooting OS Login.
Diagnosis methods for Linux and Windows VMs
Test connectivity
You might not be able to SSH to a VM instance because of connectivity issues linked to firewalls, network connection, or the user account. Follow the steps in this section to identify any connectivity issues.
Check your firewall rules
Compute Engine provisions each project with a default set of firewall
rules that permit SSH traffic. If you are unable to access your instance, use
the gcloud compute command-line tool to
check your list of firewalls
and ensure that the default-allow-ssh rule is present.
On your local workstation, run the following command:
gcloud compute firewall-rules list
If the firewall rule is missing, add it back:
gcloud compute firewall-rules create default-allow-ssh \
    --allow tcp:22
To view all data associated with the default-allow-ssh firewall rule in your
project, use the
gcloud compute firewall-rules describe command:
gcloud compute firewall-rules describe default-allow-ssh \
    --project=project-id
For more information about firewall rules, see Firewall rules in Google Cloud.
Test the network connection
To determine whether the network connection is working, test the TCP handshake:
Obtain the external
natIPfor your VM:gcloud compute instances describe VM_NAME \ --format='get(networkInterfaces[0].accessConfigs[0].natIP)'Replace
VM_NAMEwith the name of the VM you can't connect to.Test the network connection to your VM from your workstation:
Linux, Windows 2019/2022, and macOS
curl -vso /dev/null --connect-timeout 5 EXTERNAL_IP:PORT_NUMBER
Replace the following:
EXTERNAL_IP: the external IP address you obtained in the previous stepPORT_NUMBER: the port number
If the TCP handshake is successful, the output is similar to the following:
Expire in 0 ms for 6 (transfer 0x558b3289ffb0)
Expire in 5000 ms for 2 (transfer 0x558b3289ffb0)
Trying 192.168.0.4...
TCP_NODELAY set
Expire in 200 ms for 4 (transfer 0x558b3289ffb0)
Connected to 192.168.0.4 (192.168.0.4) port 443 (#0)
> GET / HTTP/1.1
> Host: 192.168.0.4:443
> User-Agent: curl/7.64.0
> Accept: */*
>
Empty reply from server
Connection #0 to host 192.168.0.4 left intact
The
Connected toline indicates a successful TCP handshake.Windows 2012 and 2016
PS C:> New-Object System.Net.Sockets.TcpClient('EXTERNAL_IP',PORT_NUMBER)Replace the following:
EXTERNAL_IP: the external IP you obtained in the previous stepPORT_NUMBER: the port number
If the TCP handshake is successful, the output is similar to the following:
Available           : 0
Client              : System.Net.Sockets.Socket
Connected           : True
ExclusiveAddressUse : False
ReceiveBufferSize   : 131072
SendBufferSize      : 131072
ReceiveTimeout      : 0
SendTimeout         : 0
LingerState         : System.Net.Sockets.LingerOption
NoDelay             : False
The
Connected: Trueline indicates a successful TCP handshake.
If the TCP handshake completes successfully, a software firewall rule is
not blocking the connection, the OS is correctly forwarding packets, and a
server is listening on the destination port. If the TCP handshake completes
successfully but the VM doesn't accept SSH connections, the issue might be
with that the sshd daemon is misconfigured or not running properly. Review
the user guide for your operating system to ensure that your sshd_config
is set up correctly.
To run connectivity tests for analyzing the VPC network path configuration between two VMs and check whether the programmed configuration should allow the traffic, see Check for misconfigured firewall rules in Google Cloud.
Connect as a different user
The issue that prevents you from logging in might be limited to your user
account. For example, the permissions on the ~/.ssh/authorized_keys file
on the instance might not be set correctly for the user.
Try logging in as a different user with the gcloud CLI by
specifying ANOTHER_USERNAME with the SSH request.
The gcloud CLI updates the project's metadata to add the
new user and allow SSH access.
gcloud compute ssh ANOTHER_USERNAME@VM_NAME
Replace the following:
ANOTHER_USERNAMEis a username other than your own usernameVM_NAMEis the name of the VM you want to connect to
Debug issues using the serial console
We recommend that you review the logs from the serial console for connection errors. You can access the serial console as the root user from your local workstation by using a browser. This approach is useful when you cannot log in with SSH, or if the instance has no connection to the network. The serial console remains accessible in both of these situations.
To log into the VM's serial console and troubleshoot problems with the VM, follow these steps::
Enable interactive access to the VM's serial console.
For Linux VMs, modify the root password, add the following startup script to your VM:
echo root:PASSWORD | chpasswd
Replace PASSWORD with a password of your choice.
Use the serial console to connect to your VM.
For Linux VMs, after you're done debugging all the errors, disable the root account login:
sudo passwd -l root
Diagnosis methods for Linux VMs
Inspect the VM instance without shutting it down
You might have an instance that you cannot connect to that continues to correctly serve production traffic. In this case, you might want to inspect the disk without interrupting the instance.
To inspect and troubleshoot the disk:
- Back up your boot disk by creating a snapshot of the disk.
- Create a regular persistent disk from that snapshot.
- Create a temporary instance.
- Attach and mount the regular persistent disk to your new temporary instance.
This procedure creates an isolated network that only allows SSH connections. This setup prevents any unintended consequences of the cloned instance interfering with your production services.
Create a new VPC network to host your cloned instance:
gcloud compute networks create debug-network
Replace
NETWORK_NAMEwith the name you want to call your new network.Add a firewall rule to allow SSH connections to the network:
gcloud compute firewall-rules create debug-network-allow-ssh \
   --network debug-network \
   --allow tcp:22
Create a snapshot of the boot disk.
gcloud compute disks snapshot BOOT_DISK_NAME \
   --snapshot-names debug-disk-snapshot
Replace
BOOT_DISK_NAMEwith the name of the boot disk.Create a new disk with the snapshot you just created:
gcloud compute disks create example-disk-debugging \
   --source-snapshot debug-disk-snapshot
Create a new debugging instance without an external IP address:
gcloud compute instances create debugger \
   --network debug-network \
   --no-address
Attach the debugging disk to the instance:
gcloud compute instances attach-disk debugger \
   --disk example-disk-debugging
Follow the instructions to Connect to a VM using a bastion host.
After you have logged into the debugger instance, troubleshoot the instance. For example, you can look at the instance logs:
sudo su -
mkdir /mnt/VM_NAME
mount /dev/disk/by-id/scsi-0Google_PersistentDisk_example-disk-debugging /mnt/VM_NAME
cd /mnt/VM_NAME/var/log
# Identify the issue preventing ssh from working
ls
Replace
VM_NAMEwith the name of the VM you can't connect to.
Use a startup script
If none of the preceding helped, you can create a startup script to collect information right after the instance starts. Follow the instructions for running a startup script.
Afterward, you also need to reset your instance before the metadata takes
effect by using
gcloud compute instances reset.
Alternatively, you can also recreate your instance by running a diagnostic startup script:
Run
gcloud compute instances deletewith the--keep-disksflag.gcloud compute instances delete VM_NAME \ --keep-disks boot
Replace
VM_NAMEwith the name of the VM you can't connect to.Add a new instance with the same disk and specify your startup script.
gcloud compute instances create NEW_VM_NAME \
   --disk name=BOOT_DISK_NAME,boot=yes \
   --metadata startup-script-url URL
Replace the following:
NEW_VM_NAMEis the name of the new VM you're creatingBOOT_DISK_NAMEis the name of the boot disk from the VM you can't connect toURLis the Cloud Storage URL to the script, in eithergs://BUCKET/FILEorhttps://storage.googleapis.com/BUCKET/FILEformat.
Use your disk on a new instance
If you still need to recover data from your persistent boot disk, you can detach the boot disk and then attach that disk as a secondary disk on a new instance.
Delete the VM you can't connect to and keep its boot disk:
gcloud compute instances delete VM_NAME \
   --keep-disks=boot
Replace
VM_NAMEwith the name of the VM you can't connect to.Create a new VM with your old VM's boot disk. Specify the name of the boot disk of the VM you just deleted.
Connect to your new VM using SSH:
gcloud compute ssh NEW_VM_NAME
Replace
NEW_VM_NAMEwith the name of your new VM.
Check whether or not the VM boot disk is full
Your VM might become inaccessible if its boot disk is full. This scenario can be difficult to troubleshoot as it's not always obvious when the VM connectivity issue is due to a full boot disk. For more information about this scenario, see Troubleshooting a VM that is inaccessible due to a full boot disk.
Diagnosis methods for Windows VMs
Reset SSH metadata
If you can't connect to a Windows VM using SSH, try unsetting the
enable-windows-ssh metadata key and re-enabling SSH for Windows.
Set the
enable-windows-sshmetadata key toFALSE. For information about how to set metadata, see Set custom metadata.Wait a few seconds for the change to take place.
Connect to the VM using RDP
If you can't diagnose and resolve the cause of failed SSH connections to your Windows VM, connect using RDP.
After you establish a connection to the VM, review the OpenSSH logs.
What's Next?
- Learn how SSH connections to Linux VMs work on Compute Engine.