CloudBolt is a cloud management platform that works with new and existing environments. It integrates on-premises virtualization and private cloud resources with public clouds, configuration management tools, and domain-specific technologies.
Users can rapidly provision the resources they need through CloudBolt’s intuitive self-service portal. Enterprise IT organizations maintain control through configuration standards, usage quotas, and cost transparency. By delivering a responsive and agile alternative to shadow IT, CloudBolt gives users what they want, when they want it.
CloudBolt’s management platform provides a single interface to:
- Turn IT resources into a self-service cloud.
- Manage accounts and configurations for all your cloud environments.
- Establish infrastructure costs for chargeback and showback.
- Set quotas, system leases and approval workflows.
- Configure a wide range of orchestration elements and extensible actions.
Features:
- Graphical user interface.
- Straightforward deployment.
- Environment auto-discovery.
- Automated provisioning.
- Internal and external workflow.
- Multi-tenant.
- Role-based quotas.
- Manages both new and legacy resources.
This tutorial shows how to install and get CloudBolt connected to the Google Cloud Platform.
Objectives
- Get the CloudBolt server up and running.
- Establish a connection to Google Compute Engine from CloudBolt.
- Configure the Resource Handler and Environment.
- Customize the Order Form and Process.
- Ensure your environments are healthy and capable of server builds.
Install CloudBolt
CloudBolt is distributed as an open virtualization appliance. You can install CloudBolt using the following steps.
Check Prerequisites
For a successful installation, make sure your on-premises virtualization system has capacity for the following:
- 2 CPUs
- 8 GB memory
- 40 GB storage. The initial VM will use 2GB if thin-provisioned, 40GB if thick-provisioned.
Deploy the CloudBolt VM
To deploy your CloudBolt VM, use your virtualization manager to deploy the
CloudBolt appliance as a virtual machine. Boot the newly created VM. CloudBolt
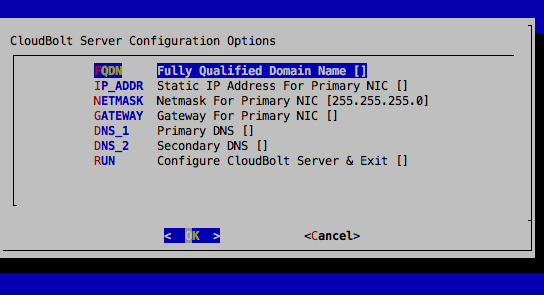
needs a few configuration items before you can access the web console. Connect
to the VM’s console using your virtualization manager and login with username
root and password cloudbolt. You will be prompted for network
configuration information and for a new root password.
Open the CloudBolt web interface by pointing your browser to the IP address that
you assigned the CloudBolt VM. Upload your CloudBolt license. If you don’t have
one, email your CloudBolt Support Engineer at
support@cloudboltsoftware.com.
Sign in with username admin and password admin.
Complete the following Quick Setup Wizard steps:
- Accept the EULA. Read the End User License Agreement. If you accept the agreement, select I agree to the EULA and continue to step 2.
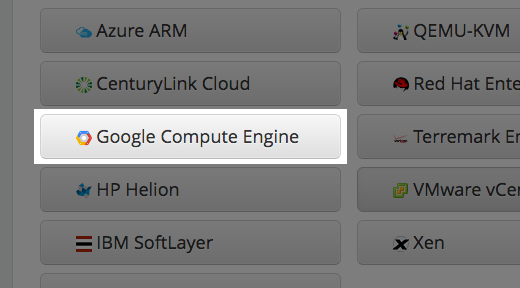
Pick a Technology. In steps three and four of the Quick Setup wizard, select Google Compute Engine and provide a service account key file in the form of a .json file or enter JSON data directly. After this, CloudBolt will discover the zones, images, and subnets in your Compute Engine account and allow you to select which of these to import. Upon completion of the wizard, CloudBolt will begin discovering all the VMs in the zones you selected.

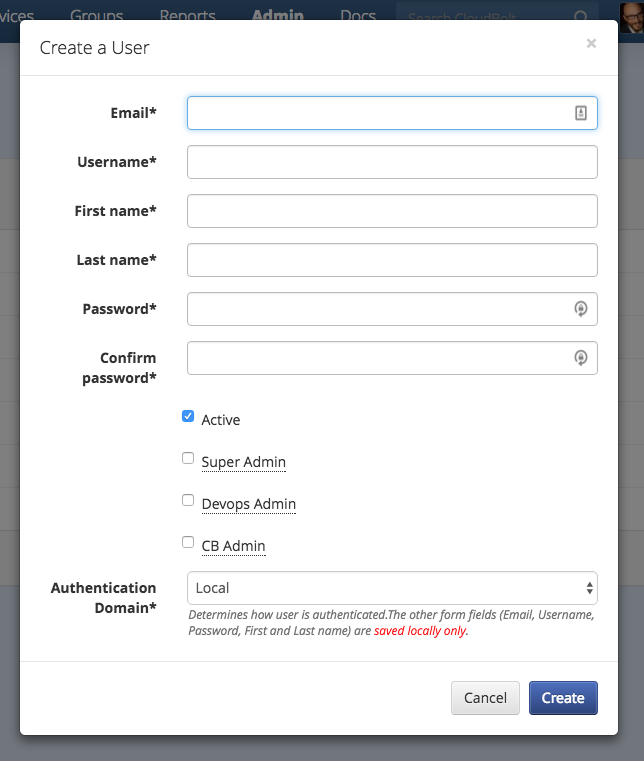
Create an administrative account. Create a CloudBolt superuser. This user will be able to change all CloudBolt permissions. Enter your own name and other information into this form. All fields are required. The value of the Organization field will be used to create a sample top-level group in CloudBolt. You can name this for the group you belong to in your company, such as, “Global IT Services”.
After the last step, the wizard will create all the objects that CloudBolt requires to begin provisioning, discovering, and managing VMs. It will create a user account using the information entered in step 3 and automatically sign you in so you can begin using CloudBolt.
Import servers, zones, images and networks
After establishing a connection to Cloud Platform, you can begin to choose which zones, images and networks you’d like to leverage in CloudBolt.
Servers
Every half-hour, or as configured, CloudBolt automatically queries for and records any changes to VMs.
If new servers have been created or deleted outside of CloudBolt, server records in CloudBolt will be created or deleted. Likewise, if changes are made to a server’s power status, CPU count, memory size, or other fields, the existing records in CloudBolt will be updated to reflect those changes. When servers are updated by this synchronization process, CloudBolt records history events, which can be seen in the history tab of the server’s detail view.
If you want to trigger this synchronization process manually:
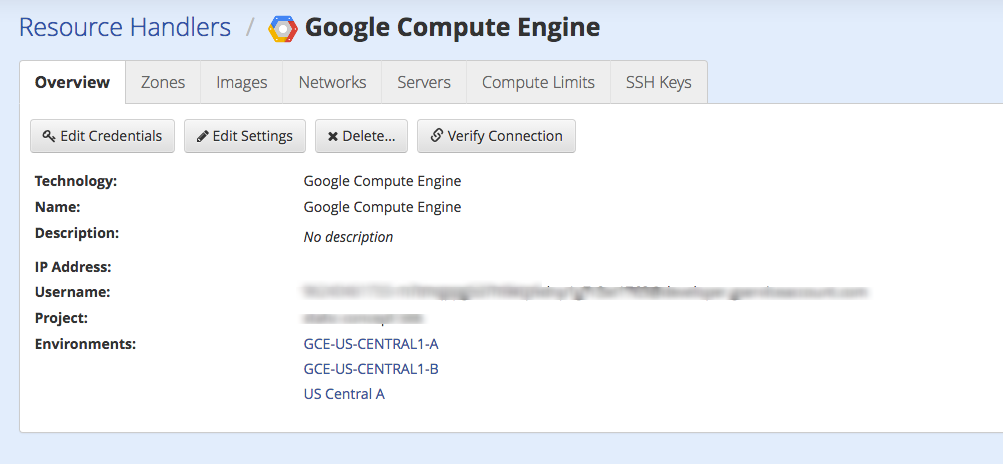
- Click Admin -> Resource Handlers.
- Choose your Compute Engine resource handler.
- Click Sync VMs.
A sync job starts and a link appears that you can click to view the job page, which updates with information about the synchronization process.
Networks
To import all of the available networks:
- Click Admin -> Resource Handlers.
- Choose your Compute Engine resource handler.
- On the Networks tab, click Import networks.
- A dialog lists all discovered networks.
- Select the networks that you want CloudBolt to be aware of, and click Import selected networks to make them usable from CloudBolt.
Images
To import all of the images:
- Click Admin -> Resource Handlers.
- Choose your Google Compute Engine resource handler.
- Click the Images tab, Click Import images.
- A dialog lists all discovered images.
- Select the images that you want CloudBolt to be aware of, and click Import selected images to make them usable from CloudBolt.
If clicking Import images causes CloudBolt to determine that images that were previously imported no longer exist, those old images will be automatically removed from CloudBolt.
Add compute limits and SSH keys
Although quotas can be established at the group level, a CloudBolt administrator can decide to place limits on a resource technology such as Google Compute Engine. Limits on the resource handler, including CPU, Mem, Disk, and number of Servers, can be adjusted by clicking the Limits tab on the Overview page for that resource handler.
Additionally, SSH Keys can be added on the SSH tab to enable the ability to run remote scripts using specific credentials.
Groups and environments in CloudBolt
Groups in CloudBolt map users to roles for a specified set of environments. You can assign one or more roles to users in a group.
A role allows you to assign specific privileges to group members. Those privileges apply only to resources and environments that are associated with the group. For example, a user with a requester role on a group is allowed to request resources in the environments associated with the group. A resource admin role on that same group can manage any of the servers that belong to that group.
An environment in CloudBolt is a logical grouping of resources. Environments can be defined by a combination of physical location, purpose, and technologies used within the environment.
Here are a few examples of how to model your Compute Engine environments:

Each environment has a single resource handler that is used whenever CloudBolt creates or alters any of the servers in the environment. For example, when a user clicks Power Off on a server, CloudBolt contacts the resource handler for that server and instructs it to power off the server.
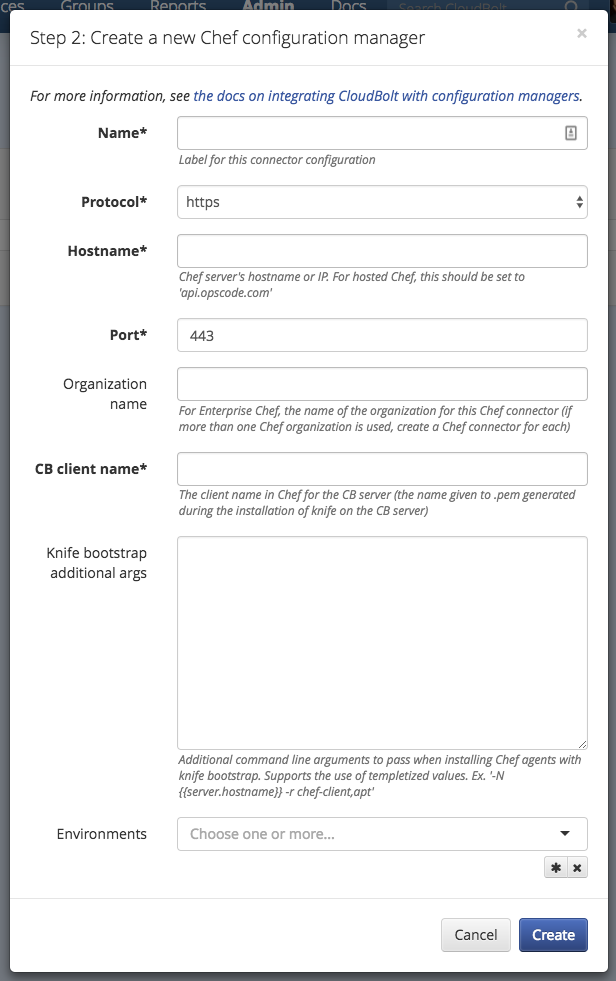
Configuration Managers
Configuration managers allow CloudBolt to install software and manage the configuration of servers when they are being built, and anytime afterward when an end user is managing the server.
To add a new Configuration Manager, from Resources & Networks navigate to Admin Home -> Configuration Managers. Click + Add Configuration Manager and a dialog box will appear. Supply some basic information about your Configuration Manager and then click Create.
Environments can also be associated with a configuration management and/or provisioning system, such as HP-SA, Cobbler, or Razor, to support installing operating systems, applications, patches, or other components.
The configuration manager integration supports the following features from the CloudBolt UI:
- Installation of software, patches and other components on servers.
- Discovery, synchronization, and association of nodes and node groups with servers.
- Automatic installation of the configuration manager’s agent on new servers being built. That is, the agent does not have to be added to images; you can use your existing images as-is.
- Displays additional server configuration data on the Server Details page.

Adding parameters to an environment
When you click the New server link, you must choose which group and environment to order server(s) for. This generates the rest of the order form based on these group and environment selections. CloudBolt admins and group admins can associate parameters with groups and environments to customize the New server order form.
For example, a Resource Admin for the Acme group could add an expiration date parameter to this group, causing CloudBolt to ask anyone ordering servers in this group for the expiration date.
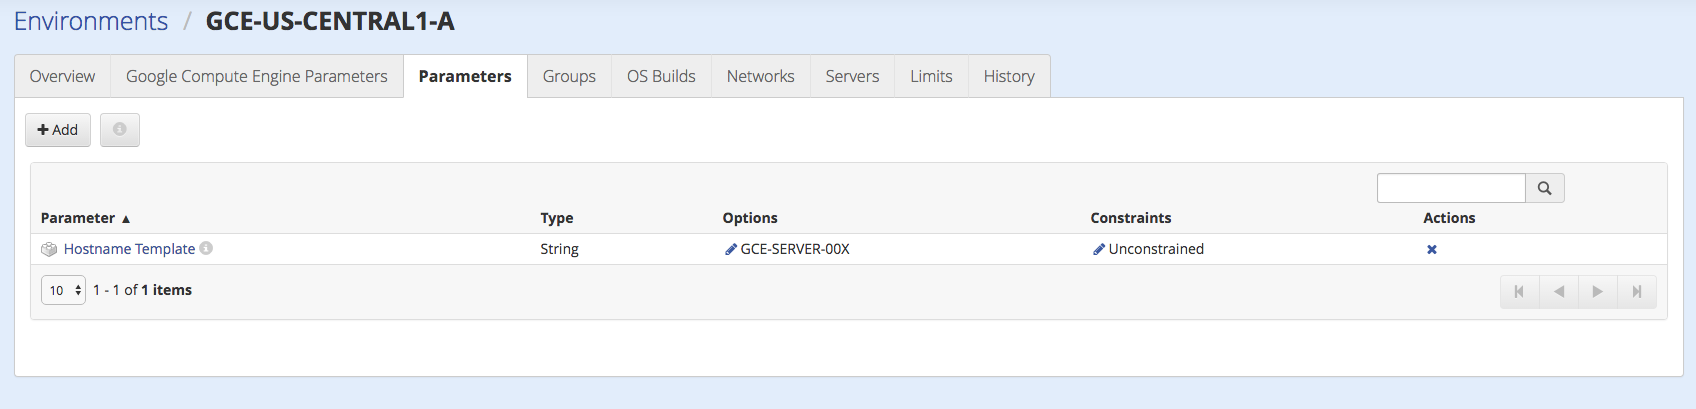
CloudBolt’s order form and service catalog items can be customized per group and environment. To get started, navigate to Admin > Environments > Google Compute Engine Parameters tab. Click the pencil on the right of the Node Size row and limit the options to just a few sizes.

You can also configure a hostname template to enforce your hostname policy.
To do this, click on the Parameters tab of the environment, add the
Hostname Template parameter, and provide an option of
{{os_family.name|first|lower}}svr-00X.
This will generate names such as
rsvr-001 for a RedHat VM or wsvr-001 for a Windows VM.
Click Servers > New Server to see how your changes affect the order
form and ensure that servers are built as expected.
Additionally, you can decide to add an Expiration Date parameter to your environment in order to handle VM sprawl. This can make a huge difference in usage and cost. Still on the Parameters tab of the environment from the previous step, add the Expiration Date parameter, and optionally constrain it to a maximum number of days. At this point, the expiration date will appear on the order form. Now you can specify the expiration behavior from Admin > Orchestration Actions > Expire. You can click the Enable/Disable toggle switch on each action, or provide your own custom action to be run upon expiration. CloudBolt provides the framework for you to accomplish those complex business process decision with minimal effort.
Provision a server using Compute Engine
CloudBolt admins design the forms for ordering servers to accommodate factors like departmental policies, technical proficiency of users, physical resources available, and business rules.
CloudBolt users can order servers in two ways:
- As part of ordering a service.
- Manually, through the New Server order form, also called “à la carte” or “ad hoc” servers. Á la carte server ordering can be disabled for everyone in Admin > Miscellaneous Settings.
In either case, the choices available are determined from a combination of the group and target environment. The order process always begins with the selection of a group. Then, for each server being added to this order, users select the target environment. This results in an order form that combines group-specific customizations with environment-specific customizations.
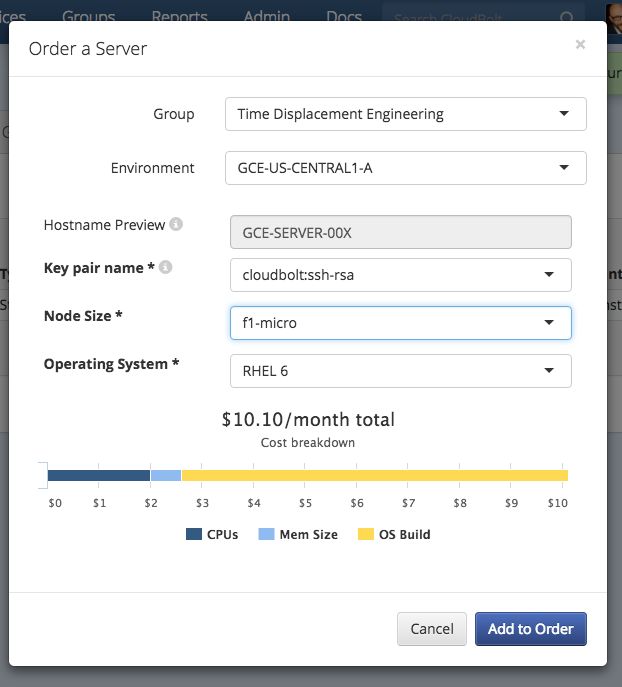
Below are two examples of the à la carte server order form for different environments.
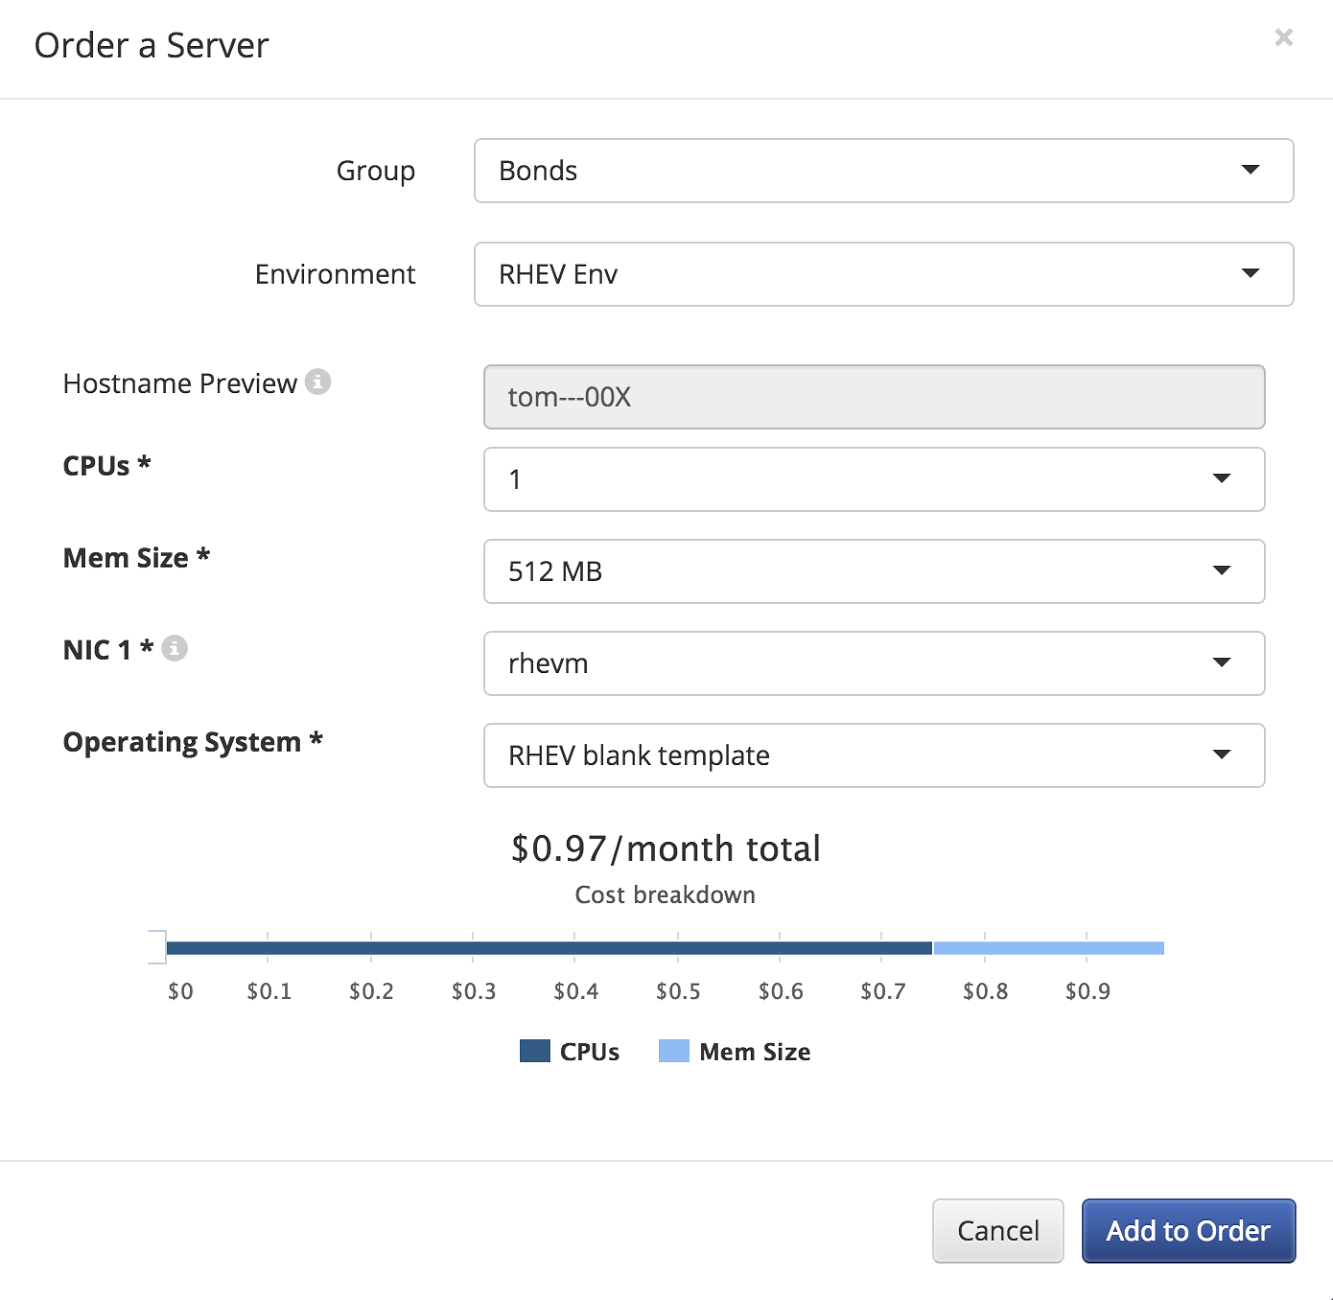
Here is an example of ordering a service with two servers, each targeting a different environment and showing different options and parameters. Admins can customize the sequence of these form fields in Admin > Orders > Parameter Display Sequence.

Configure Continuous Infrastructure Testing
Now that you can successfully provision in your environment, you can add previously completed successful orders to a queue, which will run nightly to ensure that CloudBolt is healthy.
Continuous Infrastructure Testing (CIT) executes end-to-end functional tests on the elements of your virtualization environment that are most sensitive to change. Modern virtualized IT environments are constantly changing. The unexpected effects of changes to storage, network, server configuration, passwords, DNS, VM images, and applications can cause failures in your environment.
Rather than testing infrastructure components in isolation, CIT executes a completely automated provisioning job against the environment using the CloudBolt web interface. If the job completes successfully, you have proven that all of the systems that participate in provisioning and decommissioning are functioning. CIT will delete the VM upon completion. Depending on your environment, these systems can include:
- Network
- Storage
- Virtualization host systems.
- Public cloud providers.
- DNS
- Asset tracking systems.
- Monitoring systems.
- Backup systems.
- Hostname reservation systems.
- Change management systems.
- Other infrastructure CloudBolt is managing.
If a Continuous Infrastructure Test fails, the software will notify an administrator who can intervene to resolve the problem.
Since CIT operates by re-running previously successful or failed orders, the first step is to create these orders.
- Use the order form or service catalog to create a new order.
- Submit and approve the order.
- Follow the job progress to make sure the order completes.
- When the order has completed, a new button appears on the order details page labeled Add to CIT. Clicking this button will add a CIT test for this order.
These tests run nightly and the results can be emailed, rolled into reports, or
even scheduled by using cron.
What's next
Explore reference architectures, diagrams, and best practices about Google Cloud. Take a look at our Cloud Architecture Center.