Load Cloud Storage data into BigQuery
You can load data from Cloud Storage to BigQuery using the BigQuery Data Transfer Service for Cloud Storage connector. With the BigQuery Data Transfer Service, you can schedule recurring transfer jobs that add your latest data from your Cloud Storage to BigQuery.
Before you begin
Before you create a Cloud Storage data transfer, do the following:
- Verify that you have completed all actions required in Enabling the BigQuery Data Transfer Service.
- Retrieve your Cloud Storage URI.
- Create a BigQuery dataset to store your data.
- Create the destination table for your data transfer and specify the schema definition.
- If you plan on specifying a customer-managed encryption key (CMEK), ensure that your service account has permissions to encrypt and decrypt, and that you have the Cloud KMS key resource ID required to use CMEK. For information about how CMEK works with the BigQuery Data Transfer Service, see Specify encryption key with transfers.
Limitations
Recurring data transfers from Cloud Storage to BigQuery are subject to the following limitations:
- All files matching the patterns defined by either a wildcard or by runtime parameters for your data transfer must share the same schema you defined for the destination table, or the transfer will fail. Table schema changes between runs also causes the transfer to fail.
- Because Cloud Storage objects can be versioned, it's important to note that archived Cloud Storage objects are not supported for BigQuery data transfers. Objects must be live to be transferred.
- Unlike individual loads of data from Cloud Storage to BigQuery, for ongoing data transfers you must create the destination table before setting up the transfer. For CSV and JSON files, you must also define the table schema in advance. BigQuery cannot create the table as part of the recurring data transfer process.
- data transfers from Cloud Storage set the Write preference parameter to
APPENDby default. In this mode, an unmodified file can only be loaded into BigQuery once. If the file'slast modification timeproperty is updated, then the file will be reloaded. BigQuery Data Transfer Service does not guarantee all files will be transferred or transferred only once if Cloud Storage files are modified during a data transfer. You are subject to the following limitations when you load data into BigQuery from a Cloud Storage bucket:
BigQuery does not guarantee data consistency for external data sources. Changes to the underlying data while a query is running can result in unexpected behavior.
BigQuery doesn't support Cloud Storage object versioning. If you include a generation number in the Cloud Storage URI, then the load job fails.
Depending on the format of your Cloud Storage source data, there might be additional limitations. For more information, see:
Your Cloud Storage bucket must be in a location that is compatible with the region or multi-region of the destination dataset in BigQuery. This is known as colocation. See Cloud Storage transfer Data locations for details.
Minimum intervals
- Source files are picked up for data transfer immediately, with no minimum file age.
- The minimum interval time between recurring data transfers is 15 minutes. The default interval for a recurring data transfer is every 24 hours.
- You can set up an Event driven transfer to automatically schedule data transfers at lower intervals.
Required permissions
When you load data into BigQuery, you need permissions that allow you to load data into new or existing BigQuery tables and partitions. If you are loading data from Cloud Storage, you'll also need access to the bucket that contains your data. Ensure that you have the following required permissions:
BigQuery: Ensure that the person or service account creating the data transfer has the following permissions in BigQuery:
bigquery.transfers.updatepermissions to create the data transfer- Both
bigquery.datasets.getandbigquery.datasets.updatepermissions on the target dataset
The
bigquery.adminpredefined IAM role includesbigquery.transfers.update,bigquery.datasets.updateandbigquery.datasets.getpermissions. For more information on IAM roles in the BigQuery Data Transfer Service, see Access control.Cloud Storage:
storage.objects.getpermissions are required on the individual bucket or higher. If you are using a URI wildcard, you must also havestorage.objects.listpermissions. If you would like to delete the source files after each successful transfer, you also needstorage.objects.deletepermissions. Thestorage.objectAdminpredefined IAM role includes all of these permissions.
Set up a Cloud Storage transfer
To create a Cloud Storage data transfer in the BigQuery Data Transfer Service:
Console
Go to the Data transfers page in the Google Cloud console.
Click Create transfer.
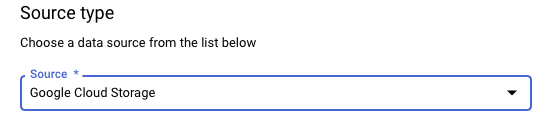
In the Source type section, for Source, choose Google Cloud Storage.
In the Transfer config name section, for Display name, enter a name for the data transfer such as
My Transfer. The transfer name can be any value that lets you identify the transfer if you need to modify it later.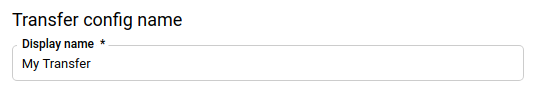
In the Schedule options section, select a Repeat frequency:
If you select Hours, Days, Weeks, or Months, you must also specify a frequency. You can also select Custom to specify a custom repeat frequency. You can select either Start now or Start at set time and provide a start date and run time.
If you select On-demand, then this data transfer runs when you manually trigger the transfer.
If you select Event-driven, you must also specify a Pub/Sub subscription. Choose your subscription name or click Create a subscription. This option enables an event-driven transfer that trigger transfer runs when events arrive at the Pub/Sub subscription.
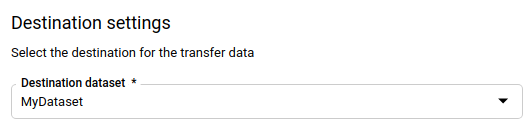
In the Destination settings section, for Destination dataset, choose the dataset that you created to store your data.
In the Data source details section:
- For Destination table, enter the name of your destination table. The destination table must follow the table naming rules. Destination table names also support parameters.
- For Cloud Storage URI, enter the Cloud Storage URI. Wildcards and parameters are supported. If the URI doesn't match any files, no data is overwritten in the destination table.
For Write preference, choose:
- APPEND to incrementally append new data to your existing destination table. APPEND is the default value for Write preference.
- MIRROR to overwrite data in the destination table during each data transfer run.
For more information about how BigQuery Data Transfer Service ingests data using either APPEND or MIRROR, see Data ingestion for Cloud Storage transfers. For more information about the
writeDispositionfield, seeJobConfigurationLoad.For Delete source files after transfer, check the box if you want to delete the source files after each successful data transfer. Delete jobs are best effort. Delete jobs don't retry if the first effort to delete the source files fails.
In the Transfer Options section:
- Under All Formats:
- For Number of errors allowed, enter the maximum number
of bad records that BigQuery can ignore when
running the job. If the number of bad records exceeds this
value, an
invaliderror is returned in the job result, and the job fails. The default value is0. - (Optional) For Decimal target types, enter a
comma-separated list of possible SQL data types that the
source decimal values could be converted to. Which SQL data
type is selected for conversion depends on the following
conditions:
- The data type selected for conversion will be the first data
type in the following list that supports the precision and
scale of the source data, in this
order:
NUMERIC,BIGNUMERIC, andSTRING. - If none of the listed data types support the precision and the scale, the data type supporting the widest range in the specified list is selected. If a value exceeds the supported range when reading the source data, an error is thrown.
- The data type
STRINGsupports all precision and scale values. - If this field is left empty, the data type will default to
NUMERIC,STRINGfor ORC, andNUMERICfor the other file formats. - This field can't contain duplicate data types.
- The order of the data types that you list in this field is ignored.
- The data type selected for conversion will be the first data
type in the following list that supports the precision and
scale of the source data, in this
order:
- For Number of errors allowed, enter the maximum number
of bad records that BigQuery can ignore when
running the job. If the number of bad records exceeds this
value, an
- Under JSON, CSV, for Ignore unknown values, check the box if you want the data transfer to drop data that does not fit the destination table's schema.
- Under AVRO, for Use avro logical types, check the box if
you want the data transfer to convert Avro logical types to their
corresponding BigQuery data types. The default
behavior is to ignore the
logicalTypeattribute for most of the types and use the underlying Avro type instead. Under CSV:
- For Field delimiter, enter the character that separates fields. The default value is a comma.
- For Quote character, enter the character that is used to
quote data sections in a CSV file. The default value is a
double-quote (
"). - For Header rows to skip, enter the number of header rows
in the source file(s) if you don't want to import them. The
default value is
0. - For Allow quoted newlines, check the box if you want to allow newlines within quoted fields.
- For Allow jagged rows, check the box if you want to
allow the data transfer of rows with missing
NULLABLEcolumns.
See CSV-only options for more information.
- Under All Formats:
In the Service Account menu, select a service account from the service accounts associated with your Google Cloud project. You can associate a service account with your data transfer instead of using your user credentials. For more information about using service accounts with data transfers, see Use service accounts.
- If you signed in with a federated identity, then a service account is required to create a data transfer. If you signed in with a Google Account, then a service account for the data transfer is optional.
- The service account must have the required permissions for both BigQuery and Cloud Storage.
Optional: In the Notification options section:
- Click the toggle to enable email notifications. When you enable this option, the owner of the data transfer configuration receives an email notification when a transfer run fails.
- For Select a Pub/Sub topic, choose your topic name or click Create a topic. This option configures Pub/Sub run notifications for your transfer.
Optional: In the Advanced options section, if you use CMEKs, select Customer-managed key. A list of your available CMEKs appears for you to choose from. For information about how CMEKs work with the BigQuery Data Transfer Service, see Specify encryption key with transfers.
Click Save.
bq
Enter the bq mk command and supply the transfer creation flag —
--transfer_config. The following flags are also required:
--data_source--display_name--target_dataset--params
Optional flags:
--destination_kms_key: Specifies the key resource ID for the Cloud KMS key if you use a customer-managed encryption key (CMEK) for this data transfer. For information about how CMEKs work with the BigQuery Data Transfer Service, see Specify encryption key with transfers.--service_account_name: Specifies a service account to use for Cloud Storage transfer authentication instead of your user account.
bq mk \
--transfer_config \
--project_id=PROJECT_ID \
--data_source=DATA_SOURCE \
--display_name=NAME \
--target_dataset=DATASET \
--destination_kms_key="DESTINATION_KEY" \
--params='PARAMETERS' \
--service_account_name=SERVICE_ACCOUNT_NAME
Where:
- PROJECT_ID is your project ID. If
--project_idisn't supplied to specify a particular project, the default project is used. - DATA_SOURCE is the data source, for example,
google_cloud_storage. - NAME is the display name for the data transfer configuration. The transfer name can be any value that lets you identify the transfer if you need to modify it later.
- DATASET is the target dataset for the transfer configuration.
- DESTINATION_KEY: the Cloud KMS key resource ID—for
example,
projects/project_name/locations/us/keyRings/key_ring_name/cryptoKeys/key_name. - PARAMETERS contains the parameters for the created transfer
configuration in JSON format. For example:
--params='{"param":"param_value"}'.destination_table_name_template: the name of the destination BigQuery table.data_path_template: the Cloud Storage URI that contains your files to be transferred. Wildcards and parameters are supported.write_disposition: determines if matching files are appended to the destination table or mirrored entirely. The supported values areAPPENDorMIRROR. For information about how the BigQuery Data Transfer Service appends or mirrors data in Cloud Storage transfers, see Data ingestion for Cloud Storage transfers.file_format: the format of the files that you want to transfer. The format can beCSV,JSON,AVRO,PARQUET, orORC. The default value isCSV.max_bad_records: for anyfile_formatvalue, the maximum number of bad records that can be ignored. The default value is0.decimal_target_types: for anyfile_formatvalue, a comma-separated list of possible SQL data types that the source decimal values could be converted to. If this field is not provided, the data type defaults to"NUMERIC,STRING"forORC, and"NUMERIC"for the other file formats.ignore_unknown_values: for anyfile_formatvalue, set toTRUEto accept rows that contain values that don't match the schema. For more information, see theignoreUnknownvaluesfield details in theJobConfigurationLoadreference table.use_avro_logical_types: forAVROfile_formatvalues, set toTRUEto interpret logical types into their corresponding types (for example,TIMESTAMP), instead of only using their raw types (for example,INTEGER).parquet_enum_as_string: forPARQUETfile_formatvalues, set toTRUEto inferPARQUETENUMlogical type asSTRINGinstead of the defaultBYTES.parquet_enable_list_inference: forPARQUETfile_formatvalues, set toTRUEto use schema inference specifically forPARQUETLISTlogical type.reference_file_schema_uri: a URI path to a reference file with the reader schema.field_delimiter: forCSVfile_formatvalues, a character that separates fields. The default value is a comma.quote: forCSVfile_formatvalues, a character that is used to quote data sections in a CSV file. The default value is a double-quote (").skip_leading_rows: forCSVfile_formatvalues, indicate the number of leading header rows that you don't want to import. The default value is 0.allow_quoted_newlines: forCSVfile_formatvalues, set toTRUEto allow newlines within quoted fields.allow_jagged_rows: forCSVfile_formatvalues, set toTRUEto accept rows that are missing trailing optional columns. The missing values are filled in withNULL.preserve_ascii_control_characters: forCSVfile_formatvalues, set toTRUEto preserve any embedded ASCII control characters.encoding: specify theCSVencoding type. Supported values areUTF8,ISO_8859_1,UTF16BE,UTF16LE,UTF32BE, andUTF32LE.delete_source_files: set toTRUEto delete the source files after each successful transfer. Delete jobs don't rerun if the first try to delete the source file fails. The default value isFALSE.
- SERVICE_ACCOUNT_NAME is the service account name used to
authenticate your transfer. The service account should
be owned by the same
project_idused to create the transfer and it should have all of the required permissions.
For example, the following command creates a Cloud Storage
data transfer named My Transfer using a data_path_template value of
gs://mybucket/myfile/*.csv, target dataset mydataset, and file_format
CSV. This example includes non-default values for the optional params
associated with the CSV file_format.
The data transfer is created in the default project:
bq mk --transfer_config \
--target_dataset=mydataset \
--project_id=myProject \
--display_name='My Transfer' \
--destination_kms_key=projects/myproject/locations/mylocation/keyRings/myRing/cryptoKeys/myKey \
--params='{"data_path_template":"gs://mybucket/myfile/*.csv",
"destination_table_name_template":"MyTable",
"file_format":"CSV",
"max_bad_records":"1",
"ignore_unknown_values":"true",
"field_delimiter":"|",
"quote":";",
"skip_leading_rows":"1",
"allow_quoted_newlines":"true",
"allow_jagged_rows":"false",
"delete_source_files":"true"}' \
--data_source=google_cloud_storage \
--service_account_name=abcdef-test-sa@abcdef-test.iam.gserviceaccount.com projects/862514376110/locations/us/transferConfigs/ 5dd12f26-0000-262f-bc38-089e0820fe38
After running the command, you receive a message like the following:
[URL omitted] Please copy and paste the above URL into your web browser and
follow the instructions to retrieve an authentication code.
Follow the instructions and paste the authentication code on the command line.
API
Use the projects.locations.transferConfigs.create
method and supply an instance of the TransferConfig
resource.
Java
Before trying this sample, follow the Java setup instructions in the BigQuery quickstart using client libraries. For more information, see the BigQuery Java API reference documentation.
To authenticate to BigQuery, set up Application Default Credentials. For more information, see Set up authentication for client libraries.
Specify encryption key with transfers
You can specify customer-managed encryption keys (CMEKs) to encrypt data for a transfer run. You can use a CMEK to support transfers from Cloud Storage.When you specify a CMEK with a transfer, the BigQuery Data Transfer Service applies the CMEK to any intermediate on-disk cache of ingested data so that the entire data transfer workflow is CMEK compliant.
You cannot update an existing transfer to add a CMEK if the transfer was not originally created with a CMEK. For example, you cannot change a destination table that was originally default encrypted to now be encrypted with CMEK. Conversely, you also cannot change a CMEK-encrypted destination table to have a different type of encryption.
You can update a CMEK for a transfer if the transfer configuration was originally created with a CMEK encryption. When you update a CMEK for a transfer configuration, the BigQuery Data Transfer Service propagates the CMEK to the destination tables at the next run of the transfer, where the BigQuery Data Transfer Service replaces any outdated CMEKs with the new CMEK during the transfer run. For more information, see Update a transfer.
You can also use project default keys. When you specify a project default key with a transfer, the BigQuery Data Transfer Service uses the project default key as the default key for any new transfer configurations.
Manually trigger a transfer
In addition to automatically scheduled data transfers from Cloud Storage, you can manually trigger a transfer to load additional data files.
If the transfer configuration is runtime parameterized, you will need to specify a range of dates for which additional transfers will be started.
To trigger a data transfer:
Console
Go to the BigQuery page in the Google Cloud console.
Click Data transfers.
Select your data transfer from the list.
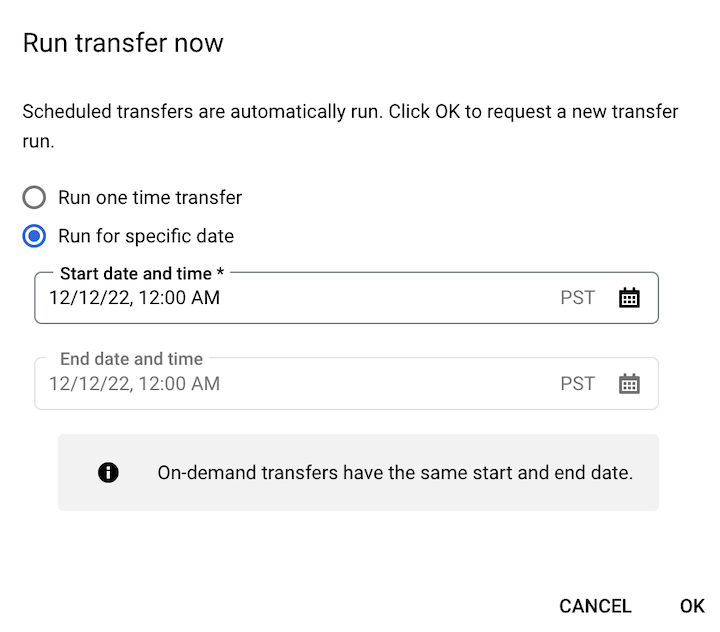
Click Run transfer now or Schedule backfill (for runtime parameterized transfer configurations).
If you clicked Run transfer now, select Run one time transfer or Run for specific date as applicable. If you selected Run for specific date, select a specific date and time:
If you clicked Schedule backfill, select Run one time transfer or Run for a date range as applicable. If you selected Run for a date range, select a start and end date and time:
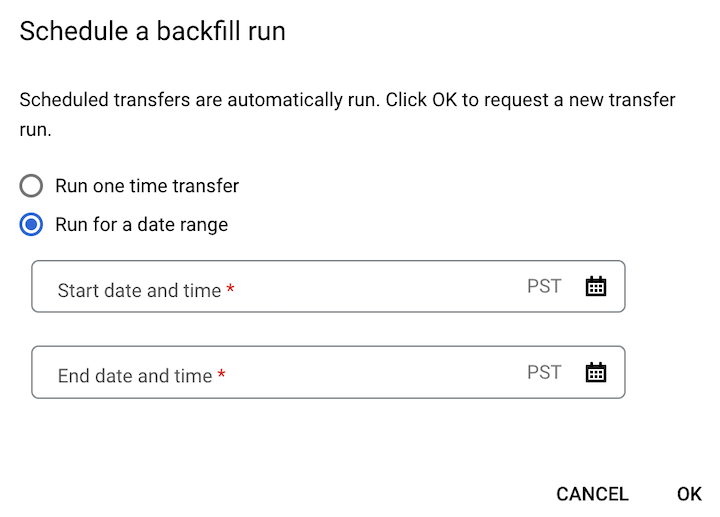
Click Ok.
bq
Enter the bq mk command
and supply the --transfer_run flag. You may either use the --run_time
flag or the --start_time and --end_time flags.
bq mk \
--transfer_run \
--start_time='START_TIME' \
--end_time='END_TIME' \
RESOURCE_NAME
bq mk \
--transfer_run \
--run_time='RUN_TIME' \
RESOURCE_NAME
Where:
START_TIME and END_TIME are timestamps that end in
Zor contain a valid time zone offset. For example:2017-08-19T12:11:35.00Z2017-05-25T00:00:00+00:00
RUN_TIME is a timestamp that specifies the time to schedule the data transfer run. If you want to run a one-time transfer for the current time, you may use the
--run_timeflag.RESOURCE_NAME is the transfer's resource name (also referred to as the transfer configuration), for example,
projects/myproject/locations/us/transferConfigs/1234a123-1234-1a23-1be9-12ab3c456de7. If you don't know the transfer's resource name, run thebq ls --transfer_config --transfer_location=LOCATIONcommand to find the resource name.
API
Use the projects.locations.transferConfigs.startManualRuns
method and provide the transfer configuration resource using the parent
parameter.
What's next
- Learn about runtime parameters in Cloud Storage transfers.
- Learn more about the BigQuery Data Transfer Service.