This guide shows you how to deploy and manually configure a Red Hat Enterprise Linux (RHEL) high-availability (HA) cluster for an SAP HANA scale-out system on Google Cloud that uses an internal passthrough Network Load Balancer to manage the virtual IP (VIP) address.
This guide includes the steps for:
- Configuring an internal passthrough Network Load Balancer to reroute traffic in the event of a failure
- Configuring a Pacemaker cluster on RHEL to manage the SAP systems and other resources during a failover
This guide also includes steps for configuring SAP HANA system replication, but refer to the SAP documentation for the definitive instructions.
To deploy a SAP HANA system without a Linux high-availability cluster or a standby node host, use the SAP HANA deployment guide.
This guide is intended for advanced SAP HANA users who are familiar with Linux high-availability configurations for SAP HANA.
The system that this guide deploys
Following this guide, you will deploy a multi-node SAP HANA HA system configured for full zone-redundancy with an additional instance acting as a majority maker, also known as tie-breaker node, which ensures the cluster quorum is maintained in case of the loss of one zone.
The final deployment comprises of the following resources:
- A primary and secondary site where each instance has a zonal counterpart.
- Two sites configured for synchronous replication.
- A single compute instance to act as a majority maker.
- A Pacemaker high-availability cluster resource manager with a fencing mechanism.
- Persistent disk(s) for SAP HANA data and log volumes attached to each SAP HANA instance.

This guide has you use the Terraform templates that are provided by Google Cloud to deploy the Compute Engine virtual machines (VMs) and the SAP HANA instances, which ensures that the VMs and the base SAP HANA systems meet SAP supportability requirements and conform to current best practices.
SAP HANA Studio is used in this guide to test SAP HANA system replication. You can use SAP HANA Cockpit instead, if you prefer. For information about installing SAP HANA Studio, see:
- Installing SAP HANA Studio on a Compute Engine Windows VM
- SAP HANA Studio Installation and Update Guide
Prerequisites
Before you create the SAP HANA high availability cluster, make sure that the following prerequisites are met:
- You have read the SAP HANA planning guide and the SAP HANA high-availability planning guide.
- You or your organization has a Google Cloud account and you have created a project for the SAP HANA deployment. For information about creating Google Cloud accounts and projects, see Setting up your Google account in the SAP HANA Deployment Guide.
- If you require your SAP workload to run in compliance with data residency, access control, support personnel, or regulatory requirements, then you must create the required Assured Workloads folder. For more information, see Compliance and sovereign controls for SAP on Google Cloud.
The SAP HANA installation media is stored in a Cloud Storage bucket that is available in your deployment project and region. For information about how to upload SAP HANA installation media to a Cloud Storage bucket, see Downloading SAP HANA in the SAP HANA Deployment Guide.
If OS login is enabled in your project metadata, you need to disable OS login temporarily until your deployment is complete. For deployment purposes, this procedure configures SSH keys in instance metadata. When OS login is enabled, metadata-based SSH key configurations are disabled, and this deployment fails. After deployment is complete, you can enable OS login again.
For more information, see:
If you are using VPC internal DNS, the value of the
vmDnsSettingvariable in your project metadata must be eitherGlobalOnlyorZonalPreferredto enable the resolution of the node names across zones. The default setting ofvmDnsSettingisZonalOnly. For more information, see:You have an NFS solution, such as the managed Filestore solution, for sharing the SAP HANA
/hana/sharedand/hanabackupvolumes among the hosts in the scale-out SAP HANA system. To deploy Filestore NFS servers, see Creating instances.- Note that the primary and secondary sites must have access to their own dedicated NFS paths to avoid overwriting data. To use a single Filestore instance, you must configure the deployment to use distinct sub-directories as the mount path.
Creating a network
For security purposes, create a new network. You can control who has access by adding firewall rules or by using another access control method.
If your project has a default VPC network, don't use it. Instead, create your own VPC network so that the only firewall rules in effect are those that you create explicitly.
During deployment, VM instances typically require access to the internet to download Google Cloud's Agent for SAP. If you are using one of the SAP-certified Linux images that are available from Google Cloud, the VM instance also requires access to the internet in order to register the license and to access OS vendor repositories. A configuration with a NAT gateway and with VM network tags supports this access, even if the target VMs do not have external IPs.
To create a VPC network for your project, complete the following steps:
-
Create a custom mode network. For more information, see Creating a custom mode network.
-
Create a subnetwork, and specify the region and IP range. For more information, see Adding subnets.
Setting up a NAT gateway
If you need to create one or more VMs without public IP addresses, you need to use network address translation (NAT) to enable the VMs to access the internet. Use Cloud NAT, a Google Cloud distributed, software-defined managed service that lets VMs send outbound packets to the internet and receive any corresponding established inbound response packets. Alternatively, you can set up a separate VM as a NAT gateway.
To create a Cloud NAT instance for your project, see Using Cloud NAT.
After you configure Cloud NAT for your project, your VM instances can securely access the internet without a public IP address.
Adding firewall rules
By default, an implied firewall rule blocks incoming connections from outside your Virtual Private Cloud (VPC) network. To allow incoming connections, set up a firewall rule for your VM. After an incoming connection is established with a VM, traffic is permitted in both directions over that connection.
You can also create a firewall rule to allow external access to specified ports,
or to restrict access between VMs on the same network. If the default
VPC network type is used, some additional default rules also
apply, such as the default-allow-internal rule, which allows connectivity
between VMs on the same network on all ports.
Depending on the IT policy that is applicable to your environment, you might need to isolate or otherwise restrict connectivity to your database host, which you can do by creating firewall rules.
Depending on your scenario, you can create firewall rules to allow access for:
- The default SAP ports that are listed in TCP/IP of All SAP Products.
- Connections from your computer or your corporate network environment to your Compute Engine VM instance. If you are unsure of what IP address to use, talk to your company's network administrator.
To create the firewall rules for your project, see Creating firewall rules.
Deploying the VMs and SAP HANA
This guide has you use a Terraform configuration file provided by Google Cloud to deploy the following:
- Two matching SAP HANA systems, each with two or more VM instances.
- A single majority maker instance also known as tie-breaker node, which ensures the cluster quorum is maintained in case of the loss of one zone.
The SAP HANA systems use asynchronous system replication such that one of the SAP HANA systems functions as the primary, active system and the other functions as a secondary, standby system. You deploy both SAP HANA systems within the same region, ideally in different zones.
If you need a scale-out system with standby hosts for SAP HANA automatic host failover, then you must instead see Terraform: SAP HANA scale-out system with host auto-failover deployment guide.
You define configuration options for the SAP HANA high-availability cluster in a Terraform configuration file.
The following instructions use Cloud Shell, but are generally applicable to a local terminal with Terraform installed and configured with the Google Provider.
Confirm that your current quotas for resources such as persistent disks and CPUs are sufficient for the SAP HANA systems you are about to install. If your quotas are insufficient, then your deployment fails.
For the SAP HANA quota requirements, see Pricing and quota considerations for SAP HANA.
Open the Cloud Shell or your local terminal.
Download the
manual_sap_hana_scaleout_ha.tfconfiguration file to your working directory by running the following command in Cloud Shell or your terminal:$wget https://storage.googleapis.com/cloudsapdeploy/terraform/latest/terraform/sap_hana_ha/terraform/manual_sap_hana_scaleout_ha.tfOpen the
manual_sap_hana_scaleout_ha.tffile in the Cloud Shell code editor or, if you are using your terminal, then open the file in a text editor of your choice.To open the Cloud Shell code editor, click the pencil icon in the upper right corner of the Cloud Shell terminal window.
In the
manual_sap_hana_scaleout_ha.tffile, for bothsap_hana_primaryandsap_hana_secondaryupdate the argument values by replacing the contents inside the double quotation marks with the values for your installation. The arguments are described in the following table.Argument Data type Description sourceString Specifies the location and version of the Terraform module to use during deployment.
The
manual_sap_hana_scaleout_ha.tfconfiguration file includes two instances of thesourceargument: one that is active and one that is included as a comment. Thesourceargument that is active by default specifieslatestas the module version. The second instance of thesourceargument, which by default is deactivated by a leading#character, specifies a timestamp that identifies a module version.If you need all of your deployments to use the same module version, then remove the leading
#character from thesourceargument that specifies the version timestamp and add it to thesourceargument that specifieslatest.project_idString Specify the ID of your Google Cloud project in which you are deploying this system. For example, my-project-x.machine_typeString Specify the type of Compute Engine virtual machine (VM) on which you need to run your SAP system. If you need a custom VM type, then specify a predefined VM type with a number of vCPUs that is closest to the number you need while still being larger. After deployment is complete, modify the number of vCPUs and the amount of memory. For example,
n1-highmem-32.networkString Specify the name of the network in which you need to create the load balancer that manages the VIP. If you are using a shared VPC network, you must add the ID of the host project as a parent directory of the network name. For example,
HOST_PROJECT_ID/NETWORK_NAME.subnetworkString Specify the name of the subnetwork that you created in a previous step. If you are deploying to a shared VPC, then specify this value as SHARED_VPC_PROJECT_ID/SUBNETWORK. For example,myproject/network1.linux_imageString Specify the name of the Linux operating system image on which you want to deploy your SAP system. For example, rhel-9-2-sap-haorsles-15-sp5-sap. For the list of available operating system images, see the Images page in the Google Cloud console.linux_image_projectString Specify the Google Cloud project that contains the image that you have specified for the argument linux_image. This project might be your own project or a Google Cloud image project. For a Compute Engine image, specify eitherrhel-sap-cloudorsuse-sap-cloud. To find the image project for your operating system, see Operating system details.primary_instance_nameString Specify a name of the VM instance for the primary SAP HANA system. The name can contain lowercase letters, numbers, or hyphens. primary_zoneString Specify a zone in which the primary SAP HANA system is deployed. The primary and secondary zones must be in the same region. For example, us-east1-c.secondary_instance_nameString Specify a name of the VM instance for the secondary SAP HANA system. The name can contain lowercase letters, numbers, or hyphens. secondary_zoneString Specify a zone in which the secondary SAP HANA system is deployed. The primary and secondary zones must be in the same region. For example, us-east1-b.sap_hana_deployment_bucketString To automatically install SAP HANA on the deployed VMs, specify the path of the Cloud Storage bucket that contains the SAP HANA installation files. Do not include gs://in the path; include only the bucket name and the names of any folders. For example,my-bucket-name/my-folder.The Cloud Storage bucket must exist in the Google Cloud project that you specify for the
project_idargument.sap_hana_scaleout_nodesInteger Specify the number of worker hosts that you need in your scale-out system. To deploy a scale-out system, you need at least one worker host. Terraform creates the worker hosts in addition to the primary SAP HANA instance. For example, if you specify
3, then four SAP HANA instances are deployed in your scale-out system.sap_hana_sidString To automatically install SAP HANA on the deployed VMs, specify the SAP HANA system ID. The ID must consist of three alpha-numeric characters and begin with a letter. All letters must be in uppercase. For example, ED1.sap_hana_instance_numberInteger Optional. Specify the instance number, 0 to 99, of the SAP HANA system. The default is 0.sap_hana_sidadm_passwordString To automatically install SAP HANA on the deployed VMs, specify a temporary SIDadmpassword for the installation scripts to use during deployment. The password must contain at least 8 characters and include at least one uppercase letter, one lowercase letter, and a number.Instead of specifying password as plain text, we recommend that you use a secret. For more information, see Password management.
sap_hana_sidadm_password_secretString Optional. If you are using Secret Manager to store the SIDadmpassword, then specify the Name of the secret that corresponds to this password.In Secret Manager, make sure that the Secret value, which is the password, contains at least 8 characters and includes at least one uppercase letter, one lowercase letter, and a number.
For more information, see Password management.
sap_hana_system_passwordString To automatically install SAP HANA on the deployed VMs, specify a temporary database superuser password for the installation scripts to use during deployment. The password must contain at least 8 characters and include at least one uppercase letter, one lowercase letter, and a number. Instead of specifying password as plain text, we recommend that you use a secret. For more information, see Password management.
sap_hana_system_password_secretString Optional. If you are using Secret Manager to store the database superuser password, then specify the Name of the secret that corresponds to this password. In Secret Manager, make sure that the Secret value, which is the password, contains at least 8 characters and includes at least one uppercase letter, one lowercase letter, and a number.
For more information, see Password management.
sap_hana_double_volume_sizeBoolean Optional. To double the HANA volume size, specify true. This argument is useful when you want to deploy multiple SAP HANA instances or a disaster-recovery SAP HANA instance on the same VM. By default, the volume size is automatically calculated to be the minimum size required for the size of your VM, while still meeting the SAP certification and support requirements. The default value isfalse.sap_hana_backup_sizeInteger Optional. Specify size of the /hanabackupvolume in GB. If you don't specify this argument or set it to0, then the installation script provisions Compute Engine instance with a HANA backup volume of two times the total memory.sap_hana_sidadm_uidInteger Optional. Specify a value to override the default value of the SID_LCadm user ID. The default value is 900. You can change this to a different value for consistency within your SAP landscape.sap_hana_sapsys_gidInteger Optional. Overrides the default group ID for sapsys. The default value is79.sap_vipString Specify the IP address that you are going to use for your VIP. The IP address must be within the range of IP addresses that are assigned to your subnetwork. The Terraform configuration file reserves this IP address for you. primary_instance_group_nameString Optional. Specify the name of the unmanaged instance group for the primary node. The default name is ig-PRIMARY_INSTANCE_NAME.secondary_instance_group_nameString Optional. Specify the name of the unmanaged instance group for the secondary node. The default name is ig-SECONDARY_INSTANCE_NAME.loadbalancer_nameString Optional. Specify the name of the internal passthrough Network Load Balancer. The default name is lb-SAP_HANA_SID-ilb.network_tagsString Optional. Specify one or more comma-separated network tags that you want to associate with your VM instances for firewall or routing purposes. If you specify
public_ip = falseand do not specify a network tag, then make sure to provide another means of access to the internet.nic_typeString Optional. Specify the network interface to use with the VM instance. You can specify the value GVNICorVIRTIO_NET. To use a Google Virtual NIC (gVNIC), you need to specify an OS image that supports gVNIC as the value for thelinux_imageargument. For the OS image list, see Operating system details.If you do not specify a value for this argument, then the network interface is automatically selected based on the machine type that you specify for the
This argument is available inmachine_typeargument.sap_hanamodule version202302060649or later.disk_typeString Optional. Specify the default type of persistent disk or Hyperdisk that you want to deploy for all the SAP volumes in your deployment. The default value is pd-ssd. The following are valid values for this argument:pd-ssd,pd-balanced,hyperdisk-extreme,hyperdisk-balanced, andpd-extreme.Note that when you specify the value
hyperdisk-extremeorhyperdisk-balanced, the/usr/sapdirectory is mounted on a separate balanced persistent disk (pd-balanced). This is because/usr/sapdirectory doesn't require as high a performance as the/hana/dataor/hana/logdirectory. In SAP HANA scale-up deployments, a separate balanced persistent disk is also deployed for the/hana/shareddirectory.You can override this default disk type and the associated default disk size and default IOPS using some advanced arguments. For more information, navigate to your working directory, then run the
terraform initcommand, and then see the/.terraform/modules/manual_sap_hana_scaleout_ha/variables.tffile. Before you use these arguments in production, make sure to test them in a test environment.use_single_shared_data_log_diskBoolean Optional. The default value is false, which directs Terraform to deploy a separate persistent disk or Hyperdisk for each of the following SAP volumes:/hana/data,/hana/log,/hana/shared, and/usr/sap. To mount these SAP volumes on the same persistent disk or Hyperdisk, specifytrue.include_backup_diskBoolean Optional. This argument is applicable to SAP HANA scale-up deployments. The default value is true, which directs Terraform to deploy a standard HDD persistent disk to host the/hanabackupdirectory. The size of this disk is determined by thesap_hana_backup_sizeargument.If you set the value for
include_backup_diskasfalse, then no disk is deployed for the/hanabackupdirectory.public_ipBoolean Optional. Determines whether or not a public IP address is added to your VM instance. The default value is true.service_accountString Optional. Specify the email address of a user-managed service account to be used by the host VMs and by the programs that run on the host VMs. For example, svc-acct-name@project-id.iam.gserviceaccount.com.If you specify this argument without a value, or omit it, then the installation script uses the Compute Engine default service account. For more information, see Identity and access management for SAP programs on Google Cloud.
sap_deployment_debugBoolean Optional. Only when Cloud Customer Care asks you to enable debugging for your deployment, specify true, which makes the deployment generate verbose deployment logs. The default value isfalse.primary_reservation_nameString Optional. To use a specific Compute Engine VM reservation for provisioning the VM instance that hosts your HA cluster's primary SAP HANA instance, specify the name of the reservation. By default, the installation script selects any available Compute Engine reservation based on the following conditions. For a reservation to be usable, regardless of whether you specify a name or the installation script selects it automatically, the reservation must be set with the following:
-
The
specificReservationRequiredoption is set totrueor, in the Google Cloud console, the Select specific reservation option is selected. -
Some Compute Engine machine types support CPU platforms that are not
covered by the SAP certification of the machine type. If the target
reservation is for any of the following machine types, then the reservation
must specify the minimum CPU platforms as indicated:
n1-highmem-32: Intel Broadwelln1-highmem-64: Intel Broadwelln1-highmem-96: Intel Skylakem1-megamem-96: Intel Skylake
The minimum CPU platforms for all of the other machine types that are
certified by SAP for use on Google Cloud conform to the SAP minimum CPU
requirement.
secondary_reservation_nameString Optional. To use a specific Compute Engine VM reservation for provisioning the VM instance that hosts your HA cluster's secondary SAP HANA instance, specify the name of the reservation. By default, the installation script selects any available Compute Engine reservation based on the following conditions. For a reservation to be usable, regardless of whether you specify a name or the installation script selects it automatically, the reservation must be set with the following:
-
The
specificReservationRequiredoption is set totrueor, in the Google Cloud console, the Select specific reservation option is selected. -
Some Compute Engine machine types support CPU platforms that are not
covered by the SAP certification of the machine type. If the target
reservation is for any of the following machine types, then the reservation
must specify the minimum CPU platforms as indicated:
n1-highmem-32: Intel Broadwelln1-highmem-64: Intel Broadwelln1-highmem-96: Intel Skylakem1-megamem-96: Intel Skylake
The minimum CPU platforms for all of the other machine types that are
certified by SAP for use on Google Cloud conform to the SAP minimum CPU
requirement.
primary_static_ipString Optional. Specify a valid static IP address for the primary VM instance in your high-availability cluster. If you don't specify one, then an IP address is automatically generated for your VM instance. For example, 128.10.10.10.This argument is available in
sap_hana_hamodule version202306120959or later.secondary_static_ipString Optional. Specify a valid static IP address for the secondary VM instance in your high-availability cluster. If you don't specify one, then an IP address is automatically generated for your VM instance. For example, 128.11.11.11.This argument is available in
sap_hana_hamodule version202306120959or later.primary_worker_static_ipsList(String) Optional. Specify an array of valid static IP addresses for the worker instances in the primary instance of your SAP HANA scale-out HA system. If you don't specify a value for this argument, then an IP address is automatically generated for each worker VM instance. For example, [ "1.0.0.1", "2.3.3.4" ].The static IP addresses are assigned in the order of instance creation. For example, if you choose to deploy 3 worker instances but specify only 2 IP addresses for the argument
primary_worker_static_ips, then these IP addresses are assigned to the first two VM instances that the Terraform configuration deploys. For the third worker VM instance, the IP address is automatically generated.This argument is available in
sap_hana_hamodule version202307270727or later.secondary_worker_static_ipsList(String) Optional. Specify an array of valid static IP addresses for the worker instances in the secondary instance of your SAP HANA scale-out HA system. If you don't specify a value for this argument, then an IP address is automatically generated for each worker VM instance. For example, [ "1.0.0.2", "2.3.3.5" ].The static IP addresses are assigned in the order of instance creation. For example, if you choose to deploy 3 worker instances but specify only 2 IP addresses for the argument
secondary_worker_static_ips, then these IP addresses are assigned to the first two VM instances that the Terraform configuration deploys. For the third worker VM instance, the IP address is automatically generated.This argument is available in
sap_hana_hamodule version202307270727or later.The following examples show completed configuration files that define a high-availability cluster for an SAP HANA scale-out system. The cluster uses an internal passthrough Network Load Balancer to manage the VIP.
Terraform deploys the Google Cloud resources that are defined in the configuration file and then scripts take over to configure the operating system and install SAP HANA.
-
The
In the same
manual_sap_hana_scaleout_ha.tffile, update the argument values formajority_maker. The arguments are described in the following table.Argument Data type Description projectString Specify the ID of your Google Cloud project in which you are deploying this system. majority_maker_instance_nameString Specify a name for the Compute Engine VM instance that serves as the majority maker.
This argument is available in
sap_hana_hamodule version202307270727or later.majority_maker_instance_typeString Specify the type of Compute Engine virtual machine (VM) that you want to use for the majority maker instance. For example, n1-highmem-32.If you want to use a custom VM type, then specify a predefined VM type with a number of vCPUs that is closest to the number you need while still being larger. After the deployment is complete, modify the number of vCPUs and the amount of memory.
This argument is available in
sap_hana_hamodule version202307270727or later.majority_maker_zoneString Specify a zone in which the majority maker VM instance is deployed. This zone must be in the same region as the primary and secondary zones. For example, us-east1-d.Google Cloud recommends that the majority maker VM instance is deployed in a different zone than the primary and secondary SAP HANA systems.
This argument is available in
sap_hana_hamodule version202307270727or later.majority_maker_linux_imageString Using the same values as in the previous step, specify the complete image path as "linux_image_project/linux_image". For example"rhel-sap-cloud/rhel-9-0-sap-v20230708".subnetworkString Specify the name of the subnetwork that you created in a previous step. If you are deploying to a shared VPC, then specify this value as SHARED_VPC_PROJECT_ID/SUBNETWORK. For example,myproject/network1.service_accountString Optional. Specify the email address of a user-managed service account to be used by the host VMs and by the programs that run on the host VMs. For example, svc-acct-name@project-id.iam.gserviceaccount.com.If you specify this argument without a value, or omit it, then the installation script uses the Compute Engine default service account. For more information, see Identity and access management for SAP programs on Google Cloud.
metadata_startup_scriptString Don't edit this argument. By default the majority maker will download the latest startup script to prepare the instance for Pacemaker clustering. For clarity, comments in the following example configuration are omitted.
  module "sap_hana_primary" {
    source = "https://storage.googleapis.com/cloudsapdeploy/terraform/latest/terraform/sap_hana/sap_hana_module.zip"

    project_id                     = "example-project-123456"
    zone                           = "us-west1-a"
    machine_type                   = "n1-highmem-32"
    subnetwork                     = "default"
    linux_image                    = "rhel-9-0-sap-v20230711"
    linux_image_project            = "rhel-sap-cloud"
    instance_name                  = "hana-ha-1"
    sap_hana_sid                   = "HA1"

    sap_hana_deployment_bucket      = "my-hana-bucket"
    sap_hana_sidadm_password_secret = "hana_sid_adm_pwd"
    sap_hana_system_password_secret = "hana_sys_pwd"
    sap_hana_scaleout_nodes         = 1
    sap_hana_shared_nfs             = "10.10.10.1:/hana_scaleout/hana_a/shared"
    sap_hana_backup_nfs             = "10.10.10.1:/hana_scaleout/hana_a/backup"

  }
  module "sap_hana_secondary" {
    source = "https://storage.googleapis.com/cloudsapdeploy/terraform/latest/terraform/sap_hana/sap_hana_module.zip"

    project_id                     = "example-project-123456"
    zone                           = "us-west1-b"
    machine_type                   = "n1-highmem-32"
    subnetwork                     = "default"
    linux_image                    = "rhel-9-0-sap-v20230711"
    linux_image_project            = "rhel-sap-cloud"
    instance_name                  = "hana-ha-2"
    sap_hana_sid                   = "HA1"

    sap_hana_deployment_bucket      = "my-hana-bucket"
    sap_hana_sidadm_password_secret = "hana_sid_adm_pwd"
    sap_hana_system_password_secret = "hana_sys_pwd"
    sap_hana_scaleout_nodes         = 1
    sap_hana_shared_nfs             = "10.10.10.2:/hana_scaleout/hana_b/shared"
    sap_hana_backup_nfs             = "10.10.10.2:/hana_scaleout/hana_b/backup"
  }

  resource "google_compute_instance" "majority_maker" {

    project =  "example-project-123456"

    # majority_maker_instance_name
    name         = "majority-maker"

    # majority_maker_instance_type
    machine_type = "n1-standard-8"

    # majority_maker_zone
    zone         = "us-west1-c"

    boot_disk {
      initialize_params {
        # majority_maker_linux_image
        image = "rhel-sap-cloud/rhel-9-0-sap-v20230711"
      }
    }

    network_interface {
      # network or subnetwork
      network = "default"
    }

      service_account {
      # service_account (Optional)
      # email  = svc-acct-name@project-id.iam.gserviceaccount.com.
      scopes = ["cloud-platform"]
    }

    # Do not edit
    metadata_startup_script = "curl -s https://storage.googleapis.com/cloudsapdeploy/deploymentmanager/latest/dm-templates/sap_majoritymaker/startup.sh | bash -s https://storage.googleapis.com/cloudsapdeploy/deploymentmanager/latest/dm-templates/sap_majoritymaker/startup.sh"

  }
Initialize your current working directory and download the Terraform provider plugin and module files for Google Cloud:
terraform init
The
terraform initcommand prepares your working directory for other Terraform commands.To force a refresh of the provider plugin and configuration files in your working directory, specify the
--upgradeflag. If the--upgradeflag is omitted and you don't make any changes in your working directory, Terraform uses the locally cached copies, even iflatestis specified in thesourceURL.terraform init --upgrade
Optionally, create the Terraform execution plan:
terraform plan
The
terraform plancommand shows the changes required by your current configuration. If you skip this step, theterraform applycommand automatically creates a new plan and prompts you to approve it.Apply the execution plan:
terraform apply
When you are prompted to approve the actions, enter
yes.The
terraform applycommand sets up the Google Cloud infrastructure and then hands control over to a script that configures the HA cluster and installs SAP HANA according to the arguments defined in the terraform configuration file.While Terraform has control, status messages are written to the Cloud Shell. After the scripts are invoked, status messages are written to Logging and are viewable in the Google Cloud console, as described in Check the logs.
Verifying the deployment of your HANA HA system
Check the logs
In the Google Cloud console, open Cloud Logging to monitor installation progress and check for errors.
Filter the logs:
Logs Explorer
In the Logs Explorer page, go to the Query pane.
From the Resource drop-down menu, select Global, and then click Add.
If you don't see the Global option, then in the query editor, enter the following query:
resource.type="global"
"Deployment"
Click Run query.
Legacy Logs Viewer
- In the Legacy Logs Viewer page, from the basic selector menu, select Global as your logging resource.
Analyze the filtered logs:
- If
"--- Finished"is displayed, then the deployment processing is complete and you can proceed to the next step. If you see a quota error:
On the IAM & Admin Quotas page, increase any of your quotas that do not meet the SAP HANA requirements that are listed in the SAP HANA planning guide.
Open Cloud Shell.
Go to your working directory and delete the deployment to clean up the VMs and persistent disks from the failed installation:
terraform destroy
When you are prompted to approve the action, enter
yes.Rerun your deployment.
- If
Check the configuration of the VM and the SAP HANA installation
After the SAP HANA system deploys without errors, connect to each VM by using SSH. From the Compute Engine VM instances page, you can click the SSH button for each VM instance, or you can use your preferred SSH method.

Change to the root user.
sudo su -
At the command prompt, enter
df -h. Ensure that you see output that includes the/hanadirectories, such as/hana/data.[root@example-ha-vm1 ~]# df -h Filesystem Size Used Avail Use% Mounted on devtmpfs 126G 0 126G 0% /dev tmpfs 126G 54M 126G 1% /dev/shm tmpfs 126G 25M 126G 1% /run tmpfs 126G 0 126G 0% /sys/fs/cgroup /dev/sda2 30G 5.4G 25G 18% / /dev/sda1 200M 6.9M 193M 4% /boot/efi /dev/mapper/vg_hana-shared 251G 52G 200G 21% /hana/shared /dev/mapper/vg_hana-sap 32G 477M 32G 2% /usr/sap /dev/mapper/vg_hana-data 426G 9.8G 417G 3% /hana/data /dev/mapper/vg_hana-log 125G 7.0G 118G 6% /hana/log /dev/mapper/vg_hanabackup-backup 512G 9.3G 503G 2% /hanabackup tmpfs 26G 0 26G 0% /run/user/900 tmpfs 26G 0 26G 0% /run/user/899 tmpfs 26G 0 26G 0% /run/user/1003
Clean up and retry deployment
If any of the deployment verification steps in the preceding sections show that the installation wasn't successful, then you must undo your deployment and retry it by completing the following steps:
Resolve any errors to ensure that your deployment doesn't fail again for the same reason. For information about checking the logs, or resolving quota related errors, see Check the logs.
Open Cloud Shell or, if you installed the Google Cloud CLI on your local workstation, then open a terminal.
Go to the directory that contains the Terraform configuration file that you used for this deployment.
Delete all resources that are part of your deployment by running the following command:
terraform destroy
When you are prompted to approve the action, enter
yes.Retry your deployment as instructed earlier in this guide.
Validate your installation of Google Cloud's Agent for SAP
After you have deployed all instances and installed your SAP system, validate that Google Cloud's Agent for SAP is functioning properly.
Verify that Google Cloud's Agent for SAP is running
To verify that the agent is running, follow these steps:
Establish an SSH connection with your host VM instance.
Run the following command:
systemctl status google-cloud-sap-agent
If the agent is functioning properly, then the output contains
active (running). For example:google-cloud-sap-agent.service - Google Cloud Agent for SAP Loaded: loaded (/usr/lib/systemd/system/google-cloud-sap-agent.service; enabled; vendor preset: disabled) Active: active (running) since Fri 2022-12-02 07:21:42 UTC; 4 days ago Main PID: 1337673 (google-cloud-sa) Tasks: 9 (limit: 100427) Memory: 22.4 M (max: 1.0G limit: 1.0G) CGroup: /system.slice/google-cloud-sap-agent.service └─1337673 /usr/bin/google-cloud-sap-agent
If the agent isn't running, then restart the agent.
Verify that SAP Host Agent is receiving metrics
To verify that the infrastructure metrics are collected by Google Cloud's Agent for SAP and sent correctly to the SAP Host Agent, follow these steps:
- In your SAP system, enter transaction
ST06. In the overview pane, check the availability and content of the following fields for the correct end-to-end setup of the SAP and Google monitoring infrastructure:
- Cloud Provider:
Google Cloud Platform - Enhanced Monitoring Access:
TRUE - Enhanced Monitoring Details:
ACTIVE
- Cloud Provider:
Set up monitoring for SAP HANA
Optionally, you can monitor your SAP HANA instances using Google Cloud's Agent for SAP. From version 2.0, you can configure the agent to collect the SAP HANA monitoring metrics and send them to Cloud Monitoring. Cloud Monitoring allows you to create dashboards to visualize these metrics, set up alerts based on metric thresholds, and more.
For more information about the collection of SAP HANA monitoring metrics using Google Cloud's Agent for SAP, see SAP HANA monitoring metrics collection.
(Optional) Create a list of instances for script automation
To partially automate some of the repetitive tasks during the configuration of SAP HANA system and Pacemaker cluster, you can use bash scripts. Throughout this guide, such bash scripts are used to speed up the configuration of your SAP HANA system and Pacemaker cluster. These scripts require a list of all deployed VM instances and their corresponding zones as an input.
To enable this automation, create a file named nodes.txt and include the
details of all the deployed VM instances in the following format: zone name,
whitespace, and then the VM instance name. The following sample file is used
throughout this guide:
# cat nodes.txt
  us-west1-a hana-ha-vm-1
  us-west1-a hana-ha-vm-1w1
  us-west1-a hana-ha-vm-1w2
  us-west1-b hana-majoritymaker
  us-west1-c hana-ha-vm-2
  us-west1-c hana-ha-vm-2w1
  us-west1-c hana-ha-vm-2w2
Set up passwordless SSH access
To configure the Pacemaker cluster and to synchronize the SAP HANA secure store (SSFS) keys, passwordless SSH access is required between all nodes, including the majority maker instance. For passwordless SSH access, you need to add the SSH public keys to the instance metadata of all deployed instances.
The format of the metadata is USERNAME: PUBLIC-KEY-VALUE.
For more information about adding SSH keys to VMs, see Add SSH keys to VMs that use metadata-based SSH keys.
Manual steps
For each instance in the primary and secondary systems, as well as the majority maker instance, collect the public key for the user
root.gcloud compute ssh --quiet --zone ZONE_ID INSTANCE_NAME -- sudo cat /root/.ssh/id_rsa.pub
Prepend the key with the string
root:and write the key as a new line into the file calledpublic-ssh-keys.txt, for example:root:ssh-rsa AAAAB3NzaC1JfuYnOI1vutCs= root@INSTANCE_NAME
After collecting all SSH public keys, upload the keys as metadata to all instances:
gcloud compute instances add-metadata --metadata-from-file ssh-keys=public-ssh-keys.txt --zone ZONE_ID INSTANCE_NAME
Automated steps
Alternatively, to automate the process of setting up passwordless SSH access for
all instances listed in nodes.txt,
perform the following steps from Google Cloud console:
Create a list of public keys from all deployed instances:
while read -u10 ZONE HOST ; do echo "Collecting public-key from $HOST"; { echo 'root:'; gcloud compute ssh --quiet --zone $ZONE $HOST --tunnel-through-iap -- sudo cat /root/.ssh/id_rsa.pub; } | tr -ds '\n' " " >> public-ssh-keys.txt; done 10< nodes.txtAssign the SSH public keys as metadata entries to all instances:
while read -u10 ZONE HOST ; do echo "Adding public keys to $HOST"; gcloud compute instances add-metadata --metadata-from-file ssh-keys=public-ssh-keys.txt --zone $ZONE $HOST; done 10< nodes.txt
Disable SAP HANA autostart
Manual steps
For each SAP HANA instance in the cluster, make sure that SAP HANA autostart is disabled. For failovers, Pacemaker manages the starting and stopping of the SAP HANA instances in a cluster.
On each host as SID_LCadm, stop SAP HANA:
>HDB stopOn each host, open the SAP HANA profile by using an editor, such as vi:
vi /usr/sap/SID/SYS/profile/SID_HDBINST_NUM_HOST_NAME
Set the
Autostartproperty to0:Autostart=0
Save the profile.
On each host as SID_LCadm, start SAP HANA:
>HDB start
Automated steps
Alternatively, to disable SAP HANA autostart for all instances listed in
nodes.txt,
run the following script from Google Cloud console:
while read -u10 ZONE HOST ;
 do gcloud compute ssh --verbosity=none --zone $ZONE $HOST -- "echo Setting Autostart=0 on \$HOSTNAME;
 sudo sed -i 's/Autostart=1/Autostart=0/g' /usr/sap/SID/SYS/profile/SID_HDBINST_NUM_\$HOSTNAME";
 done 10< nodes.txt
Enable SAP HANA Fast Restart
Google Cloud strongly recommends enabling SAP HANA Fast Restart for each instance of SAP HANA, especially for larger instances. SAP HANA Fast Restart reduces restart time in the event that SAP HANA terminates, but the operating system remains running.
As configured by the automation scripts that Google Cloud provides,
the operating system and kernel settings already support SAP HANA Fast Restart.
You need to define the tmpfs file system and configure SAP HANA.
To define the tmpfs file system and configure SAP HANA, you can follow
the manual steps or use the automation script that
Google Cloud provides to enable SAP HANA Fast Restart. For more
information, see:
For the complete authoritative instructions for SAP HANA Fast Restart, see the SAP HANA Fast Restart Option documentation.
Manual steps
Configure the tmpfs file system
After the host VMs and the base SAP HANA systems are successfully deployed,
you need to create and mount directories for the NUMA nodes in the tmpfs
file system.
Display the NUMA topology of your VM
Before you can map the required tmpfs file system, you need to know how
many NUMA nodes your VM has. To display the available NUMA nodes on
a Compute Engine VM, enter the following command:
lscpu | grep NUMA
For example, an m2-ultramem-208 VM type has four NUMA nodes,
numbered 0-3, as shown in the following example:
NUMA node(s):        4
NUMA node0 CPU(s):   0-25,104-129
NUMA node1 CPU(s):   26-51,130-155
NUMA node2 CPU(s):   52-77,156-181
NUMA node3 CPU(s):   78-103,182-207
Create the NUMA node directories
Create a directory for each NUMA node in your VM and set the permissions.
For example, for four NUMA nodes that are numbered 0-3:
mkdir -pv /hana/tmpfs{0..3}/SID
chown -R SID_LCadm:sapsys /hana/tmpfs*/SID
chmod 777 -R /hana/tmpfs*/SID
Mount the NUMA node directories to tmpfs
Mount the tmpfs file system directories and specify
a NUMA node preference for each with mpol=prefer:
SID specify the SID with uppercase letters.
mount tmpfsSID0 -t tmpfs -o mpol=prefer:0 /hana/tmpfs0/SID
mount tmpfsSID1 -t tmpfs -o mpol=prefer:1 /hana/tmpfs1/SID
mount tmpfsSID2 -t tmpfs -o mpol=prefer:2 /hana/tmpfs2/SID
mount tmpfsSID3 -t tmpfs -o mpol=prefer:3 /hana/tmpfs3/SID
Update /etc/fstab
To ensure that the mount points are available after an operating system
reboot, add entries into the file system table, /etc/fstab:
tmpfsSID0 /hana/tmpfs0/SID tmpfs rw,relatime,mpol=prefer:0
tmpfsSID1 /hana/tmpfs1/SID tmpfs rw,relatime,mpol=prefer:1
tmpfsSID1 /hana/tmpfs2/SID tmpfs rw,relatime,mpol=prefer:2
tmpfsSID1 /hana/tmpfs3/SID tmpfs rw,relatime,mpol=prefer:3
Optional: set limits on memory usage
The tmpfs file system can grow and shrink dynamically.
To limit the memory used by the tmpfs file system, you
can set a size limit for a NUMA node volume with the size option.
For example:
mount tmpfsSID0 -t tmpfs -o mpol=prefer:0,size=250G /hana/tmpfs0/SID
You can also limit overall tmpfs memory usage for all NUMA nodes for
a given SAP HANA instance and a given server node by setting the
persistent_memory_global_allocation_limit parameter in the [memorymanager]
section of the global.ini file.
SAP HANA configuration for Fast Restart
To configure SAP HANA for Fast Restart, update the global.ini file
and specify the tables to store in persistent memory.
Update the [persistence] section in the global.ini file
Configure the [persistence] section in the SAP HANA global.ini file
to reference the tmpfs locations. Separate each tmpfs location with
a semicolon:
[persistence]
basepath_datavolumes = /hana/data
basepath_logvolumes = /hana/log
basepath_persistent_memory_volumes = /hana/tmpfs0/SID;/hana/tmpfs1/SID;/hana/tmpfs2/SID;/hana/tmpfs3/SID
The preceding example specifies four memory volumes for four NUMA nodes,
which corresponds to the m2-ultramem-208. If you were running on
the m2-ultramem-416, you would need to configure eight memory volumes (0..7).
Restart SAP HANA after modifying the global.ini file.
SAP HANA can now use the tmpfs location as persistent memory space.
Specify the tables to store in persistent memory
Specify specific column tables or partitions to store in persistent memory.
For example, to turn on persistent memory for an existing table, execute the SQL query:
ALTER TABLE exampletable persistent memory ON immediate CASCADE
To change the default for new tables add the parameter
table_default in the indexserver.ini file. For example:
[persistent_memory]
table_default = ON
For more information on how to control columns, tables and which monitoring views provide detailed information, see SAP HANA Persistent Memory.
Automated steps
The automation script that Google Cloud provides to enable
SAP HANA Fast Restart
makes changes to directories /hana/tmpfs*, file /etc/fstab, and
SAP HANA configuration. When you run the script, you might need to perform
additional steps depending on whether this is the initial deployment of your
SAP HANA system or you are resizing your machine to a different NUMA size.
For the initial deployment of your SAP HANA system or resizing the machine to increase the number of NUMA nodes, make sure that SAP HANA is running during the execution of automation script that Google Cloud provides to enable SAP HANA Fast Restart.
When you resize your machine to decrease the number of NUMA nodes, make sure that SAP HANA is stopped during the execution of the automation script that Google Cloud provides to enable SAP HANA Fast Restart. After the script is executed, you need to manually update the SAP HANA configuration to complete the SAP HANA Fast Restart setup. For more information, see SAP HANA configuration for Fast Restart.
To enable SAP HANA Fast Restart, follow these steps:
Establish an SSH connection with your host VM.
Switch to root:
sudo su -
Download the
sap_lib_hdbfr.shscript:wget https://storage.googleapis.com/cloudsapdeploy/terraform/latest/terraform/lib/sap_lib_hdbfr.sh
Make the file executable:
chmod +x sap_lib_hdbfr.sh
Verify that the script has no errors:
vi sap_lib_hdbfr.sh
./sap_lib_hdbfr.sh -help
If the command returns an error, contact Cloud Customer Care. For more information about contacting Customer Care, see Getting support for SAP on Google Cloud.
Run the script after replacing SAP HANA system ID (SID) and password for the SYSTEM user of the SAP HANA database. To securely provide the password, we recommend that you use a secret in Secret Manager.
Run the script by using the name of a secret in Secret Manager. This secret must exist in the Google Cloud project that contains your host VM instance.
sudo ./sap_lib_hdbfr.sh -h 'SID' -s SECRET_NAME
Replace the following:
SID: specify the SID with uppercase letters. For example,AHA.SECRET_NAME: specify the name of the secret that corresponds to the password for the SYSTEM user of the SAP HANA database. This secret must exist in the Google Cloud project that contains your host VM instance.
Alternatively, you can run the script using a plain text password. After SAP HANA Fast Restart is enabled, make sure to change your password. Using plain text password is not recommended as your password would be recorded in the command-line history of your VM.
sudo ./sap_lib_hdbfr.sh -h 'SID' -p 'PASSWORD'
Replace the following:
SID: specify the SID with uppercase letters. For example,AHA.PASSWORD: specify the password for the SYSTEM user of the SAP HANA database.
For a successful initial run, you should see an output similar to the following:
INFO - Script is running in standalone mode
ls: cannot access '/hana/tmpfs*': No such file or directory
INFO - Setting up HANA Fast Restart for system 'TST/00'.
INFO - Number of NUMA nodes is 2
INFO - Number of directories /hana/tmpfs* is 0
INFO - HANA version 2.57
INFO - No directories /hana/tmpfs* exist. Assuming initial setup.
INFO - Creating 2 directories /hana/tmpfs* and mounting them
INFO - Adding /hana/tmpfs* entries to /etc/fstab. Copy is in /etc/fstab.20220625_030839
INFO - Updating the HANA configuration.
INFO - Running command: select * from dummy
DUMMY
"X"
1 row selected (overall time 4124 usec; server time 130 usec)

INFO - Running command: ALTER SYSTEM ALTER CONFIGURATION ('global.ini', 'SYSTEM') SET ('persistence', 'basepath_persistent_memory_volumes') = '/hana/tmpfs0/TST;/hana/tmpfs1/TST;'
0 rows affected (overall time 3570 usec; server time 2239 usec)

INFO - Running command: ALTER SYSTEM ALTER CONFIGURATION ('global.ini', 'SYSTEM') SET ('persistent_memory', 'table_unload_action') = 'retain';
0 rows affected (overall time 4308 usec; server time 2441 usec)

INFO - Running command: ALTER SYSTEM ALTER CONFIGURATION ('indexserver.ini', 'SYSTEM') SET ('persistent_memory', 'table_default') = 'ON';
0 rows affected (overall time 3422 usec; server time 2152 usec)
Automated steps
To automate this process use nodes.txt and the following scripts from Google Cloud console:
Generate a
hosts.txtfile with a list of IP addresses and hostnames:while read -u10 ZONE HOST ; do gcloud compute instances list --filter="name=( 'NAME' $HOST )" --format="csv[separator=' ',no-heading](networkInterfaces[0].networkIP,name)" >> hosts.txt; done 10< nodes.txt
Verify that your
hosts.txtfile appears similar to the following example:10.138.0.1 rhel-hana-primary 10.138.0.2 rhel-hana-primaryw1 10.138.0.3 rhel-hana-secondary 10.138.0.4 rhel-hana-secondaryw1 10.138.0.5 rhel-sap-mm
On all hosts in the cluster, including the majority maker, update the
/etc/hostsfile to include the hostnames and the internal IP addresses of all instances in the Pacemaker cluster.while read -u10 ZONE HOST ; do gcloud compute ssh --tunnel-through-iap --quiet $HOST --zone $ZONE -- "sudo tee -a /etc/hosts" < hosts.txt; done 10< nodes.txt
Back up the databases
Create backups of your databases to initiate database logging for SAP HANA system replication and create a recovery point.
If you have multiple tenant databases in an MDC configuration, back up each tenant database.
The Deployment Manager template uses /hanabackup/data/SID as the default backup directory.
To create backups of new SAP HANA databases:
On the primary host, switch to
SID_LCadm. Depending on your OS image, the command might be different.sudo -i -u SID_LCadm
Create database backups:
For a SAP HANA single-database-container system:
>hdbsql -t -u system -p SYSTEM_PASSWORD -i INST_NUM \ "backup data using file ('full')"The following example shows a successful response from a new SAP HANA system:
0 rows affected (overall time 18.416058 sec; server time 18.414209 sec)
For a SAP HANA multi-database-container system (MDC), create a backup of the system database as well as any tenant databases:
>hdbsql -t -d SYSTEMDB -u system -p SYSTEM_PASSWORD -i INST_NUM \ "backup data using file ('full')">hdbsql -t -d SID -u system -p SYSTEM_PASSWORD -i INST_NUM \ "backup data using file ('full')"
The following example shows a successful response from a new SAP HANA system:
0 rows affected (overall time 16.590498 sec; server time 16.588806 sec)
Confirm that the logging mode is set to normal:
>hdbsql -u system -p SYSTEM_PASSWORD -i INST_NUM \ "select value from "SYS"."M_INIFILE_CONTENTS" where key='log_mode'"You should see:
VALUE
"normal"
Enable SAP HANA system replication
As a part of enabling SAP HANA system replication, you need to copy the data and key files for the SAP HANA secure stores on the file system (SSFS) from the primary host to the secondary host. The method that this procedure uses to copy the files is just one possible method that you can use.
On the primary host as
SID_LCadm, enable system replication:>hdbnsutil -sr_enable --name=PRIMARY_HOST_NAMEOn the secondary host:
As
SID_LCadm, stop SAP HANA:>sapcontrol -nr INST_NUM -function StopSystemAs root, archive the existing SSFS data and key files:
#cd /usr/sap/SID/SYS/global/security/rsecssfs/#mv data/SSFS_SID.DAT data/SSFS_SID.DAT-ARC#mv key/SSFS_SID.KEY key/SSFS_SID.KEY-ARCCopy the data file from the primary host:
#scp -o StrictHostKeyChecking=no \ PRIMARY_HOST_NAME:/usr/sap/SID/SYS/global/security/rsecssfs/data/SSFS_SID.DAT \ /usr/sap/SID/SYS/global/security/rsecssfs/data/SSFS_SID.DATCopy the key file from the primary host:
#scp -o StrictHostKeyChecking=no \ PRIMARY_HOST_NAME:/usr/sap/SID/SYS/global/security/rsecssfs/key/SSFS_SID.KEY \ /usr/sap/SID/SYS/global/security/rsecssfs/key/SSFS_SID.KEYUpdate ownership of the files:
#chown SID_LCadm:sapsys /usr/sap/SID/SYS/global/security/rsecssfs/data/SSFS_SID.DAT#chown SID_LCadm:sapsys /usr/sap/SID/SYS/global/security/rsecssfs/key/SSFS_SID.KEYUpdate permissions for the files:
#chmod 644 /usr/sap/SID/SYS/global/security/rsecssfs/data/SSFS_SID.DAT#chmod 640 /usr/sap/SID/SYS/global/security/rsecssfs/key/SSFS_SID.KEYAs SID_LCadm, register the secondary SAP HANA system with SAP HANA system replication:
>hdbnsutil -sr_register --remoteHost=PRIMARY_HOST_NAME --remoteInstance=INST_NUM \ --replicationMode=syncmem --operationMode=logreplay --name=SECONDARY_HOST_NAMEAs SID_LCadm, start SAP HANA:
>sapcontrol -nr INST_NUM -function StartSystem
Validating system replication
On the primary host as SID_LCadm, confirm that SAP
HANA system replication is active by running the following python script:
$ python $DIR_INSTANCE/exe/python_support/systemReplicationStatus.pyIf replication is set up properly, among other indicators, the following values
are displayed for the xsengine, nameserver, and indexserver services:
- The
Secondary Active StatusisYES - The
Replication StatusisACTIVE
Also, the overall system replication status shows ACTIVE.
Enable the SAP HANA HA/DR provider hooks
Red Hat recommends that you enable the SAP HANA HA/DR provider hooks, which allows SAP HANA to send out notifications for certain events and improves failure detection. The SAP HANA HA/DR provider hooks require SAP HANA 2.0 SPS 03 or a later version.
On both the primary and secondary site, complete the following steps:
As
SID_LCadm, stop SAP HANA:>sapcontrol -nr 00 -function StopSystem
As root or
SID_LCadm, open theglobal.inifile for editing:>vi /hana/shared/SID/global/hdb/custom/config/global.iniAdd the following definitions to the
global.inifile:[ha_dr_provider_SAPHanaSR] provider = SAPHanaSR path = /usr/share/SAPHanaSR-ScaleOut/ execution_order = 1 [trace] ha_dr_saphanasr = info
As root, create a custom configuration file in the
/etc/sudoers.ddirectory by running the following command. This new configuration file allows theSID_LCadmuser to access the cluster node attributes when thesrConnectionChanged()hook method is called.>sudo visudo -f /etc/sudoers.d/20-saphanaIn the
/etc/sudoers.d/20-saphanafile, add the following text:Replace
SID_LCwith the SID in lowercase letters.Cmnd_Alias SOK = /usr/sbin/crm_attribute -n hana_SID_LC_glob_srHook -v SOK -t crm_config -s SAPHanaSR Cmnd_Alias SFAIL = /usr/sbin/crm_attribute -n hana_SID_LC_glob_srHook -v SFAIL -t crm_config -s SAPHanaSR SID_LCadm ALL=(ALL) NOPASSWD: SOK, SFAIL Defaults!SOK, SFAIL !requiretty
In your
/etc/sudoersfile, make sure that the following text is included:#includedir /etc/sudoers.d
Note that the
#in this text is part of the syntax and does not mean that the line is a comment.As
SID_LCadm, start SAP HANA:>sapcontrol -nr 00 -function StartSystemOn the primary host as
SID_LCadm, test the status reported by the hook script:>cdtrace>awk '/ha_dr_SAPHanaSR.*crm_attribute/ { printf "%s %s %s %s\n",$2,$3,$5,$16 }' nameserver_*
Configure the Cloud Load Balancing failover support
The internal passthrough Network Load Balancer service with failover support routes traffic to the active host in an SAP HANA cluster based on a health check service.
Reserve an IP address for the virtual IP
The virtual IP (VIP) address , which is sometimes referred to as a floating IP address, follows the active SAP HANA system. The load balancer routes traffic that is sent to the VIP to the VM that is currently hosting the active SAP HANA system.
Open Cloud Shell:
Reserve an IP address for the virtual IP. This is the IP address that applications use to access SAP HANA. If you omit the
--addressesflag, an IP address in the specified subnet is chosen for you:$gcloud compute addresses create VIP_NAME \ --region CLUSTER_REGION --subnet CLUSTER_SUBNET \ --addresses VIP_ADDRESSFor more information about reserving a static IP, see Reserving a static internal IP address.
Confirm IP address reservation:
$gcloud compute addresses describe VIP_NAME \ --region CLUSTER_REGIONYou should see output similar to the following example:
address: 10.0.0.19
addressType: INTERNAL
creationTimestamp: '2020-05-20T14:19:03.109-07:00'
description: ''
id: '8961491304398200872'
kind: compute#address
name: vip-for-hana-ha
networkTier: PREMIUM
purpose: GCE_ENDPOINT
region: https://www.googleapis.com/compute/v1/projects/example-project-123456/regions/us-central1
selfLink: https://www.googleapis.com/compute/v1/projects/example-project-123456/regions/us-central1/addresses/vip-for-hana-ha
status: RESERVED
subnetwork: https://www.googleapis.com/compute/v1/projects/example-project-123456/regions/us-central1/subnetworks/example-subnet-us-central1
Create instance groups for your host VMs
In Cloud Shell, create two unmanaged instance groups and assign the primary master host VM to one and the secondary master host VM to the other:
$gcloud compute instance-groups unmanaged create PRIMARY_IG_NAME \ --zone=PRIMARY_ZONE$gcloud compute instance-groups unmanaged add-instances PRIMARY_IG_NAME \ --zone=PRIMARY_ZONE \ --instances=PRIMARY_HOST_NAME$gcloud compute instance-groups unmanaged create SECONDARY_IG_NAME \ --zone=SECONDARY_ZONE$gcloud compute instance-groups unmanaged add-instances SECONDARY_IG_NAME \ --zone=SECONDARY_ZONE \ --instances=SECONDARY_HOST_NAMEConfirm the creation of the instance groups:
$gcloud compute instance-groups unmanaged listYou should see output similar to the following example:
NAME          ZONE           NETWORK          NETWORK_PROJECT        MANAGED  INSTANCES
hana-ha-ig-1  us-central1-a  example-network  example-project-123456 No       1
hana-ha-ig-2  us-central1-c  example-network  example-project-123456 No       1
Create a Compute Engine health check
In Cloud Shell, create the health check. For the port used by the health check, choose a port that is in the private range, 49152-65535, to avoid clashing with other services. The check-interval and timeout values are slightly longer than the defaults so as to increase failover tolerance during Compute Engine live migration events. You can adjust the values, if necessary:
$gcloud compute health-checks create tcp HEALTH_CHECK_NAME --port=HEALTHCHECK_PORT_NUM \ --proxy-header=NONE --check-interval=10 --timeout=10 --unhealthy-threshold=2 \ --healthy-threshold=2Confirm the creation of the health check:
$gcloud compute health-checks describe HEALTH_CHECK_NAMEYou should see output similar to the following example:
checkIntervalSec: 10
creationTimestamp: '2020-05-20T21:03:06.924-07:00'
healthyThreshold: 2
id: '4963070308818371477'
kind: compute#healthCheck
name: hana-health-check
selfLink: https://www.googleapis.com/compute/v1/projects/example-project-123456/global/healthChecks/hana-health-check
tcpHealthCheck:
 port: 60000
 portSpecification: USE_FIXED_PORT
 proxyHeader: NONE
timeoutSec: 10
type: TCP
unhealthyThreshold: 2
Create a firewall rule for the health checks
Define a firewall rule for a port in the private range that allows access
to your host VMs from the IP ranges that are used by Compute Engine
health checks, 35.191.0.0/16 and 130.211.0.0/22. For more information,
see Creating firewall rules for health checks.
If you don't already have one, add a network tag to your host VMs. This network tag is used by the firewall rule for health checks.
$gcloud compute instances add-tags PRIMARY_HOST_NAME \ --tags NETWORK_TAGS \ --zone PRIMARY_ZONE$gcloud compute instances add-tags SECONDARY_HOST_NAME \ --tags NETWORK_TAGS \ --zone SECONDARY_ZONEIf you don't already have one, create a firewall rule to allow the health checks:
$gcloud compute firewall-rules create RULE_NAME \ --network NETWORK_NAME \ --action ALLOW \ --direction INGRESS \ --source-ranges 35.191.0.0/16,130.211.0.0/22 \ --target-tags NETWORK_TAGS \ --rules tcp:HLTH_CHK_PORT_NUMFor example:
gcloud compute firewall-rules create  fw-allow-health-checks \
--network example-network \
--action ALLOW \
--direction INGRESS \
--source-ranges 35.191.0.0/16,130.211.0.0/22 \
--target-tags cluster-ntwk-tag \
--rules tcp:60000
Configure the load balancer and failover group
Create the load balancer backend service:
$gcloud compute backend-services create BACKEND_SERVICE_NAME \ --load-balancing-scheme internal \ --health-checks HEALTH_CHECK_NAME \ --no-connection-drain-on-failover \ --drop-traffic-if-unhealthy \ --failover-ratio 1.0 \ --region CLUSTER_REGION \ --global-health-checksAdd the primary instance group to the backend service:
$gcloud compute backend-services add-backend BACKEND_SERVICE_NAME \ --instance-group PRIMARY_IG_NAME \ --instance-group-zone PRIMARY_ZONE \ --region CLUSTER_REGIONAdd the secondary, failover instance group to the backend service:
$gcloud compute backend-services add-backend BACKEND_SERVICE_NAME \ --instance-group SECONDARY_IG_NAME \ --instance-group-zone SECONDARY_ZONE \ --failover \ --region CLUSTER_REGIONCreate a forwarding rule. For the IP address, specify the IP address that you reserved for the VIP. If you need to access the SAP HANA system from outside of the region that is specified below, include the flag
--allow-global-accessin the definition:$gcloud compute forwarding-rules create RULE_NAME \ --load-balancing-scheme internal \ --address VIP_ADDRESS \ --subnet CLUSTER_SUBNET \ --region CLUSTER_REGION \ --backend-service BACKEND_SERVICE_NAME \ --ports ALLFor more information about cross-region access to your SAP HANA high-availability system, see Internal TCP/UDP Load Balancing.
Test the load balancer configuration
Even though your backend instance groups won't register as healthy until later, you can test the load balancer configuration by setting up a listener to respond to the health checks. After setting up a listener, if the load balancer is configured correctly, the status of the backend instance groups changes to healthy.
The following sections present different methods that you can use to test the configuration.
Testing the load balancer with the socat utility
You can use the socat utility to temporarily listen on the health check
port.
On both primary and secondary master host VMs, install the
socatutility:$sudo yum install -y socatStart a
socatprocess to listen for 60 seconds on the health check port:$sudo timeout 60s socat - TCP-LISTEN:HLTH_CHK_PORT_NUM,forkIn Cloud Shell, after waiting a few seconds for the health check to detect the listener, check the health of your backend instance groups:
$gcloud compute backend-services get-health BACKEND_SERVICE_NAME \ --region CLUSTER_REGIONYou should see output similar to the following:
---
backend: https://www.googleapis.com/compute/v1/projects/example-project-123456/zones/us-central1-a/instanceGroups/hana-ha-ig-1
status:
 healthStatus:
 ‐ healthState: HEALTHY
   instance: https://www.googleapis.com/compute/v1/projects/example-project-123456/zones/us-central1-a/instances/hana-ha-vm-1
   ipAddress: 10.0.0.35
   port: 80
 kind: compute#backendServiceGroupHealth
---
backend: https://www.googleapis.com/compute/v1/projects/example-project-123456/zones/us-central1-c/instanceGroups/hana-ha-ig-2
status:
 healthStatus:
 ‐ healthState: HEALTHY
   instance: https://www.googleapis.com/compute/v1/projects/example-project-123456/zones/us-central1-c/instances/hana-ha-vm-2
   ipAddress: 10.0.0.34
   port: 80
 kind: compute#backendServiceGroupHealth
Testing the load balancer using port 22
If port 22 is open for SSH connections on your host VMs, you can temporarily edit the health checker to use port 22, which has a listener that can respond to the health checker.
To temporarily use port 22, follow these steps:
Click your health check in the console:
Click Edit.
In the Port field, change the port number to 22.
Click Save and wait a minute or two.
In Cloud Shell, check the health of your backend instance groups:
$gcloud compute backend-services get-health BACKEND_SERVICE_NAME \ --region CLUSTER_REGIONYou should see output similar to the following:
---
backend: https://www.googleapis.com/compute/v1/projects/example-project-123456/zones/us-central1-a/instanceGroups/hana-ha-ig-1
status:
 healthStatus:
 ‐ healthState: HEALTHY
   instance: https://www.googleapis.com/compute/v1/projects/example-project-123456/zones/us-central1-a/instances/hana-ha-vm-1
   ipAddress: 10.0.0.35
   port: 80
 kind: compute#backendServiceGroupHealth
---
backend: https://www.googleapis.com/compute/v1/projects/example-project-123456/zones/us-central1-c/instanceGroups/hana-ha-ig-2
status:
 healthStatus:
 ‐ healthState: HEALTHY
   instance: https://www.googleapis.com/compute/v1/projects/example-project-123456/zones/us-central1-c/instances/hana-ha-vm-2
   ipAddress: 10.0.0.34
   port: 80
 kind: compute#backendServiceGroupHealth
When you are done, change the health check port number back to the original port number.
Set up Pacemaker
The following procedure configures the Red Hat implementation of a Pacemaker cluster on Compute Engine VMs for SAP HANA.
The procedure is based on Red Hat documentation for configuring high-availability clusters, including (a Red Hat subscription is required):
- Installing and Configuring a Red Hat Enterprise Linux 7.6 (and later) High-Availability Cluster on Google Cloud
- Automated SAP HANA System Replication in Scale-Out in pacemaker cluster
Manual steps
Complete the following steps on all hosts. On Google-provided RHEL-for-SAP image, some packages are already installed however some additional modifications are required.
As root, remove the SAP HANA Scale-Up resource agent that came pre-installed on the image:
#yum -y remove resource-agents-sap-hanaInstall Pacemaker and the missing resource agents:
#yum -y install pcs pacemaker fence-agents-gce resource-agents-gcp resource-agents-sap-hana-scaleoutUpdate packages to latest version:
#yum update -ySet the password for the
haclusteruser, which was created as part of the packages:#passwd haclusterSpecify a password for
haclusterat the prompts.In the RHEL-for-SAP images provided by Google Cloud, the OS firewall service is active by default. Configure the firewall service to allow high-availability traffic:
#firewall-cmd --permanent --add-service=high-availability#firewall-cmd --reloadStart the pcs service and configure it to start at boot time:
#systemctl start pcsd.service#systemctl enable pcsd.serviceCheck the status of the pcs service:
#systemctl status pcsd.serviceYou should see output similar to the following:
● pcsd.service - PCS GUI and remote configuration interface
  Loaded: loaded (/usr/lib/systemd/system/pcsd.service; enabled; vendor preset: disabled)
  Active: active (running) since Sat 2020-06-13 21:17:05 UTC; 25s ago
    Docs: man:pcsd(8)
          man:pcs(8)
Main PID: 31627 (pcsd)
  CGroup: /system.slice/pcsd.service
          └─31627 /usr/bin/ruby /usr/lib/pcsd/pcsd
Jun 13 21:17:03 hana-ha-1 systemd[1]: Starting PCS GUI and remote configuration interface...
Jun 13 21:17:05 hana-ha-1 systemd[1]: Started PCS GUI and remote configuration interface.
Automated steps
To automate this process you may use nodes.txt and the following script from Google Cloud Console.
At the prompt, enter a password to be used by the hacluster user that was created during the installation of the Pacemaker resource agents.
echo "Set password for hacluster user:"; read -r HA_PASSWD; while read -u10 HOST ; do gcloud compute ssh --tunnel-through-iap --quiet --zone $HOST -- "sudo yum -y remove resource-agents-sap-hana; sudo yum -y install pcs pacemaker fence-agents-gce resource-agents-sap-hana-scaleout resource-agents-gcp; sudo yum update -y; sudo firewall-cmd --permanent --add-service=high-availability; sudo firewall-cmd --reload; sudo systemctl start pcsd.service; sudo systemctl enable pcsd.service; yes $HA_PASSWD | sudo passwd hacluster"; done 10< nodes.txt
Update /etc/hosts file
On all hosts in the cluster, including the majority maker, update the /etc/hosts file to include the hostnames and the internal IP addresses of all instances in the Pacemaker cluster.
The output of the /etc/hosts file should look similar to below example:
127.0.0.1 localhost localhost.localdomain localhost4 localhost4.localdomain4
::1                localhost localhost.localdomain localhost6 localhost6.localdomain6
10.138.0.1 rhel-hana-primary.us-west1-a.c.project-name.internal rhel-hana-primary # Added by Google
169.254.169.254 metadata.google.internal # Added by Google
10.138.0.1 rhel-hana-primary
10.138.0.2 rhel-hana-primaryw1
10.138.0.3 rhel-hana-secondary
10.138.0.4 rhel-hana-secondaryw1
10.138.0.5 rhel-sap-mm
For more information from Red Hat about setting up the /etc/hosts file on RHEL cluster nodes, see https://access.redhat.com/solutions/81123
Create the cluster
As root on primary master host, authorize the
haclusteruser. It is important to include every host of the cluster in this command, which should be part of the cluster.RHEL 8.0 and later
pcs host auth primary-master-name primary-worker-name(s) secondary-master-name secondary-worker-name(s) majority-maker-name
RHEL 7.6 and later
pcs cluster auth primary-master-name primary-worker-name(s) secondary-master-name secondary-worker-name(s) majority-maker-name
At the prompts, enter the
haclusteruser name and the password that you set for thehaclusteruser in the previous section.Set the cluster into maintenance mode.
pcs property set maintenance-mode=true
Generate and synchronize the corosync configuration.
RHEL 8.0 and later
pcs cluster setup scale_out_hsr primary-master-name primary-worker-name(s) secondary-master-name secondary-worker-name(s) majority-maker-name
RHEL 7.6 and later
pcs cluster setup --start --name hanascaleoutsr primary-master-name primary-worker-name(s) secondary-master-name secondary-worker-name(s) majority-maker-name
Edit the corosync.conf default settings
Open the
/etc/corosync/corosync.conffile using an editor of your choice.Remove the
consensusparameter.Modify the remaining parameters according to Google Cloud's recommendations.
The following table shows thetotemparameters for which Google Cloud recommends values, along with the impact of changing the values. For the default values of these parameters, which can differ between Linux distributions, see the documentation for your Linux distribution.Parameter Recommended value Impact of changing the value secauthoffDisables authentication and encryption of all totemmessages.join60 (ms) Increases how long the node waits for joinmessages in the membership protocol.max_messages20 Increases the maximum number of messages that might be sent by the node after receiving the token. token20000 (ms) Increases how long the node waits for a
totemprotocol token before the node declares a token loss, assumes a node failure, and starts taking action.Increasing the value of the
tokenparameter makes the cluster more tolerant of momentary infrastructure events, such as a live migration. However, it can also make the cluster take longer to detect and recover from a node failure.The value of the
tokenparameter also determines the default value of theconsensusparameter, which controls how long a node waits for consensus to be achieved before it attempts to re-establish configuration membership.consensusN/A Specifies, in milliseconds, how long to wait for consensus to be achieved before starting a new round of membership configuration.
We recommend that you omit this parameter. When the
If you explicitly specify a value forconsensusparameter is not specified, Corosync sets its value to 1.2 times the value of thetokenparameter. If you use thetokenparameter's recommended value of20000, then theconsesusparameter is set with the value24000.consensus, then make sure that the value is24000or1.2*token, whichever is greater.token_retransmits_before_loss_const10 Increases the number of token retransmits that the node attempts before it concludes that the recipient node has failed and takes action. transport- For SLES:
udpu - For RHEL 8 or later:
knet - For RHEL 7:
udpu
Specifies the transport mechanism used by corosync. - For SLES:
From the host that contains the edited
corosync.conffile, sync the corosync configuration across the cluster:RHEL 8 and later
#pcs cluster sync corosyncRHEL 7
#pcs cluster syncSet the cluster to start automatically:
#pcs cluster enable --all#pcs cluster start --allConfirm that the new corosync settings are active in the cluster by using the corosync-cmapctl utility:
#corosync-cmapctl
Set a delay for the restart of Corosync
Manual steps
On all hosts as root, create a
systemddrop-in file that delays the startup of Corosync to ensure the proper sequence of events after a fenced VM is rebooted:systemctl edit corosync.service
Add the following lines to the file:
[Service]
ExecStartPre=/bin/sleep 60
Save the file and exit the editor.
Reload the systemd manager configuration.
systemctl daemon-reload
Confirm the drop-in file was created:
service corosync status
You should see a line for the drop-in file, as shown in the following example:
● corosync.service - Corosync Cluster Engine
   Loaded: loaded (/usr/lib/systemd/system/corosync.service; disabled; vendor preset: disabled)
  Drop-In: /etc/systemd/system/corosync.service.d
           └─override.conf
   Active: active (running) since Tue 2021-07-20 23:45:52 UTC; 2 days ago
Automated steps
Alternatively, to automate this process for all instances listed in nodes.txt, run the following script from Google Cloud console:
while read -u10 HOST; do gcloud compute ssh --tunnel-through-iap --quiet --zone $HOST -- "sudo mkdir -p /etc/systemd/system/corosync.service.d/; sudo echo -e '[Service]\nExecStartPre=/bin/sleep 60' | sudo tee -a /etc/systemd/system/corosync.service.d/override.conf; sudo systemctl daemon-reload"; done 10< nodes.txt
Set up fencing
RHEL images that are provided by Google Cloud include a fencing agent
named fence_gce, which is specific to Google Cloud. You use fence_gce
to create fence devices for each host VM.
To ensure that the correct sequence of events take place after a fencing action, you must configure the operating system to delay the restart of Corosync after a VM is fenced. You also must adjust the Pacemaker timeout for reboots to account for the delay.
To see all of the options that are available with the fence_gce fencing agent,
run fence_gce -h.
Manual steps
On the primary host, as the root user, create the fencing devices for all hosts, including majority maker:
pcs stonith create STONITH-host-name fence_gce \
port=host-name \
zone=host-zone \
project=project-id \
pcmk_host_list=host-name pcmk_reboot_timeout=300 pcmk_monitor_retries=4 \
op monitor interval="300s" timeout="120s" \
op start interval="0" timeout="60s"
Set the location constraint for the fencing devices:
pcs constraint location STONITH-host-name avoids host-name
Repeat the previous two steps for all the other hosts on the primary and secondary clusters, and the majority maker host, by entering appropriate values for the variables host-name and host-zone.
Automated steps
To automate this process, you must use the
nodes.txt file
and the following script from Google Cloud console:
while read -u10 ZONE HOST; do gcloud compute ssh $HOST --tunnel-through-iap --quiet --zone $ZONE -- "sudo pcs stonith create STONITH-$HOST fence_gce project=project-id port=$HOST zone=$ZONE pcmk_host_list=$HOST pcmk_reboot_timeout=300 pcmk_monitor_retries=4 op monitor interval=300s timeout=120s op start interval=0 timeout=60s && sudo pcs constraint location STONITH-$HOST avoids $HOST"; done 10< nodes.txt
Set the cluster defaults
Set up migration thresholds and stickiness to determine the number of failovers to attempt before failure and to set the system to try restarting on the current host first. This only needs to be set on one node to apply to the cluster.
As root from any host, set the resource defaults:
RHEL 8.0 and later
#pcs resource defaults update resource-stickiness=1000#pcs resource defaults update migration-threshold=5000RHEL 7.6 and later
#pcs resource defaults resource-stickiness=1000#pcs resource defaults migration-threshold=5000The property
resource-stickinesscontrols how likely a service is to stay running where it is. Higher values make the service more sticky. A value of1000means that the service is very sticky.The property
migration-thresholdspecifies the number of failures that must occur before a service fails over to another host. A value of 5000 is high enough to prevent failover for shorter-lived error situations.You can check the resource defaults by entering
pcs resource defaults.Set the resource operation timeout defaults:
RHEL 8.0 and later
#pcs resource op defaults update timeout=600sRHEL 7.6 and later
#pcs resource op defaults timeout=600sYou can check the resource op defaults by entering
pcs resource op defaults.Set below cluster properties:
#pcs property set stonith-enabled="true"#pcs property set stonith-timeout="300s"You can check your proprerty settings with
pcs property list.
Create the SAPHanaTopology resource
The SAPHanaTopology resource gets the status and configuration of HANA System
Replication on the nodes. It also checks the SAP host agent.
As root on either host, create the
SAPHanaTopologyresource:RHEL 8.0 and later
#pcs resource create rsc_SAPHanaTopology_SID_HDBinstNr SAPHanaTopology SID=SID \ InstanceNumber=inst_num \ op methods interval=0s timeout=5 \ op monitor interval=10 timeout=600 \ clone meta clone-node-max=1 interleave=trueRHEL 7.6 and later
#pcs resource create rsc_SAPHanaTopology_SID_HDBinstNr SAPHanaTopologyScaleOut SID=SID \ InstanceNumber=inst_num \ op start timeout=600 \ op stop timeout=300 \ op monitor interval=10 timeout=600#pcs resource clone rsc_SAPHanaTopology_SID_HDBinstNr meta clone-node-max=1 interleave=trueAfter the resource is created, check the configuration. Append
-cloneto the resource name to include the clone set information in the response.RHEL 8.0 and later
#pcs resource config rsc_SAPHanaTopology_SID_HDBinstNr-cloneYou should see output similar to the following:
Clone: SAPHanaTopology_HA1_00-clone
Meta Attrs: clone-node-max=1 interleave=true
Resource: SAPHanaTopology_HA1_00 (class=ocf provider=heartbeat type=SAPHanaTopology)
Attributes: InstanceNumber=00 SID=HA1
Operations: methods interval=0s timeout=5 (SAPHanaTopology_HA1_00-methods-interval-0s)
       monitor interval=10 timeout=600 (SAPHanaTopology_HA1_00-monitor-interval-10)
       start interval=0s timeout=600 (SAPHanaTopology_HA1_00-start-interval-0s)
       stop interval=0s timeout=300 (SAPHanaTopology_HA1_00-stop-interval-0s)
RHEL 7.6 and later
#pcs resource show rsc_SAPHanaTopology_SID_HDBinstNr-cloneYou should see output similar to the following:
Clone: rsc_SAPHanaTopology_HA1_HDB00-clone
Meta Attrs: clone-node-max=1 interleave=true
Resource: rsc_SAPHanaTopology_HA1_HDB00 (class=ocf provider=heartbeat type=SAPHanaTopologyScaleOut)
Attributes: InstanceNumber=00 SID=HA1
Meta Attrs: clone-node-max=1 interleave=true
Operations: methods interval=0s timeout=5 (rsc_SAPHanaTopology_HA1_HDB00-methods-interval-0s)
       monitor interval=10 timeout=600 (rsc_SAPHanaTopology_HA1_HDB00-monitor-interval-10)
       start interval=0s timeout=600 (rsc_SAPHanaTopology_HA1_HDB00-start-interval-0s)
       stop interval=0s timeout=300 (rsc_SAPHanaTopology_HA1_HDB00-stop-interval-0s)
You can also check the cluster attributes by using the crm_mon -A1 command.
Create the SAPHanaController resource
The SAPHanaController resource agent manages the databases that are configured for SAP HANA system replication.
The following parameters in the SAPHana resource definition are optional:
AUTOMATED_REGISTER, which, when set totrue, automatically registers the former primary as secondary when the DUPLICATE_PRIMARY_TIMEOUT expires after a takeover. The default isfalse.For a multi-tier an SAP HANA HA cluster, if you are using a version earlier than SAP HANA 2.0 SP03, set
AUTOMATED_REGISTERtofalse. This prevents a recovered instance from attempting to self-register for replication to a HANA system that already has a replication target configured. For SAP HANA 2.0 SP03 or later, you can setAUTOMATED_REGISTERtotruefor SAP HANA configurations that use multitier system replication.DUPLICATE_PRIMARY_TIMEOUT, which sets the time difference in seconds between two primary timestamps if a dual-primary situation occurs. The default is7200.PREFER_SITE_TAKEOVER, which determines if local restarts are tried before failover is initiated. The default isfalse.
For additional information about these parameters see, Installing and Configuring a Red Hat Enterprise Linux 7.6 (and later) High-Availability Cluster on Google Cloud. A Red Hat subscription is required.
As root on either host, create the SAPHanaController resource:
RHEL 8.0 and later
#pcs resource create rsc_SAPHana_SID_HDBinstNr SAPHanaController SID=SID \ InstanceNumber=inst_num \ PREFER_SITE_TAKEOVER=true DUPLICATE_PRIMARY_TIMEOUT=7200 AUTOMATED_REGISTER=true \ op demote interval=0s timeout=320 \ op methods interval=0s timeout=5 \ op monitor interval=59 \ role="Master" timeout=700 \ op monitor interval=61 \ role="Slave" timeout=700 \ op promote interval=0 timeout=3600 \ op start interval=0 timeout=3600 \ op stop interval=0 timeout=3600e#pcs resource promotable rsc_SAPHana_SID_HDBinstNr meta master-max="1" clone-node-max=1 interleave=trueRHEL 7.6 and later
#pcs resource create rsc_SAPHana_SID_HDBinstNr SAPHanaController SID=SID \ InstanceNumber=inst_num \ PREFER_SITE_TAKEOVER=true DUPLICATE_PRIMARY_TIMEOUT=7200 AUTOMATED_REGISTER=true \ op start interval=0 timeout=3600 \ op stop interval=0 timeout=3600 \ op promote interval=0 timeout=3600 \ op monitor interval=60 \ role="Master" timeout=700 \ op monitor interval=61 \ role="Slave" timeout=700#pcs resource master msl_rsc_SAPHana_SID_HDBinstNr rsc_SAPHana_SID_HDBinstNr master-max="1" clone-node-max=1 interleave=trueCheck the resulting resource attributes:
RHEL 8.0 and later
#pcs resource config rsc_SAPHana_SID_HDBinstNr-cloneYou should see output similar to the following example:
Resource: SAPHana_HA1_00 (class=ocf provider=heartbeat type=SAPHanaController)
Attributes: AUTOMATED_REGISTER=true DUPLICATE_PRIMARY_TIMEOUT=7200 InstanceNumber=00 PREFER_SITE_TAKEOVER=true SID=HA1
Operations: demote interval=0s timeout=320 (SAPHana_HA1_00-demote-interval-0s)
      methods interval=0s timeout=5 (SAPHana_HA1_00-methods-interval-0s)
      monitor interval=59 role=Master timeout=700 (SAPHana_HA1_00-monitor-interval-59)
      promote interval=0 timeout=3600 (SAPHana_HA1_00-promote-interval-0)
      reload interval=0s timeout=5 (SAPHana_HA1_00-reload-interval-0s)
      start interval=0 timeout=3600 (SAPHana_HA1_00-start-interval-0)
      stop interval=0 timeout=3600 (SAPHana_HA1_00-stop-interval-0)
      monitor interval=61 role=Slave timeout=700 (SAPHana_HA1_00-monitor-interval-61)
RHEL 7.6 and later
#pcs resource show msl_rsc_SAPHana_SID_HDBinstNrYou should see output similar to the following example:
Master: msl_rsc_SAPHana_HA1_HDB00
Meta Attrs: clone-node-max=1 interleave=true master-max=1
Resource: rsc_SAPHana_HA1_HDB00 (class=ocf provider=heartbeat type=SAPHanaController)
Attributes: AUTOMATED_REGISTER=true DUPLICATE_PRIMARY_TIMEOUT=7200 InstanceNumber=00 PREFER_SITE_TAKEOVER=true SID=HA1
Operations: demote interval=0s timeout=320 (rsc_SAPHana_HA1_HDB00-demote-interval-0s)
       methods interval=0s timeout=5 (rsc_SAPHana_HA1_HDB00-methods-interval-0s)
       monitor interval=60 role=Master timeout=700 (rsc_SAPHana_HA1_HDB00-monitor-interval-60)
       monitor interval=61 role=Slave timeout=700 (rsc_SAPHana_HA1_HDB00-monitor-interval-61)
       promote interval=0 timeout=3600 (rsc_SAPHana_HA1_HDB00-promote-interval-0)
       start interval=0 timeout=3600 (rsc_SAPHana_HA1_HDB00-start-interval-0)
       stop interval=0 timeout=3600 (rsc_SAPHana_HA1_HDB00-stop-interval-0)
Create a virtual IP address resource
You need to create a cluster resource for the VIP. The VIP resource is localized to the primary operating system and is not routable by other hosts. The load balancer routes traffic that is sent to the VIP to the backend host based on the health check.
As root on either host:
# pcs resource create rsc_ip_SAPHANA_SID_HDBinstNr \
  IPaddr2 ip="vip-address" nic=eth0 cidr_netmask=32 \
  op monitor interval=3600s timeout=60s
The vip-address value is the same IP address
that you reserved earlier and specified in the forwarding rule for the
front-end of your load balancer. Change the network interface as appropriate
for your configuration.
Create the constraints
You create constraints to define which services need to start first, and which services need to run together on the same host.
Define the start order constraint:
RHEL 8.0 and later
#pcs constraint order start rsc_SAPHanaTopology_SID_HDBinstNr-clone then start rsc_SAPHana_SID_HDBinstNr-cloneRHEL 7.6
#pcs constraint order rsc_SAPHanaTopology_SID_HDBinstNr-clone then rsc_SAPHana_SID_HDBinstNr-masterConfigure the majority maker to avoid taking an an active role in the cluster environment:
RHEL 8.0 and later
#pcs constraint location rsc_SAPHana_SID_HDBinstNr-clone avoids majority-maker-name#pcs constraint location rsc_SAPHanaTopology_SID_HDBinstNr-clone avoids majoritymakerRHEL 7.6
#pcs constraint location msl_rsc_SAPHana_SID_HDBinstNr avoids majoritymaker#pcs constraint location rsc_SAPHanaTopology_SID_HDBinstNr-clone avoids majoritymakerCheck the constraints:
#pcs constraintYou should see output similar to the following:
Location Constraints:
Resource: STONITH-hana-ha-1
  Disabled on: hana-ha-1 (score:-INFINITY)
Resource: STONITH-hana-ha-1w1
  Disabled on: hana-ha-1w1 (score:-INFINITY)
Resource: STONITH-hana-ha-2
  Disabled on: hana-ha-2 (score:-INFINITY)
Resource: STONITH-hana-ha-2w1
  Disabled on: hana-ha-2w1 (score:-INFINITY)
Resource: STONITH-majority-maker
  Disabled on: majority-maker (score:-INFINITY)
Resource: rsc_SAPHanaTopology_HA1_HDB00-clone
  Disabled on: majority-maker (score:-INFINITY)
Resource: rsc_SAPHana_HA1_HDB00-master
  Disabled on: majority-maker (score:-INFINITY)
Ordering Constraints:
  start rsc_SAPHanaTopology_HA1_HDB00-clone then start rsc_SAPHana_HA1_HDB00-master (kind:Mandatory)
Install listeners and create a health check resource
To configure a health check resource, you need to install the listeners first.
Install a listener
The load balancer uses a listener on the health-check port of each host to determine where the primary instance of the SAP HANA cluster is running. 1. As root on the master instance on the primary and secondary systems, install a TCP listener. These instructions install and use HAProxy as the listener.
# yum install haproxyOpen the configuration file
haproxy.cfgfor editing:#vi /etc/haproxy/haproxy.cfgIn the defaults section of the
haproxy.cfg, change themodetotcp.After the defaults section, create a new section by adding:
#---------------------------------------------------------------------
# Health check listener port for SAP HANA HA cluster
#---------------------------------------------------------------------
listen healthcheck
  bind *:healthcheck-port-num
The bind port is the same port that you used when you created the health check.
When you are done, your updates should look similar to the following example:
#---------------------------------------------------------------------
# common defaults that all the 'listen' and 'backend' sections will
# use if not designated in their block
#---------------------------------------------------------------------
defaults
  mode                    tcp
  log                     global
  option                  tcplog
  option                  dontlognull
  option http-server-close
  # option forwardfor       except 127.0.0.0/8
  option                  redispatch
  retries                 3
  timeout http-request    10s
  timeout queue           1m
  timeout connect         10s
  timeout client          1m
  timeout server          1m
  timeout http-keep-alive 10s
  timeout check           10s
  maxconn                 3000

#---------------------------------------------------------------------
# Set up health check listener for SAP HANA HA cluster
#---------------------------------------------------------------------
listen healthcheck
 bind *:60000
On each host as root, start the service to confirm it is correctly configured:
#systemctl start haproxy.serviceOn the Load balancer page in the Google Cloud console, click your load balancer entry:
In the Backend section on the Load balancer details page, if the HAProxy service is active on both hosts, you see
1/1in the Healthy column of each instance group entry.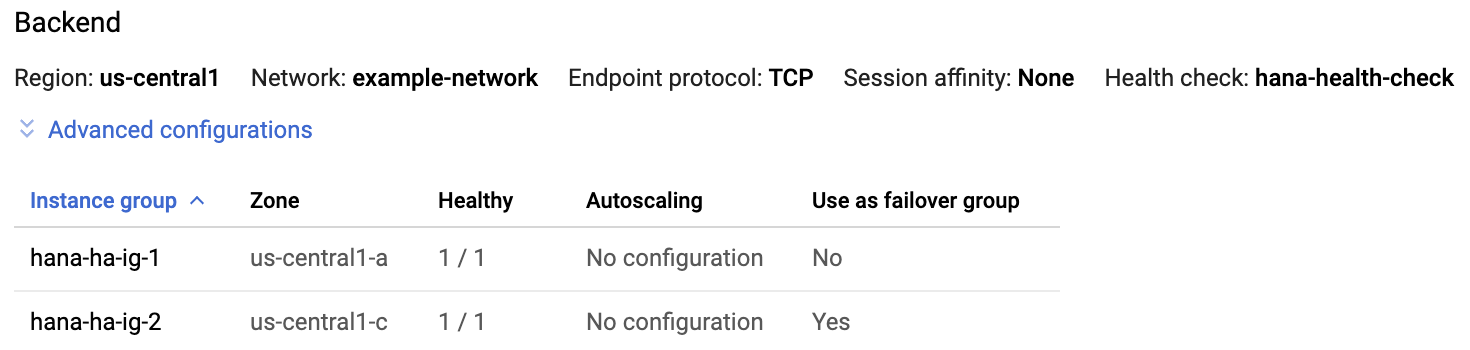
On each host, stop the HAProxy service:
#systemctl stop haproxy.serviceAfter you stop the HAProxy service on each host,
0/1displays in the Healthy column of each instance group.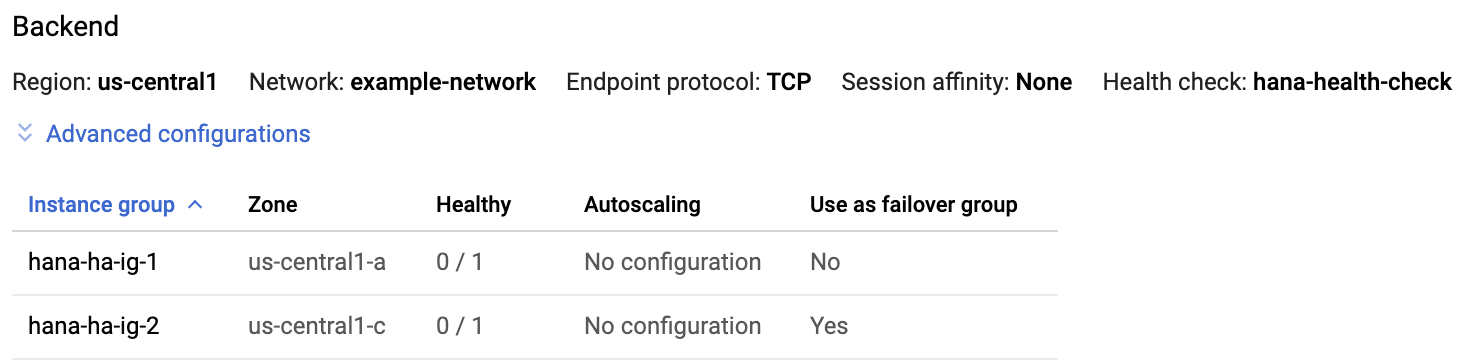
Later, when the health check is configured, the cluster restarts the listener on the master node.
Create the health check resource
From any host as root, create a health check resource for the HAProxy service:
#pcs resource create hc_SID_HDBinstNr service:haproxy op monitor interval=10s timeout=20sGroup the VIP and health check resources together:
#pcs resource group add rsc-group-name hc_SID_HDBinstNr rsc_ip_SAPHANA_SID_HDBinstNrCreate a constraint that colocates the group on the same node as the master SAP HANA instance.
RHEL 8.0 and later
#pcs constraint colocation add rsc-group-name with master rsc_SAPHana_SID_HDBinstNr-cloneRHEL 7.6 and later
#pcs constraint colocation add rsc-group-name with master msl_rsc_SAPHana_SID_HDBinstNrCreate a order constraint to start the group only after HANA is promoted:
#pcs constraint order promote rsc_SAPHana_SID_HDBinstNr-clone then start rsc-group-nameYour final constraints should look similar to the following example:
# pcs constraint

Location Constraints:
Resource: STONITH-hana-ha-1
 Disabled on: hana-ha-1 (score:-INFINITY)
Resource: STONITH-hana-ha-1w1
 Disabled on: hana-ha-1w1 (score:-INFINITY)
Resource: STONITH-hana-ha-2
 Disabled on: hana-ha-2 (score:-INFINITY)
Resource: STONITH-hana-ha-2w1
 Disabled on: hana-ha-2w1 (score:-INFINITY)
Resource: STONITH-majority-maker
 Disabled on: majority-maker (score:-INFINITY)
Resource: rsc_SAPHanaTopology_HA1_HDB00-clone
 Disabled on: majority-maker (score:-INFINITY)
Resource: rsc_SAPHana_HA1_HDB00-master
 Disabled on: majority-maker (score:-INFINITY)
Ordering Constraints:
 start rsc_SAPHanaTopology_HA1_HDB00-clone then start rsc_SAPHana_HA1_HDB00-master (kind:Mandatory)
 promote rsc_SAPHana_HA1_HDB00-clone then start g-primary (kind:Mandatory) (id:order-rsc_SAPHana_HA1_HDB00-clone-g-primary-mandatory)
Colocation Constraints:
 g-primary with rsc_SAPHana_HA1_HDB00-master (score:INFINITY) (rsc-role:Started) (with-rsc-role:Master)
Ticket Constraints:
Finalize setup
Bring the cluster out of maintenance mode.
pcs property set maintenance-mode=false
After the resource is started, check the node attributes to see the current state of the SAP HANA databases on the nodes:
#crm_mon -A1You should see output similar to the following:
RHEL 8.0 and later
Cluster Summary:
Stack: corosync
Current DC: hana-ha-2w1 (version 2.0.5-9.el8_4.7-ba59be7122) - partition with quorum
Last updated: Wed Oct 11 17:59:51 2023
Last change:  Wed Oct 11 17:59:48 2023 by hacluster via crmd on hana-ha-2
5 nodes configured
17 resource instances configured

Node List:
Online: [ hana-ha-1 hana-ha-1w1 hana-ha-2 hana-ha-2w1 dru-somm ]

Active Resources:
STONITH-hana-ha-1     (stonith:fence_gce):     Started hana-ha-2
STONITH-hana-ha-1w1   (stonith:fence_gce):     Started hana-ha-1
STONITH-hana-ha-2     (stonith:fence_gce):     Started hana-ha-2w1
STONITH-hana-ha-2w1   (stonith:fence_gce):     Started dru-somm
STONITH-dru-somm    (stonith:fence_gce):     Started hana-ha-1
Clone Set: SAPHanaTopology_HA1_00-clone [SAPHanaTopology_HA1_00]:
 Started: [ hana-ha-1 hana-ha-1w1 hana-ha-2 hana-ha-2w1 ]
Clone Set: SAPHana_HA1_00-clone [SAPHana_HA1_00]-(promotable):
 Slaves: [ hana-ha-1w1 hana-ha-2w1 ]
Resource Group: g-primary:
 healthcheck_HA1   (service:haproxy):       Started hana-ha-1
 ip_SAPHANA_HA1_00 (ocf::heartbeat:IPaddr2):        Started hana-ha-1

Node Attributes:
Node: hana-ha-1:
 hana_ha1_clone_state              : PROMOTED
 hana_ha1_gra                      : 2.0
 hana_ha1_remoteHost               : hana-ha-2w1
 hana_ha1_roles                    : master1:master:worker:master
 hana_ha1_site                     : hana-ha-1
 hana_ha1_sra                      : -
 hana_ha1_srmode                   : syncmem
 hana_ha1_vhost                    : hana-ha-1
 master-SAPHana_HA1_00             : 5
Node: hana-ha-1w1:
 hana_ha1_clone_state              : DEMOTED
 hana_ha1_gra                      : 2.0
 hana_ha1_remoteHost               : hana-ha-2w1
 hana_ha1_roles                    : slave:slave:worker:slave
 hana_ha1_site                     : hana-ha-1
 hana_ha1_srmode                   : syncmem
 hana_ha1_vhost                    : hana-ha-1w1
 master-SAPHana_HA1_00             : -INFINITY
Node: hana-ha-2:
 hana_ha1_clone_state              : DEMOTED
 hana_ha1_gra                      : 2.0
 hana_ha1_remoteHost               : hana-ha-1w1
 hana_ha1_roles                    : master1:master:worker:master
 hana_ha1_site                     : hana-ha-2
 hana_ha1_sra                      : -
 hana_ha1_srmode                   : syncmem
 hana_ha1_vhost                    : hana-ha-2
 master-SAPHana_HA1_00             : 100
Node: hana-ha-2w1:
 hana_ha1_clone_state              : DEMOTED
 hana_ha1_gra                      : 2.0
 hana_ha1_remoteHost               : hana-ha-1w1
 hana_ha1_roles                    : slave:slave:worker:slave
 hana_ha1_site                     : hana-ha-2
 hana_ha1_srmode                   : syncmem
 hana_ha1_vhost                    : hana-ha-2w1
 master-SAPHana_HA1_00             : -12200
Node: dru-somm:
 hana_ha1_remoteHost               : hana-ha-2w1
 hana_ha1_srmode                   : syncmem
RHEL 7.6 and later
Stack: corosync
Current DC: majority-maker (version 1.1.23-1.el7_9.1-9acf116022) - partition with quorum
Last updated: Wed Oct 11 17:58:07 2023
Last change: Wed Oct 11 17:57:57 2023 by hacluster via crmd on hana-ha-2w1

5 nodes configured
17 resource instances configured

Online: [ hana-ha-1 hana-ha-1w1 hana-ha-2 hana-ha-2w1 majority-maker ]

Active resources:

STONITH-hana-ha-1 (stonith:fence_gce):    Started hana-ha-1w1
STONITH-hana-ha-1w1       (stonith:fence_gce):    Started hana-ha-2
STONITH-hana-ha-2 (stonith:fence_gce):    Started hana-ha-1
STONITH-hana-ha-2w1       (stonith:fence_gce):    Started majority-maker
STONITH-majority-maker (stonith:fence_gce):    Started hana-ha-1w1
Master/Slave Set: msl_rsc_SAPHana_HA1_HDB00 [rsc_SAPHana_HA1_HDB00]
 rsc_SAPHana_HA1_HDB00      (ocf::heartbeat:SAPHanaController):     Master hana-ha-1 (Monitoring)
 Slaves: [ hana-ha-1w1 hana-ha-2 hana-ha-2w1 ]
Clone Set: rsc_SAPHanaTopology_HA1_HDB00-clone [rsc_SAPHanaTopology_HA1_HDB00]
 Started: [ hana-ha-1 hana-ha-1w1 hana-ha-2 hana-ha-2w1 ]
Resource Group: g-primary
 hc_HA1_HDB00       (service:haproxy):      Started hana-ha-1
 rsc_ip_SAPHANA_HA1_HDB00   (ocf::heartbeat:IPaddr2):       Started hana-ha-1

Node Attributes:
Node hana-ha-1:
  hana_ha1_clone_state              : PROMOTED
  hana_ha1_remoteHost               : hana-ha-2
  hana_ha1_roles                    : master1:master:worker:master
  hana_ha1_site                     : hana-ha-1
  hana_ha1_srmode                   : syncmem
  hana_ha1_vhost                    : hana-ha-1
  master-rsc_SAPHana_HA1_HDB00      : 150
Node hana-ha-1w1:
  hana_ha1_clone_state              : DEMOTED
  hana_ha1_remoteHost               : hana-ha-2w1
  hana_ha1_roles                    : slave:slave:worker:slave
  hana_ha1_site                     : hana-ha-1
  hana_ha1_srmode                   : syncmem
  hana_ha1_version                  : 2.00.052.00.1599235305
  hana_ha1_vhost                    : hana-ha-1w1
  master-rsc_SAPHana_HA1_HDB00      : -10000
Node hana-ha-2:
  hana_ha1_clone_state              : DEMOTED
  hana_ha1_remoteHost               : hana-ha-2w1
  hana_ha1_roles                    : master1:master:worker:master
  hana_ha1_site                     : hana-ha-2
  hana_ha1_srmode                   : syncmem
  hana_ha1_vhost                    : hana-ha-2
  master-rsc_SAPHana_HA1_HDB00      : 100
Node hana-ha-2w1:
  hana_ha1_clone_state              : DEMOTED
  hana_ha1_remoteHost               : hana-ha-1
  hana_ha1_roles                    : slave:slave:worker:slave
  hana_ha1_site                     : hana-ha-2
  hana_ha1_srmode                   : syncmem
  hana_ha1_vhost                    : hana-ha-2w1
  master-rsc_SAPHana_HA1_HDB00      : -12200
Node majority-maker:
  hana_ha1_srmode                   : syncmem
If there are failed cluster resources, you may need to run the next command:
pcs resource cleanup
Test failover
Test your cluster by simulating a failure on the primary host. Use a test system or run the test on your production system before you release the system for use.
Backup the system before the test.
You can simulate a failure in a variety of ways, including:
HDB stopHDB killreboot(on the active node)ip link set eth0 downfor instances with a single network interfaceiptables ... DROPfor instances with multiple network interfacesecho c > /proc/sysrq-trigger
These instructions use ip link set eth0 down or iptables to simulate a
network disruption between your two hosts in the cluster. Use the ip link
command on an instance with a single network interface and use the iptables
command on instances with one or more network interfaces. The test validates
both failover as well as fencing. In the case where your instances have multiple
network interfaces defined, you use the iptables command on the secondary
host to drop incoming and outgoing traffic based on the IP used by the primary
host for cluster communication, thereby simulating a network connection loss to
the primary.
On the active host, as root, take the network interface offline:
#ip link set eth0 downOr, if multiple network interfaces are active, using the
iptableson the secondary host:#iptables -A INPUT -s PRIMARY_CLUSTER_IP -j DROP; iptables -A OUTPUT -d PRIMARY_CLUSTER_IP -j DROPReconnect to either host using SSH and change to the root user.
Enter
pcs statusto confirm that the primary host is now active on the VM that used to contain the secondary host. Automatic restart is enabled in the cluster, so the stopped host will restart and assume the role of secondary host, as shown in the following example.Cluster name: hana-ha-cluster Stack: corosync Current DC: hana-ha-vm-2 (version 1.1.19-8.el7_6.5-c3c624ea3d) - partition with quorum Last updated: Wed Jun 17 01:04:36 2020 Last change: Wed Jun 17 01:03:58 2020 by root via crm_attribute on hana-ha-vm-2 2 nodes configured 8 resources configured Online: [ hana-ha-vm-1 hana-ha-vm-2 hana-ha-vm-1w1 hana-ha-vm-2w1] Full list of resources: STONITH-hana-ha-vm-1 (stonith:fence_gce): Started hana-ha-vm-2 STONITH-hana-ha-vm-2 (stonith:fence_gce): Started hana-ha-vm-1 STONITH-hana-ha-vm-1w1 (stonith:fence_gce): Started hana-ha-vm-2w1 STONITH-hana-ha-vm-1w1 (stonith:fence_gce): Started hana-ha-vm-mm STONITH-hana-ha-vm-mm (stonith:fence_gce): Started hana-ha-vm-1w1 Clone Set: SAPHanaTopology_HA1_22-clone [SAPHanaTopology_HA1_22] Started: [ hana-ha-vm-1 hana-ha-vm-2 hana-ha-vm-1w1 hana-ha-vm-2w1 Stopped: [ hana-ha-vm-mm ] ] Master/Slave Set: SAPHana_HA1_22-master [SAPHana_HA1_22] Masters: [ hana-ha-vm-2 ] Slaves: [ hana-ha-vm-1 hana-ha-vm-1w1 hana-ha-vm-2w1 Stopped: [ hana-ha-vm-mm ] ] Resource Group: g-primary rsc_healthcheck_HA1 (service:haproxy): Started hana-ha-vm-2 rsc_vip_HA1_22 (ocf::heartbeat:IPaddr2): Started hana-ha-vm-2 Daemon Status: corosync: active/enabled pacemaker: active/enabled pcsd: active/enabled
Troubleshooting
To troubleshoot problems with high-availability configurations for SAP HANA on RHEL, see Troubleshooting high-availability configurations for SAP.
Getting support for SAP HANA on RHEL
If you need help resolving a problem with high-availability clusters for SAP HANA on RHEL, gather the required diagnostic information and contact Cloud Customer Care. For more information, see High-availability clusters on RHEL diagnostic information.
Support
For issues with Google Cloud infrastructure or services, contact Customer Care. You can find contact information on the Support Overview page in the Google Cloud console. If Customer Care determines that a problem resides in your SAP systems, you are referred to SAP Support.
For SAP product-related issues, log your support request with
SAP support.
SAP evaluates the support ticket and, if it appears to be a Google Cloud
infrastructure issue, transfers the ticket to the Google Cloud component
BC-OP-LNX-GOOGLE or BC-OP-NT-GOOGLE.
Support requirements
Before you can receive support for SAP systems and the Google Cloud infrastructure and services that they use, you must meet the minimum support plan requirements.
For more information about the minimum support requirements for SAP on Google Cloud, see:
- Getting support for SAP on Google Cloud
- SAP Note 2456406 - SAP on Google Cloud Platform: Support Prerequisites (An SAP user account is required)
Connecting to SAP HANA
If the host VMs don't have an external IP address for SAP HANA, you can only connect to the SAP HANA instances through the bastion instance using SSH or through the Windows server through SAP HANA Studio.
To connect to SAP HANA through the bastion instance, connect to the bastion host, and then to the SAP HANA instance(s) by using an SSH client of your choice.
To connect to the SAP HANA database through SAP HANA Studio, use a remote desktop client to connect to the Windows Server instance. After connection, manually install SAP HANA Studio and access your SAP HANA database.
Post-deployment tasks
After you complete the deployment, finish with the following steps:
Change the temporary passwords for the SAP HANA system administrator and database superuser. For example:
sudo passwd SID_LCadm
For information from SAP about changing the password, see Reset the SYSTEM User Password of the System Database.
Before using your SAP HANA instance, configure and backup your new SAP HANA database.
If your SAP HANA system is deployed on a VirtIO network interface, then we recommend that you ensure the value of the TCP parameter
/proc/sys/net/ipv4/tcp_limit_output_bytesis set to1048576. This modification helps improve the overall network throughput on the VirtIO network interface without affecting the network latency.
For more information, see:
What's next
See the following resource for more information:
- Installing and Configuring a Red Hat Enterprise Linux 7.6 (and later) High-Availability Cluster on Google Compute Cloud
- Automated SAP HANA System Replication in Scale-Up in pacemaker cluster
- Support Policies for RHEL High Availability Clusters - General Requirements for Fencing/STONITH
- SAP HANA high-availability planning guide
- SAP HANA disaster recovery planning guide
- For more information about VM administration and monitoring, see the SAP HANA Operations Guide