Notebook auf GitHub speichern
Wenn Sie Ihre nutzerverwaltete Notebookinstanz sichern und anderen Nutzern zur Verfügung stellen möchten, speichern Sie den Inhalt der vom Nutzer verwalteten Notebooks Instanz auf GitHub.
GitHub-Repository erstellen
Wenn Sie noch kein GitHub-Repository haben, müssen Sie eines erstellen.
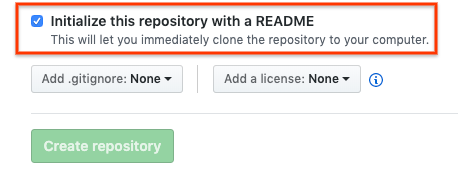
Achten Sie beim Erstellen des GitHub-Repositorys darauf, dass Ihr GitHub-Repository geklont werden kann, indem Sie das Kästchen Dieses Repository mit einer README-Datei initialisieren anklicken.
Klonen Sie das GitHub-Repository in der nutzerverwalteten Notebookinstanz.
Führen Sie die folgenden Schritte aus, um das GitHub-Repository in der vom Nutzer verwalteten Notebookinstanz zu klonen:
Klicken Sie in Ihrem GitHub-Repository auf die Schaltfläche Code und dann auf den Tab Lokal.
Kopieren Sie die URL unter HTTPS.
Rufen Sie in der Google Cloud Console die Seite Nutzerverwaltete Notebooks auf.
Klicken Sie auf JupyterLab öffnen, um die nutzerverwaltete Notebookinstanz zu öffnen.
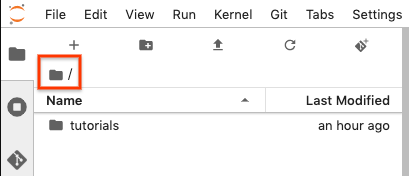
Im JupyterLab Dateibrowser den Ordner aus, in den Sie das GitHub-Repository klonen möchten. Beispiel: der Basisordner.
Wählen Sie in JupyterLab Git > Repository klonen aus.
Geben Sie Ihre Anmeldedaten ein, wenn Sie dazu aufgefordert werden.
Wenn Sie einen GitHub-Nutzernamen und ein GitHub-Passwort verwenden, geben Sie Ihren GitHub-Nutzernamen und das Passwort ein.
Wenn Sie die 2-Faktor-Authentifizierung mit GitHub nutzen, erstellen Sie ein persönliches Zugriffstoken und verwenden Sie dieses.
Fügen Sie im Dialogfeld Repository klonen die HTTPS-URL für Ihr GitHub-Repository ein.
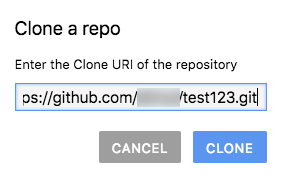
Klicken Sie auf Klonen.
Konfigurieren Sie die nutzerverwaltete Notebookinstanz mit den GitHub-Nutzerinformationen.
Wählen Sie in JupyterLab Git > Git Repository in Terminal öffnen aus, um ein Git-Terminalfenster zu öffnen.
Geben Sie im Git-Terminalfenster die folgenden Befehle ein, um Ihren Git-Nutzernamen und Ihre E-Mail-Adresse zu konfigurieren:
git config --global user.name "YOUR_NAME"
git config --global user.email "YOUR_EMAIL"
Wenn für Ihr GitHub-Konto eine SSH-Authentifizierung erforderlich ist, führen Sie die folgenden Schritte aus, um Ihr Konto zu verbinden:
Folgen Sie im Git-Terminal in Ihrer nutzerverwalteten Notebookinstanz der GitHub-Anleitung zum Generieren eines neuen SSH-Schlüssels.
Folgen Sie dann der Anleitung zum Hinzufügen des SSH-Schlüssels zu Ihrem GitHub-Konto.
Schließen Sie das Git-Terminalfenster.
Dateien, für die ein Commit durchgeführt wurde, zum GitHub-Repository hinzufügen
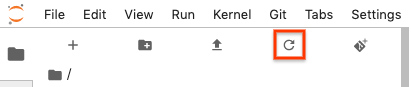
Ihre nutzerverwaltete Notebookinstanz zeigt Ihr Repository als neuen Ordner an. Wenn Ihr geklontes GitHub-Repository nicht als Ordner angezeigt wird, klicken Sie auf die Schaltfläche Dateiliste aktualisieren, wie nachstehend gezeigt:
Doppelklicken Sie auf Ihren Repository-Ordner, um ihn zu öffnen.
Fügen Sie der nutzerverwalteten Notebookinstanz ein neues Notebook hinzu.
Zum Hinzufügen einer Notebook-Datei können Sie das Menü oder den Launcher verwenden.
Menü
Um über das Menü eine neue Notebookdatei hinzuzufügen wählen Sie File > New > Notebook aus.
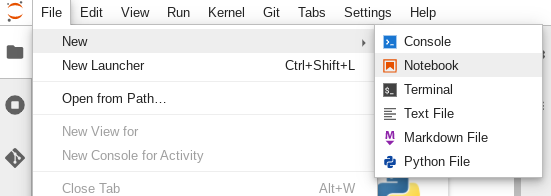
Wählen Sie im Dialogfeld Select Kernel den Kernel für Ihr neues Notebook aus, z. B. Python 3, und klicken Sie dann auf Select.
Ihre neue Notebookdatei wird geöffnet.
Launcher
Wählen Sie zum Hinzufügen einer neuen Notebook-Datei aus dem Launcher File > New > Launcher aus.
Klicken Sie auf die Kachel für den Kernel, den Sie verwenden möchten.
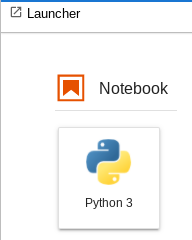
Ihre neue Notebookdatei wird geöffnet.
Benennen Sie die neue Notebook-Datei um.
Menü
Wählen Sie File > Rename notebook aus. Das Dialogfeld Rename file wird geöffnet.
Ändern Sie im Feld New name
Untitled.ipynbin einen aussagekräftigen Namen, beispielsweiseinstall.ipynb.Klicken Sie auf Umbenennen.
Launcher
Klicken Sie mit der rechten Maustaste auf den Tab
Untitled.ipynbund dann auf Rename Notebook. Das Dialogfeld Rename file wird geöffnet.Ändern Sie im Feld New name
Untitled.ipynbin einen aussagekräftigen Namen, beispielsweiseinstall.ipynb.Klicken Sie auf Umbenennen.
Wählen Sie den Tab Git aus. Das neue Notebook wird in der Gruppe Untracked aufgelistet.
Klicken Sie mit der rechten Maustaste auf das neue Notebook und wählen Sie Nachverfolgen aus, um das neue Notebook als Datei für das GitHub-Repository hinzuzufügen. Auf dem Tab Git wird Ihr Notebook nun zur Gruppe Staged hinzugefügt.
Fügen Sie auf dem Tab Git einen Commit-Kommentar hinzu und klicken Sie auf Commit, um einen Commit für das neue Notebook im GitHub-Repository durchzuführen.
Wählen Sie zum Öffnen eines Git-Terminalfensters Git > Git-Repository im Terminal öffnen aus.
Geben Sie im Git-Terminalfenster den Befehl
git pushein.Wenn Sie einen GitHub-Nutzernamen und -Passwort verwenden, geben Sie bei entsprechender Aufforderung den GitHub-Nutzernamen und das Passwort ein.
Wenn Sie die 2-Faktor-Authentifizierung mit GitHub nutzen, erstellen Sie ein persönliches Zugriffstoken zum Verwenden.
Wenn der Befehl
git pushausgeführt wurde, befinden sich die Dateien, für die ein Commit durchgeführt wurde, in Ihrem GitHub-Repository.