管理表

本文档介绍了如何管理 BigQuery 中的表。您可以通过以下方式管理 BigQuery 表:

如需详细了解如何创建和使用表(包括获取表信息、列出表以及控制对表数据的访问),请参阅创建和使用表

准备工作

授予为用户提供执行本文档中的每个任务所需权限的 Identity and Access Management (IAM) 角色。执行任务所需的权限(如果有)列出在任务的“所需权限”部分中。

更新表属性

您可以更新表的以下元素:

所需权限

如需获得更新表属性所需的权限,请让您的管理员向您授予表的 Data Editor (roles/bigquery.dataEditor) IAM 角色。 如需详细了解如何授予角色,请参阅管理访问权限

此预定义角色包含更新表属性所需的权限。如需查看所需的确切权限,请展开所需权限部分:

所需权限

如需更新表属性,您需要具备以下权限:

  • bigquery.tables.update
  • bigquery.tables.get

您也可以使用自定义角色或其他预定义角色来获取这些权限。

此外,如果您拥有 bigquery.datasets.create 权限,则可以更新您创建的数据集的表属性。

更新表的说明

您可以通过以下方式更新表的说明:

  • 使用 Google Cloud 控制台。
  • 使用数据定义语言 (DDL) ALTER TABLE 语句。
  • 使用 bq 命令行工具的 bq update 命令。
  • 调用 tables.patch API 方法。
  • 使用客户端库。

若要更新表的说明,请执行以下操作:

控制台

使用 Google Cloud 控制台创建表时,您无法添加说明。创建表后,您可以在详细信息页面上添加说明。

  1. 探索器面板中,展开您的项目和数据集,然后选择表。

  2. 在详细信息面板中,点击详细信息

  3. 说明部分,点击铅笔图标以修改说明。

    修改说明。

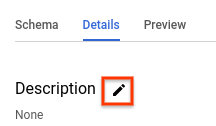
  4. 在文本框中输入说明,然后点击更新进行保存。

SQL

使用 ALTER TABLE SET OPTIONS 语句。以下示例会更新名为 mytable 的表的说明:

  1. 在 Google Cloud 控制台中,转到 BigQuery 页面。

    转到 BigQuery

  2. 在查询编辑器中,输入以下语句:

    ALTER TABLE mydataset.mytable
      SET OPTIONS (
        description = 'Description of mytable');
    

  3. 点击 运行

如需详细了解如何运行查询,请参阅运行交互式查询

bq

  1. 在 Google Cloud 控制台中,激活 Cloud Shell。

    激活 Cloud Shell

    Cloud Shell 会话随即会在 Google Cloud 控制台的底部启动,并显示命令行提示符。Cloud Shell 是一个已安装 Google Cloud CLI 且已为当前项目设置值的 Shell 环境。该会话可能需要几秒钟时间来完成初始化。

  2. 发出带 --description 标志的 bq update 命令。如果您要更新非默认项目中的表,请按以下格式将相应项目 ID 添加到数据集名称中:project_id:dataset

    bq update \
    --description "description" \
    project_id:dataset.table
    

    替换以下内容:

    • description:加英文引号的说明表的文本。
    • project_id:您的项目 ID
    • dataset:要更新的表所属数据集的名称
    • table:要更新的表的名称

    示例:

    如需将 mydataset 数据集中的 mytable 表的说明更改为“Description of mytable”,请输入以下命令。mydataset 数据集在默认项目中。

    bq update --description "Description of mytable" mydataset.mytable
    

    如需将 mydataset 数据集中的 mytable 表的说明更改为“Description of mytable”,请输入以下命令。mydataset 数据集在 myotherproject 项目中,不在默认项目中。

    bq update \
    --description "Description of mytable" \
    myotherproject:mydataset.mytable
    

API

调用 tables.patch 方法并使用表资源中的 description 属性来更新表的说明。由于 tables.update 方法会替换整个表资源,因此最好使用 tables.patch 方法。

Go

试用此示例之前,请按照 BigQuery 快速入门:使用客户端库中的 Go 设置说明进行操作。如需了解详情,请参阅 BigQuery Go API 参考文档

如需向 BigQuery 进行身份验证,请设置应用默认凭据。 如需了解详情,请参阅为客户端库设置身份验证

import (
	"context"
	"fmt"

	"cloud.google.com/go/bigquery"
)

// updateTableDescription demonstrates how to fetch a table's metadata and updates the Description metadata.
func updateTableDescription(projectID, datasetID, tableID string) error {
	// projectID := "my-project-id"
	// datasetID := "mydataset"
	// tableID := "mytable"
	ctx := context.Background()
	client, err := bigquery.NewClient(ctx, projectID)
	if err != nil {
		return fmt.Errorf("bigquery.NewClient: %v", err)
	}
	defer client.Close()

	tableRef := client.Dataset(datasetID).Table(tableID)
	meta, err := tableRef.Metadata(ctx)
	if err != nil {
		return err
	}
	update := bigquery.TableMetadataToUpdate{
		Description: "Updated description.",
	}
	if _, err = tableRef.Update(ctx, update, meta.ETag); err != nil {
		return err
	}
	return nil
}

Java

试用此示例之前,请按照 BigQuery 快速入门:使用客户端库中的 Java 设置说明进行操作。如需了解详情,请参阅 BigQuery Java API 参考文档

如需向 BigQuery 进行身份验证,请设置应用默认凭据。 如需了解详情,请参阅为客户端库设置身份验证

import com.google.cloud.bigquery.BigQuery;
import com.google.cloud.bigquery.BigQueryException;
import com.google.cloud.bigquery.BigQueryOptions;
import com.google.cloud.bigquery.Table;

public class UpdateTableDescription {

  public static void runUpdateTableDescription() {
    // TODO(developer): Replace these variables before running the sample.
    String datasetName = "MY_DATASET_NAME";
    String tableName = "MY_TABLE_NAME";
    String newDescription = "this is the new table description";
    updateTableDescription(datasetName, tableName, newDescription);
  }

  public static void updateTableDescription(
      String datasetName, String tableName, String newDescription) {
    try {
      // Initialize client that will be used to send requests. This client only needs to be created
      // once, and can be reused for multiple requests.
      BigQuery bigquery = BigQueryOptions.getDefaultInstance().getService();

      Table table = bigquery.getTable(datasetName, tableName);
      bigquery.update(table.toBuilder().setDescription(newDescription).build());
      System.out.println("Table description updated successfully to " + newDescription);
    } catch (BigQueryException e) {
      System.out.println("Table description was not updated \n" + e.toString());
    }
  }
}

Python

试用此示例之前,请按照 BigQuery 快速入门:使用客户端库中的 Python 设置说明进行操作。如需了解详情,请参阅 BigQuery Python API 参考文档

如需向 BigQuery 进行身份验证,请设置应用默认凭据。 如需了解详情,请参阅为客户端库设置身份验证

配置 Table.description 属性并调用 Client.update_table() 向 API 发送更新。
# from google.cloud import bigquery
# client = bigquery.Client()
# project = client.project
# dataset_ref = bigquery.DatasetReference(project, dataset_id)
# table_ref = dataset_ref.table('my_table')
# table = client.get_table(table_ref)  # API request

assert table.description == "Original description."
table.description = "Updated description."

table = client.update_table(table, ["description"])  # API request

assert table.description == "Updated description."

更新表的到期时间

您可以在数据集级层设置默认的表到期时间,也可以在创建表时设置表的到期时间。表的到期时间通常称为“存留时间”或 TTL。

如果某个表到期,该表及其包含的所有数据都会被删除。如有需要,您可以在为数据集指定的时间旅行窗口内恢复已删除的过期表,如需了解详情,请参阅恢复已删除的表

如果在创建表时设置到期时间,则会忽略数据集的默认表到期时间。如果未在数据集级层设置默认的表到期时间,也未在创建表时设置表到期时间,则该表永不过期,您必须手动删除该表。

表创建完毕后,您可以随时通过以下方式更新表的到期时间:

  • 使用 Google Cloud 控制台。
  • 使用数据定义语言 (DDL) ALTER TABLE 语句。
  • 使用 bq 命令行工具的 bq update 命令。
  • 调用 tables.patch API 方法。
  • 使用客户端库。

如需更新表的到期时间,请执行以下操作:

控制台

使用 Google Cloud 控制台创建表时,您无法添加过期时间。创建表后,您可以在表详细信息页面上添加或更新表过期时间。

  1. 探索器面板中,展开您的项目和数据集,然后选择表。

  2. 在详细信息面板中,点击详细信息

  3. 点击表信息旁边的铅笔图标

  4. 对于表过期时间,选择指定日期。然后使用下面的日历微件选择到期日期。

  5. 点击更新进行保存。已更新的到期时间会显示在表信息部分中。

SQL

使用 ALTER TABLE SET OPTIONS 语句。以下示例会更新名为 mytable 的表的到期时间:

  1. 在 Google Cloud 控制台中,转到 BigQuery 页面。

    转到 BigQuery

  2. 在查询编辑器中,输入以下语句:

    ALTER TABLE mydataset.mytable
      SET OPTIONS (
        -- Sets table expiration to timestamp 2025-02-03 12:34:56
        expiration_timestamp = TIMESTAMP '2025-02-03 12:34:56');
    

  3. 点击 运行

如需详细了解如何运行查询,请参阅运行交互式查询

bq

  1. 在 Google Cloud 控制台中,激活 Cloud Shell。

    激活 Cloud Shell

    Cloud Shell 会话随即会在 Google Cloud 控制台的底部启动,并显示命令行提示符。Cloud Shell 是一个已安装 Google Cloud CLI 且已为当前项目设置值的 Shell 环境。该会话可能需要几秒钟时间来完成初始化。

  2. 发出带 --expiration 标志的 bq update 命令。如果您要更新非默认项目中的表,请按以下格式将相应项目 ID 添加到数据集名称中:project_id:dataset

    bq update \
    --expiration integer \
    project_id:dataset.table
    

    替换以下内容:

    • integer:表的默认生命周期(以秒为单位)。最小值为 3600 秒(一小时)。到期时间以当前时间加上这个整数值为准。如果您指定 0,表过期时间将被移除,且表永不过期。您必须手动删除未设定过期时间的表。
    • project_id:您的项目 ID。
    • dataset:要更新的表所属数据集的名称。
    • table:要更新的表的名称。

    示例:

    如需将 mydataset 数据集中的 mytable 表的到期时间更新为 5 天(432000 秒),请输入以下命令。mydataset 数据集在默认项目中。

    bq update --expiration 432000 mydataset.mytable
    

    如需将 mydataset 数据集中的 mytable 表的到期时间更新为 5 天(432000 秒),请输入以下命令。mydataset 数据集在 myotherproject 项目中,不在默认项目中。

    bq update --expiration 432000 myotherproject:mydataset.mytable
    

API

调用 tables.patch 方法,并使用表资源中的 expirationTime 属性更新表过期时间(以毫秒为单位)。由于 tables.update 方法会替换整个表资源,因此最好使用 tables.patch 方法。

Go

试用此示例之前,请按照 BigQuery 快速入门:使用客户端库中的 Go 设置说明进行操作。如需了解详情,请参阅 BigQuery Go API 参考文档

如需向 BigQuery 进行身份验证,请设置应用默认凭据。 如需了解详情,请参阅为客户端库设置身份验证

import (
	"context"
	"fmt"
	"time"

	"cloud.google.com/go/bigquery"
)

// updateTableExpiration demonstrates setting the table expiration of a table to a specific point in time
// in the future, at which time it will be deleted.
func updateTableExpiration(projectID, datasetID, tableID string) error {
	// projectID := "my-project-id"
	// datasetID := "mydataset"
	// tableID := "mytable"
	ctx := context.Background()
	client, err := bigquery.NewClient(ctx, projectID)
	if err != nil {
		return fmt.Errorf("bigquery.NewClient: %v", err)
	}
	defer client.Close()

	tableRef := client.Dataset(datasetID).Table(tableID)
	meta, err := tableRef.Metadata(ctx)
	if err != nil {
		return err
	}
	update := bigquery.TableMetadataToUpdate{
		ExpirationTime: time.Now().Add(time.Duration(5*24) * time.Hour), // table expiration in 5 days.
	}
	if _, err = tableRef.Update(ctx, update, meta.ETag); err != nil {
		return err
	}
	return nil
}

Java

试用此示例之前,请按照 BigQuery 快速入门:使用客户端库中的 Java 设置说明进行操作。如需了解详情,请参阅 BigQuery Java API 参考文档

如需向 BigQuery 进行身份验证,请设置应用默认凭据。 如需了解详情,请参阅为客户端库设置身份验证

import com.google.cloud.bigquery.BigQuery;
import com.google.cloud.bigquery.BigQueryException;
import com.google.cloud.bigquery.BigQueryOptions;
import com.google.cloud.bigquery.Table;
import java.util.concurrent.TimeUnit;

public class UpdateTableExpiration {

  public static void runUpdateTableExpiration() {
    // TODO(developer): Replace these variables before running the sample.
    String datasetName = "MY_DATASET_NAME";
    String tableName = "MY_TABLE_NAME";
    // Update table expiration to one day.
    Long newExpiration = TimeUnit.MILLISECONDS.convert(1, TimeUnit.DAYS);
    updateTableExpiration(datasetName, tableName, newExpiration);
  }

  public static void updateTableExpiration(
      String datasetName, String tableName, Long newExpiration) {
    try {
      // Initialize client that will be used to send requests. This client only needs to be created
      // once, and can be reused for multiple requests.
      BigQuery bigquery = BigQueryOptions.getDefaultInstance().getService();

      Table table = bigquery.getTable(datasetName, tableName);
      bigquery.update(table.toBuilder().setExpirationTime(newExpiration).build());

      System.out.println("Table expiration updated successfully to " + newExpiration);
    } catch (BigQueryException e) {
      System.out.println("Table expiration was not updated \n" + e.toString());
    }
  }
}

Node.js

试用此示例之前,请按照 BigQuery 快速入门:使用客户端库中的 Node.js 设置说明进行操作。如需了解详情,请参阅 BigQuery Node.js API 参考文档

如需向 BigQuery 进行身份验证,请设置应用默认凭据。 如需了解详情,请参阅为客户端库设置身份验证

// Import the Google Cloud client library
const {BigQuery} = require('@google-cloud/bigquery');
const bigquery = new BigQuery();

async function updateTableExpiration() {
  // Updates a table's expiration.

  /**
   * TODO(developer): Uncomment the following lines before running the sample.
   */
  // const datasetId = 'my_dataset', // Existing dataset
  // const tableId = 'my_table', // Existing table
  // const expirationTime = Date.now() + 1000 * 60 * 60 * 24 * 5 // 5 days from current time in ms

  // Retreive current table metadata
  const table = bigquery.dataset(datasetId).table(tableId);
  const [metadata] = await table.getMetadata();

  // Set new table expiration to 5 days from current time
  metadata.expirationTime = expirationTime.toString();
  const [apiResponse] = await table.setMetadata(metadata);

  const newExpirationTime = apiResponse.expirationTime;
  console.log(`${tableId} expiration: ${newExpirationTime}`);
}

Python

试用此示例之前,请按照 BigQuery 快速入门:使用客户端库中的 Python 设置说明进行操作。如需了解详情,请参阅 BigQuery Python API 参考文档

如需向 BigQuery 进行身份验证,请设置应用默认凭据。 如需了解详情,请参阅为客户端库设置身份验证

配置 Table.expires 属性并调用 Client.update_table() 向 API 发送更新。
# Copyright 2022 Google LLC
#
# Licensed under the Apache License, Version 2.0 (the "License");
# you may not use this file except in compliance with the License.
# You may obtain a copy of the License at
#
#     https://www.apache.org/licenses/LICENSE-2.0
#
# Unless required by applicable law or agreed to in writing, software
# distributed under the License is distributed on an "AS IS" BASIS,
# WITHOUT WARRANTIES OR CONDITIONS OF ANY KIND, either express or implied.
# See the License for the specific language governing permissions and
# limitations under the License.

import datetime

def update_table_expiration(table_id, expiration):
    orig_table_id = table_id
    orig_expiration = expiration

    from google.cloud import bigquery

    client = bigquery.Client()

    # TODO(dev): Change table_id to the full name of the table you want to update.
    table_id = "your-project.your_dataset.your_table_name"

    # TODO(dev): Set table to expire for desired days days from now.
    expiration = datetime.datetime.now(datetime.timezone.utc) + datetime.timedelta(
        days=5
    )

    table_id = orig_table_id
    expiration = orig_expiration

    table = client.get_table(table_id)  # Make an API request.
    table.expires = expiration
    table = client.update_table(table, ["expires"])  # API request

    print(f"Updated {table_id}, expires {table.expires}.")

如需更新默认数据集分区到期时间,请执行以下操作:

Java

试用此示例之前,请按照 BigQuery 快速入门:使用客户端库中的 Java 设置说明进行操作。如需了解详情,请参阅 BigQuery Java API 参考文档

如需向 BigQuery 进行身份验证,请设置应用默认凭据。 如需了解详情,请参阅为客户端库设置身份验证

import com.google.cloud.bigquery.BigQuery;
import com.google.cloud.bigquery.BigQueryException;
import com.google.cloud.bigquery.BigQueryOptions;
import com.google.cloud.bigquery.Dataset;
import java.util.concurrent.TimeUnit;

// Sample to update partition expiration on a dataset.
public class UpdateDatasetPartitionExpiration {

  public static void main(String[] args) {
    // TODO(developer): Replace these variables before running the sample.
    String datasetName = "MY_DATASET_NAME";
    // Set the default partition expiration (applies to new tables, only) in
    // milliseconds. This example sets the default expiration to 90 days.
    Long newExpiration = TimeUnit.MILLISECONDS.convert(90, TimeUnit.DAYS);
    updateDatasetPartitionExpiration(datasetName, newExpiration);
  }

  public static void updateDatasetPartitionExpiration(String datasetName, Long newExpiration) {
    try {
      // Initialize client that will be used to send requests. This client only needs to be created
      // once, and can be reused for multiple requests.
      BigQuery bigquery = BigQueryOptions.getDefaultInstance().getService();

      Dataset dataset = bigquery.getDataset(datasetName);
      bigquery.update(dataset.toBuilder().setDefaultPartitionExpirationMs(newExpiration).build());
      System.out.println(
          "Dataset default partition expiration updated successfully to " + newExpiration);
    } catch (BigQueryException e) {
      System.out.println("Dataset partition expiration was not updated \n" + e.toString());
    }
  }
}

Python

试用此示例之前,请按照 BigQuery 快速入门:使用客户端库中的 Python 设置说明进行操作。如需了解详情,请参阅 BigQuery Python API 参考文档

如需向 BigQuery 进行身份验证,请设置应用默认凭据。 如需了解详情,请参阅为客户端库设置身份验证

# Copyright 2019 Google LLC
#
# Licensed under the Apache License, Version 2.0 (the "License");
# you may not use this file except in compliance with the License.
# You may obtain a copy of the License at
#
#     https://www.apache.org/licenses/LICENSE-2.0
#
# Unless required by applicable law or agreed to in writing, software
# distributed under the License is distributed on an "AS IS" BASIS,
# WITHOUT WARRANTIES OR CONDITIONS OF ANY KIND, either express or implied.
# See the License for the specific language governing permissions and
# limitations under the License.

def update_dataset_default_partition_expiration(dataset_id: str) -> None:

    from google.cloud import bigquery

    # Construct a BigQuery client object.
    client = bigquery.Client()

    # TODO(developer): Set dataset_id to the ID of the dataset to fetch.
    # dataset_id = 'your-project.your_dataset'

    dataset = client.get_dataset(dataset_id)  # Make an API request.

    # Set the default partition expiration (applies to new tables, only) in
    # milliseconds. This example sets the default expiration to 90 days.
    dataset.default_partition_expiration_ms = 90 * 24 * 60 * 60 * 1000

    dataset = client.update_dataset(
        dataset, ["default_partition_expiration_ms"]
    )  # Make an API request.

    print(
        "Updated dataset {}.{} with new default partition expiration {}".format(
            dataset.project, dataset.dataset_id, dataset.default_partition_expiration_ms
        )
    )

更新表的舍入模式

您可以使用 ALTER TABLE SET OPTIONS DDL 语句更新表的默认舍入模式。以下示例将 mytable 的默认舍入模式更新为 ROUND_HALF_EVEN

ALTER TABLE mydataset.mytable
SET OPTIONS (
  default_rounding_mode = "ROUND_HALF_EVEN");

如果向表添加 NUMERICBIGNUMERIC 字段并且未指定舍入模式,则舍入模式会自动设置为表的默认舍入模式。更改表的默认舍入模式不会更改现有字段的舍入模式。

更新表的架构定义

如需详细了解如何更新表的架构定义,请参阅修改表架构

重命名表

您可以在创建表后使用 ALTER TABLE RENAME TO 语句重命名该表。以下示例会将 mytable 重命名为 mynewtable

ALTER TABLE mydataset.mytable
RENAME TO mynewtable;

重命名表的限制

  • 如果您想重命名包含流式插入到其中的数据的表,则必须停止流式插入,然后等待 BigQuery 指示当前未使用流式插入。
  • 表通常可以在上次流式操作后的 72 小时内重命名,但可能需要更长时间。
  • 系统会保留现有的表 ACL 和行访问权限政策,但不会保留在表重命名期间进行的表 ACL 和行访问权限政策更新。
  • 无法并发重命名表并在该表上运行 DML 语句。
  • 重命名表会移除该表中的所有 Data Catalog 标记
  • 无法重命名外部表。

复制表

本部分介绍如何创建表的完整副本。如需了解其他类型的表副本,请参阅表克隆表快照

您可以通过以下方式复制表:

  • 使用 Google Cloud 控制台。
  • 使用 bq cp 命令。
  • 使用数据定义语言 (DDL) CREATE TABLE COPY 语句。
  • 调用 jobs.insert API 方法并配置 copy 作业。
  • 使用客户端库。

复制表的限制

表的复制作业受到以下限制:

  • 复制表时,目标表的名称必须遵循与创建表时相同的命名惯例。
  • 表的副本需遵循 BigQuery 对复制作业的限制
  • Google Cloud 控制台支持一次仅复制一个表。 您无法覆盖目标数据集中的现有表。该表必须在目标数据集中具有唯一名称。
  • Google Cloud 控制台不支持将多个源表复制到目标表。
  • 使用 API、bq 命令行工具或客户端库将多个源表复制到目标表时,所有源表的架构必须相同,包括任何分区或聚簇。
  • 由于底层存储是动态管理的,因此 BigQuery 复制表所花费的时间可能因不同的运行而异。
  • 您无法将源表复制和附加到所含列数比源表列数多且那些多出来的列包含默认值的目标表。您可以运行 INSERT destination_table SELECT * FROM source_table 来复制数据。
  • 如果复制操作会覆盖现有表,则系统会保留现有表的表级访问权限。源表中的标记不会复制到被覆盖的表中。
  • 如果复制操作创建新表,则新表的表级访问权限将由创建新表的数据集的访问权限政策来决定。此外,标记会从源表复制到新表中。
  • 将多个源表复制到目标表时,所有源表必须具有相同的标记。

所需的角色

如需执行本文档中的任务,您需要以下权限。

复制表和分区所需的角色

如需获得复制表和分区所需的权限,请让您的管理员向您授予源数据集和目标数据集的 Data Editor (roles/bigquery.dataEditor) IAM 角色。如需详细了解如何授予角色,请参阅管理访问权限

此预定义角色包含复制表和分区所需的权限。如需查看所需的确切权限,请展开所需权限部分:

所需权限

您需要具备以下权限才能复制表和分区:

  • 源数据集和目标数据集的 bigquery.tables.getData 权限
  • 源数据集和目标数据集的 bigquery.tables.get 权限
  • 目标数据集的 bigquery.tables.create 权限
  • 目标数据集的 bigquery.tables.update 权限

您也可以使用自定义角色或其他预定义角色来获取这些权限。

运行复制作业的权限

如需获得运行复制作业所需的权限,请让您的管理员向您授予源数据集和目标数据集的 Job User (roles/bigquery.jobUser) IAM 角色。如需详细了解如何授予角色,请参阅管理访问权限

此预定义角色包含运行复制作业所需的 bigquery.jobs.create 权限。

您也可以使用自定义角色或其他预定义角色来获取此权限。

复制单个源表

您可以通过以下方式复制单个表:

  • 使用 Google Cloud 控制台。
  • 使用 bq 命令行工具的 bq cp 命令。
  • 使用数据定义语言 (DDL) CREATE TABLE COPY 语句。
  • 调用 jobs.insert API 方法,配置一个 copy 作业并指定 sourceTable 属性。
  • 使用客户端库。

在一项复制作业中,Google Cloud 控制台和 CREATE TABLE COPY 语句仅支持一个源表和一个目标表。如需将多个源文件复制到目标表,必须使用 bq 命令行工具或 API。

如需复制单个源表,请执行以下操作:

控制台

  1. 探索器面板中,展开您的项目和数据集,然后选择表。

  2. 在详细信息面板中,点击复制表

  3. 复制表对话框的目标下:

    • 项目名称部分,选择将存储复制表的项目。
    • 数据集名称部分,选择要存储复制表的数据集。源数据集和目标数据集必须在同一位置
    • 表名部分,输入新表的名称。该名称在目标数据集中必须唯一。您无法使用 Google Cloud 控制台覆盖目标数据集中的现有表。如需详细了解表名要求,请参阅表命名
  4. 点击复制以开始复制作业。

SQL

使用 CREATE TABLE COPY 语句将名为 table1 的表复制到名为 table1copy 的新表:

  1. 在 Google Cloud 控制台中,转到 BigQuery 页面。

    转到 BigQuery

  2. 在查询编辑器中,输入以下语句:

    CREATE TABLE myproject.mydataset.table1copy
    COPY myproject.mydataset.table1;
    

  3. 点击 运行

如需详细了解如何运行查询,请参阅运行交互式查询

bq

  1. 在 Google Cloud 控制台中,激活 Cloud Shell。

    激活 Cloud Shell

    Cloud Shell 会话随即会在 Google Cloud 控制台的底部启动,并显示命令行提示符。Cloud Shell 是一个已安装 Google Cloud CLI 且已为当前项目设置值的 Shell 环境。该会话可能需要几秒钟时间来完成初始化。

  2. 发出 bq cp 命令。可使用以下可选标志控制目标表的写入处置方式:

    • -a--append_table 用于将源表中的数据附加到目标数据集中的现有表。
    • -f--force 会覆盖目标数据集中的现有表,并且不会提示您进行确认。
    • -n--no_clobber 会在目标数据集中已存在同名表时返回以下错误消息:Table 'project_id:dataset.table' already exists, skipping.。如果未指定 -n,则默认行为是提示您选择是否替换目标表。
    • --destination_kms_key 是客户管理的 Cloud KMS 密钥,用于加密目标表。

    本文未演示 --destination_kms_key。如需了解详情,请参阅使用 Cloud Key Management Service 密钥保护数据

    如果源数据集或目标数据集属于非默认项目,请按以下格式将相应项目 ID 添加到数据集名称中:project_id:dataset

    (可选)提供 --location 标志并将其值设置为您的位置

    bq --location=location cp \
    -a -f -n \
    project_id:dataset.source_table \
    project_id:dataset.destination_table
    

    替换以下内容:

    • location:您所在位置的名称。--location 是可选标志。例如,如果您在东京区域使用 BigQuery,可将该标志的值设置为 asia-northeast1。您可以使用 .bigqueryrc 文件设置默认位置值。
    • project_id:您的项目 ID。
    • dataset:源数据集或目标数据集的名称。
    • source_table:要复制的表。
    • destination_table:目标数据集中表的名称。

    示例:

    要将 mydataset.mytable 表复制到 mydataset2.mytable2 表,请输入以下命令。两个数据集均属于默认项目。

    bq cp mydataset.mytable mydataset2.mytable2
    

    如需复制 mydataset.mytable 表并覆盖具有相同名称的目标表,请输入以下命令。源数据集在默认项目中。目标数据集在 myotherproject 项目中。-f 快捷键用于在无提示的情况下覆盖目标表。

    bq cp -f \
    mydataset.mytable \
    myotherproject:myotherdataset.mytable
    

    如需复制 mydataset.mytable 表并在目标数据集中包含同名表时返回错误,请输入以下命令。源数据集在默认项目中。目标数据集在 myotherproject 项目中。-n 快捷键用于防止覆盖具有相同名称的表。

    bq cp -n \
    mydataset.mytable \
    myotherproject:myotherdataset.mytable
    

    如需复制 mydataset.mytable 表并向具有相同名称的目标表附加数据,请输入以下命令。源数据集属于默认项目。目标数据集在 myotherproject 项目中。- a 快捷键用于附加到目标表。

    bq cp -a mydataset.mytable myotherproject:myotherdataset.mytable
    

API

若要通过 API 复制现有的表,您可以调用 bigquery.jobs.insert 方法并配置一个 copy 作业。在作业资源jobReference 部分的 location 属性中指定您的位置。

您必须在作业配置中指定以下值:

"copy": {
      "sourceTable": {       // Required
        "projectId": string, // Required
        "datasetId": string, // Required
        "tableId": string    // Required
      },
      "destinationTable": {  // Required
        "projectId": string, // Required
        "datasetId": string, // Required
        "tableId": string    // Required
      },
      "createDisposition": string,  // Optional
      "writeDisposition": string,   // Optional
    },

其中,sourceTable 提供要复制的表的相关信息,destinationTable 提供新表的相关信息,createDisposition 指定是否在表不存在时创建表,writeDisposition 指定是覆盖还是附加到现有的表。

C#

试用此示例之前,请按照 BigQuery 快速入门:使用客户端库中的 C# 设置说明进行操作。如需了解详情,请参阅 BigQuery C# API 参考文档

如需向 BigQuery 进行身份验证,请设置应用默认凭据。 如需了解详情,请参阅为客户端库设置身份验证


using Google.Apis.Bigquery.v2.Data;
using Google.Cloud.BigQuery.V2;
using System;

public class BigQueryCopyTable
{
    public void CopyTable(
        string projectId = "your-project-id",
        string destinationDatasetId = "your_dataset_id"
    )
    {
        BigQueryClient client = BigQueryClient.Create(projectId);
        TableReference sourceTableRef = new TableReference()
        {
            TableId = "shakespeare",
            DatasetId = "samples",
            ProjectId = "bigquery-public-data"
        };
        TableReference destinationTableRef = client.GetTableReference(
            destinationDatasetId, "destination_table");
        BigQueryJob job = client.CreateCopyJob(
            sourceTableRef, destinationTableRef)
            .PollUntilCompleted() // Wait for the job to complete.
            .ThrowOnAnyError();

        // Retrieve destination table
        BigQueryTable destinationTable = client.GetTable(destinationTableRef);
        Console.WriteLine(
            $"Copied {destinationTable.Resource.NumRows} rows from table "
            + $"{sourceTableRef.DatasetId}.{sourceTableRef.TableId} "
            + $"to {destinationTable.FullyQualifiedId}."
        );
    }
}

Go

试用此示例之前,请按照 BigQuery 快速入门:使用客户端库中的 Go 设置说明进行操作。如需了解详情,请参阅 BigQuery Go API 参考文档

如需向 BigQuery 进行身份验证,请设置应用默认凭据。 如需了解详情,请参阅为客户端库设置身份验证

import (
	"context"
	"fmt"

	"cloud.google.com/go/bigquery"
)

// copyTable demonstrates copying a table from a source to a destination, and
// allowing the copy to overwrite existing data by using truncation.
func copyTable(projectID, datasetID, srcID, dstID string) error {
	// projectID := "my-project-id"
	// datasetID := "mydataset"
	// srcID := "sourcetable"
	// dstID := "destinationtable"
	ctx := context.Background()
	client, err := bigquery.NewClient(ctx, projectID)
	if err != nil {
		return fmt.Errorf("bigquery.NewClient: %v", err)
	}
	defer client.Close()

	dataset := client.Dataset(datasetID)
	copier := dataset.Table(dstID).CopierFrom(dataset.Table(srcID))
	copier.WriteDisposition = bigquery.WriteTruncate
	job, err := copier.Run(ctx)
	if err != nil {
		return err
	}
	status, err := job.Wait(ctx)
	if err != nil {
		return err
	}
	if err := status.Err(); err != nil {
		return err
	}
	return nil
}

Java

试用此示例之前,请按照 BigQuery 快速入门:使用客户端库中的 Java 设置说明进行操作。如需了解详情,请参阅 BigQuery Java API 参考文档

如需向 BigQuery 进行身份验证,请设置应用默认凭据。 如需了解详情,请参阅为客户端库设置身份验证

import com.google.cloud.bigquery.BigQuery;
import com.google.cloud.bigquery.BigQueryException;
import com.google.cloud.bigquery.BigQueryOptions;
import com.google.cloud.bigquery.CopyJobConfiguration;
import com.google.cloud.bigquery.Job;
import com.google.cloud.bigquery.JobInfo;
import com.google.cloud.bigquery.TableId;

public class CopyTable {

  public static void runCopyTable() {
    // TODO(developer): Replace these variables before running the sample.
    String destinationDatasetName = "MY_DESTINATION_DATASET_NAME";
    String destinationTableId = "MY_DESTINATION_TABLE_NAME";
    String sourceDatasetName = "MY_SOURCE_DATASET_NAME";
    String sourceTableId = "MY_SOURCE_TABLE_NAME";

    copyTable(sourceDatasetName, sourceTableId, destinationDatasetName, destinationTableId);
  }

  public static void copyTable(
      String sourceDatasetName,
      String sourceTableId,
      String destinationDatasetName,
      String destinationTableId) {
    try {
      // Initialize client that will be used to send requests. This client only needs to be created
      // once, and can be reused for multiple requests.
      BigQuery bigquery = BigQueryOptions.getDefaultInstance().getService();

      TableId sourceTable = TableId.of(sourceDatasetName, sourceTableId);
      TableId destinationTable = TableId.of(destinationDatasetName, destinationTableId);

      // For more information on CopyJobConfiguration see:
      // https://googleapis.dev/java/google-cloud-clients/latest/com/google/cloud/bigquery/JobConfiguration.html
      CopyJobConfiguration configuration =
          CopyJobConfiguration.newBuilder(destinationTable, sourceTable).build();

      // For more information on Job see:
      // https://googleapis.dev/java/google-cloud-clients/latest/index.html?com/google/cloud/bigquery/package-summary.html
      Job job = bigquery.create(JobInfo.of(configuration));

      // Blocks until this job completes its execution, either failing or succeeding.
      Job completedJob = job.waitFor();
      if (completedJob == null) {
        System.out.println("Job not executed since it no longer exists.");
        return;
      } else if (completedJob.getStatus().getError() != null) {
        System.out.println(
            "BigQuery was unable to copy table due to an error: \n" + job.getStatus().getError());
        return;
      }
      System.out.println("Table copied successfully.");
    } catch (BigQueryException | InterruptedException e) {
      System.out.println("Table copying job was interrupted. \n" + e.toString());
    }
  }
}

Node.js

试用此示例之前,请按照 BigQuery 快速入门:使用客户端库中的 Node.js 设置说明进行操作。如需了解详情,请参阅 BigQuery Node.js API 参考文档

如需向 BigQuery 进行身份验证,请设置应用默认凭据。 如需了解详情,请参阅为客户端库设置身份验证

// Import the Google Cloud client library and create a client
const {BigQuery} = require('@google-cloud/bigquery');
const bigquery = new BigQuery();

async function copyTable() {
  // Copies src_dataset:src_table to dest_dataset:dest_table.

  /**
   * TODO(developer): Uncomment the following lines before running the sample
   */
  // const srcDatasetId = "my_src_dataset";
  // const srcTableId = "my_src_table";
  // const destDatasetId = "my_dest_dataset";
  // const destTableId = "my_dest_table";

  // Copy the table contents into another table
  const [job] = await bigquery
    .dataset(srcDatasetId)
    .table(srcTableId)
    .copy(bigquery.dataset(destDatasetId).table(destTableId));

  console.log(`Job ${job.id} completed.`);

  // Check the job's status for errors
  const errors = job.status.errors;
  if (errors && errors.length > 0) {
    throw errors;
  }
}

PHP

试用此示例之前,请按照 BigQuery 快速入门:使用客户端库中的 PHP 设置说明进行操作。如需了解详情,请参阅 BigQuery PHP API 参考文档

如需向 BigQuery 进行身份验证,请设置应用默认凭据。 如需了解详情,请参阅为客户端库设置身份验证

use Google\Cloud\BigQuery\BigQueryClient;
use Google\Cloud\Core\ExponentialBackoff;

/** Uncomment and populate these variables in your code */
// $projectId = 'The Google project ID';
// $datasetId = 'The BigQuery dataset ID';
// $sourceTableId   = 'The BigQuery table ID to copy from';
// $destinationTableId = 'The BigQuery table ID to copy to';

$bigQuery = new BigQueryClient([
    'projectId' => $projectId,
]);
$dataset = $bigQuery->dataset($datasetId);
$sourceTable = $dataset->table($sourceTableId);
$destinationTable = $dataset->table($destinationTableId);
$copyConfig = $sourceTable->copy($destinationTable);
$job = $sourceTable->runJob($copyConfig);

// poll the job until it is complete
$backoff = new ExponentialBackoff(10);
$backoff->execute(function () use ($job) {
    print('Waiting for job to complete' . PHP_EOL);
    $job->reload();
    if (!$job->isComplete()) {
        throw new Exception('Job has not yet completed', 500);
    }
});
// check if the job has errors
if (isset($job->info()['status']['errorResult'])) {
    $error = $job->info()['status']['errorResult']['message'];
    printf('Error running job: %s' . PHP_EOL, $error);
} else {
    print('Table copied successfully' . PHP_EOL);
}

Python

试用此示例之前,请按照 BigQuery 快速入门:使用客户端库中的 Python 设置说明进行操作。如需了解详情,请参阅 BigQuery Python API 参考文档

如需向 BigQuery 进行身份验证,请设置应用默认凭据。 如需了解详情,请参阅为客户端库设置身份验证


from google.cloud import bigquery

# Construct a BigQuery client object.
client = bigquery.Client()

# TODO(developer): Set source_table_id to the ID of the original table.
# source_table_id = "your-project.source_dataset.source_table"

# TODO(developer): Set destination_table_id to the ID of the destination table.
# destination_table_id = "your-project.destination_dataset.destination_table"

job = client.copy_table(source_table_id, destination_table_id)
job.result()  # Wait for the job to complete.

print("A copy of the table created.")

复制多个源表

您可以通过以下方式将多个源表复制到目标表:

  • 使用 bq 命令行工具的 bq cp 命令。
  • 调用 jobs.insert 方法,配置一个 copy 作业并指定 sourceTables 属性。
  • 使用客户端库。

所有源表必须具有相同的架构和标记,并且只能有一个目标表。

在指定源表时,您必须采用以英文逗号分隔的列表的形式。在复制多个源表时,您不能使用通配符。

如需复制多个源表,请选择以下选项之一:

bq

  1. 在 Google Cloud 控制台中,激活 Cloud Shell。

    激活 Cloud Shell

    Cloud Shell 会话随即会在 Google Cloud 控制台的底部启动,并显示命令行提示符。Cloud Shell 是一个已安装 Google Cloud CLI 且已为当前项目设置值的 Shell 环境。该会话可能需要几秒钟时间来完成初始化。

  2. 发出 bq cp 命令并采用英文逗号分隔列表的形式添加多个源表。可使用以下可选标志控制目标表的写入处置方式:

    • -a--append_table 用于将源表中的数据附加到目标数据集中的现有表。
    • -f--force 用于覆盖目标数据集中的现有目标表,并且不会提示您进行确认。
    • -n--no_clobber 会在目标数据集中已存在同名表时返回以下错误消息:Table 'project_id:dataset.table' already exists, skipping.。如果未指定 -n,则默认行为是提示您选择是否替换目标表。
    • --destination_kms_key是客户管理的 Cloud Key Management Service 密钥,用于加密目标表。

    本文未演示 --destination_kms_key。如需了解详情,请参阅使用 Cloud Key Management Service 密钥保护数据

    如果源数据集或目标数据集属于非默认项目,请按以下格式将相应项目 ID 添加到数据集名称中:project_id:dataset

    (可选)提供 --location 标志并将其值设置为您的位置

    bq --location=location cp \
    -a -f -n \
    project_id:dataset.source_table,project_id:dataset.source_table \
    project_id:dataset.destination_table
    

    替换以下内容:

    • location:您所在位置的名称。--location 是可选标志。例如,如果您在东京区域使用 BigQuery,可将该标志的值设置为 asia-northeast1。您可以使用 .bigqueryrc 文件设置默认位置值。
    • project_id:您的项目 ID。
    • dataset:源数据集或目标数据集的名称。
    • source_table:要复制的表。
    • destination_table:目标数据集中表的名称。

    示例:

    如需将 mydataset.mytable 表和 mydataset.mytable2 表复制到 mydataset2.tablecopy 表,请输入以下命令。所有数据集均属于默认项目。

    bq cp \
    mydataset.mytable,mydataset.mytable2 \
    mydataset2.tablecopy
    

    如需将 mydataset.mytable 表和 mydataset.mytable2 表复制到 myotherdataset.mytable 表并覆盖具有相同名称的目标表,请输入以下命令。目标数据集在 myotherproject 项目中,不在默认项目中。-f 快捷键用于在无提示的情况下覆盖目标表。

    bq cp -f \
    mydataset.mytable,mydataset.mytable2 \
    myotherproject:myotherdataset.mytable
    

    如需复制 myproject:mydataset.mytable 表和 myproject:mydataset.mytable2 表,并在目标数据集中包含同名表时返回错误,请输入以下命令。目标数据集在 myotherproject 项目中。-n 快捷键用于防止覆盖具有相同名称的表。

    bq cp -n \
    myproject:mydataset.mytable,myproject:mydataset.mytable2 \
    myotherproject:myotherdataset.mytable
    

    如需复制 mydataset.mytable 表和 mydataset.mytable2 表并向具有相同名称的目标表附加数据,请输入以下命令。源数据集在默认项目中。目标数据集在 myotherproject 项目中。-a 快捷键用于附加到目标表。

    bq cp -a \
    mydataset.mytable,mydataset.mytable2 \
    myotherproject:myotherdataset.mytable
    

API

如需使用 API 复制多个表,请调用 jobs.insert 方法,配置一个表 copy 作业,并指定 sourceTables 属性。

作业资源jobReference 部分的 location 属性中指定您的区域。

Go

试用此示例之前,请按照 BigQuery 快速入门:使用客户端库中的 Go 设置说明进行操作。如需了解详情,请参阅 BigQuery Go API 参考文档

如需向 BigQuery 进行身份验证,请设置应用默认凭据。 如需了解详情,请参阅为客户端库设置身份验证

import (
	"context"
	"fmt"

	"cloud.google.com/go/bigquery"
)

// copyMultiTable demonstrates using a copy job to copy multiple source tables into a single destination table.
func copyMultiTable(projectID, srcDatasetID string, srcTableIDs []string, dstDatasetID, dstTableID string) error {
	// projectID := "my-project-id"
	// srcDatasetID := "sourcedataset"
	// srcTableIDs := []string{"table1","table2"}
	// dstDatasetID = "destinationdataset"
	// dstTableID = "destinationtable"
	ctx := context.Background()
	client, err := bigquery.NewClient(ctx, projectID)
	if err != nil {
		return fmt.Errorf("bigquery.NewClient: %v", err)
	}
	defer client.Close()

	srcDataset := client.Dataset(srcDatasetID)
	dstDataset := client.Dataset(dstDatasetID)
	var tableRefs []*bigquery.Table
	for _, v := range srcTableIDs {
		tableRefs = append(tableRefs, srcDataset.Table(v))
	}
	copier := dstDataset.Table(dstTableID).CopierFrom(tableRefs...)
	copier.WriteDisposition = bigquery.WriteTruncate
	job, err := copier.Run(ctx)
	if err != nil {
		return err
	}
	status, err := job.Wait(ctx)
	if err != nil {
		return err
	}
	if err := status.Err(); err != nil {
		return err
	}
	return nil
}

Java

试用此示例之前,请按照 BigQuery 快速入门:使用客户端库中的 Java 设置说明进行操作。如需了解详情,请参阅 BigQuery Java API 参考文档

如需向 BigQuery 进行身份验证,请设置应用默认凭据。 如需了解详情,请参阅为客户端库设置身份验证

import com.google.cloud.bigquery.BigQuery;
import com.google.cloud.bigquery.BigQueryException;
import com.google.cloud.bigquery.BigQueryOptions;
import com.google.cloud.bigquery.CopyJobConfiguration;
import com.google.cloud.bigquery.Job;
import com.google.cloud.bigquery.JobInfo;
import com.google.cloud.bigquery.TableId;
import java.util.Arrays;

public class CopyMultipleTables {

  public static void runCopyMultipleTables() {
    // TODO(developer): Replace these variables before running the sample.
    String destinationDatasetName = "MY_DATASET_NAME";
    String destinationTableId = "MY_TABLE_NAME";
    copyMultipleTables(destinationDatasetName, destinationTableId);
  }

  public static void copyMultipleTables(String destinationDatasetName, String destinationTableId) {
    try {
      // Initialize client that will be used to send requests. This client only needs to be created
      // once, and can be reused for multiple requests.
      BigQuery bigquery = BigQueryOptions.getDefaultInstance().getService();

      TableId destinationTable = TableId.of(destinationDatasetName, destinationTableId);

      // For more information on CopyJobConfiguration see:
      // https://googleapis.dev/java/google-cloud-clients/latest/com/google/cloud/bigquery/JobConfiguration.html
      CopyJobConfiguration configuration =
          CopyJobConfiguration.newBuilder(
                  destinationTable,
                  Arrays.asList(
                      TableId.of(destinationDatasetName, "table1"),
                      TableId.of(destinationDatasetName, "table2")))
              .build();

      // For more information on Job see:
      // https://googleapis.dev/java/google-cloud-clients/latest/index.html?com/google/cloud/bigquery/package-summary.html
      Job job = bigquery.create(JobInfo.of(configuration));

      // Blocks until this job completes its execution, either failing or succeeding.
      Job completedJob = job.waitFor();
      if (completedJob == null) {
        System.out.println("Job not executed since it no longer exists.");
        return;
      } else if (completedJob.getStatus().getError() != null) {
        System.out.println(
            "BigQuery was unable to copy tables due to an error: \n" + job.getStatus().getError());
        return;
      }
      System.out.println("Table copied successfully.");
    } catch (BigQueryException | InterruptedException e) {
      System.out.println("Table copying job was interrupted. \n" + e.toString());
    }
  }
}

Node.js

试用此示例之前,请按照 BigQuery 快速入门:使用客户端库中的 Node.js 设置说明进行操作。如需了解详情,请参阅 BigQuery Node.js API 参考文档

如需向 BigQuery 进行身份验证,请设置应用默认凭据。 如需了解详情,请参阅为客户端库设置身份验证

// Import the Google Cloud client library
const {BigQuery} = require('@google-cloud/bigquery');
const bigquery = new BigQuery();

async function copyTableMultipleSource() {
  // Copy multiple source tables to a given destination.

  /**
   * TODO(developer): Uncomment the following lines before running the sample.
   */
  // const datasetId = "my_dataset";
  // sourceTable = 'my_table';
  // destinationTable = 'testing';

  // Create a client
  const dataset = bigquery.dataset(datasetId);

  const metadata = {
    createDisposition: 'CREATE_NEVER',
    writeDisposition: 'WRITE_TRUNCATE',
  };

  // Create table references
  const table = dataset.table(sourceTable);
  const yourTable = dataset.table(destinationTable);

  // Copy table
  const [apiResponse] = await table.copy(yourTable, metadata);
  console.log(apiResponse.configuration.copy);
}

Python

试用此示例之前,请按照 BigQuery 快速入门:使用客户端库中的 Python 设置说明进行操作。如需了解详情,请参阅 BigQuery Python API 参考文档

如需向 BigQuery 进行身份验证,请设置应用默认凭据。 如需了解详情,请参阅为客户端库设置身份验证


from google.cloud import bigquery

# Construct a BigQuery client object.
client = bigquery.Client()

# TODO(developer): Set dest_table_id to the ID of the destination table.
# dest_table_id = "your-project.your_dataset.your_table_name"

# TODO(developer): Set table_ids to the list of the IDs of the original tables.
# table_ids = ["your-project.your_dataset.your_table_name", ...]

job = client.copy_table(table_ids, dest_table_id)  # Make an API request.
job.result()  # Wait for the job to complete.

print("The tables {} have been appended to {}".format(table_ids, dest_table_id))

跨区域复制表

如需申请使用此预览版功能,请填写 BigQuery 跨区域表复制预览注册表单

您可以将表、表快照表克隆从一个 BigQuery 区域或多区域复制到另一个区域。这包括应用了客户管理的 Cloud KMS (CMEK) 的任何表。这样做会产生额外的费用(根据 BigQuery 价格)。

如需跨区域复制表,请选择以下选项之一:

bq

  1. 在 Google Cloud 控制台中,激活 Cloud Shell。

    激活 Cloud Shell

    Cloud Shell 会话随即会在 Google Cloud 控制台的底部启动,并显示命令行提示符。Cloud Shell 是一个已安装 Google Cloud CLI 且已为当前项目设置值的 Shell 环境。该会话可能需要几秒钟时间来完成初始化。

  2. 运行 bq cp 命令

   bq cp \
   -f -n \
   SOURCE_PROJECT:SOURCE_DATASET.SOURCE_TABLE \
   DESTINATION_PROJECT:DESTINATION_DATASET.DESTINATION_TABLE
   

替换以下内容:

  • SOURCE_PROJECT:源项目 ID。如果源数据集属于非默认项目,请将项目 ID 添加到源数据集名称。

  • DESTINATION_PROJECT:目标项目 ID。如果目标数据集属于非默认项目,请将项目 ID 添加到目标数据集名称。

  • SOURCE_DATASET:来源数据集的名称。

  • DESTINATION_DATASET:目标数据集的名称。

  • SOURCE_TABLE:要复制的表。

  • DESTINATION_TABLE:目标数据集中表的名称。

    示例:

    如需将 mydataset_us.mytable 表从 us 多区域复制到 eu 多区域中的 mydataset_eu.mytable2 表,请输入以下命令。两个数据集均属于默认项目。

    bq cp --sync=false mydataset_us.mytable mydataset_eu.mytable2
    

    如需复制启用了 CMEK 的表,您可以使用 Cloud KMS 创建密钥并在 bq cp 命令中指定该密钥,或者使用配置了默认 CMEK 的目标数据集。以下示例在 bq cp 命令中指定目标 CMEK。

    bq cp ----destination_kms_key=projects/testing/locations/us/keyRings/us_key/cryptoKeys/eu_key mydataset_us.mytable mydataset_eu.mytable2
    

API

如需使用 API 跨区域复制表,请调用 jobs.insert 方法并配置一个表 copy 作业。

作业资源jobReference 部分的 location 属性中指定您的区域。

C#

试用此示例之前,请按照 BigQuery 快速入门:使用客户端库中的 C# 设置说明进行操作。如需了解详情,请参阅 BigQuery C# API 参考文档

如需向 BigQuery 进行身份验证,请设置应用默认凭据。 如需了解详情,请参阅为客户端库设置身份验证


using Google.Apis.Bigquery.v2.Data;
using Google.Cloud.BigQuery.V2;
using System;

public class BigQueryCopyTable
{
    public void CopyTable(
        string projectId = "your-project-id",
        string destinationDatasetId = "your_dataset_id"
    )
    {
        BigQueryClient client = BigQueryClient.Create(projectId);
        TableReference sourceTableRef = new TableReference()
        {
            TableId = "shakespeare",
            DatasetId = "samples",
            ProjectId = "bigquery-public-data"
        };
        TableReference destinationTableRef = client.GetTableReference(
            destinationDatasetId, "destination_table");
        BigQueryJob job = client.CreateCopyJob(
            sourceTableRef, destinationTableRef)
            .PollUntilCompleted() // Wait for the job to complete.
            .ThrowOnAnyError();

        // Retrieve destination table
        BigQueryTable destinationTable = client.GetTable(destinationTableRef);
        Console.WriteLine(
            $"Copied {destinationTable.Resource.NumRows} rows from table "
            + $"{sourceTableRef.DatasetId}.{sourceTableRef.TableId} "
            + $"to {destinationTable.FullyQualifiedId}."
        );
    }
}

Go

试用此示例之前,请按照 BigQuery 快速入门:使用客户端库中的 Go 设置说明进行操作。如需了解详情,请参阅 BigQuery Go API 参考文档

如需向 BigQuery 进行身份验证,请设置应用默认凭据。 如需了解详情,请参阅为客户端库设置身份验证

import (
	"context"
	"fmt"

	"cloud.google.com/go/bigquery"
)

// copyTable demonstrates copying a table from a source to a destination, and
// allowing the copy to overwrite existing data by using truncation.
func copyTable(projectID, datasetID, srcID, dstID string) error {
	// projectID := "my-project-id"
	// datasetID := "mydataset"
	// srcID := "sourcetable"
	// dstID := "destinationtable"
	ctx := context.Background()
	client, err := bigquery.NewClient(ctx, projectID)
	if err != nil {
		return fmt.Errorf("bigquery.NewClient: %v", err)
	}
	defer client.Close()

	dataset := client.Dataset(datasetID)
	copier := dataset.Table(dstID).CopierFrom(dataset.Table(srcID))
	copier.WriteDisposition = bigquery.WriteTruncate
	job, err := copier.Run(ctx)
	if err != nil {
		return err
	}
	status, err := job.Wait(ctx)
	if err != nil {
		return err
	}
	if err := status.Err(); err != nil {
		return err
	}
	return nil
}

Java

试用此示例之前,请按照 BigQuery 快速入门:使用客户端库中的 Java 设置说明进行操作。如需了解详情,请参阅 BigQuery Java API 参考文档

如需向 BigQuery 进行身份验证,请设置应用默认凭据。 如需了解详情,请参阅为客户端库设置身份验证

import com.google.cloud.bigquery.BigQuery;
import com.google.cloud.bigquery.BigQueryException;
import com.google.cloud.bigquery.BigQueryOptions;
import com.google.cloud.bigquery.CopyJobConfiguration;
import com.google.cloud.bigquery.Job;
import com.google.cloud.bigquery.JobInfo;
import com.google.cloud.bigquery.TableId;

public class CopyTable {

  public static void runCopyTable() {
    // TODO(developer): Replace these variables before running the sample.
    String destinationDatasetName = "MY_DESTINATION_DATASET_NAME";
    String destinationTableId = "MY_DESTINATION_TABLE_NAME";
    String sourceDatasetName = "MY_SOURCE_DATASET_NAME";
    String sourceTableId = "MY_SOURCE_TABLE_NAME";

    copyTable(sourceDatasetName, sourceTableId, destinationDatasetName, destinationTableId);
  }

  public static void copyTable(
      String sourceDatasetName,
      String sourceTableId,
      String destinationDatasetName,
      String destinationTableId) {
    try {
      // Initialize client that will be used to send requests. This client only needs to be created
      // once, and can be reused for multiple requests.
      BigQuery bigquery = BigQueryOptions.getDefaultInstance().getService();

      TableId sourceTable = TableId.of(sourceDatasetName, sourceTableId);
      TableId destinationTable = TableId.of(destinationDatasetName, destinationTableId);

      // For more information on CopyJobConfiguration see:
      // https://googleapis.dev/java/google-cloud-clients/latest/com/google/cloud/bigquery/JobConfiguration.html
      CopyJobConfiguration configuration =
          CopyJobConfiguration.newBuilder(destinationTable, sourceTable).build();

      // For more information on Job see:
      // https://googleapis.dev/java/google-cloud-clients/latest/index.html?com/google/cloud/bigquery/package-summary.html
      Job job = bigquery.create(JobInfo.of(configuration));

      // Blocks until this job completes its execution, either failing or succeeding.
      Job completedJob = job.waitFor();
      if (completedJob == null) {
        System.out.println("Job not executed since it no longer exists.");
        return;
      } else if (completedJob.getStatus().getError() != null) {
        System.out.println(
            "BigQuery was unable to copy table due to an error: \n" + job.getStatus().getError());
        return;
      }
      System.out.println("Table copied successfully.");
    } catch (BigQueryException | InterruptedException e) {
      System.out.println("Table copying job was interrupted. \n" + e.toString());
    }
  }
}

Node.js

试用此示例之前,请按照 BigQuery 快速入门:使用客户端库中的 Node.js 设置说明进行操作。如需了解详情,请参阅 BigQuery Node.js API 参考文档

如需向 BigQuery 进行身份验证,请设置应用默认凭据。 如需了解详情,请参阅为客户端库设置身份验证

// Import the Google Cloud client library and create a client
const {BigQuery} = require('@google-cloud/bigquery');
const bigquery = new BigQuery();

async function copyTable() {
  // Copies src_dataset:src_table to dest_dataset:dest_table.

  /**
   * TODO(developer): Uncomment the following lines before running the sample
   */
  // const srcDatasetId = "my_src_dataset";
  // const srcTableId = "my_src_table";
  // const destDatasetId = "my_dest_dataset";
  // const destTableId = "my_dest_table";

  // Copy the table contents into another table
  const [job] = await bigquery
    .dataset(srcDatasetId)
    .table(srcTableId)
    .copy(bigquery.dataset(destDatasetId).table(destTableId));

  console.log(`Job ${job.id} completed.`);

  // Check the job's status for errors
  const errors = job.status.errors;
  if (errors && errors.length > 0) {
    throw errors;
  }
}

PHP

试用此示例之前,请按照 BigQuery 快速入门:使用客户端库中的 PHP 设置说明进行操作。如需了解详情,请参阅 BigQuery PHP API 参考文档

如需向 BigQuery 进行身份验证,请设置应用默认凭据。 如需了解详情,请参阅为客户端库设置身份验证

use Google\Cloud\BigQuery\BigQueryClient;
use Google\Cloud\Core\ExponentialBackoff;

/** Uncomment and populate these variables in your code */
// $projectId = 'The Google project ID';
// $datasetId = 'The BigQuery dataset ID';
// $sourceTableId   = 'The BigQuery table ID to copy from';
// $destinationTableId = 'The BigQuery table ID to copy to';

$bigQuery = new BigQueryClient([
    'projectId' => $projectId,
]);
$dataset = $bigQuery->dataset($datasetId);
$sourceTable = $dataset->table($sourceTableId);
$destinationTable = $dataset->table($destinationTableId);
$copyConfig = $sourceTable->copy($destinationTable);
$job = $sourceTable->runJob($copyConfig);

// poll the job until it is complete
$backoff = new ExponentialBackoff(10);
$backoff->execute(function () use ($job) {
    print('Waiting for job to complete' . PHP_EOL);
    $job->reload();
    if (!$job->isComplete()) {
        throw new Exception('Job has not yet completed', 500);
    }
});
// check if the job has errors
if (isset($job->info()['status']['errorResult'])) {
    $error = $job->info()['status']['errorResult']['message'];
    printf('Error running job: %s' . PHP_EOL, $error);
} else {
    print('Table copied successfully' . PHP_EOL);
}

Python

试用此示例之前,请按照 BigQuery 快速入门:使用客户端库中的 Python 设置说明进行操作。如需了解详情,请参阅 BigQuery Python API 参考文档

如需向 BigQuery 进行身份验证,请设置应用默认凭据。 如需了解详情,请参阅为客户端库设置身份验证


from google.cloud import bigquery

# Construct a BigQuery client object.
client = bigquery.Client()

# TODO(developer): Set source_table_id to the ID of the original table.
# source_table_id = "your-project.source_dataset.source_table"

# TODO(developer): Set destination_table_id to the ID of the destination table.
# destination_table_id = "your-project.destination_dataset.destination_table"

job = client.copy_table(source_table_id, destination_table_id)
job.result()  # Wait for the job to complete.

print("A copy of the table created.")

限制

跨区域复制表存在以下限制:

  • 无法使用 Google Cloud 控制台或 TABLE COPY DDL 语句复制表。
  • 如果源表存在任何政策标记,则无法复制表。
  • 无法复制与表关联的 IAM 政策。您可以在复制完成后将相同的政策应用于目标位置。
  • 无法将多个源表复制到单个目标表。
  • 无法在附加模式下复制表。
  • 时间旅行信息不会复制到目标区域。
  • 表克隆会转换为目标区域的完整副本。

查看当前配额用量

您可以运行 INFORMATION_SCHEMA 查询来查看在指定时间段内运行的作业的元数据,从而查看查询、加载、提取或复制作业的当前使用情况。您可以将当前用量与配额限制进行比较,以确定特定类型的作业的配额用量。以下示例查询使用 INFORMATION_SCHEMA.JOBS 视图按项目列出查询、加载、提取和复制作业的数量:

SELECT
  sum(case  when job_type="QUERY" then 1 else 0 end) as QRY_CNT,
  sum(case  when job_type="LOAD" then 1 else 0 end) as LOAD_CNT,
  sum(case  when job_type="EXTRACT" then 1 else 0 end) as EXT_CNT,
  sum(case  when job_type="COPY" then 1 else 0 end) as CPY_CNT
FROM `region-eu`.INFORMATION_SCHEMA.JOBS_BY_PROJECT
WHERE date(creation_time)= CURRENT_DATE()

如需查看复制作业的配额限制,请参阅配额和限制 - 复制作业

删除表

您可以通过以下方式删除表:

  • 使用 Google Cloud 控制台。
  • 使用数据定义语言 (DDL) DROP TABLE 语句。
  • 使用 bq 命令行工具 bq rm 命令。
  • 调用 tables.delete API 方法。
  • 使用客户端库。

如需删除数据集中的所有表,请删除数据集

删除表时,该表中的所有数据也将一并删除。若要在指定的时间段后自动删除表,请设置数据集的默认表过期时间,或在创建表时设置到期时间。

删除表也会删除与此表关联的所有权限。重新创建已删除的表时,您还必须手动重新配置先前与之关联的任何访问权限

所需的角色

如需获得删除表所需的权限,请让您的管理员向您授予数据集的 Data Editor (roles/bigquery.dataEditor) IAM 角色。如需详细了解如何授予角色,请参阅管理访问权限

此预定义角色包含删除表所需的权限。如需查看所需的确切权限,请展开所需权限部分:

所需权限

您需要具备以下权限才能删除表:

  • bigquery.tables.delete
  • bigquery.tables.get

您也可以使用自定义角色或其他预定义角色来获取这些权限。

删除表

要删除表,请执行以下操作:

控制台

  1. 探索器面板中,展开您的项目和数据集,然后选择表。

  2. 在详细信息面板中,点击删除表

  3. 在对话框中输入 "delete",然后点击删除进行确认。

SQL

使用 DROP TABLE 语句。以下示例将删除名为 mytable 的表:

  1. 在 Google Cloud 控制台中,转到 BigQuery 页面。

    转到 BigQuery

  2. 在查询编辑器中,输入以下语句:

    DROP TABLE mydataset.mytable;
    

  3. 点击 运行

如需详细了解如何运行查询,请参阅运行交互式查询

bq

  1. 在 Google Cloud 控制台中,激活 Cloud Shell。

    激活 Cloud Shell

    Cloud Shell 会话随即会在 Google Cloud 控制台的底部启动,并显示命令行提示符。Cloud Shell 是一个已安装 Google Cloud CLI 且已为当前项目设置值的 Shell 环境。该会话可能需要几秒钟时间来完成初始化。

  2. 使用带有 --table 标志(或 -t 快捷方式)的 bq rm 命令删除表。使用 bq 命令行工具移除表时,必须确认该操作。您可以使用 --force 标志(或 -f 快捷方式)跳过确认。

    如果该表属于非默认项目中的数据集,请按以下格式将相应项目 ID 添加到数据集名称中:project_id:dataset

    bq rm \
    -f \
    -t \
    project_id:dataset.table
    

    替换以下内容:

    • project_id:您的项目 ID
    • dataset:包含该表的数据集的名称
    • table:要删除的表的名称

    示例:

    如需从 mydataset 数据集中删除 mytable 表,请输入以下命令。mydataset 数据集在默认项目中。

    bq rm -t mydataset.mytable
    

    如需从 mydataset 数据集中删除 mytable 表,请输入以下命令。mydataset 数据集在 myotherproject 项目中,不在默认项目中。

    bq rm -t myotherproject:mydataset.mytable
    

    如需从 mydataset 数据集中删除 mytable 表,请输入以下命令。mydataset 数据集在默认项目中。该命令使用 -f 快捷方式绕过确认。

    bq rm -f -t mydataset.mytable
    

API

调用 tables.delete API 方法并使用 tableId 参数指定要删除的表。

C#

试用此示例之前,请按照 BigQuery 快速入门:使用客户端库中的 C# 设置说明进行操作。如需了解详情,请参阅 BigQuery C# API 参考文档

如需向 BigQuery 进行身份验证,请设置应用默认凭据。 如需了解详情,请参阅为客户端库设置身份验证


using Google.Cloud.BigQuery.V2;
using System;

public class BigQueryDeleteTable
{
    public void DeleteTable(
        string projectId = "your-project-id",
        string datasetId = "your_dataset_id",
        string tableId = "your_table_id"
    )
    {
        BigQueryClient client = BigQueryClient.Create(projectId);
        client.DeleteTable(datasetId, tableId);
        Console.WriteLine($"Table {tableId} deleted.");
    }
}

Go

试用此示例之前,请按照 BigQuery 快速入门:使用客户端库中的 Go 设置说明进行操作。如需了解详情,请参阅 BigQuery Go API 参考文档

如需向 BigQuery 进行身份验证,请设置应用默认凭据。 如需了解详情,请参阅为客户端库设置身份验证

import (
	"context"
	"fmt"

	"cloud.google.com/go/bigquery"
)

// deleteTable demonstrates deletion of a BigQuery table.
func deleteTable(projectID, datasetID, tableID string) error {
	// projectID := "my-project-id"
	// datasetID := "mydataset"
	// tableID := "mytable"
	ctx := context.Background()
	client, err := bigquery.NewClient(ctx, projectID)
	if err != nil {
		return fmt.Errorf("bigquery.NewClient: %v", err)
	}
	defer client.Close()

	table := client.Dataset(datasetID).Table(tableID)
	if err := table.Delete(ctx); err != nil {
		return err
	}
	return nil
}

Java

试用此示例之前,请按照 BigQuery 快速入门:使用客户端库中的 Java 设置说明进行操作。如需了解详情,请参阅 BigQuery Java API 参考文档

如需向 BigQuery 进行身份验证,请设置应用默认凭据。 如需了解详情,请参阅为客户端库设置身份验证

import com.google.cloud.bigquery.BigQuery;
import com.google.cloud.bigquery.BigQueryException;
import com.google.cloud.bigquery.BigQueryOptions;
import com.google.cloud.bigquery.TableId;

public class DeleteTable {

  public static void runDeleteTable() {
    // TODO(developer): Replace these variables before running the sample.
    String datasetName = "MY_DATASET_NAME";
    String tableName = "MY_TABLE_NAME";
    deleteTable(datasetName, tableName);
  }

  public static void deleteTable(String datasetName, String tableName) {
    try {
      // Initialize client that will be used to send requests. This client only needs to be created
      // once, and can be reused for multiple requests.
      BigQuery bigquery = BigQueryOptions.getDefaultInstance().getService();
      boolean success = bigquery.delete(TableId.of(datasetName, tableName));
      if (success) {
        System.out.println("Table deleted successfully");
      } else {
        System.out.println("Table was not found");
      }
    } catch (BigQueryException e) {
      System.out.println("Table was not deleted. \n" + e.toString());
    }
  }
}

Node.js

试用此示例之前,请按照 BigQuery 快速入门:使用客户端库中的 Node.js 设置说明进行操作。如需了解详情,请参阅 BigQuery Node.js API 参考文档

如需向 BigQuery 进行身份验证,请设置应用默认凭据。 如需了解详情,请参阅为客户端库设置身份验证

// Import the Google Cloud client library
const {BigQuery} = require('@google-cloud/bigquery');
const bigquery = new BigQuery();

async function deleteTable() {
  // Deletes "my_table" from "my_dataset".

  /**
   * TODO(developer): Uncomment the following lines before running the sample.
   */
  // const datasetId = "my_dataset";
  // const tableId = "my_table";

  // Delete the table
  await bigquery
    .dataset(datasetId)
    .table(tableId)
    .delete();

  console.log(`Table ${tableId} deleted.`);
}

PHP

试用此示例之前,请按照 BigQuery 快速入门:使用客户端库中的 PHP 设置说明进行操作。如需了解详情,请参阅 BigQuery PHP API 参考文档

如需向 BigQuery 进行身份验证,请设置应用默认凭据。 如需了解详情,请参阅为客户端库设置身份验证

use Google\Cloud\BigQuery\BigQueryClient;

/** Uncomment and populate these variables in your code */
// $projectId = 'The Google project ID';
// $datasetId = 'The BigQuery dataset ID';
// $tableId = 'The BigQuery table ID';

$bigQuery = new BigQueryClient([
    'projectId' => $projectId,
]);
$dataset = $bigQuery->dataset($datasetId);
$table = $dataset->table($tableId);
$table->delete();
printf('Deleted table %s.%s' . PHP_EOL, $datasetId, $tableId);

Python

试用此示例之前,请按照 BigQuery 快速入门:使用客户端库中的 Python 设置说明进行操作。如需了解详情,请参阅 BigQuery Python API 参考文档

如需向 BigQuery 进行身份验证,请设置应用默认凭据。 如需了解详情,请参阅为客户端库设置身份验证


from google.cloud import bigquery

# Construct a BigQuery client object.
client = bigquery.Client()

# TODO(developer): Set table_id to the ID of the table to fetch.
# table_id = 'your-project.your_dataset.your_table'

# If the table does not exist, delete_table raises
# google.api_core.exceptions.NotFound unless not_found_ok is True.
client.delete_table(table_id, not_found_ok=True)  # Make an API request.
print("Deleted table '{}'.".format(table_id))

Ruby

试用此示例之前,请按照 BigQuery 快速入门:使用客户端库中的 Ruby 设置说明进行操作。如需了解详情,请参阅 BigQuery Ruby API 参考文档

如需向 BigQuery 进行身份验证,请设置应用默认凭据。 如需了解详情,请参阅为客户端库设置身份验证

require "google/cloud/bigquery"

def delete_table dataset_id = "my_dataset_id", table_id = "my_table_id"
  bigquery = Google::Cloud::Bigquery.new
  dataset  = bigquery.dataset dataset_id
  table    = dataset.table table_id

  table.delete

  puts "Table #{table_id} deleted."
end

恢复已删除的表

您可以在为数据集指定的时间旅行窗口内恢复已删除的表,包括显式删除和基于表过期的隐式删除。您可以配置时间旅行窗口

时间旅行窗口的持续时间可以为 2 到 7 天。时间旅行窗口过后,您无法使用任何方法(包括创建支持服务工单)恢复已删除的表。

恢复因过期而被删除的分区表时,您必须手动重新创建分区

从历史数据恢复表时,源表中的标记不会复制到目标表。

要恢复已删除但仍在时间旅行窗口内的表,您可以使用 @<time> 时间修饰符将该表复制到一个新表。如需复制表,您可以使用 bq 命令行工具或客户端库:

控制台

您无法使用 Google Cloud 控制台恢复删除的表。

bq

  1. 在 Google Cloud 控制台中,激活 Cloud Shell。

    激活 Cloud Shell

    Cloud Shell 会话随即会在 Google Cloud 控制台的底部启动,并显示命令行提示符。Cloud Shell 是一个已安装 Google Cloud CLI 且已为当前项目设置值的 Shell 环境。该会话可能需要几秒钟时间来完成初始化。

  2. 如需恢复表,请首先确定表存在时间的 UNIX 时间戳(以毫秒为单位)。您可以使用 Linux date 命令根据常规时间戳值生成 Unix 时间戳:

    date -d '2023-08-04 16:00:34.456789Z' +%s000
    
  3. 然后,使用 bq copy 命令和 @<time> 时间旅行修饰器执行表复制操作。

    例如,输入以下命令可将时间为 1418864998000mydataset.mytable 表复制到新表 mydataset.newtable

    bq cp mydataset.mytable@1418864998000 mydataset.newtable
    

    (可选)提供 --location 标志并将其值设置为您的位置

    您还可以指定相对偏移量。以下示例复制一小时前表的版本:

    bq cp mydataset.mytable@-3600000 mydataset.newtable
    

    如需了解详情,请参阅从某个时间点恢复表

Go

试用此示例之前,请按照 BigQuery 快速入门:使用客户端库中的 Go 设置说明进行操作。如需了解详情,请参阅 BigQuery Go API 参考文档

如需向 BigQuery 进行身份验证,请设置应用默认凭据。 如需了解详情,请参阅为客户端库设置身份验证

import (
	"context"
	"fmt"
	"time"

	"cloud.google.com/go/bigquery"
)

// deleteAndUndeleteTable demonstrates how to recover a deleted table by copying it from a point in time
// that predates the deletion event.
func deleteAndUndeleteTable(projectID, datasetID, tableID string) error {
	// projectID := "my-project-id"
	// datasetID := "mydataset"
	// tableID := "mytable"
	ctx := context.Background()
	client, err := bigquery.NewClient(ctx, projectID)
	if err != nil {
		return fmt.Errorf("bigquery.NewClient: %v", err)
	}
	defer client.Close()

	ds := client.Dataset(datasetID)
	if _, err := ds.Table(tableID).Metadata(ctx); err != nil {
		return err
	}
	// Record the current time.  We'll use this as the snapshot time
	// for recovering the table.
	snapTime := time.Now()

	// "Accidentally" delete the table.
	if err := client.Dataset(datasetID).Table(tableID).Delete(ctx); err != nil {
		return err
	}

	// Construct the restore-from tableID using a snapshot decorator.
	snapshotTableID := fmt.Sprintf("%s@%d", tableID, snapTime.UnixNano()/1e6)
	// Choose a new table ID for the recovered table data.
	recoverTableID := fmt.Sprintf("%s_recovered", tableID)

	// Construct and run a copy job.
	copier := ds.Table(recoverTableID).CopierFrom(ds.Table(snapshotTableID))
	copier.WriteDisposition = bigquery.WriteTruncate
	job, err := copier.Run(ctx)
	if err != nil {
		return err
	}
	status, err := job.Wait(ctx)
	if err != nil {
		return err
	}
	if err := status.Err(); err != nil {
		return err
	}

	ds.Table(recoverTableID).Delete(ctx)
	return nil
}

Java

试用此示例之前,请按照 BigQuery 快速入门:使用客户端库中的 Java 设置说明进行操作。如需了解详情,请参阅 BigQuery Java API 参考文档

如需向 BigQuery 进行身份验证,请设置应用默认凭据。 如需了解详情,请参阅为客户端库设置身份验证

import com.google.cloud.bigquery.BigQuery;
import com.google.cloud.bigquery.BigQueryException;
import com.google.cloud.bigquery.BigQueryOptions;
import com.google.cloud.bigquery.CopyJobConfiguration;
import com.google.cloud.bigquery.Job;
import com.google.cloud.bigquery.JobInfo;
import com.google.cloud.bigquery.TableId;

// Sample to undeleting a table
public class UndeleteTable {

  public static void runUndeleteTable() {
    // TODO(developer): Replace these variables before running the sample.
    String datasetName = "MY_DATASET_NAME";
    String tableName = "MY_TABLE_TABLE";
    String recoverTableName = "MY_RECOVER_TABLE_TABLE";
    undeleteTable(datasetName, tableName, recoverTableName);
  }

  public static void undeleteTable(String datasetName, String tableName, String recoverTableName) {
    try {
      // Initialize client that will be used to send requests. This client only needs to be created
      // once, and can be reused for multiple requests.
      BigQuery bigquery = BigQueryOptions.getDefaultInstance().getService();

      // "Accidentally" delete the table.
      bigquery.delete(TableId.of(datasetName, tableName));

      // Record the current time.  We'll use this as the snapshot time
      // for recovering the table.
      long snapTime = System.currentTimeMillis();

      // Construct the restore-from tableID using a snapshot decorator.
      String snapshotTableId = String.format("%s@%d", tableName, snapTime);

      // Construct and run a copy job.
      CopyJobConfiguration configuration =
          CopyJobConfiguration.newBuilder(
                  // Choose a new table ID for the recovered table data.
                  TableId.of(datasetName, recoverTableName),
                  TableId.of(datasetName, snapshotTableId))
              .build();

      Job job = bigquery.create(JobInfo.of(configuration));
      job = job.waitFor();
      if (job.isDone() && job.getStatus().getError() == null) {
        System.out.println("Undelete table recovered successfully.");
      } else {
        System.out.println(
            "BigQuery was unable to copy the table due to an error: \n"
                + job.getStatus().getError());
        return;
      }
    } catch (BigQueryException | InterruptedException e) {
      System.out.println("Table not found. \n" + e.toString());
    }
  }
}

Node.js

试用此示例之前,请按照 BigQuery 快速入门:使用客户端库中的 Node.js 设置说明进行操作。如需了解详情,请参阅 BigQuery Node.js API 参考文档

如需向 BigQuery 进行身份验证,请设置应用默认凭据。 如需了解详情,请参阅为客户端库设置身份验证

// Import the Google Cloud client library
const {BigQuery} = require('@google-cloud/bigquery');
const bigquery = new BigQuery();

async function undeleteTable() {
  // Undeletes "my_table_to_undelete" from "my_dataset".

  /**
   * TODO(developer): Uncomment the following lines before running the sample.
   */
  // const datasetId = "my_dataset";
  // const tableId = "my_table_to_undelete";
  // const recoveredTableId = "my_recovered_table";

  /**
   * TODO(developer): Choose an appropriate snapshot point as epoch milliseconds.
   * For this example, we choose the current time as we're about to delete the
   * table immediately afterwards.
   */
  const snapshotEpoch = Date.now();

  // Delete the table
  await bigquery
    .dataset(datasetId)
    .table(tableId)
    .delete();

  console.log(`Table ${tableId} deleted.`);

  // Construct the restore-from table ID using a snapshot decorator.
  const snapshotTableId = `${tableId}@${snapshotEpoch}`;

  // Construct and run a copy job.
  await bigquery
    .dataset(datasetId)
    .table(snapshotTableId)
    .copy(bigquery.dataset(datasetId).table(recoveredTableId));

  console.log(
    `Copied data from deleted table ${tableId} to ${recoveredTableId}`
  );
}

Python

试用此示例之前,请按照 BigQuery 快速入门:使用客户端库中的 Python 设置说明进行操作。如需了解详情,请参阅 BigQuery Python API 参考文档

如需向 BigQuery 进行身份验证,请设置应用默认凭据。 如需了解详情,请参阅为客户端库设置身份验证

import time

from google.cloud import bigquery

# Construct a BigQuery client object.
client = bigquery.Client()

# TODO(developer): Choose a table to recover.
# table_id = "your-project.your_dataset.your_table"

# TODO(developer): Choose a new table ID for the recovered table data.
# recovered_table_id = "your-project.your_dataset.your_table_recovered"

# TODO(developer): Choose an appropriate snapshot point as epoch
# milliseconds. For this example, we choose the current time as we're about
# to delete the table immediately afterwards.
snapshot_epoch = int(time.time() * 1000)

# ...

# "Accidentally" delete the table.
client.delete_table(table_id)  # Make an API request.

# Construct the restore-from table ID using a snapshot decorator.
snapshot_table_id = "{}@{}".format(table_id, snapshot_epoch)

# Construct and run a copy job.
job = client.copy_table(
    snapshot_table_id,
    recovered_table_id,
    # Must match the source and destination tables location.
    location="US",
)  # Make an API request.

job.result()  # Wait for the job to complete.

print(
    "Copied data from deleted table {} to {}".format(table_id, recovered_table_id)
)

如果您预计可能需要在时间旅行窗口允许的时间后恢复表,请创建该表的表快照。 如需了解详情,请参阅表快照

表安全性

如需控制对 BigQuery 中表的访问权限,请参阅表访问权限控制简介

后续步骤