Si has conectado un disco nuevo y vacío a tu VM, debes formatearlo y montarlo antes de poder usarlo. Si has adjuntado un disco que ya contiene datos, debes montar el disco para poder usarlo.
Antes de empezar
-
Si aún no lo has hecho, configura la autenticación.
La autenticación verifica tu identidad para acceder a Google Cloud servicios y APIs. Para ejecutar código o ejemplos desde un entorno de desarrollo local, puedes autenticarte en Compute Engine seleccionando una de las siguientes opciones:
Select the tab for how you plan to use the samples on this page:
Console
When you use the Google Cloud console to access Google Cloud services and APIs, you don't need to set up authentication.
gcloud
-
Instala Google Cloud CLI. Después de la instalación, inicializa la CLI de Google Cloud ejecutando el siguiente comando:
gcloud initSi utilizas un proveedor de identidades (IdP) externo, primero debes iniciar sesión en la CLI de gcloud con tu identidad federada.
- Set a default region and zone.
REST
Para usar las muestras de la API REST de esta página en un entorno de desarrollo local, debes usar las credenciales que proporciones a la CLI de gcloud.
Instala Google Cloud CLI. Después de la instalación, inicializa la CLI de Google Cloud ejecutando el siguiente comando:
gcloud initSi utilizas un proveedor de identidades (IdP) externo, primero debes iniciar sesión en la CLI de gcloud con tu identidad federada.
Para obtener más información, consulta el artículo Autenticarse para usar REST de la documentación sobre autenticación de Google Cloud .
Conéctate a la VM.
Ve a la página Instancias de VM.
Haz clic en el botón RDP situado junto a la VM que tiene adjunto el nuevo disco en blanco. El navegador abre una conexión RDP a la instancia.
Formatear y montar un disco que no sea de arranque en una VM de Windows
Usa la utilidad Administración de discos de Windows para formatear y montar el nuevo disco en una VM de Windows.
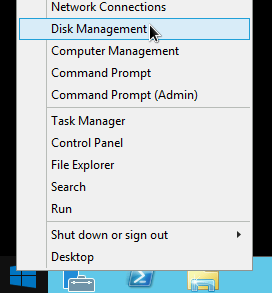
Haz clic con el botón derecho en el botón Inicio de Windows y selecciona Administración de discos.
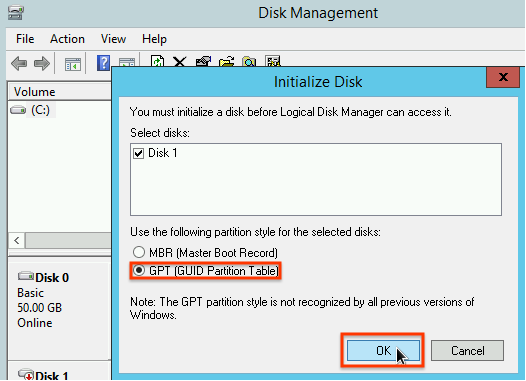
Administración de discos te pedirá que selecciones un esquema de particiones para el nuevo disco. Selecciona GPT y haz clic en Aceptar.
Una vez que se haya inicializado el disco, haz clic con el botón derecho en el espacio sin asignar y selecciona Nuevo volumen simple.

Sigue las instrucciones del Asistente para nuevo volumen simple para configurar el nuevo volumen. Puedes usar el formato de partición que quieras, pero en este ejemplo selecciona
NTFS. También puedes consultar la sección Realizar un formato rápido para acelerar el proceso de formato. También puede definir el tamaño del clúster en el campo Tamaño de unidad de asignación. El tamaño del clúster limita el tamaño máximo de la partición. Tenlo en cuenta si intentas cambiar el tamaño del disco persistente de zona y de esta partición más adelante.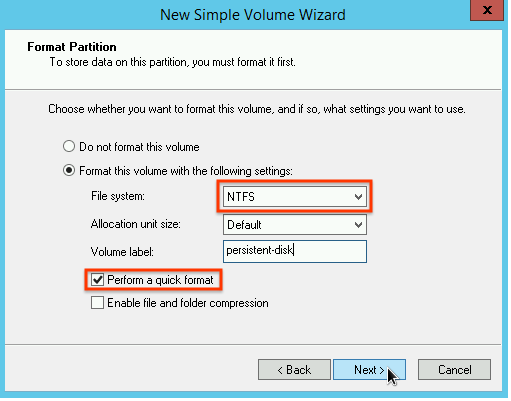
Una vez que hayas completado el asistente y el volumen esté formateado, consulta la columna
Statusde la lista de discos conectados para asegurarte de que el nuevo disco tiene el estadoHealthy.
Ahora puedes escribir archivos en el disco.
Siguientes pasos
- Consulta cómo cambiar el tamaño de tus discos persistentes.
- Consulta cómo crear copias de seguridad de tus discos con regularidad mediante capturas para evitar la pérdida de datos accidental.
A menos que se indique lo contrario, el contenido de esta página está sujeto a la licencia Reconocimiento 4.0 de Creative Commons y las muestras de código están sujetas a la licencia Apache 2.0. Para obtener más información, consulta las políticas del sitio web de Google Developers. Java es una marca registrada de Oracle o sus afiliados.
Última actualización: 2025-10-19 (UTC).
-