一般公開データセットに対してクエリを実行し、結果を可視化する
一般公開データセットに対してクエリを実行し、BigQuery で結果を可視化する方法を学習します。
このタスクを Google Cloud コンソールで直接行う際の順を追ったガイダンスについては、「ガイドを表示」をクリックしてください。
始める前に
- Sign in to your Google Cloud account. If you're new to Google Cloud, create an account to evaluate how our products perform in real-world scenarios. New customers also get $300 in free credits to run, test, and deploy workloads.
-
In the Google Cloud console, on the project selector page, select or create a Google Cloud project.
Roles required to select or create a project
- Select a project: Selecting a project doesn't require a specific IAM role—you can select any project that you've been granted a role on.
-
Create a project: To create a project, you need the Project Creator
(
roles/resourcemanager.projectCreator), which contains theresourcemanager.projects.createpermission. Learn how to grant roles.
-
Make sure that you have the following role or roles on the project: BigQuery Job User, Service Usage Admin
Check for the roles
-
In the Google Cloud console, go to the IAM page.
Go to IAM - Select the project.
-
In the Principal column, find all rows that identify you or a group that you're included in. To learn which groups you're included in, contact your administrator.
- For all rows that specify or include you, check the Role column to see whether the list of roles includes the required roles.
Grant the roles
-
In the Google Cloud console, go to the IAM page.
IAM に移動 - プロジェクトを選択します。
- [ アクセスを許可] をクリックします。
-
[新しいプリンシパル] フィールドに、ユーザー ID を入力します。 これは通常、Google アカウントのメールアドレスです。
- [ロールを選択] リストでロールを選択します。
- 追加のロールを付与するには、 [別のロールを追加] をクリックして各ロールを追加します。
- [保存] をクリックします。
-
-
Verify that billing is enabled for your Google Cloud project.
BigQuery API が有効になっている。
新しいプロジェクトを作成している場合は、BigQuery API が自動的に有効になっています。
Google Cloud コンソールで、[BigQuery] ページに移動します。
BigQuery Studio の [エクスプローラ] ペインで、[データを追加] をクリックします。
[データを追加] ダイアログの [フィルタ条件] ペインで、[
![[フィルタ条件] ページにある一般公開データセットのアイコン](https://cloud.google.com/static/bigquery/images/icon-public-dataset.png?authuser=0000&hl=ja) 一般公開データセット] をクリックします。
一般公開データセット] をクリックします。[Marketplace] ページの [Marketplace を検索] フィールドに「
NYC Citi Bike Trips」と入力して、検索結果を絞り込みます。検索結果で [NYC Citi Bike Trips] をクリックします。
[プロダクトの詳細] ページで、[データセットを表示] をクリックします。データセットに関する情報は、[詳細] タブで確認できます。
Google Cloud コンソールで、[BigQuery] ページを開きます。
[
SQL クエリ ] をクリックします。クエリエディタ で、次のクエリを入力します。SELECT start_station_name, start_station_latitude, start_station_longitude, ST_GEOGPOINT(start_station_longitude, start_station_latitude) AS geo_location, COUNT(*) AS num_trips FROM `bigquery-public-data.new_york.citibike_trips` GROUP BY 1, 2, 3 ORDER BY num_trips DESC LIMIT 100;クエリが有効な場合は、クエリによって処理されるデータの量とともにチェックマークが表示されます。クエリが無効な場合は、感嘆符がエラー メッセージとともに表示されます。

[
実行 ] をクリックします。最も人気のある駅が [クエリ結果 ] セクションに表示されます。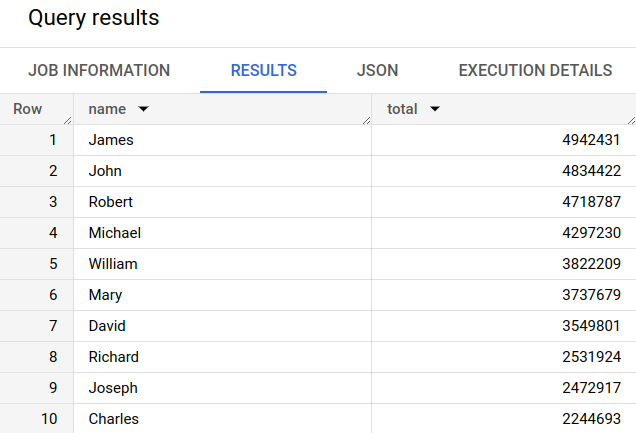
省略可: ジョブの期間とクエリジョブで処理されたデータの量を表示するには、[クエリ結果] セクションの [ジョブ情報] タブをクリックします。
[
ビジュアリゼーション ] タブに切り替えます。このタブでは、結果をすばやく可視化するための地図が生成されます。[可視化の構成] パネルで、次の操作を行います。
- [可視化タイプ] が [マップ] に設定されていることを確認します。
- [地域列] が [
geo_location] に設定されていることを確認します。 - [DATA 列] で [
num_trips] を選択します。 - [ズームイン] オプションを使用して、マンハッタンの地図を表示します。
![[ビジュアリゼーション] タブで生成されたヒートマップ](https://cloud.google.com/static/bigquery/images/query-visualization-ui.png?authuser=0000&hl=ja)
- In the Google Cloud console, go to the Manage resources page.
- In the project list, select the project that you want to delete, and then click Delete.
- In the dialog, type the project ID, and then click Shut down to delete the project.
- BigQuery サンドボックスについて学習する。
- BigQuery でデータセットを作成し、データを読み込み、テーブルに対してクエリを実行する方法を学習する。
このチュートリアルで使用する Google Cloud プロジェクトの課金を有効にしない場合は、BigQuery サンドボックスで一般公開データにクエリを実行します。BigQuery サンドボックスを使用すると、一部の BigQuery 機能を無料で使用して、BigQuery を試すことができます。
一般公開データセットを表示する
BigQuery の一般公開データセットは、デフォルトで BigQuery Studio の bigquery-public-data という名前のプロジェクトに表示されます。このチュートリアルでは、NYC Citi Bike Trips データセットに対してクエリを実行します。シティバイクは、マンハッタン、ブルックリン、クイーンズ、ジャージーシティの全域で 10,000 台の自転車と 600 のステーションを持つ、大規模な自転車シェア プログラムです。このデータセットには、2013 年 9 月にシティバイクが発足して以来のシティバイクの移動記録が含まれています。
一般公開データセットに対してクエリを実行する
次の手順では、citibike_trips テーブルに対してクエリを実行し、NYC Citi Bike Trips 一般公開データセットで最も人気のある Citi Bike ステーション 100 か所を特定します。このクエリは、ステーションの名前と場所、そのステーションから開始された乗車回数を取得します。
このクエリでは、ST_GEOGPOINT 関数を使用して、各ステーションの経度と緯度のパラメータからポイントを作成し、そのポイントを GEOGRAPHY 列に含めて返します。GEOGRAPHY 列は、統合された地理データビューアでヒートマップを生成するために使用されます。
クリーンアップ
このページで使用したリソースについて、 Google Cloud アカウントに課金されないようにするには、次の手順を実施します。
プロジェクトを削除する
BigQuery サンドボックスを使用して一般公開データセットをクエリした場合、そのプロジェクトでは課金は有効になっていないため、プロジェクトを削除する必要はありません。
課金をなくす最も簡単な方法は、チュートリアル用に作成したプロジェクトを削除することです。
プロジェクトを削除するには: