Query a public dataset and visualize the results using BigQuery Studio
Learn how to query a public dataset and visualize the results by using BigQuery Studio.
To follow step-by-step guidance for this task directly in the Google Cloud console, click Guide me:
Before you begin
- Sign in to your Google Cloud account. If you're new to Google Cloud, create an account to evaluate how our products perform in real-world scenarios. New customers also get $300 in free credits to run, test, and deploy workloads.
-
In the Google Cloud console, on the project selector page, select or create a Google Cloud project.
-
Make sure that you have the following role or roles on the project: BigQuery Job User, Service Usage Admin
Check for the roles
-
In the Google Cloud console, go to the IAM page.
Go to IAM - Select the project.
-
In the Principal column, find all rows that identify you or a group that you're included in. To learn which groups you're included in, contact your administrator.
- For all rows that specify or include you, check the Role column to see whether the list of roles includes the required roles.
Grant the roles
-
In the Google Cloud console, go to the IAM page.
Go to IAM - Select the project.
- Click Grant access.
-
In the New principals field, enter your user identifier. This is typically the email address for a Google Account.
- In the Select a role list, select a role.
- To grant additional roles, click Add another role and add each additional role.
- Click Save.
-
-
Verify that billing is enabled for your Google Cloud project.
Ensure that the BigQuery API is enabled.
If you created a new project, the BigQuery API is automatically enabled.
If you don't enable billing for the Google Cloud project that you use in this tutorial, then you query the public data in the BigQuery sandbox. The BigQuery sandbox lets you learn BigQuery with a limited set of BigQuery features at no charge.
View a public dataset
BigQuery public datasets are available by default in
BigQuery Studio in a project named bigquery-public-data. In this
tutorial you query the NYC Citi Bike Trips dataset. Citi Bike is a large bike
share program, with 10,000 bikes and 600 stations across Manhattan, Brooklyn,
Queens, and Jersey City. This dataset includes Citi Bike trips since Citi Bike
launched in September 2013.
In the Google Cloud console, go to the BigQuery Studio page.
In the Explorer pane, click Add data.
In the Add data dialog, in the Filter By pane, click
 Public datasets.
On the Marketplace page, in the Search Marketplace field, type
NYC
Citi Bike Trips
to narrow your search.In the search results, click NYC Citi Bike Trips.
On the Product details page, click View dataset. You can view information about the dataset on the Details tab.
Query a public dataset
In the following steps, you query the citibike_trips table to determine the
100 most popular Citi Bike stations in the NYC Citi Bike Trips public dataset.
The query retrieves the station's name and location, and the number of
trips that started at that station.
The query uses the ST_GEOGPOINT function
to create a point from each station's longitude and latitude parameters and
returns that point in a GEOGRAPHY column. The GEOGRAPHY column is used to
generate a heatmap in the integrated geography data viewer.
In the Google Cloud console, open the BigQuery Studio page.
Click
SQL query .In the
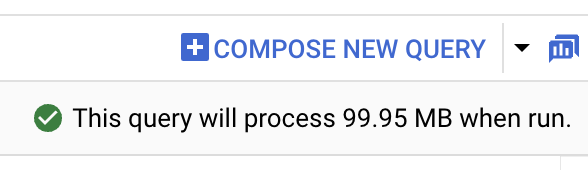
query editor , enter the following query:SELECT start_station_name, start_station_latitude, start_station_longitude, ST_GEOGPOINT(start_station_longitude, start_station_latitude) AS geo_location, COUNT(*) AS num_trips FROM `bigquery-public-data.new_york.citibike_trips` GROUP BY 1, 2, 3 ORDER BY num_trips DESC LIMIT 100;If the query is valid, then a check mark appears along with the amount of data that the query processes. If the query is invalid, then an exclamation point appears along with an error message.
Click
Run . The most popular stations are listed in theQuery results section.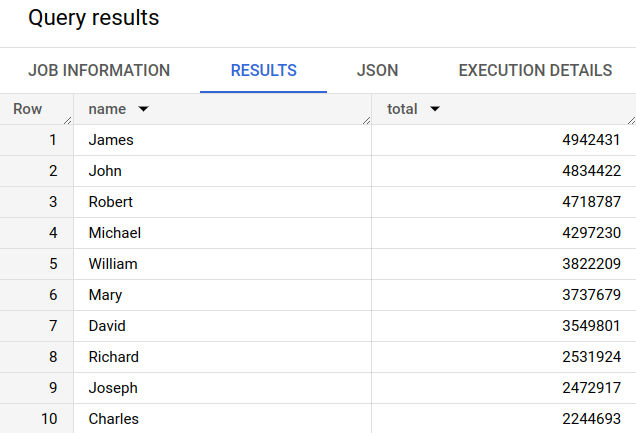
Optional: To display the duration of the job and the amount of data that the query job processed, click the Job information tab in the Query results section.
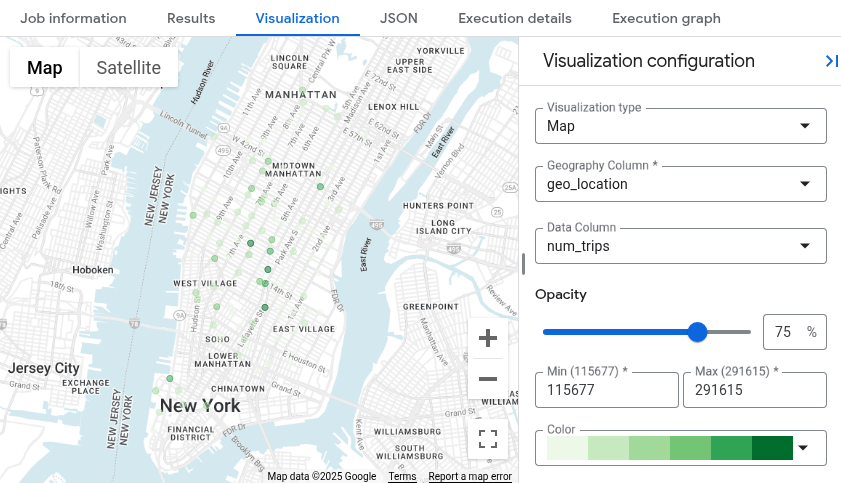
Switch to the
Visualization tab. This tab generates a map to quickly visualize your results.In the Visualization configuration panel:
- Verify that Visualization type is set to Map.
- Verify that Geography column is set to
geo_location. - For Data column, choose
num_trips. - Use the Zoom in option to reveal the map of Manhattan.
Clean up
To avoid incurring charges to your Google Cloud account for the resources used on this page, follow these steps.
Delete the project
If you used the BigQuery sandbox to query the public dataset, then billing is not enabled for your project, and you don't need to delete the project.
The easiest way to eliminate billing is to delete the project that you created for the tutorial.
To delete the project:
- In the Google Cloud console, go to the Manage resources page.
- In the project list, select the project that you want to delete, and then click Delete.
- In the dialog, type the project ID, and then click Shut down to delete the project.
What's next
- Learn about the BigQuery sandbox.
- Learn how to create a dataset, load data, and query tables in BigQuery Studio.