Mengontrol akses ke resource dengan IAM
Dokumen ini menjelaskan cara melihat, memberikan, dan mencabut kontrol akses untuk set data BigQuery dan untuk resource dalam set data: tabel, tampilan, dan rutin. Meskipun model juga merupakan resource tingkat set data, Anda tidak dapat memberikan akses ke setiap model menggunakan peran IAM.
Anda dapat memberikan akses ke resource Google Cloud menggunakan kebijakan izin, yang juga dikenal sebagai kebijakan Identity and Access Management (IAM), yang terpasang ke resource. Anda hanya dapat memasang satu kebijakan izin ke setiap resource. Kebijakan izin mengontrol akses ke resource itu sendiri, serta ke berbagai turunan resource tersebut yang mewarisi kebijakan izin.
Untuk mengetahui informasi selengkapnya tentang kebijakan izin, lihat Struktur kebijakan dalam dokumentasi IAM.
Dokumen ini mengasumsikan Anda telah memahami Identity and Access Management (IAM) di Google Cloud.
Batasan
- Daftar kontrol akses (ACL) rutin tidak disertakan dalam rutinitas yang direplikasi.
- Rutinitas di dalam set data eksternal atau tertaut tidak mendukung kontrol akses.
- Tabel di dalam set data eksternal atau tertaut tidak mendukung kontrol akses.
- Kontrol akses rutin tidak dapat ditetapkan dengan Terraform.
- Kontrol akses rutin tidak dapat ditetapkan dengan Google Cloud SDK.
- Kontrol akses rutin tidak dapat ditetapkan menggunakan bahasa kontrol data (DCL) BigQuery.
- Data Catalog tidak mendukung kontrol akses rutin. Jika pengguna telah memberikan akses tingkat rutin secara bersyarat, mereka tidak akan melihat rutinitasnya di panel samping BigQuery. Sebagai solusinya, berikan akses tingkat set data.
- Tampilan
INFORMATION_SCHEMA.OBJECT_PRIVILEGEStidak menampilkan kontrol akses untuk rutinitas.
Sebelum memulai
Memberikan peran Identity and Access Management (IAM) yang memberi izin yang diperlukan kepada pengguna untuk melakukan setiap tugas dalam dokumen ini.
Peran yang diperlukan
Untuk mendapatkan izin yang Anda perlukan untuk mengubah kebijakan IAM untuk resource, minta administrator Anda untuk memberi Anda peran IAM BigQuery Data Owner (roles/bigquery.dataOwner) di project.
Untuk mengetahui informasi selengkapnya tentang cara memberikan peran, lihat Mengelola akses ke project, folder, dan organisasi.
Peran bawaan ini berisi izin yang diperlukan untuk mengubah kebijakan IAM untuk resource. Untuk melihat izin yang benar-benar diperlukan, luaskan bagian Izin yang diperlukan:
Izin yang diperlukan
Izin berikut diperlukan guna mengubah kebijakan IAM untuk resource:
-
Untuk mendapatkan kebijakan akses set data:
bigquery.datasets.get -
Untuk menetapkan kebijakan akses set data:
bigquery.datasets.update -
Untuk mendapatkan kebijakan akses set data (khusus konsolGoogle Cloud ):
bigquery.datasets.getIamPolicy -
Untuk menetapkan kebijakan akses set data (khusus konsol):
bigquery.datasets.setIamPolicy -
Untuk mendapatkan kebijakan tabel atau tabel virtual:
bigquery.tables.getIamPolicy -
Untuk menyetel kebijakan tabel atau tabel virtual:
bigquery.tables.setIamPolicy -
Untuk mendapatkan kebijakan akses rutin:
bigquery.routines.getIamPolicy -
Untuk menetapkan kebijakan akses rutin:
bigquery.routines.setIamPolicy -
Untuk membuat alat bq atau tugas BigQuery SQL (opsional):
bigquery.jobs.create
Anda mungkin juga bisa mendapatkan izin ini dengan peran khusus atau peran bawaan lainnya.
Bekerja dengan kontrol akses set data
Anda dapat memberikan akses ke set data dengan memberikan akun utama IAM peran standar atau kustom yang menentukan apa yang dapat dilakukan akun utama dengan set data. Hal ini juga dikenal sebagai melampirkan kebijakan izin ke resource. Setelah memberikan akses, Anda dapat melihat kontrol akses set data, dan Anda dapat mencabut akses ke set data.
Memberikan akses ke set data
Anda tidak dapat memberikan akses ke set data saat membuatnya menggunakan UI web BigQuery atau
alat command line bq. Anda harus membuat set data terlebih dahulu, lalu memberikan akses ke set data tersebut.
API memungkinkan Anda memberikan akses selama pembuatan set data dengan memanggil
metode datasets.insert
dengan resource set data yang ditentukan.
Project adalah resource induk untuk set data, dan set data adalah resource induk untuk tabel dan tampilan, rutinitas, dan model. Saat Anda memberikan peran di level project, peran dan izinnya akan diwarisi oleh set data dan resource set data. Demikian pula, saat Anda memberikan peran di tingkat set data, peran dan izinnya diwarisi oleh resource dalam set data.
Anda dapat memberikan akses ke set data dengan memberikan izin peran IAM untuk mengakses set data atau dengan memberikan akses secara bersyarat menggunakan kondisi IAM. Untuk mengetahui informasi selengkapnya tentang pemberian akses bersyarat, lihat Mengontrol akses dengan Kondisi IAM.
Untuk memberikan akses peran IAM ke set data tanpa menggunakan kondisi, pilih salah satu opsi berikut:
Konsol
Buka halaman BigQuery.
Di panel Explorer, luaskan project Anda dan pilih set data untuk dibagikan.
Klik Sharing > Permissions.
Klik Add principal.
Di kolom New principals, masukkan akun utama.
Di daftar Select a role, pilih peran yang telah ditetapkan atau peran khusus.
Klik Save.
Untuk kembali ke info set data, klik Close.
SQL
Untuk memberikan akses ke set data kepada akun utama, gunakan pernyataan DCL GRANT:
Di Google Cloud konsol, buka halaman BigQuery.
Di editor kueri, masukkan pernyataan berikut:
GRANT `ROLE_LIST`
ON SCHEMA RESOURCE_NAME
TO "USER_LIST"
Ganti kode berikut:
ROLE_LIST: peran atau daftar peran yang dipisahkan koma yang ingin Anda berikanRESOURCE_NAME: nama set data yang aksesnya Anda berikanUSER_LIST: daftar pengguna yang dipisahkan koma yang diberi peranUntuk mengetahui daftar format yang valid, lihat
user_list.
Klik Run.
Untuk mengetahui informasi selengkapnya tentang cara menjalankan kueri, lihat artikel Menjalankan kueri interaktif.
Contoh berikut memberikan peran BigQuery Data Viewer kepada myDataset:
GRANT `roles/bigquery.dataViewer`
ON SCHEMA `myProject`.myDataset
TO "user:user@example.com", "user:user2@example.com"
bq
-
In the Google Cloud console, activate Cloud Shell.
At the bottom of the Google Cloud console, a Cloud Shell session starts and displays a command-line prompt. Cloud Shell is a shell environment with the Google Cloud CLI already installed and with values already set for your current project. It can take a few seconds for the session to initialize.
Untuk menulis informasi set data yang ada (termasuk kontrol akses) ke file JSON, gunakan perintah
bq show:bq show \ --format=prettyjson \ PROJECT_ID:DATASET > PATH_TO_FILE
Ganti kode berikut:
- PROJECT_ID: project ID Anda
- DATASET: nama set data Anda
- PATH_TO_FILE: jalur ke file JSON di komputer lokal Anda
Buat perubahan pada bagian
accesspada file JSON. Anda dapat menambahkan ke salah satu entrispecialGroup:projectOwners,projectWriters,projectReaders, danallAuthenticatedUsers. Anda juga dapat menambahkan salah satu dari:userByEmail,groupByEmail, dandomain.Misalnya, bagian
accesspada file JSON set data akan terlihat seperti berikut:{ "access": [ { "role": "READER", "specialGroup": "projectReaders" }, { "role": "WRITER", "specialGroup": "projectWriters" }, { "role": "OWNER", "specialGroup": "projectOwners" }, { "role": "READER", "specialGroup": "allAuthenticatedUsers" }, { "role": "READER", "domain": "domain_name" }, { "role": "WRITER", "userByEmail": "user_email" }, { "role": "READER", "groupByEmail": "group_email" } ], ... }
Setelah pengeditan selesai, gunakan perintah
bq updatedan sertakan file JSON menggunakan flag--source. Jika set data berada dalam project selain project default Anda, tambahkan project ID ke nama set data dalam format berikut:PROJECT_ID:DATASET.bq update
--source PATH_TO_FILE
PROJECT_ID:DATASETUntuk memverifikasi perubahan kontrol akses, gunakan kembali perintah
bq showtanpa perlu menulis informasi tersebut ke file:bq show --format=prettyjson PROJECT_ID:DATASET
- Luncurkan Cloud Shell.
-
Tetapkan project default Google Cloud tempat Anda ingin menerapkan konfigurasi Terraform.
Anda hanya perlu menjalankan perintah ini sekali per project, dan dapat dijalankan di direktori mana pun.
export GOOGLE_CLOUD_PROJECT=PROJECT_ID
Variabel lingkungan akan diganti jika Anda menetapkan nilai eksplisit dalam file konfigurasi Terraform.
-
Di Cloud Shell, buat direktori dan file baru di dalam direktori tersebut. Nama file harus memiliki
ekstensi
.tf—misalnyamain.tf. Dalam tutorial ini, file ini disebut sebagaimain.tf.mkdir DIRECTORY && cd DIRECTORY && touch main.tf
-
Jika mengikuti tutorial, Anda dapat menyalin kode contoh di setiap bagian atau langkah.
Salin kode contoh ke dalam
main.tfyang baru dibuat.Atau, salin kode dari GitHub. Tindakan ini direkomendasikan jika cuplikan Terraform adalah bagian dari solusi menyeluruh.
- Tinjau dan ubah contoh parameter untuk diterapkan pada lingkungan Anda.
- Simpan perubahan Anda.
-
Lakukan inisialisasi Terraform. Anda hanya perlu melakukan ini sekali per direktori.
terraform init
Secara opsional, untuk menggunakan versi penyedia Google terbaru, sertakan opsi
-upgrade:terraform init -upgrade
-
Tinjau konfigurasi dan pastikan resource yang akan dibuat atau
diupdate oleh Terraform sesuai yang Anda inginkan:
terraform plan
Koreksi konfigurasi jika diperlukan.
-
Terapkan konfigurasi Terraform dengan menjalankan perintah berikut dan memasukkan
yespada prompt:terraform apply
Tunggu hingga Terraform menampilkan pesan "Apply complete!".
- Buka Google Cloud project Anda untuk melihat hasilnya. Di konsol Google Cloud , buka resource Anda di UI untuk memastikan bahwa Terraform telah membuat atau mengupdatenya.
Terraform
Gunakan resource google_bigquery_dataset_iam untuk memperbarui akses ke set data.
Menetapkan kebijakan akses untuk set data
Contoh berikut menunjukkan cara menggunakan
resource google_bigquery_dataset_iam_policy
untuk menetapkan kebijakan IAM untuk
set data mydataset. Tindakan ini akan menggantikan kebijakan apa pun yang sudah ada dan telah dilampirkan ke set data:
# This file sets the IAM policy for the dataset created by
# https://github.com/terraform-google-modules/terraform-docs-samples/blob/main/bigquery/bigquery_create_dataset/main.tf.
# You must place it in the same local directory as that main.tf file,
# and you must have already applied that main.tf file to create
# the "default" dataset resource with a dataset_id of "mydataset".

data "google_iam_policy" "iam_policy" {
  binding {
    role = "roles/bigquery.admin"
    members = [
      "user:user@example.com",
    ]
  }
  binding {
    role = "roles/bigquery.dataOwner"
    members = [
      "group:data.admin@example.com",
    ]
  }
  binding {
    role = "roles/bigquery.dataEditor"
    members = [
      "serviceAccount:bqcx-1234567891011-12a3@gcp-sa-bigquery-condel.iam.gserviceaccount.com",
    ]
  }
}

resource "google_bigquery_dataset_iam_policy" "dataset_iam_policy" {
  dataset_id  = google_bigquery_dataset.default.dataset_id
  policy_data = data.google_iam_policy.iam_policy.policy_data
}
Menetapkan keanggotaan peran untuk set data
Contoh berikut menunjukkan cara menggunakan
resource google_bigquery_dataset_iam_binding
untuk menetapkan keanggotaan dalam peran tertentu untuk set data mydataset. Tindakan ini akan menggantikan keanggotaan yang ada dalam peran tersebut.
Peran lain dalam kebijakan IAM untuk set data dipertahankan:
# This file sets membership in an IAM role for the dataset created by
# https://github.com/terraform-google-modules/terraform-docs-samples/blob/main/bigquery/bigquery_create_dataset/main.tf.
# You must place it in the same local directory as that main.tf file,
# and you must have already applied that main.tf file to create
# the "default" dataset resource with a dataset_id of "mydataset".

resource "google_bigquery_dataset_iam_binding" "dataset_iam_binding" {
  dataset_id = google_bigquery_dataset.default.dataset_id
  role       = "roles/bigquery.jobUser"

  members = [
    "user:user@example.com",
    "group:group@example.com"
  ]
}
Menetapkan keanggotaan peran untuk satu akun utama
Contoh berikut menunjukkan cara menggunakan
resource google_bigquery_dataset_iam_member
untuk memperbarui kebijakan IAM untuk set data mydataset guna memberikan peran kepada satu akun utama. Memperbarui kebijakan IAM ini tidak memengaruhi akses untuk akun utama lain yang telah diberi peran tersebut untuk set data.
# This file adds a member to an IAM role for the dataset created by
# https://github.com/terraform-google-modules/terraform-docs-samples/blob/main/bigquery/bigquery_create_dataset/main.tf.
# You must place it in the same local directory as that main.tf file,
# and you must have already applied that main.tf file to create
# the "default" dataset resource with a dataset_id of "mydataset".

resource "google_bigquery_dataset_iam_member" "dataset_iam_member" {
  dataset_id = google_bigquery_dataset.default.dataset_id
  role       = "roles/bigquery.user"
  member     = "user:user@example.com"
}
Untuk menerapkan konfigurasi Terraform di project Google Cloud , selesaikan langkah-langkah di bagian berikut.
Menyiapkan Cloud Shell
Menyiapkan direktori
Setiap file konfigurasi Terraform harus memiliki direktorinya sendiri (juga disebut modul root).
Menerapkan perubahan
API
Untuk menerapkan kontrol akses saat set data dibuat, panggil metode datasets.insert dengan resource set data yang ditentukan.
Untuk memperbarui kontrol akses, panggil
metode datasets.patch dan
gunakan properti access di resource Dataset.
Karena metode datasets.update menggantikan seluruh resource set data, datasets.patch adalah metode yang lebih disukai untuk memperbarui kontrol akses.
Go
Sebelum mencoba contoh ini, ikuti petunjuk penyiapan Go di Panduan memulai BigQuery menggunakan library klien. Untuk mengetahui informasi selengkapnya, lihat Dokumentasi referensi BigQuery Go API.
Untuk melakukan autentikasi ke BigQuery, siapkan Kredensial Default Aplikasi. Untuk mengetahui informasi selengkapnya, lihat Menyiapkan autentikasi untuk library klien.
Tetapkan daftar akses baru dengan menambahkan entri baru ke daftar yang ada dengan jenisDatasetMetadataToUpdate
. Kemudian, panggil
fungsi dataset.Update() untuk memperbarui properti.
Java
Sebelum mencoba contoh ini, ikuti petunjuk penyiapan Java di Panduan memulai BigQuery menggunakan library klien. Untuk mengetahui informasi selengkapnya, lihat Dokumentasi referensi BigQuery Java API.
Untuk melakukan autentikasi ke BigQuery, siapkan Kredensial Default Aplikasi. Untuk mengetahui informasi selengkapnya, lihat Menyiapkan autentikasi untuk library klien.
Node.js
Sebelum mencoba contoh ini, ikuti petunjuk penyiapan Node.js di Panduan memulai BigQuery menggunakan library klien. Untuk mengetahui informasi selengkapnya, lihat Dokumentasi referensi BigQuery Node.js API.
Untuk melakukan autentikasi ke BigQuery, siapkan Kredensial Default Aplikasi. Untuk mengetahui informasi selengkapnya, lihat Menyiapkan autentikasi untuk library klien.
Tetapkan daftar akses baru dengan menambahkan entri baru ke daftar yang ada menggunakan metode Dataset#metadata. Kemudian, panggil fungsi Dataset#setMetadata() untuk memperbarui properti.Python
Sebelum mencoba contoh ini, ikuti petunjuk penyiapan Python di Panduan memulai BigQuery menggunakan library klien. Untuk mengetahui informasi selengkapnya, lihat Dokumentasi referensi BigQuery Python API.
Untuk melakukan autentikasi ke BigQuery, siapkan Kredensial Default Aplikasi. Untuk mengetahui informasi selengkapnya, lihat Menyiapkan autentikasi untuk library klien.
Tetapkan propertidataset.access_entries
dengan kontrol akses untuk set data. Kemudian, panggil
fungsi client.update_dataset() untuk memperbarui properti.
Peran bawaan yang memberikan akses ke set data
Anda dapat memberikan akses ke set data untuk peran bawaan IAM berikut.
| Peran | Deskripsi |
|---|---|
BigQuery Data Owner
(roles/bigquery.dataOwner) |
Jika diberikan pada set data, peran ini memberikan izin berikut:
|
BigQuery Data Editor
(roles/bigquery.dataEditor) |
Jika diberikan pada set data, peran ini memberikan izin berikut:
|
BigQuery Data Viewer
(roles/bigquery.dataViewer) |
Jika diberikan pada set data, peran ini memberikan izin berikut:
|
BigQuery Metadata Viewer
(roles/bigquery.metadataViewer) |
Jika diberikan pada set data, peran ini memberikan izin berikut:
|
Izin set data
Sebagian besar izin yang diawali dengan bigquery.datasets berlaku di tingkat set data.
bigquery.datasets.create tidak. Untuk membuat set data, izin bigquery.datasets.create harus diberikan ke peran di penampung induk–project.
Tabel berikut mencantumkan semua izin untuk set data dan resource tingkat terendah yang dapat diterapkan izinnya.
| Izin | Resource | Tindakan |
|---|---|---|
bigquery.datasets.create |
Project | Buat set data baru dalam project. |
bigquery.datasets.get |
Set data | Mendapatkan metadata dan kontrol akses untuk set data. Melihat izin di
konsol juga memerlukan
izin bigquery.datasets.getIamPolicy. |
bigquery.datasets.getIamPolicy |
Set data | Diperlukan oleh konsol untuk memberikan izin kepada pengguna guna mendapatkan kontrol akses
set data. Gagal terbuka. Konsol juga memerlukan
izin bigquery.datasets.get untuk melihat set data. |
bigquery.datasets.update |
Set data | Perbarui metadata dan kontrol akses untuk set data. Memperbarui kontrol akses di konsol juga memerlukan izin bigquery.datasets.setIamPolicy.
|
bigquery.datasets.setIamPolicy |
Set data | Diperlukan oleh konsol untuk memberikan izin kepada pengguna untuk menyetel
kontrol akses set data. Gagal terbuka. Konsol juga memerlukan
izin bigquery.datasets.update untuk memperbarui set data. |
bigquery.datasets.delete |
Set data | Menghapus set data. |
bigquery.datasets.createTagBinding |
Set data | Pasang tag ke set data. |
bigquery.datasets.deleteTagBinding |
Set data | Melepaskan tag dari set data. |
bigquery.datasets.listTagBindings |
Set data | Mencantumkan tag untuk set data. |
bigquery.datasets.listEffectiveTags |
Set data | Mencantumkan tag efektif (diterapkan dan diwariskan) untuk set data. |
bigquery.datasets.link |
Set data | Buat set data tertaut. |
bigquery.datasets.listSharedDatasetUsage |
Project | Mencantumkan statistik penggunaan set data bersama untuk set data yang dapat Anda akses
dalam project. Izin ini diperlukan untuk membuat kueri tampilan
INFORMATION_SCHEMA.SHARED_DATASET_USAGE. |
Melihat kontrol akses untuk set data
Anda dapat melihat kontrol akses yang ditetapkan secara eksplisit untuk set data dengan memilih salah satu opsi berikut. Untuk melihat peran yang diwariskan, untuk set data, gunakan UI web BigQuery.
Konsol
Buka halaman BigQuery.
Di panel Explorer, luaskan project Anda dan pilih set data.
Klik Sharing > Permissions.
Kontrol akses set data akan muncul di panel Dataset Permissions.
bq
-
In the Google Cloud console, activate Cloud Shell.
At the bottom of the Google Cloud console, a Cloud Shell session starts and displays a command-line prompt. Cloud Shell is a shell environment with the Google Cloud CLI already installed and with values already set for your current project. It can take a few seconds for the session to initialize.
Untuk mendapatkan kebijakan yang ada dan menghasilkannya ke file lokal di JSON, gunakan perintah
bq showdi Cloud Shell:bq show \ --format=prettyjson \ PROJECT_ID:DATASET > PATH_TO_FILE
Ganti kode berikut:
- PROJECT_ID: project ID Anda
- DATASET: nama set data Anda
- PATH_TO_FILE: jalur ke file JSON di komputer lokal Anda
Di Google Cloud konsol, buka halaman BigQuery.
Di editor kueri, masukkan pernyataan berikut:
SELECT
COLUMN_LIST
FROM
  PROJECT_ID.`region-REGION`.INFORMATION_SCHEMA.OBJECT_PRIVILEGES
WHERE
object_name = "DATASET";
Ganti kode berikut:
- COLUMN_LIST: daftar kolom yang dipisahkan koma dari
tampilan
INFORMATION_SCHEMA.OBJECT_PRIVILEGES. - PROJECT_ID: project ID Anda
- REGION: penentu region.
- DATASET: nama set data di project Anda
- COLUMN_LIST: daftar kolom yang dipisahkan koma dari
tampilan
Klik Run.
SQL
Buat kueri tampilan INFORMATION_SCHEMA.OBJECT_PRIVILEGES.
Kueri untuk mengambil kontrol akses bagi set data harus menentukan
object_name.
Untuk mengetahui informasi selengkapnya tentang cara menjalankan kueri, lihat artikel Menjalankan kueri interaktif.
Contoh:
Kueri ini mendapatkan kontrol akses untuk mydataset.
SELECT
object_name, privilege_type, grantee
FROM
my_project.`region-us`.INFORMATION_SCHEMA.OBJECT_PRIVILEGES
WHERE
object_name = "mydataset";
Outputnya akan terlihat seperti berikut ini:
+------------------+-----------------------------+-------------------------+
|   object_name    |  privilege_type             | grantee                 |
+------------------+-----------------------------+-------------------------+
| mydataset        | roles/bigquery.dataOwner    | projectOwner:myproject  |
| mydataset        | roles/bigquery.dataViwer    | user:user@example.com   |
+------------------+-----------------------------+-------------------------+
API
Untuk melihat kontrol akses set data, panggil metode
datasets.get
dengan
resource dataset yang ditentukan.
Kontrol akses muncul di properti access dari resource dataset.
Go
Sebelum mencoba contoh ini, ikuti petunjuk penyiapan Go di Panduan memulai BigQuery menggunakan library klien. Untuk mengetahui informasi selengkapnya, lihat Dokumentasi referensi BigQuery Go API.
Untuk melakukan autentikasi ke BigQuery, siapkan Kredensial Default Aplikasi. Untuk mengetahui informasi selengkapnya, lihat Menyiapkan autentikasi untuk library klien.
Panggil fungsiclient.Dataset().Metadata(). Kebijakan akses tersedia di properti Access.
Java
Sebelum mencoba contoh ini, ikuti petunjuk penyiapan Java di Panduan memulai BigQuery menggunakan library klien. Untuk mengetahui informasi selengkapnya, lihat Dokumentasi referensi BigQuery Java API.
Untuk melakukan autentikasi ke BigQuery, siapkan Kredensial Default Aplikasi. Untuk mengetahui informasi selengkapnya, lihat Menyiapkan autentikasi untuk library klien.
Node.js
Sebelum mencoba contoh ini, ikuti petunjuk penyiapan Node.js di Panduan memulai BigQuery menggunakan library klien. Untuk mengetahui informasi selengkapnya, lihat Dokumentasi referensi BigQuery Node.js API.
Untuk melakukan autentikasi ke BigQuery, siapkan Kredensial Default Aplikasi. Untuk mengetahui informasi selengkapnya, lihat Menyiapkan autentikasi untuk library klien.
Ambil metadata set data menggunakan fungsiDataset#getMetadata().
Kebijakan akses tersedia di properti akses objek metadata yang dihasilkan.
Python
Sebelum mencoba contoh ini, ikuti petunjuk penyiapan Python di Panduan memulai BigQuery menggunakan library klien. Untuk mengetahui informasi selengkapnya, lihat Dokumentasi referensi BigQuery Python API.
Untuk melakukan autentikasi ke BigQuery, siapkan Kredensial Default Aplikasi. Untuk mengetahui informasi selengkapnya, lihat Menyiapkan autentikasi untuk library klien.
Panggil fungsiclient.get_dataset().
Kebijakan akses tersedia di
properti dataset.access_entries.
Mencabut akses ke set data
Untuk mencabut akses ke set data, pilih salah satu opsi berikut:
Konsol
Buka halaman BigQuery.
Di panel Explorer, luaskan project Anda dan pilih set data.
Di panel detail, klik Sharing > Permissions.
Pada dialog Dataset Permissions, luaskan akun utama yang aksesnya ingin Anda cabut.
Klik Remove principal.
Pada dialog Hapus peran dari akun utama?, klik Hapus.
Untuk kembali ke detail set data, klik Close.
SQL
Untuk menghapus akses akun utama ke set data, gunakan
pernyataan DCL REVOKE:
Di Google Cloud konsol, buka halaman BigQuery.
Di editor kueri, masukkan pernyataan berikut:
REVOKE `ROLE_LIST`
ON SCHEMA RESOURCE_NAME
FROM "USER_LIST"
Ganti kode berikut:
ROLE_LIST: peran atau daftar peran yang dipisahkan koma yang ingin Anda cabutRESOURCE_NAME: nama resource yang izinnya ingin Anda cabutUSER_LIST: daftar pengguna yang dipisahkan koma yang perannya akan dicabutUntuk mengetahui daftar format yang valid, lihat
user_list.
Klik Run.
Untuk mengetahui informasi selengkapnya tentang cara menjalankan kueri, lihat artikel Menjalankan kueri interaktif.
Contoh berikut mencabut peran BigQuery Data Owner dari myDataset:
REVOKE `roles/bigquery.dataOwner`
ON SCHEMA `myProject`.myDataset
FROM "group:group@example.com", "serviceAccount:user@test-project.iam.gserviceaccount.com"
bq
-
In the Google Cloud console, activate Cloud Shell.
At the bottom of the Google Cloud console, a Cloud Shell session starts and displays a command-line prompt. Cloud Shell is a shell environment with the Google Cloud CLI already installed and with values already set for your current project. It can take a few seconds for the session to initialize.
Untuk menulis informasi set data yang ada (termasuk kontrol akses) ke file JSON, gunakan perintah
bq show:bq show \ --format=prettyjson \ PROJECT_ID:DATASET > PATH_TO_FILE
Ganti kode berikut:
- PROJECT_ID: project ID Anda
- DATASET: nama set data Anda
- PATH_TO_FILE: jalur ke file JSON di komputer lokal Anda
Buat perubahan pada bagian
accesspada file JSON. Anda dapat menghapus salah satu entrispecialGroup:projectOwners,projectWriters,projectReaders, danallAuthenticatedUsers. Anda juga dapat menghapus salah satu dari:userByEmail,groupByEmail, dandomain.Misalnya, bagian
accesspada file JSON set data akan terlihat seperti berikut:{ "access": [ { "role": "READER", "specialGroup": "projectReaders" }, { "role": "WRITER", "specialGroup": "projectWriters" }, { "role": "OWNER", "specialGroup": "projectOwners" }, { "role": "READER", "specialGroup": "allAuthenticatedUsers" }, { "role": "READER", "domain": "domain_name" }, { "role": "WRITER", "userByEmail": "user_email" }, { "role": "READER", "groupByEmail": "group_email" } ], ... }
Setelah pengeditan selesai, gunakan perintah
bq updatedan sertakan file JSON menggunakan flag--source. Jika set data berada dalam project selain project default Anda, tambahkan project ID ke nama set data dalam format berikut:PROJECT_ID:DATASET.bq update
--source PATH_TO_FILE
PROJECT_ID:DATASETUntuk memverifikasi perubahan kontrol akses Anda, gunakan perintah
showtanpa perlu menulis informasi tersebut ke file:bq show --format=prettyjson PROJECT_ID:DATASET
API
Panggil metode datasets.patch
dan gunakan properti access di resource Dataset untuk memperbarui kontrol akses.
Karena metode datasets.update menggantikan seluruh resource set data, datasets.patch adalah metode yang lebih disukai untuk memperbarui kontrol akses.
Go
Sebelum mencoba contoh ini, ikuti petunjuk penyiapan Go di Panduan memulai BigQuery menggunakan library klien. Untuk mengetahui informasi selengkapnya, lihat Dokumentasi referensi BigQuery Go API.
Untuk melakukan autentikasi ke BigQuery, siapkan Kredensial Default Aplikasi. Untuk mengetahui informasi selengkapnya, lihat Menyiapkan autentikasi untuk library klien.
Tetapkan daftar akses baru dengan menghapus entri dari daftar yang ada dengan jenisDatasetMetadataToUpdate
. Kemudian, panggil
fungsi dataset.Update() untuk memperbarui properti.
Java
Sebelum mencoba contoh ini, ikuti petunjuk penyiapan Java di Panduan memulai BigQuery menggunakan library klien. Untuk mengetahui informasi selengkapnya, lihat Dokumentasi referensi BigQuery Java API.
Untuk melakukan autentikasi ke BigQuery, siapkan Kredensial Default Aplikasi. Untuk mengetahui informasi selengkapnya, lihat Menyiapkan autentikasi untuk library klien.
Node.js
Sebelum mencoba contoh ini, ikuti petunjuk penyiapan Node.js di Panduan memulai BigQuery menggunakan library klien. Untuk mengetahui informasi selengkapnya, lihat Dokumentasi referensi BigQuery Node.js API.
Untuk melakukan autentikasi ke BigQuery, siapkan Kredensial Default Aplikasi. Untuk mengetahui informasi selengkapnya, lihat Menyiapkan autentikasi untuk library klien.
Perbarui daftar akses set data dengan menghapus entri yang ditentukan dari daftar yang ada menggunakan metodeDataset#get()
untuk mengambil metadata saat ini. Ubah properti akses untuk mengecualikan entity yang diinginkan, lalu panggil fungsi
Dataset#setMetadata()
untuk menerapkan daftar akses yang diperbarui.
Python
Sebelum mencoba contoh ini, ikuti petunjuk penyiapan Python di Panduan memulai BigQuery menggunakan library klien. Untuk mengetahui informasi selengkapnya, lihat Dokumentasi referensi BigQuery Python API.
Untuk melakukan autentikasi ke BigQuery, siapkan Kredensial Default Aplikasi. Untuk mengetahui informasi selengkapnya, lihat Menyiapkan autentikasi untuk library klien.
Tetapkan propertidataset.access_entries dengan kontrol akses untuk set data. Kemudian, panggil
fungsi client.update_dataset() untuk memperbarui properti.
Bekerja dengan kontrol akses tabel dan tampilan
Tampilan diperlakukan sebagai resource tabel di BigQuery. Anda dapat memberikan akses ke tabel atau tampilan dengan memberikan akun utama IAM peran bawaan atau kustom yang menentukan apa yang dapat dilakukan akun utama dengan tabel atau tampilan. Hal ini juga dikenal sebagai melampirkan kebijakan izin ke resource. Setelah memberikan akses, Anda dapat melihat kontrol akses untuk tabel atau tabel virtual, dan Anda dapat mencabut akses ke tabel atau tabel virtual.
Memberikan akses ke tabel atau tabel virtual
Untuk kontrol akses terperinci, Anda dapat memberikan peran IAM yang telah ditetapkan atau khusus pada tabel atau tampilan tertentu. Tabel atau tampilan juga mewarisi kontrol akses yang ditentukan di tingkat set data dan yang lebih tinggi. Misalnya, jika Anda memberikan peran Pemilik Data BigQuery kepada akun utama di set data, akun utama tersebut juga memiliki izin Pemilik Data BigQuery pada tabel dan tampilan di set data tersebut.
Untuk memberikan akses ke tabel atau tampilan, pilih salah satu opsi berikut:
Konsol
Buka halaman BigQuery.
Di panel Explorer, luaskan project Anda dan pilih tabel atau tampilan untuk dibagikan.
Klik Bagikan.
Klik Add principal.
Di kolom New principals, masukkan akun utama.
Di daftar Select a role, pilih peran yang telah ditetapkan atau peran khusus.
Klik Save.
Untuk kembali ke tabel atau melihat detail, klik Close.
SQL
Untuk memberikan akses ke tabel atau tabel virtual kepada akun utama, gunakan pernyataan DCL GRANT:
Di Google Cloud konsol, buka halaman BigQuery.
Di editor kueri, masukkan pernyataan berikut:
GRANT `ROLE_LIST`
ON RESOURCE_TYPE RESOURCE_NAME
TO "USER_LIST"
Ganti kode berikut:
ROLE_LIST: peran atau daftar peran yang dipisahkan koma yang ingin Anda berikanRESOURCE_TYPE: jenis resource tempat peran diterapkanNilai yang didukung mencakup
TABLE,VIEW,MATERIALIZED VIEW, danEXTERNAL TABLE.RESOURCE_NAME: nama resource yang ingin Anda beri izinUSER_LIST: daftar pengguna yang dipisahkan koma yang diberi peranUntuk daftar format yang valid, lihat
user_list.
Klik Run.
Untuk mengetahui informasi selengkapnya tentang cara menjalankan kueri, lihat artikel Menjalankan kueri interaktif.
Contoh berikut memberikan peran BigQuery Data Viewer pada myTable:
GRANT `roles/bigquery.dataViewer`
ON TABLE `myProject`.myDataset.myTable
TO "user:user@example.com", "user:user2@example.com"
bq
-
In the Google Cloud console, activate Cloud Shell.
At the bottom of the Google Cloud console, a Cloud Shell session starts and displays a command-line prompt. Cloud Shell is a shell environment with the Google Cloud CLI already installed and with values already set for your current project. It can take a few seconds for the session to initialize.
Untuk memberikan akses ke tabel atau tabel virtual, gunakan perintah
bq add-iam-policy-binding:bq add-iam-policy-binding --member=MEMBER_TYPE:MEMBER --role=ROLE --table=true RESOURCE
Ganti kode berikut:
- MEMBER_TYPE: jenis anggota, seperti
user,group,serviceAccount, ataudomain. - MEMBER: alamat email atau nama domain anggota.
- ROLE: peran yang ingin Anda berikan kepada anggota.
- RESOURCE: nama tabel atau tampilan yang kebijakannya ingin Anda perbarui.
- MEMBER_TYPE: jenis anggota, seperti
- Luncurkan Cloud Shell.
-
Tetapkan project default Google Cloud tempat Anda ingin menerapkan konfigurasi Terraform.
Anda hanya perlu menjalankan perintah ini sekali per project, dan dapat dijalankan di direktori mana pun.
export GOOGLE_CLOUD_PROJECT=PROJECT_ID
Variabel lingkungan akan diganti jika Anda menetapkan nilai eksplisit dalam file konfigurasi Terraform.
-
Di Cloud Shell, buat direktori dan file baru di dalam direktori tersebut. Nama file harus memiliki
ekstensi
.tf—misalnyamain.tf. Dalam tutorial ini, file ini disebut sebagaimain.tf.mkdir DIRECTORY && cd DIRECTORY && touch main.tf
-
Jika mengikuti tutorial, Anda dapat menyalin kode contoh di setiap bagian atau langkah.
Salin kode contoh ke dalam
main.tfyang baru dibuat.Atau, salin kode dari GitHub. Tindakan ini direkomendasikan jika cuplikan Terraform adalah bagian dari solusi menyeluruh.
- Tinjau dan ubah contoh parameter untuk diterapkan pada lingkungan Anda.
- Simpan perubahan Anda.
-
Lakukan inisialisasi Terraform. Anda hanya perlu melakukan ini sekali per direktori.
terraform init
Secara opsional, untuk menggunakan versi penyedia Google terbaru, sertakan opsi
-upgrade:terraform init -upgrade
-
Tinjau konfigurasi dan pastikan resource yang akan dibuat atau
diupdate oleh Terraform sesuai yang Anda inginkan:
terraform plan
Koreksi konfigurasi jika diperlukan.
-
Terapkan konfigurasi Terraform dengan menjalankan perintah berikut dan memasukkan
yespada prompt:terraform apply
Tunggu hingga Terraform menampilkan pesan "Apply complete!".
- Buka Google Cloud project Anda untuk melihat hasilnya. Di konsol Google Cloud , buka resource Anda di UI untuk memastikan bahwa Terraform telah membuat atau mengupdatenya.
Untuk mengambil kebijakan saat ini, panggil metode
tables.getIamPolicy.Edit kebijakan untuk menambahkan anggota atau kontrol akses, atau keduanya. Untuk mengetahui format yang diperlukan untuk kebijakan, lihat topik referensi Kebijakan.
Panggil
tables.setIamPolicyuntuk menulis kebijakan yang diperbarui.
Terraform
Gunakan resource google_bigquery_table_iam untuk memperbarui akses ke tabel.
Menetapkan kebijakan akses untuk tabel
Contoh berikut menunjukkan cara menggunakan
resource google_bigquery_table_iam_policy
untuk menetapkan kebijakan IAM untuk tabel
mytable. Tindakan ini akan menggantikan kebijakan apa pun yang sudah ada dan telah dilampirkan ke tabel:
# This file sets the IAM policy for the table created by
# https://github.com/terraform-google-modules/terraform-docs-samples/blob/main/bigquery/bigquery_create_table/main.tf.
# You must place it in the same local directory as that main.tf file,
# and you must have already applied that main.tf file to create
# the "default" table resource with a table_id of "mytable".

data "google_iam_policy" "iam_policy" {
  binding {
    role = "roles/bigquery.dataOwner"
    members = [
      "user:user@example.com",
    ]
  }
}

resource "google_bigquery_table_iam_policy" "table_iam_policy" {
  dataset_id  = google_bigquery_table.default.dataset_id
  table_id    = google_bigquery_table.default.table_id
  policy_data = data.google_iam_policy.iam_policy.policy_data
}
Menetapkan keanggotaan peran untuk tabel
Contoh berikut menunjukkan cara menggunakan
google_bigquery_table_iam_binding resource
untuk menetapkan keanggotaan dalam peran tertentu untuk tabel
mytable. Tindakan ini akan menggantikan keanggotaan yang ada dalam peran tersebut.
Peran lain dalam kebijakan IAM untuk tabel dipertahankan.
# This file sets membership in an IAM role for the table created by
# https://github.com/terraform-google-modules/terraform-docs-samples/blob/main/bigquery/bigquery_create_table/main.tf.
# You must place it in the same local directory as that main.tf file,
# and you must have already applied that main.tf file to create
# the "default" table resource with a table_id of "mytable".

resource "google_bigquery_table_iam_binding" "table_iam_binding" {
  dataset_id = google_bigquery_table.default.dataset_id
  table_id   = google_bigquery_table.default.table_id
  role       = "roles/bigquery.dataOwner"

  members = [
    "group:group@example.com",
  ]
}
Menetapkan keanggotaan peran untuk satu akun utama
Contoh berikut menunjukkan cara menggunakan
resource google_bigquery_table_iam_member
untuk memperbarui kebijakan IAM untuk tabel mytable guna memberikan peran kepada satu akun utama. Memperbarui kebijakan IAM ini tidak memengaruhi akses untuk akun utama lain yang telah diberi peran tersebut untuk set data.
# This file adds a member to an IAM role for the table created by
# https://github.com/terraform-google-modules/terraform-docs-samples/blob/main/bigquery/bigquery_create_table/main.tf.
# You must place it in the same local directory as that main.tf file,
# and you must have already applied that main.tf file to create
# the "default" table resource with a table_id of "mytable".

resource "google_bigquery_table_iam_member" "table_iam_member" {
  dataset_id = google_bigquery_table.default.dataset_id
  table_id   = google_bigquery_table.default.table_id
  role       = "roles/bigquery.dataEditor"
  member     = "serviceAccount:bqcx-1234567891011-12a3@gcp-sa-bigquery-condel.iam.gserviceaccount.com"
}
Untuk menerapkan konfigurasi Terraform di project Google Cloud , selesaikan langkah-langkah di bagian berikut.
Menyiapkan Cloud Shell
Menyiapkan direktori
Setiap file konfigurasi Terraform harus memiliki direktorinya sendiri (juga disebut modul root).
Menerapkan perubahan
API
Go
Sebelum mencoba contoh ini, ikuti petunjuk penyiapan Go di Panduan memulai BigQuery menggunakan library klien. Untuk mengetahui informasi selengkapnya, lihat Dokumentasi referensi BigQuery Go API.
Untuk melakukan autentikasi ke BigQuery, siapkan Kredensial Default Aplikasi. Untuk mengetahui informasi selengkapnya, lihat Menyiapkan autentikasi untuk library klien.
Panggil fungsiIAM().SetPolicy()
resource untuk menyimpan perubahan pada kebijakan akses tabel atau tabel virtual.
Java
Sebelum mencoba contoh ini, ikuti petunjuk penyiapan Java di Panduan memulai BigQuery menggunakan library klien. Untuk mengetahui informasi selengkapnya, lihat Dokumentasi referensi BigQuery Java API.
Untuk melakukan autentikasi ke BigQuery, siapkan Kredensial Default Aplikasi. Untuk mengetahui informasi selengkapnya, lihat Menyiapkan autentikasi untuk library klien.
Node.js
Sebelum mencoba contoh ini, ikuti petunjuk penyiapan Node.js di Panduan memulai BigQuery menggunakan library klien. Untuk mengetahui informasi selengkapnya, lihat Dokumentasi referensi BigQuery Node.js API.
Untuk melakukan autentikasi ke BigQuery, siapkan Kredensial Default Aplikasi. Untuk mengetahui informasi selengkapnya, lihat Menyiapkan autentikasi untuk library klien.
Panggil fungsiTable#getIamPolicy()
untuk mengambil kebijakan IAM saat ini untuk tabel atau tampilan, ubah kebijakan dengan menambahkan binding baru, lalu gunakan
fungsi Table#setIamPolicy()
untuk menyimpan perubahan pada kebijakan akses.
Python
Sebelum mencoba contoh ini, ikuti petunjuk penyiapan Python di Panduan memulai BigQuery menggunakan library klien. Untuk mengetahui informasi selengkapnya, lihat Dokumentasi referensi BigQuery Python API.
Untuk melakukan autentikasi ke BigQuery, siapkan Kredensial Default Aplikasi. Untuk mengetahui informasi selengkapnya, lihat Menyiapkan autentikasi untuk library klien.
Panggil fungsiclient.set_iam_policy()
untuk menyimpan perubahan pada kebijakan akses untuk tabel atau tabel virtual.
Peran bawaan yang memberikan akses ke tabel dan tampilan
Tampilan diperlakukan sebagai resource tabel di BigQuery. Untuk kontrol akses terperinci, Anda dapat memberikan peran IAM standar atau kustom pada tabel atau tampilan tertentu. Tabel atau tampilan juga mewarisi kontrol akses yang ditentukan di tingkat set data dan yang lebih tinggi. Misalnya, jika Anda memberikan peran Pemilik Data BigQuery kepada akun utama di set data, akun utama tersebut juga memiliki izin Pemilik Data pada tabel dan tampilan di set data.
Peran IAM bawaan berikut memiliki izin pada tabel atau tabel virtual.
| Peran | Deskripsi |
|---|---|
BigQuery Data Owner
(roles/bigquery.dataOwner) |
Jika diberikan pada tabel atau tampilan, peran ini memberikan izin berikut:
|
BigQuery Data Editor
(roles/bigquery.dataEditor) |
Jika diberikan pada tabel atau tampilan, peran ini memberikan izin berikut:
|
BigQuery Data Viewer
(roles/bigquery.dataViewer) |
Jika diberikan pada tabel atau tampilan, peran ini memberikan izin berikut:
|
BigQuery Metadata Viewer
(roles/bigquery.metadataViewer) |
Jika diberikan pada tabel atau tampilan, peran ini memberikan izin berikut:
|
Izin untuk tabel dan tampilan
Tampilan diperlakukan sebagai resource tabel di BigQuery. Semua izin tingkat tabel berlaku untuk tampilan.
Sebagian besar izin yang diawali dengan bigquery.tables berlaku di tingkat tabel.
bigquery.tables.create dan bigquery.tables.list tidak. Untuk membuat dan mencantumkan tabel atau tampilan, izin bigquery.tables.create dan bigquery.tables.list harus diberikan ke peran pada penampung induk–set data atau project.
Tabel berikut mencantumkan semua izin untuk tabel dan tampilan serta resource tingkat terendah yang dapat diberikan izinnya.
| Izin | Resource | Tindakan |
|---|---|---|
bigquery.tables.create |
Set data | Buat tabel baru dalam set data. |
bigquery.tables.createIndex |
Tabel | Buat indeks penelusuran pada tabel. |
bigquery.tables.deleteIndex |
Tabel | Hapus indeks penelusuran pada tabel. |
bigquery.tables.createSnapshot |
Tabel | Buat snapshot tabel. Membuat snapshot memerlukan beberapa izin tambahan di tingkat tabel dan set data. Untuk mengetahui detailnya, lihat Izin dan peran untuk membuat snapshot tabel. |
bigquery.tables.deleteSnapshot |
Tabel | Menghapus snapshot tabel. |
bigquery.tables.delete |
Tabel | Menghapus tabel. |
bigquery.tables.createTagBinding |
Tabel | Buat binding tag resource pada tabel. |
bigquery.tables.deleteTagBinding |
Tabel | Menghapus binding tag resource pada tabel. |
bigquery.tables.listTagBindings |
Tabel | Mencantumkan binding tag resource pada tabel. |
bigquery.tables.listEffectiveTags |
Tabel | Mencantumkan tag efektif (diterapkan dan diwariskan) untuk tabel. |
bigquery.tables.export |
Tabel | Mengekspor data tabel. Menjalankan tugas ekspor juga memerlukan
izin bigquery.jobs.create. |
bigquery.tables.get |
Tabel | Mendapatkan metadata untuk tabel. |
bigquery.tables.getData |
Tabel | Buat kueri data tabel. Menjalankan tugas kueri juga memerlukan
izin bigquery.jobs.create. |
bigquery.tables.getIamPolicy |
Tabel | Mendapatkan kontrol akses untuk tabel. |
bigquery.tables.list |
Set data | Mencantumkan semua tabel dan metadata tabel dalam set data. |
bigquery.tables.replicateData |
Tabel | Mereplikasikan data tabel. Izin ini diperlukan untuk membuat replika tampilan terwujud. |
bigquery.tables.restoreSnapshot |
Tabel | Memulihkan snapshot tabel. |
bigquery.tables.setCategory |
Tabel | Tetapkan tag kebijakan dalam skema tabel. |
bigquery.tables.setColumnDataPolicy |
Tabel | Menetapkan kebijakan akses tingkat kolom pada tabel. |
bigquery.tables.setIamPolicy |
Tabel | Menetapkan kontrol akses pada tabel. |
bigquery.tables.update |
Tabel | Perbarui tabel. metadata. bigquery.tables.get juga
diperlukan untuk memperbarui metadata tabel di konsol. |
bigquery.tables.updateData |
Tabel | Perbarui data tabel. |
bigquery.tables.updateIndex |
Tabel | Perbarui indeks penelusuran pada tabel. |
Melihat kontrol akses untuk tabel atau tabel virtual
Untuk melihat kontrol akses untuk tabel atau tampilan, pilih salah satu opsi berikut:
Konsol
Buka halaman BigQuery.
Di panel Explorer, luaskan project Anda, luaskan set data, lalu pilih tabel atau tampilan.
Klik Bagikan.
Kontrol akses tabel atau tabel virtual akan muncul di panel Bagikan.
bq
-
In the Google Cloud console, activate Cloud Shell.
At the bottom of the Google Cloud console, a Cloud Shell session starts and displays a command-line prompt. Cloud Shell is a shell environment with the Google Cloud CLI already installed and with values already set for your current project. It can take a few seconds for the session to initialize.
Untuk mendapatkan kebijakan akses yang ada dan menghasilkannya ke file lokal di JSON, gunakan perintah
bq get-iam-policydi Cloud Shell:bq get-iam-policy \ --table=true \ PROJECT_ID:DATASET.RESOURCE > PATH_TO_FILE
Ganti kode berikut:
- PROJECT_ID: project ID Anda
- DATASET: nama set data Anda
- RESOURCE: nama tabel atau tampilan yang kebijakannya ingin Anda lihat
- PATH_TO_FILE: jalur ke file JSON di komputer lokal Anda
Di Google Cloud konsol, buka halaman BigQuery.
Di editor kueri, masukkan pernyataan berikut:
SELECT
COLUMN_LIST
FROM
  PROJECT_ID.`region-REGION`.INFORMATION_SCHEMA.OBJECT_PRIVILEGES
WHERE
object_schema = "DATASET" AND object_name = "TABLE";
Ganti kode berikut:
- COLUMN_LIST: daftar kolom yang dipisahkan koma dari
tampilan
INFORMATION_SCHEMA.OBJECT_PRIVILEGES. - PROJECT_ID: project ID Anda
- REGION: penentu region.
- DATASET: nama set data yang berisi tabel atau tampilan
- TABLE: nama tabel atau tampilan
- COLUMN_LIST: daftar kolom yang dipisahkan koma dari
tampilan
Klik Run.
SQL
Buat kueri tampilan INFORMATION_SCHEMA.OBJECT_PRIVILEGES.
Kueri untuk mengambil kontrol akses untuk tabel atau tabel virtual harus menentukan
object_schema dan object_name.
Untuk mengetahui informasi selengkapnya tentang cara menjalankan kueri, lihat artikel Menjalankan kueri interaktif.
Contoh:
SELECT
object_name, privilege_type, grantee
FROM
my_project.`region-us`.INFORMATION_SCHEMA.OBJECT_PRIVILEGES
WHERE
object_schema = "mydataset" AND object_name = "mytable";
+------------------+-----------------------------+--------------------------+
|   object_name    |  privilege_type             | grantee                  |
+------------------+-----------------------------+--------------------------+
| mytable          | roles/bigquery.dataEditor   | group:group@example.com|
| mytable          | roles/bigquery.dataOwner    | user:user@example.com|
+------------------+-----------------------------+--------------------------+
API
Untuk mengambil kebijakan saat ini, panggil metode tables.getIamPolicy.
Go
Sebelum mencoba contoh ini, ikuti petunjuk penyiapan Go di Panduan memulai BigQuery menggunakan library klien. Untuk mengetahui informasi selengkapnya, lihat Dokumentasi referensi BigQuery Go API.
Untuk melakukan autentikasi ke BigQuery, siapkan Kredensial Default Aplikasi. Untuk mengetahui informasi selengkapnya, lihat Menyiapkan autentikasi untuk library klien.
Panggil fungsiIAM().Policy() resource. Kemudian, panggil fungsi Roles() untuk mendapatkan kebijakan akses tabel atau tabel virtual.
Java
Sebelum mencoba contoh ini, ikuti petunjuk penyiapan Java di Panduan memulai BigQuery menggunakan library klien. Untuk mengetahui informasi selengkapnya, lihat Dokumentasi referensi BigQuery Java API.
Untuk melakukan autentikasi ke BigQuery, siapkan Kredensial Default Aplikasi. Untuk mengetahui informasi selengkapnya, lihat Menyiapkan autentikasi untuk library klien.
Node.js
Sebelum mencoba contoh ini, ikuti petunjuk penyiapan Node.js di Panduan memulai BigQuery menggunakan library klien. Untuk mengetahui informasi selengkapnya, lihat Dokumentasi referensi BigQuery Node.js API.
Untuk melakukan autentikasi ke BigQuery, siapkan Kredensial Default Aplikasi. Untuk mengetahui informasi selengkapnya, lihat Menyiapkan autentikasi untuk library klien.
Ambil kebijakan IAM untuk tabel atau tampilan menggunakan fungsiTable#getIamPolicy().
Detail kebijakan akses tersedia di objek kebijakan yang ditampilkan.
Mencabut akses ke tabel atau tabel virtual
Untuk mencabut akses ke tabel atau tampilan, pilih salah satu opsi berikut:
Konsol
Buka halaman BigQuery.
Di panel Explorer, luaskan project Anda, luaskan set data, lalu pilih tabel atau tampilan.
Di panel detail, klik Share.
Pada dialog Share, luaskan akun utama yang aksesnya ingin Anda cabut.
Klik Delete.
Pada dialog Hapus peran dari akun utama?, klik Hapus.
Untuk kembali ke tabel atau melihat detail, klik Close.
SQL
Untuk menghapus akses ke tabel atau tabel virtual dari akun utama, gunakan pernyataan DCL REVOKE:
Di Google Cloud konsol, buka halaman BigQuery.
Di editor kueri, masukkan pernyataan berikut:
REVOKE `ROLE_LIST`
ON RESOURCE_TYPE RESOURCE_NAME
FROM "USER_LIST"
Ganti kode berikut:
ROLE_LIST: peran atau daftar peran yang dipisahkan koma yang ingin Anda cabutRESOURCE_TYPE: jenis resource tempat peran dicabutNilai yang didukung mencakup
TABLE,VIEW,MATERIALIZED VIEW, danEXTERNAL TABLE.RESOURCE_NAME: nama resource yang izinnya ingin Anda cabutUSER_LIST: daftar pengguna yang dipisahkan koma yang perannya akan dicabutUntuk daftar format yang valid, lihat
user_list.
Klik Run.
Untuk mengetahui informasi selengkapnya tentang cara menjalankan kueri, lihat artikel Menjalankan kueri interaktif.
Contoh berikut mencabut peran Pemilik Data BigQuery pada myTable:
REVOKE `roles/bigquery.dataOwner`
ON TABLE `myProject`.myDataset.myTable
FROM "group:group@example.com", "serviceAccount:user@myproject.iam.gserviceaccount.com"
bq
-
In the Google Cloud console, activate Cloud Shell.
At the bottom of the Google Cloud console, a Cloud Shell session starts and displays a command-line prompt. Cloud Shell is a shell environment with the Google Cloud CLI already installed and with values already set for your current project. It can take a few seconds for the session to initialize.
Untuk mencabut akses ke tabel atau tampilan, gunakan perintah
bq remove-iam-policy-binding:bq remove-iam-policy-binding --member=MEMBER_TYPE:MEMBER --role=ROLE --table=true RESOURCE
Ganti kode berikut:
- MEMBER_TYPE: jenis anggota, seperti
user,group,serviceAccount, ataudomain - MEMBER: alamat email atau nama domain anggota
- ROLE: peran yang ingin Anda cabut dari anggota
- RESOURCE: nama tabel atau tabel virtual yang kebijakannya ingin Anda perbarui
- MEMBER_TYPE: jenis anggota, seperti
Untuk mengambil kebijakan saat ini, panggil metode
tables.getIamPolicy.Edit kebijakan untuk menghapus anggota atau binding, atau keduanya. Untuk mengetahui format yang diperlukan untuk kebijakan, lihat topik referensi Kebijakan.
Panggil
tables.setIamPolicyuntuk menulis kebijakan yang diperbarui.
API
Go
Sebelum mencoba contoh ini, ikuti petunjuk penyiapan Go di Panduan memulai BigQuery menggunakan library klien. Untuk mengetahui informasi selengkapnya, lihat Dokumentasi referensi BigQuery Go API.
Untuk melakukan autentikasi ke BigQuery, siapkan Kredensial Default Aplikasi. Untuk mengetahui informasi selengkapnya, lihat Menyiapkan autentikasi untuk library klien.
Panggil fungsipolicy.Remove()
untuk menghapus akses.
Kemudian, panggil fungsi
IAM().SetPolicy()
untuk menyimpan perubahan pada kebijakan akses tabel atau tampilan.
Java
Sebelum mencoba contoh ini, ikuti petunjuk penyiapan Java di Panduan memulai BigQuery menggunakan library klien. Untuk mengetahui informasi selengkapnya, lihat Dokumentasi referensi BigQuery Java API.
Untuk melakukan autentikasi ke BigQuery, siapkan Kredensial Default Aplikasi. Untuk mengetahui informasi selengkapnya, lihat Menyiapkan autentikasi untuk library klien.
Node.js
Sebelum mencoba contoh ini, ikuti petunjuk penyiapan Node.js di Panduan memulai BigQuery menggunakan library klien. Untuk mengetahui informasi selengkapnya, lihat Dokumentasi referensi BigQuery Node.js API.
Untuk melakukan autentikasi ke BigQuery, siapkan Kredensial Default Aplikasi. Untuk mengetahui informasi selengkapnya, lihat Menyiapkan autentikasi untuk library klien.
Ambil kebijakan IAM saat ini untuk tabel atau tampilan menggunakan metodeTable#getIamPolicy().
Ubah kebijakan untuk menghapus peran atau akun utama yang diinginkan, lalu terapkan kebijakan yang diperbarui menggunakan metode
Table#setIamPolicy().
Bekerja dengan kontrol akses untuk rutinitas
Untuk memberikan masukan atau meminta dukungan terkait fitur ini, kirim email ke bq-govsec-eng@google.com.
Anda dapat memberikan akses ke rutinitas dengan memberikan peran bawaan atau kustom ke pokok IAM yang menentukan apa yang dapat dilakukan pokok dengan rutinitas tersebut. Tindakan ini juga dikenal sebagai melampirkan kebijakan izin ke resource. Setelah memberikan akses, Anda dapat melihat kontrol akses untuk rutinitas, dan Anda dapat mencabut akses ke rutinitas.
Memberikan akses ke rutinitas
Untuk kontrol akses yang lebih mendetail, Anda dapat memberikan peran IAM standar atau kustom pada rutinitas tertentu. Rutinitas juga mewarisi kontrol akses yang ditentukan di tingkat set data dan yang lebih tinggi. Misalnya, jika Anda memberikan peran Pemilik Data BigQuery kepada akun utama di set data, akun utama tersebut juga memiliki izin Pemilik Data pada rutinitas di set data tersebut.
Pilih salah satu opsi berikut:
Konsol
Buka halaman BigQuery.
Di panel Explorer, luaskan project Anda, luaskan set data Anda, luaskan Rutinitas, lalu pilih rutinitas.
Klik Bagikan.
Klik Tambahkan anggota.
Di kolom New members, masukkan akun utama.
Di daftar Select a role, pilih peran yang telah ditetapkan atau peran khusus.
Klik Simpan.
Untuk kembali ke info rutinitas, klik Selesai.
bq
-
In the Google Cloud console, activate Cloud Shell.
At the bottom of the Google Cloud console, a Cloud Shell session starts and displays a command-line prompt. Cloud Shell is a shell environment with the Google Cloud CLI already installed and with values already set for your current project. It can take a few seconds for the session to initialize.
Untuk menulis informasi rutin yang ada (termasuk kontrol akses) ke file JSON, gunakan perintah
bq get-iam-policy:bq get-iam-policy \ PROJECT_ID:DATASET.ROUTINE \ > PATH_TO_FILE
Ganti kode berikut:
- PROJECT_ID: project ID Anda
- DATASET: nama set data yang berisi rutin yang ingin Anda perbarui
- ROUTINE: nama resource yang akan diupdate
- PATH_TO_FILE: jalur ke file JSON di komputer lokal Anda
Buat perubahan pada bagian
bindingspada file JSON. Binding mengikat satu atau beberapa akun utama ke saturole. Akun utama dapat berupa akun pengguna, akun layanan, grup Google, dan domain. Misalnya, bagianbindingspada file JSON rutin akan terlihat seperti berikut:{ "bindings": [ { "role": "roles/bigquery.dataViewer", "members": [ "user:user@example.com", "group:group@example.com", "domain:example.com", ] }, ], "etag": "BwWWja0YfJA=", "version": 1 }
Untuk memperbarui kebijakan akses, gunakan perintah
bq set-iam-policy:bq set-iam-policy PROJECT_ID:DATASET.ROUTINE PATH_TO_FILE
Untuk memverifikasi perubahan kontrol akses Anda, gunakan perintah
bq get-iam-policylagi tanpa perlu menulis informasi tersebut ke file:bq get-iam-policy --format=prettyjson \\ PROJECT_ID:DATASET.ROUTINE
Untuk mengambil kebijakan saat ini, panggil metode
routines.getIamPolicy.Edit kebijakan untuk menambahkan akun utama, binding, atau keduanya. Untuk mengetahui format yang diperlukan untuk kebijakan, lihat topik referensi Kebijakan.
Panggil
routines.setIamPolicyuntuk menulis kebijakan yang diperbarui.
API
Peran bawaan yang memberikan akses ke rutinitas
Untuk kontrol akses yang lebih mendetail, Anda dapat memberikan peran IAM standar atau kustom pada rutinitas tertentu. Rutinitas juga mewarisi kontrol akses yang ditentukan di tingkat set data dan yang lebih tinggi. Misalnya, jika Anda memberikan peran Pemilik Data kepada akun utama di set data, akun utama tersebut juga memiliki izin Pemilik Data pada rutinitas di set data melalui pewarisan.
Peran IAM bawaan berikut memiliki izin pada rutinitas.
| Peran | Deskripsi |
|---|---|
BigQuery Data Owner
(roles/bigquery.dataOwner) |
Jika diberikan secara rutin, peran ini memberikan izin berikut:
Anda tidak boleh memberikan peran Pemilik Data di tingkat rutin. Editor Data juga memberikan semua izin untuk rutin dan merupakan peran yang kurang permisif. |
BigQuery Data Editor
(roles/bigquery.dataEditor) |
Jika diberikan secara rutin, peran ini memberikan izin berikut:
|
BigQuery Data Viewer
(roles/bigquery.dataViewer) |
Jika diberikan secara rutin, peran ini memberikan izin berikut:
|
BigQuery Metadata Viewer
(roles/bigquery.metadataViewer) |
Jika diberikan secara rutin, peran ini memberikan izin berikut:
|
Izin untuk rutinitas
Sebagian besar izin yang dimulai dengan bigquery.routines berlaku di tingkat rutinitas.
bigquery.routines.create dan bigquery.routines.list tidak. Untuk
membuat dan mencantumkan rutinitas, izin bigquery.routines.create dan
bigquery.routines.list harus diberikan ke peran pada
penampung induk–set data.
Tabel berikut mencantumkan semua izin untuk rutinitas dan resource tingkat terendah yang dapat diberikan izinnya.
| Izin | Resource | Deskripsi |
|---|---|---|
bigquery.routines.create |
Set data | Buat rutinitas dalam set data. Izin ini juga memerlukan
bigquery.jobs.create untuk menjalankan tugas kueri yang berisi pernyataan
CREATE FUNCTION. |
bigquery.routines.delete |
Rutinitas | Menghapus rutinitas. |
bigquery.routines.get |
Rutinitas | Mereferensikan rutinitas yang dibuat oleh orang lain. Izin ini juga
memerlukan bigquery.jobs.create untuk menjalankan tugas kueri yang
mereferensikan rutinitas, dan Anda juga memerlukan izin untuk mengakses resource apa pun
yang dirujuk oleh rutinitas, seperti tabel atau tampilan. |
bigquery.routines.list |
Set data | Mencantumkan rutinitas dalam set data dan menampilkan metadata untuk rutinitas. |
bigquery.routines.update |
Rutinitas | Memperbarui metadata dan definisi rutinitas. |
bigquery.routines.getIamPolicy |
Rutinitas | Mendapatkan kontrol akses untuk rutinitas. |
bigquery.routines.setIamPolicy |
Rutinitas | Tetapkan kontrol akses untuk rutinitas. |
Melihat kontrol akses untuk rutinitas
Untuk melihat kontrol akses rutin, pilih salah satu opsi berikut:
Konsol
Buka halaman BigQuery.
Di panel Explorer, luaskan project Anda, luaskan set data, luaskan Rutinitas, lalu pilih rutinitas.
Klik Bagikan.
Kontrol akses rutin akan muncul di panel Bagikan.
bq
Perintah bq get-iam-policy tidak memberikan dukungan untuk melihat kontrol akses pada rutinitas.
SQL
Tampilan
INFORMATION_SCHEMA.OBJECT_PRIVILEGES
tidak menampilkan kontrol akses untuk rutinitas.
API
Untuk mengambil kebijakan saat ini, panggil metode routines.getIamPolicy.
Mencabut akses ke rutinitas
Untuk mencabut akses ke rutinitas, pilih salah satu opsi berikut:
Konsol
Buka halaman BigQuery.
Di panel Explorer, luaskan project Anda, luaskan set data, luaskan Rutinitas, lalu pilih rutinitas.
Di panel detail, klik Sharing > Permissions.
Pada dialog Routine Permissions, luaskan akun utama yang aksesnya ingin Anda cabut.
Klik Remove principal.
Pada dialog Hapus peran dari akun utama?, klik Hapus.
Klik Close.
bq
-
In the Google Cloud console, activate Cloud Shell.
At the bottom of the Google Cloud console, a Cloud Shell session starts and displays a command-line prompt. Cloud Shell is a shell environment with the Google Cloud CLI already installed and with values already set for your current project. It can take a few seconds for the session to initialize.
Untuk menulis informasi rutin yang ada (termasuk kontrol akses) ke file JSON, gunakan perintah
bq get-iam-policy:bq get-iam-policy --routine PROJECT_ID:DATASET.ROUTINE > PATH_TO_FILE
Ganti kode berikut:
- PROJECT_ID: project ID Anda
- DATASET: nama set data yang berisi rutin yang ingin Anda perbarui
- ROUTINE: nama resource yang akan diupdate
- PATH_TO_FILE: jalur ke file JSON di komputer lokal Anda
Dalam file kebijakan, nilai untuk
versiontetap1. Nomor ini merujuk pada versi skema kebijakan IAM, bukan versi kebijakan. Nilai untuk nilaietagadalah nomor versi kebijakan.Buat perubahan pada bagian
accesspada file JSON. Anda dapat menghapus salah satu entrispecialGroup:projectOwners,projectWriters,projectReaders, danallAuthenticatedUsers. Anda juga dapat menghapus salah satu dari:userByEmail,groupByEmail, dandomain.Misalnya, bagian
accesspada file JSON rutin akan terlihat seperti berikut:{ "bindings": [ { "role": "roles/bigquery.dataViewer", "members": [ "user:user@example.com", "group:group@example.com", "domain:google.com", ] }, ], "etag": "BwWWja0YfJA=", "version": 1 }
Untuk memperbarui kebijakan akses, gunakan perintah
bq set-iam-policy:bq set-iam-policy --routine PROJECT_ID:DATASET.ROUTINE PATH_TO_FILE
Untuk memverifikasi perubahan kontrol akses Anda, gunakan kembali perintah
get-iam-policytanpa perlu menulis informasi tersebut ke file:bq get-iam-policy --routine --format=prettyjson PROJECT_ID:DATASET.ROUTINE
Untuk mengambil kebijakan saat ini, panggil metode
routines.getIamPolicy.Edit kebijakan untuk menambahkan akun utama atau binding, atau keduanya. Untuk mengetahui format yang diperlukan untuk kebijakan, lihat topik referensi Kebijakan.
API
Melihat kontrol akses yang diwarisi untuk resource
Anda dapat memeriksa peran IAM yang diwariskan untuk resource menggunakan UI web BigQuery. Anda memerlukan izin yang sesuai untuk melihat pewarisan di konsol. Untuk memeriksa pewarisan set data, tabel, tampilan, atau rutinitas:
Di Google Cloud konsol, buka halaman BigQuery.
Di panel Explorer, pilih set data, atau luaskan set data dan pilih tabel, tampilan, atau rutin.
Untuk set data, klik Berbagi. Untuk tabel, tampilan, atau rutinitas, klik Bagikan.
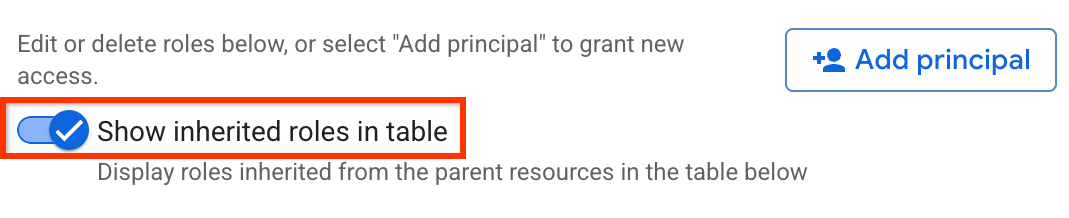
Pastikan opsi Show inherited roles in table diaktifkan.
Luaskan peran dalam tabel.
Di kolom Pewarisan, ikon heksagonal menunjukkan apakah peran diwarisi dari resource induk.

Menolak akses ke resource
Kebijakan penolakan IAM memungkinkan Anda menetapkan batasan pada akses ke resource BigQuery. Anda dapat menentukan aturan tolak yang mencegah akun utama yang dipilih menggunakan izin tertentu, terlepas dari peran yang diberikan.
Untuk mengetahui informasi tentang cara membuat, memperbarui, dan menghapus kebijakan tolak, lihat Menolak akses ke resource.
Kasus khusus
Pertimbangkan skenario berikut saat Anda membuat kebijakan penolakan IAM pada beberapa izin BigQuery:
Akses ke resource yang diotorisasi (tampilan, rutin, set data, atau prosedur tersimpan) memungkinkan Anda membuat, menghapus, atau memanipulasi tabel, serta membaca dan mengubah data tabel, meskipun Anda tidak memiliki izin langsung untuk melakukan operasi tersebut. Prosedur ini juga dapat mendapatkan data atau metadata model dan memanggil prosedur tersimpan lainnya di tabel pokok. Kemampuan ini menunjukkan bahwa resource yang diberi otorisasi memiliki izin berikut:
bigquery.tables.getbigquery.tables.listbigquery.tables.getDatabigquery.tables.updateDatabigquery.tables.createbigquery.tables.deletebigquery.routines.getbigquery.routines.listbigquery.datasets.getbigquery.models.getDatabigquery.models.getMetadata
Untuk menolak akses ke resource yang diberi otorisasi ini, tambahkan salah satu nilai berikut ke kolom
deniedPrincipalsaat Anda membuat kebijakan penolakan:Nilai Kasus penggunaan principalSet://goog/public:allMemblokir semua prinsipal, termasuk resource yang diberi otorisasi. principalSet://bigquery.googleapis.com/projects/PROJECT_NUMBER/*Memblokir semua resource BigQuery yang diizinkan dalam project yang ditentukan. PROJECT_NUMBERadalah ID unik yang dibuat secara otomatis untuk project Anda yang berjenisINT64.Untuk mengecualikan akun utama tertentu dari kebijakan penolakan, tentukan akun utama tersebut di kolom
exceptionPrincipalskebijakan penolakan Anda. Misalnya,exceptionPrincipals: "principalSet://bigquery.googleapis.com/projects/1234/*".BigQuery meng-cache hasil kueri milik pemilik tugas selama 24 jam, yang dapat diakses oleh pemilik tugas tanpa memerlukan izin
bigquery.tables.getDatapada tabel yang berisi data. Oleh karena itu, menambahkan kebijakan penolakan IAM ke izinbigquery.tables.getDatatidak akan memblokir akses ke hasil yang di-cache untuk pemilik tugas hingga cache berakhir. Untuk memblokir akses pemilik tugas ke hasil yang di-cache, buat kebijakan penolakan terpisah pada izinbigquery.jobs.create.Untuk mencegah akses data yang tidak diinginkan saat menggunakan kebijakan penolakan untuk memblokir operasi baca data, sebaiknya Anda juga meninjau dan mencabut langganan yang ada pada set data.
Untuk membuat kebijakan penolakan IAM untuk melihat kontrol akses set data, tolak izin berikut:
bigquery.datasets.getbigquery.datasets.getIamPolicy
Untuk membuat kebijakan penolakan IAM untuk memperbarui kontrol akses set data, tolak izin berikut:
bigquery.datasets.updatebigquery.datasets.setIamPolicy
Langkah berikutnya
Pelajari cara menggunakan
metode projects.testIamPermissions
untuk menguji akses pengguna ke resource.