Guarda notebooks en GitHub
Para crear una copia de seguridad de tu instancia de notebooks administrados por el usuario y hacer que esté disponible para otros, guarda el contenido de tu instancia de notebooks administrados por el usuario en GitHub.
Crea un repositorio de GitHub
Si aún no tienes un repositorio de GitHub, debes crear uno.
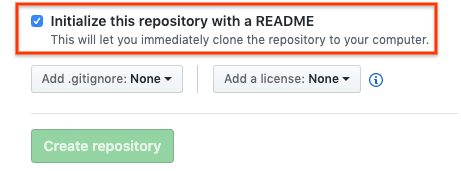
Cuando crees el repositorio de GitHub, asegúrate de que el repositorio de GitHub se pueda clonar; para ello, selecciona la casilla de verificación Inicializar este repositorio con un archivo README (Initialize this repository with a README).
Clona tu repositorio de GitHub en tu instancia de notebooks administrados por el usuario
Para clonar tu repositorio de GitHub en la instancia de notebooks administrados por el usuario, completa los siguientes pasos:
En tu repositorio de GitHub, haz clic en el botón Código y luego en la pestaña Local.
Copia la URL HTTPS.
En la consola de Google Cloud , ve a la página Notebooks administrados por el usuario.
Haz clic en Abrir JupyterLab para abrir tu instancia de notebooks administrados por el usuario.
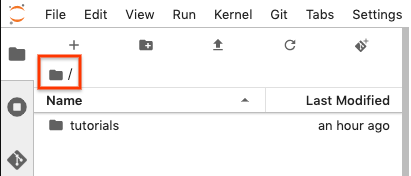
En el navegador de archivos de de JupyterLab, selecciona la carpeta en la que deseas clonar el repositorio de GitHub. Por ejemplo, la carpeta principal.
En JupyterLab, selecciona Git > Clonar un repositorio.
Si se te solicita, ingresa tus credenciales.
Si usas un nombre de usuario y una contraseña de GitHub, ingresa tu nombre de usuario y contraseña de GitHub.
Si usas la autenticación de dos factores con GitHub, crea y usa un token de acceso personal.
En el cuadro de diálogo Clonar a repo, pega la URL HTTPS para tu repositorio de GitHub.
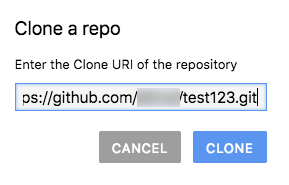
Haz clic en Clonar.
Configura tu instancia de notebooks administrados por el usuario con información de tu usuario de GitHub
En JupyterLab, selecciona Git > Open Git Repository in Terminal para abrir la ventana de terminal de Git.
En la ventana de la terminal de Git, ingresa los siguientes comandos para configurar tu nombre de usuario y correo electrónico de Git:
git config --global user.name "YOUR_NAME"
git config --global user.email "YOUR_EMAIL"
Si tu cuenta de GitHub requiere autenticación SSH, completa los siguientes pasos para conectar tu cuenta:
Desde la terminal de Git en la instancia de notebooks administrados por el usuario, sigue las instrucciones para generar una clave SSH nueva de GitHub.
Sigue las instrucciones para agregar la clave SSH a tu cuenta de GitHub.
Cierra la ventana de la terminal de Git.
Agrega los archivos confirmados al repositorio de GitHub
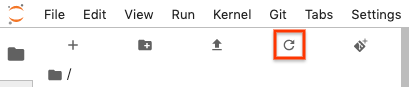
La instancia de notebooks administrados por el usuario muestra el repositorio como una carpeta nueva. Si no ves el repositorio de GitHub clonado como una carpeta, haz clic en el botón Actualizar lista de archivos.
Haz doble clic en tu carpeta del repositorio para abrirla.
Agrega un notebook nuevo a tu instancia de notebooks administrados por el usuario.
Para agregar un archivo de notebook, puedes usar el menú o el Selector.
Menú
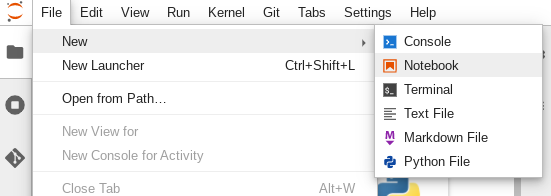
Para agregar un archivo de notebook nuevo desde el menú, selecciona File > New > Notebook.
En el cuadro de diálogo Seleccionar kernel, selecciona el kernel para tu notebook nuevo, por ejemplo, Python 3 y haz clic en Seleccionar.
Se abrirá el archivo de notebook nuevo.
Launcher
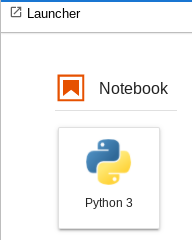
Para agregar un archivo de notebook nuevo desde el Selector, selecciona Archivo > Nuevo > Selector (Launcher).
Haz clic en el mosaico del kernel que deseas usar.
Se abrirá el archivo de notebook nuevo.
Cambia el nombre de tu nuevo archivo de notebook.
Menú
Selecciona Archivo > Cambiar nombre de notebook. Se abrirá el cuadro de diálogo Cambiar nombre de archivo.
En el campo Nombre nuevo, cambia
Untitled.ipynbpor uno significativo, comoinstall.ipynb.Haga clic en Cambiar nombre.
Launcher
Haz clic con el botón derecho en la pestaña
Untitled.ipynby, luego, en Cambiar nombre de notebook. Se abrirá el cuadro de diálogo Cambiar nombre de archivo.En el campo Nombre nuevo, cambia
Untitled.ipynbpor uno significativo, comoinstall.ipynb.Haga clic en Cambiar nombre.
Selecciona la pestaña Git. El notebook nuevo se enumera en la agrupación Untracked (Sin seguimiento).
Para agregar el notebook nuevo como un archivo para tu repositorio de GitHub, haz clic con el botón derecho en el notebook nuevo y selecciona Realizar seguimiento. En la pestaña Git, tu notebook se agrega a la agrupación En etapas.
Para confirmar el notebook nuevo en el repositorio de GitHub, en la pestaña Git, agrega un comentario de confirmación y haz clic en Confirmar.
Para abrir la ventana de la terminal de Git, selecciona Git > Open Git repositorio en la terminal.
En la ventana de terminal de Git, ingresa el comando
git push.Si usas un nombre de usuario y una contraseña de GitHub, cuando se te solicite, escribe tu nombre de usuario y contraseña de GitHub.
Si usas la autenticación de dos factores con GitHub, crea un token de acceso personal para usarlo.
Cuando se completa el comando
git push, los archivos confirmados se encuentran en el repositorio de GitHub.