메모장을 GitHub에 저장
이 페이지에서는 jupyterlab-git 확장 프로그램을 사용하여 Vertex AI Workbench 인스턴스의 노트북 파일을 GitHub에 저장하는 방법을 설명합니다. 이렇게 하면 노트북의 백업을 만들거나 노트북을 다른 사용자에게 제공할 수 있습니다.
Vertex AI Workbench 인스턴스에서는 jupyterlab-git 확장 프로그램을 사용하여 버전 관리를 도울 수 있습니다. 자세한 내용은 GitHub의 jupyterlab-git를 참조하세요.
GitHub 저장소 만들기
GitHub 저장소가 아직 없으면 지금 만들어야 합니다.
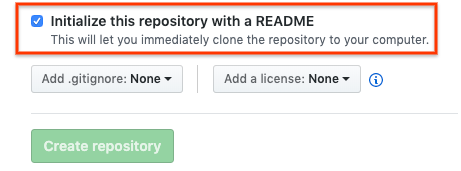
GitHub 저장소를 만들 때 README로 이 저장소 초기화 체크박스를 선택하여 GitHub 저장소를 클론할 수 있는지 확인합니다.
Vertex AI Workbench 인스턴스에 GitHub 저장소 클론
Vertex AI Workbench 인스턴스에서 GitHub 저장소를 클론하려면 다음 단계를 완료합니다.
GitHub 저장소에서 코드 버튼을 클릭한 후 로컬 탭을 클릭합니다.
HTTPS URL을 복사합니다.
Google Cloud 콘솔에서 인스턴스 페이지로 이동합니다.
JupyterLab 열기를 클릭하여 Vertex AI Workbench 인스턴스를 엽니다.
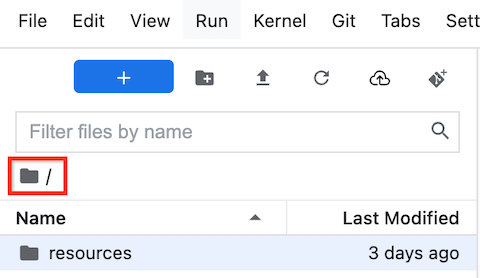
JupyterLab File Browser(파일 브라우저)에서 GitHub 저장소를 클론할 폴더를 선택합니다. 예를 들면 홈 폴더입니다.
JupyterLab에서 Git > 저장소 클론을 선택합니다.
저장소 클론 대화상자에서 GitHub 저장소의 HTTPS URL을 붙여넣습니다.

메시지가 표시되면 사용자 인증 정보를 입력합니다.
GitHub 사용자 이름과 비밀번호를 사용하는 경우 GitHub 사용자 이름과 비밀번호를 입력합니다.
GitHub에서 2단계 인증을 사용하는 경우 개인 액세스 토큰을 만들어 사용합니다.
복제를 클릭합니다.
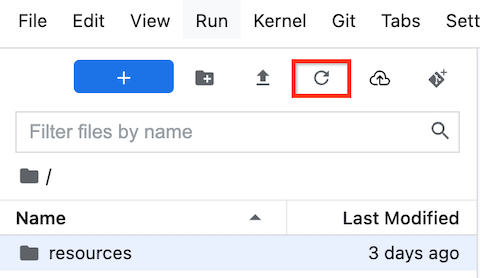
Vertex AI Workbench 인스턴스가 저장소를 새 폴더로 표시합니다. 복제된 GitHub 저장소가 폴더로 표시되지 않으면 Refresh File List(파일 목록 새로고침) 버튼을 클릭합니다.
GitHub 사용자 정보로 인스턴스 구성
JupyterLab에서 저장소가 있는 폴더를 엽니다.
Git > 터미널에서 Git 저장소 열기를 선택하여 Git 터미널 창을 엽니다.
Git 터미널 창에서 다음 명령어를 입력하여 Git 사용자 이름과 이메일을 구성합니다.
git config --global user.name "USERNAME"
git config --global user.email "EMAIL_ADDRESS"
다음을 바꿉니다.
USERNAME: GitHub 사용자 이름입니다.EMAIL_ADDRESS: GitHub 계정 이메일 주소입니다.
GitHub 계정에 SSH 인증이 필요한 경우 다음 단계를 완료하여 계정을 연결합니다.
Vertex AI Workbench 인스턴스의 Git 터미널에서 GitHub의 새 SSH 키 생성 안내를 따릅니다.
그런 다음 GitHub 계정에 해당 SSH 키 추가에 대한 안내를 따릅니다.
Git 터미널 창을 닫습니다.
GitHub 저장소에 커밋된 파일 추가
JupyterLab에서 저장소가 있는 폴더를 엽니다.
Git 탭을 선택합니다. 새 노트북이 추적하지 않음 그룹에 나열됩니다.
새 노트북을 GitHub 저장소의 파일로 추가하려면 새 노트북을 마우스 오른쪽 버튼으로 클릭하고 Track(추적)을 선택합니다. 이제 Git 탭에서 노트북이 Staged(스테이징) 그룹에 추가됩니다.
새 노트북을 GitHub 저장소에 커밋하려면 Git 탭의 Summary(요약) 필드에 커밋 주석을 추가하고 Commit(커밋)을 클릭합니다.
Git > 원격 브랜치에 푸시를 선택합니다.
GitHub 사용자 이름과 비밀번호를 사용하는 경우 메시지가 표시되면 GitHub 사용자 이름과 비밀번호를 입력합니다.
GitHub에서 2단계 인증을 사용하는 경우 GitHub 사용자 이름과 개인 액세스 토큰을 입력합니다.
git push명령어가 완료되면 커밋된 파일이 GitHub 저장소에 있습니다.